If your home WiFi doesn’t reach every room, you don’t always need to buy an expensive extender or mesh system. A spare TP-Link router can easily be converted into a wireless access point to expand your existing network coverage and improve signal strength in weak areas. This is a cost-effective way to upgrade your WiFi without replacing your main router.
In this guide, I’ll walk you through two simple methods to set up a TP-Link router as a wireless access point. The first method uses the built-in access point mode available on newer TP-Link routers, while the second method shows a manual setup that works on older models. Both methods are beginner-friendly and take only a few minutes to complete.
What is Access Point Mode?
Access Point mode allows a secondary router to extend your existing wired or wireless network without creating a separate network. Instead of acting as a full router with its own firewall, DHCP server, and NAT system, the TP-Link device simply becomes a bridge that shares internet from your main router.
This means your main router continues handling all routing tasks, while the TP-Link router focuses only on delivering WiFi and wired connectivity to more areas of your home or office. Devices connected to the access point behave exactly as if they were connected directly to the main router.
Using an access point is ideal when:
- Your WiFi signal is weak in certain rooms
- You want more LAN ports in another area
- You want seamless internet coverage across floors
- You already own an extra router and want to reuse it
Before starting the setup, make sure your main router is working properly and connected to the internet. The TP-Link router will rely entirely on the main router for internet access.
Method 1: Using Built-in Operation Mode (Recommended)
If your TP-Link router includes an Operation Mode feature, this is the easiest and safest way to turn it into an access point. The router automatically adjusts all the required settings for you, so there’s less chance of misconfiguration.
Step 1: Connect Your Computer to the TP-Link Router
First, power on the TP-Link router. Use an Ethernet cable to connect your computer to any LAN port on the TP-Link router. This ensures a stable connection during setup.
Step 2: Log in to the Router Admin Panel
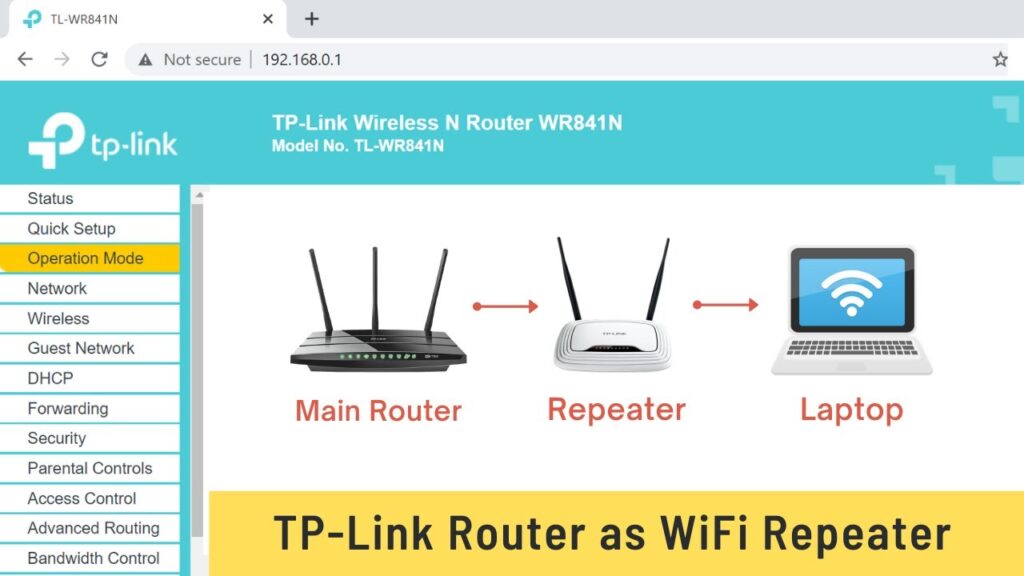
Open a web browser and type one of the following in the address bar:
tplinkwifi.net192.168.0.1192.168.1.1
Press Enter and log in using your router’s admin username and password.
If this is your first time logging in, the router may ask you to create a new password.
Step 3: Switch to Access Point Mode
Once inside the router interface:
- Go to the Advanced tab
- Click Operation Mode
- Select Access Point Mode
- Click Save
The router will reboot automatically. During this reboot, you may be logged out — this is normal.
After the restart, log in again if needed.
Step 4: Set WiFi Name and Password
Now configure your wireless network:
- Set a WiFi name (SSID)
- Create a strong password
- Choose WPA2 or WPA3 security if available
You’ll notice fewer settings in the menu. That’s expected, because features like parental controls and NAT are disabled in Access Point mode.
Step 5: Connect the Router to Your Main Network
Finally, use an Ethernet cable:
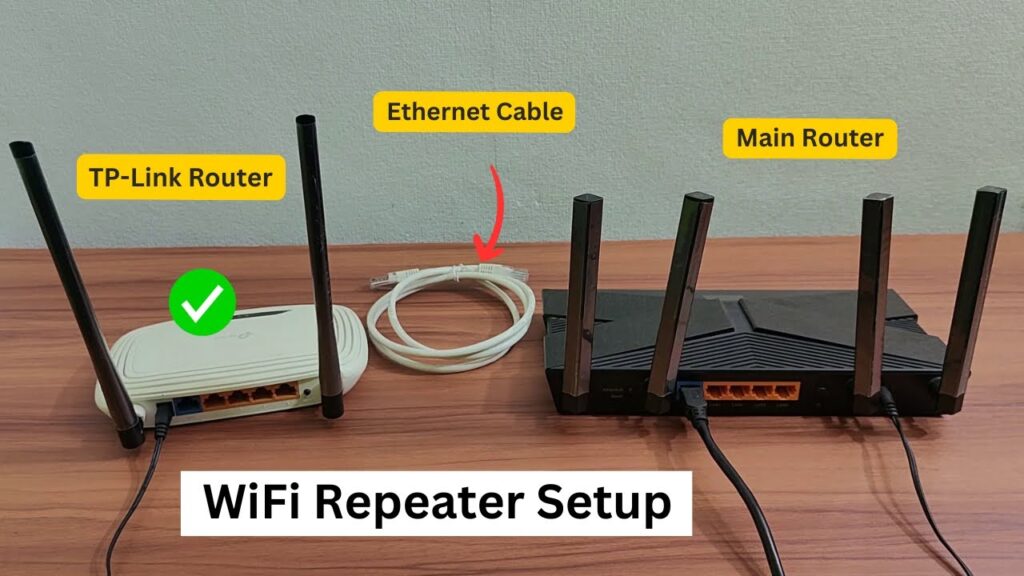
👉 Connect Main Router LAN port → TP-Link WAN port
Once connected, the TP-Link router will receive internet from your main router and broadcast it as an access point.
You can now connect devices using WiFi or LAN ports on the TP-Link router.
Method 2: Without Operation Mode (Manual Setup)
If your TP-Link router does not include an Operation Mode option, don’t worry — you can still configure it manually. This method works on older TP-Link models and gives you full control over the setup.
Step 1: Connect to the TP-Link Router
Power on the TP-Link router and connect your computer to one of its LAN ports using an Ethernet cable. Open a browser and log in to the router’s admin panel using its IP address.
Step 2: Change the Router’s LAN IP Address
The TP-Link router must be on the same network as your main router, but it cannot use the same IP address.
For example:
- Main router IP: 192.168.0.1
- Set TP-Link IP: 192.168.0.2
Steps:
- Go to Network → LAN
- Change the LAN IP address
- Click Save
The router will reboot automatically.
After reboot, log in again using the new IP address you assigned.
Step 3: Disable DHCP Server
Only your main router should assign IP addresses in the network.
- Go to DHCP Settings
- Disable the DHCP Server
- Click Save
This prevents IP conflicts and keeps the network stable.
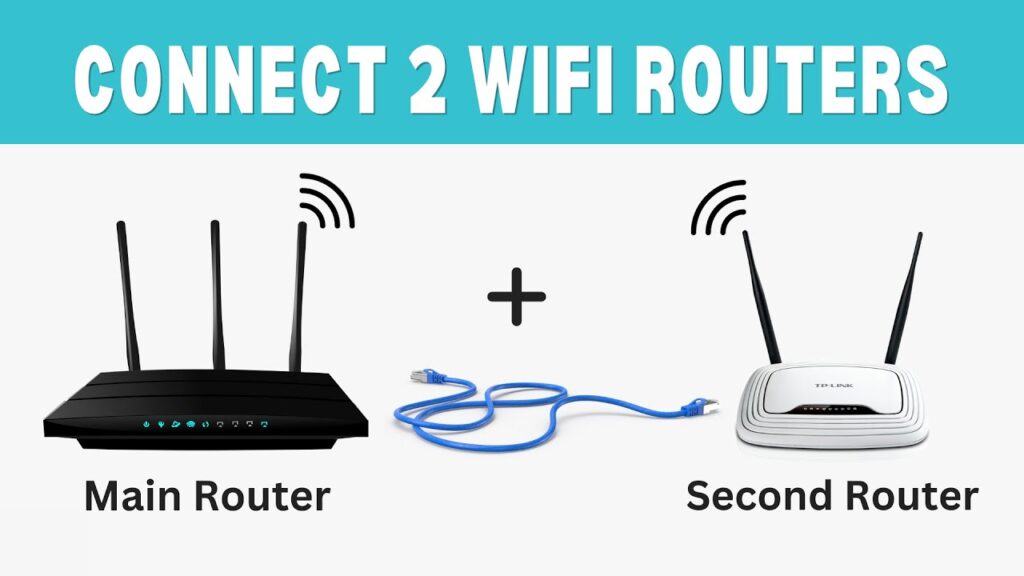
Step 4: Connect Both Routers (LAN to LAN)
Now connect them using an Ethernet cable:
👉 Main Router LAN port → TP-Link LAN port
Do not use the WAN port in this method.
The remaining LAN ports on the TP-Link router can now be used to connect computers, TVs, or gaming consoles.
Step 5: Configure WiFi Settings
Go to the wireless section and set:
- WiFi name (SSID)
- Password
- Security mode
You can use the same WiFi name as your main router for roaming, or a different name to easily identify the access point.
Step 6: Reboot the Router
Restart the TP-Link router once to apply all changes.
After reboot, devices connected to the TP-Link router will receive internet from the main router.
You can access:
- Main router at 192.168.0.1
- TP-Link access point at 192.168.0.2
Troubleshooting & Tips
If everything is set correctly, the access point should work immediately. But if you run into problems, here are a few quick fixes.
No Internet After Setup
- Check the cable connection again
- Method 1 → Main LAN → TP-Link WAN
- Method 2 → Main LAN → TP-Link LAN
- Reboot both routers after connecting
- Wait 1–2 minutes for IP assignment
Can’t Open TP-Link Admin Page
- Make sure you are using the new IP address you assigned
- Example:
192.168.0.2 - If you forget the IP, reset the router and start over
WiFi Connected but Slow
- Move the access point to an open area
- Avoid placing it inside cabinets or behind walls
- Use a Cat5e or Cat6 Ethernet cable
- Enable 5GHz WiFi if supported
Devices Not Getting IP Address
- Ensure DHCP is enabled on the main router
- Ensure DHCP is disabled on the TP-Link router (Method 2)
Final Words
Setting up a TP-Link router as a wireless access point is one of the easiest ways to expand your WiFi coverage without spending extra money. If your router supports Operation Mode, Method 1 is the fastest option. If not, the manual method works on nearly all TP-Link models.
Once configured, your TP-Link router becomes a powerful extension of your existing network, delivering stable internet to areas that previously had weak or no signal.
And that’s it — your home network is now stronger, faster, and more reliable.