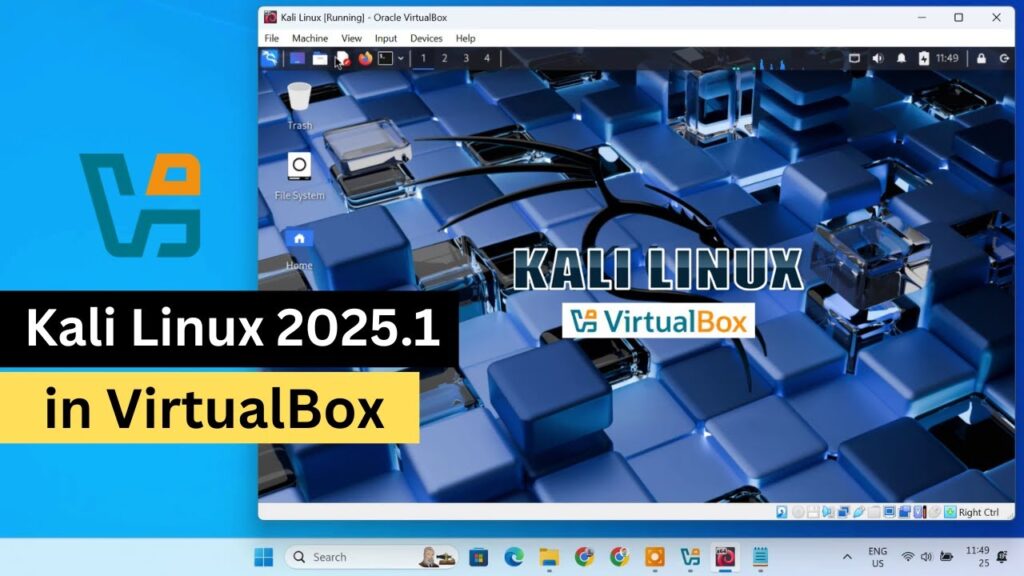
Do you want to install Kali Linux on Windows 11 without using VirtualBox or creating a traditional virtual machine? In this guide, I will show you how to install Kali Linux using WSL2 and run a complete Kali Linux desktop directly inside Windows 11.
With this method, Windows 11 will continue running normally in the background. You can open Kali Linux, use the terminal, browse files, install Linux applications, access the Kali tools menu, and work with the graphical desktop interface without restarting your computer.
This method does not require dual booting. You also do not need to manually create a virtual machine. Instead, we will use Windows Subsystem for Linux, also known as WSL2, and then install Win-KeX to get the full Kali Linux graphical desktop.
What is WSL2?
WSL2 stands for Windows Subsystem for Linux 2. It allows you to run a Linux environment directly inside Windows.
Instead of installing Kali Linux in VirtualBox or dual booting it with Windows, WSL2 lets you install Kali Linux as a Linux distribution inside Windows 11.
This makes it easy to switch between Windows apps and Kali Linux tools without rebooting the computer.
What is Win-KeX?
By default, Kali Linux in WSL starts as a command-line environment. To get the full graphical desktop interface, we will install Win-KeX.
Win-KeX provides a Kali Linux desktop environment for WSL2. After installing it, you can launch Kali with a full desktop interface, including the Kali menu, taskbar, file manager, terminal, and graphical settings.
What You Need
Before starting, make sure you have these things ready:
- A Windows 11 PC
- Windows fully updated
- Hardware virtualization enabled
- Internet connection
- Enough free storage for Kali Linux and tools
- Windows Terminal or Terminal app
The Win-KeX desktop and extra Kali tools can require a large download, so make sure you have enough internet data and storage space.
Step 1: Update Windows 11
Before installing WSL2 and Kali Linux, make sure Windows 11 is fully updated.
Open Settings, go to Windows Update, and install all available updates.
Updating Windows helps prevent compatibility problems with WSL, Kali Linux, and Linux GUI applications.
Step 2: Check Hardware Virtualization
WSL2 uses hardware virtualization to run the Linux environment, so virtualization must be enabled on your computer.
To check this, right-click the Start button and open Task Manager.
Go to the Performance tab.
Select CPU.
Now look for the virtualization status.
If it says Enabled, your computer is ready.
If it says Disabled, you need to enable virtualization from your BIOS or UEFI settings before continuing.
Step 3: Open Terminal as Administrator
Once everything is ready, open the Start menu and search for Terminal.
Right-click Terminal and select Run as administrator.
We need administrator permission because we are going to install Windows Subsystem for Linux.
Step 4: Install WSL Without a Default Distribution
Now we need to install WSL on Windows 11.
Inside Terminal, run this command:
wsl --install --no-distributionThis installs Windows Subsystem for Linux without automatically installing a default Linux distribution.
Once the installation is complete, restart your computer if Windows asks you to do so.
Step 5: Check Available Linux Distributions
After restarting, open Terminal as administrator again.
Now check which Linux distributions are available through WSL.
Run this command:
wsl --list --onlineThis will display the Linux distributions that Windows can install.
You should see Kali Linux in the list. For this tutorial, we will install Kali Linux.
Step 6: Install Kali Linux on Windows 11
To install Kali Linux through WSL2, run this command:
wsl --install -d kali-linuxThe installation may take some time depending on your internet connection.
After the installation is complete, Kali Linux will ask you to create a Linux username.
This username is used only inside Kali Linux. It does not need to match your Windows username.
Next, create a password for your Kali account.
When you type the password, nothing will appear on the screen. This is normal because Linux hides passwords while they are being typed.
Re-enter the password to confirm it.
After that, the Kali Linux terminal will appear. This means Kali Linux has been installed successfully.
Step 7: Open Kali Linux from Start Menu
After installation, you can also open Kali Linux from the Windows Start menu.
Search for Kali Linux and open it.
At this point, Kali Linux is installed, but it is still running as a command-line interface.
Next, we will install Win-KeX to get the full graphical desktop.
Step 8: Update Kali Package List
Before installing Win-KeX, update the Kali package list.
Inside the Kali terminal, run:
sudo apt updateEnter your Kali password if it asks for permission.
This command refreshes the package list and helps Kali find the latest available version of Win-KeX and its required packages.
Step 9: Install Win-KeX Desktop
Now install Win-KeX using this command:
sudo apt install -y kali-win-kexThis command downloads Win-KeX and the packages required for the Kali graphical desktop.
The download can be quite large, so the installation time will depend on your internet speed.
Keep the terminal open until the installation is complete.
During installation, Kali may ask you to select your keyboard layout. Choose the correct layout and continue.
Step 10: Launch Kali Linux GUI
Once Win-KeX has been installed, you can launch the complete Kali Linux desktop.
Run this command:
kex --win -sDuring the first launch, Windows may show a security prompt. Allow the connection.
Win-KeX will also ask you to create a VNC password. This password protects the connection to the graphical Kali session.
Enter a password and press Enter.
Confirm the same password.
If it asks whether you want to create a view-only password, type:
nThen press Enter.
After a few moments, the complete Kali Linux desktop should appear on your Windows 11 PC.
Step 11: Use the Kali Linux Desktop
Now you should see Kali Linux running with a full graphical interface.
The desktop includes the Kali menu, taskbar, file manager, terminal, and graphical system settings.
You can open the Kali application menu and access available applications.
You can also open the terminal from inside the Kali desktop.
Windows 11 is still running in the background, so you can switch between Windows and Kali without restarting your computer.
Win-KeX also supports a shared clipboard between Windows and Kali. So, you can copy text from Windows and paste it inside Kali Linux.
Step 12: Access Windows Files from Kali
Kali Linux can access your Windows drives.
Open the file manager inside Kali Linux.
Open the file system and go to:
/mntThen open:
CThis folder represents the Windows C drive.
For example, your Windows Downloads folder can normally be found from this location. So, you can easily copy files from Windows to Kali Linux.
Step 13: Access Kali Files from Windows
You can also access Kali Linux files from Windows File Explorer.
Open File Explorer in Windows.
In the address bar, type:
\\wsl$Then press Enter.
Now open kali-linux.
You can browse the Kali Linux file system directly from Windows.
Step 14: Use Win-KeX Controls
Win-KeX has a context menu that lets you control the graphical session.
Press the F8 key.
This opens the Win-KeX context menu.
From this menu, you can switch between fullscreen and windowed mode.
You can also disconnect from the current desktop session.
Step 15: Install More Kali Tools
By default, Kali Linux includes only a limited set of tools. This keeps the initial download smaller and the installation faster.
If you need more Kali tools, you can install a larger package collection.
Run this command:
sudo apt install -y kali-linux-largeThis package includes many commonly used tools for vulnerability scanning, web security testing, wireless security testing, password auditing, exploitation, digital forensics, reverse engineering, and other security-related tasks.
The download is quite large, so install it only if you have enough free storage and internet data.
During installation, a few package configuration prompts may appear. For a normal WSL2 setup, keep the safer default options and continue.
Step 16: Install Linux Applications
You can also install specific Linux applications using the terminal.
The command format is:
sudo apt install -y package-nameFor example, to install VLC, run:
sudo apt install -y vlcTo install GIMP, run:
sudo apt install -y gimpTo install LibreOffice, run:
sudo apt install -y libreofficeYou can also install other applications like Krita, FileZilla, and Thunderbird:
sudo apt install -y krita
sudo apt install -y filezilla
sudo apt install -y thunderbird
Step 17: Install a .deb Package in Kali
You can also install applications using a downloaded .deb package, similar to installing an .exe file on Windows.
For example, if you download a Google Chrome .deb package, open the folder containing the file.
You can rename the file to make the command shorter. For example:
chrome.debNow launch a terminal in the same folder and run:
sudo apt install ./chrome.debIf your file name is different, replace chrome.deb with the actual file name.
Kali will install the application along with any required dependencies.
How to Remove Kali Linux from Windows 11
If you ever want to remove Kali Linux from your computer, you can uninstall it from WSL.
Step 1: Close Kali and Win-KeX
First, close Kali Linux and the Win-KeX desktop session.
Step 2: Open Terminal as Administrator
Open the Start menu, search for Terminal, right-click it, and select Run as administrator.
Step 3: Shut Down WSL
Run this command:
wsl --shutdownStep 4: Remove Kali Linux
To remove Kali Linux from WSL, run:
wsl --unregister kali-linuxStep 5: Remove WSL Completely Optional
If you also want to remove Windows Subsystem for Linux completely, run:
wsl --uninstallUse this only if you no longer need WSL on your Windows 11 PC.
Important Notes
Before using Kali Linux through WSL2, remember these points:
- Keep Windows 11 updated before installing WSL2.
- Hardware virtualization must be enabled.
- Win-KeX is required for the full Kali graphical desktop.
- The Win-KeX VNC password should not be more than 8 characters.
- Kali can access Windows files from /mnt/c.
- Windows can access Kali files from \\wsl$.
- Installing kali-linux-large can require a large download and extra storage.
- Use Kali tools only for legal and authorized testing.
Troubleshooting
Virtualization is Disabled
If Task Manager shows virtualization as disabled, restart your computer and enter BIOS or UEFI settings.
Enable the virtualization option. On Intel systems, it may be called Intel VT-x. On AMD systems, it may be called SVM or AMD-V.
WSL Command Does Not Work
If the WSL command does not work, make sure Windows 11 is updated.
Also run Terminal as administrator and try the WSL installation command again.
Kali Installation is Slow
The installation speed depends on your internet connection and system performance.
Wait for the process to complete and do not close the terminal while installation is running.
Win-KeX Does Not Open
If Win-KeX does not open, make sure the installation completed properly.
Run:
sudo apt updateThen reinstall Win-KeX if needed:
sudo apt install -y kali-win-kexF8 Menu Not Opening
If the F8 menu does not open, click inside the Win-KeX window first and then press F8 again.
Cannot Access Windows Files from Kali
Open the Kali file manager and go to:
/mnt/cThis location represents your Windows C drive.
Frequently Asked Questions
Can I install Kali Linux on Windows 11 without VirtualBox?
Yes, you can install Kali Linux on Windows 11 using WSL2 without installing VirtualBox or creating a traditional virtual machine.
Can I run Kali Linux GUI on Windows 11?
Yes, after installing Win-KeX, you can run a full Kali Linux graphical desktop directly inside Windows 11.
Do I need dual boot for this method?
No, this method does not require dual booting. Kali runs inside Windows through WSL2.
Can Kali access Windows files?
Yes, Kali can access Windows drives from the /mnt directory. For example, the Windows C drive is available at /mnt/c.
Can Windows access Kali files?
Yes, open File Explorer and enter \\wsl$ in the address bar. Then open the Kali Linux folder.
Can I install all Kali tools?
You can install many commonly used Kali tools by installing the kali-linux-large package. However, it requires more storage and a larger download.
Can I remove Kali Linux later?
Yes, you can remove Kali Linux by running wsl –unregister kali-linux from an administrator Terminal.
Conclusion
So, this is how you can install Kali Linux on Windows 11 using WSL2 without VirtualBox.
First, we installed WSL, then installed Kali Linux, created a Kali username and password, installed Win-KeX, and launched the full Kali Linux graphical desktop inside Windows 11.
We also checked how to access Windows files from Kali, access Kali files from Windows, install extra Kali tools, install Linux applications, and remove Kali Linux later if needed.
This is one of the easiest ways to use Kali Linux on a Windows 11 PC while keeping Windows running normally in the background.