Do you want to run Android TV on your Windows PC or laptop? In this guide, I will show you how to create and run Android TV on a Windows computer using Android Studio and the Android Emulator.
With this method, you can experience the Android TV interface directly on your PC without using any physical Android TV box, smart TV, or external device. Everything will run virtually inside your Windows computer. This is useful if you want to test Android TV apps, install supported TV apps, explore the Android TV interface, or simply use Android TV on your Windows 10 or Windows 11 computer.
We will first install Android Studio, then create an Android TV virtual device, and finally use AutoHotkey to make the Android TV emulator look more like a proper fullscreen Android TV setup.
Requirements
Before starting, make sure you have these things:
- A Windows 10 or Windows 11 PC
- Virtualization enabled in BIOS
- At least 8 GB RAM
- 16 GB RAM recommended for smoother performance
- Android Studio
- AutoHotkey for fullscreen script
Download Required Tools
First, download the required tools from their official websites.
Step 1: Install Android Studio on Windows
First, open your browser and search for Android Studio download. Open the official Android Studio website and download Android Studio for Windows.
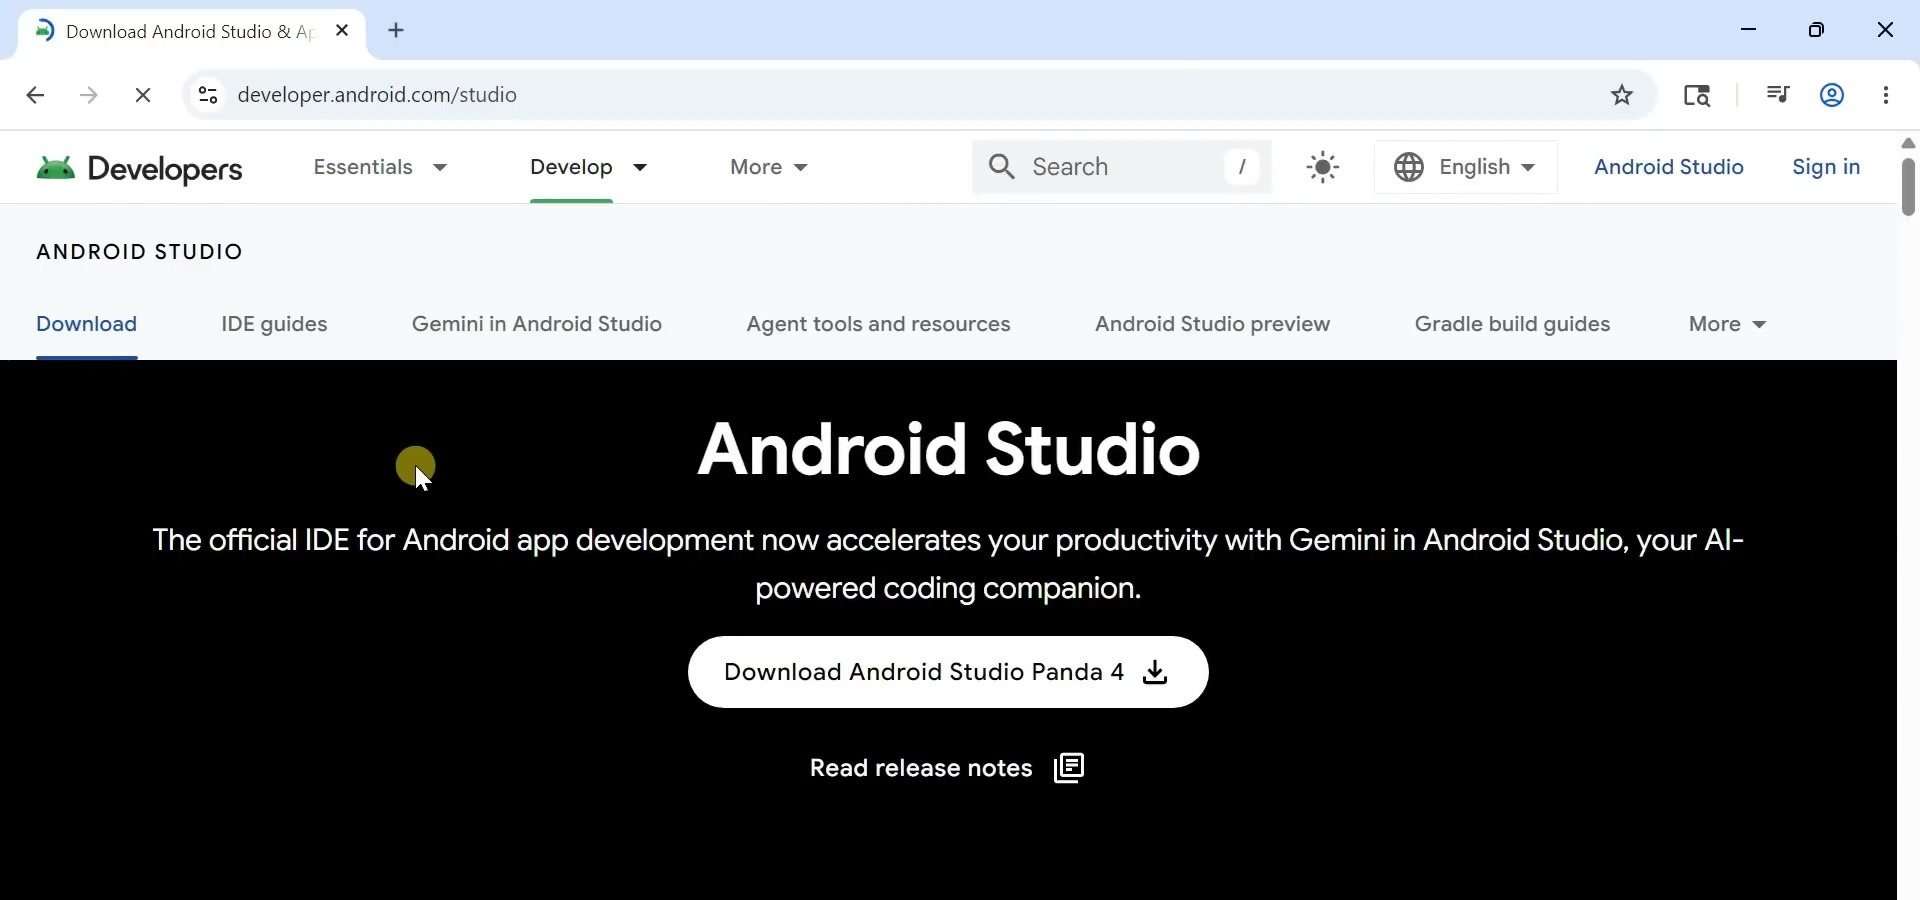
Once the setup file is downloaded, open it. The Android Studio installation wizard will appear on your screen.
During installation, make sure both Android Studio and Android Virtual Device are selected. The Android Virtual Device option is important because it allows you to create and run virtual Android devices on your PC.
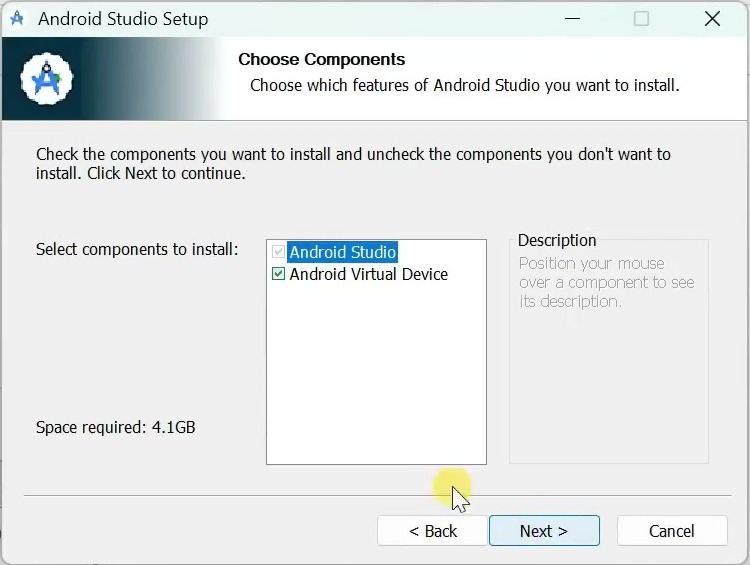
After that, click on Next and complete the installation. Once the installation is finished, click on Finish.
Step 2: Complete Android Studio First-Time Setup
When Android Studio opens for the first time, it will show the setup wizard. Click on Next.
Now choose Standard installation. This is the easiest option because Android Studio will automatically download and install the required Android SDK components, emulator files, and other important tools.
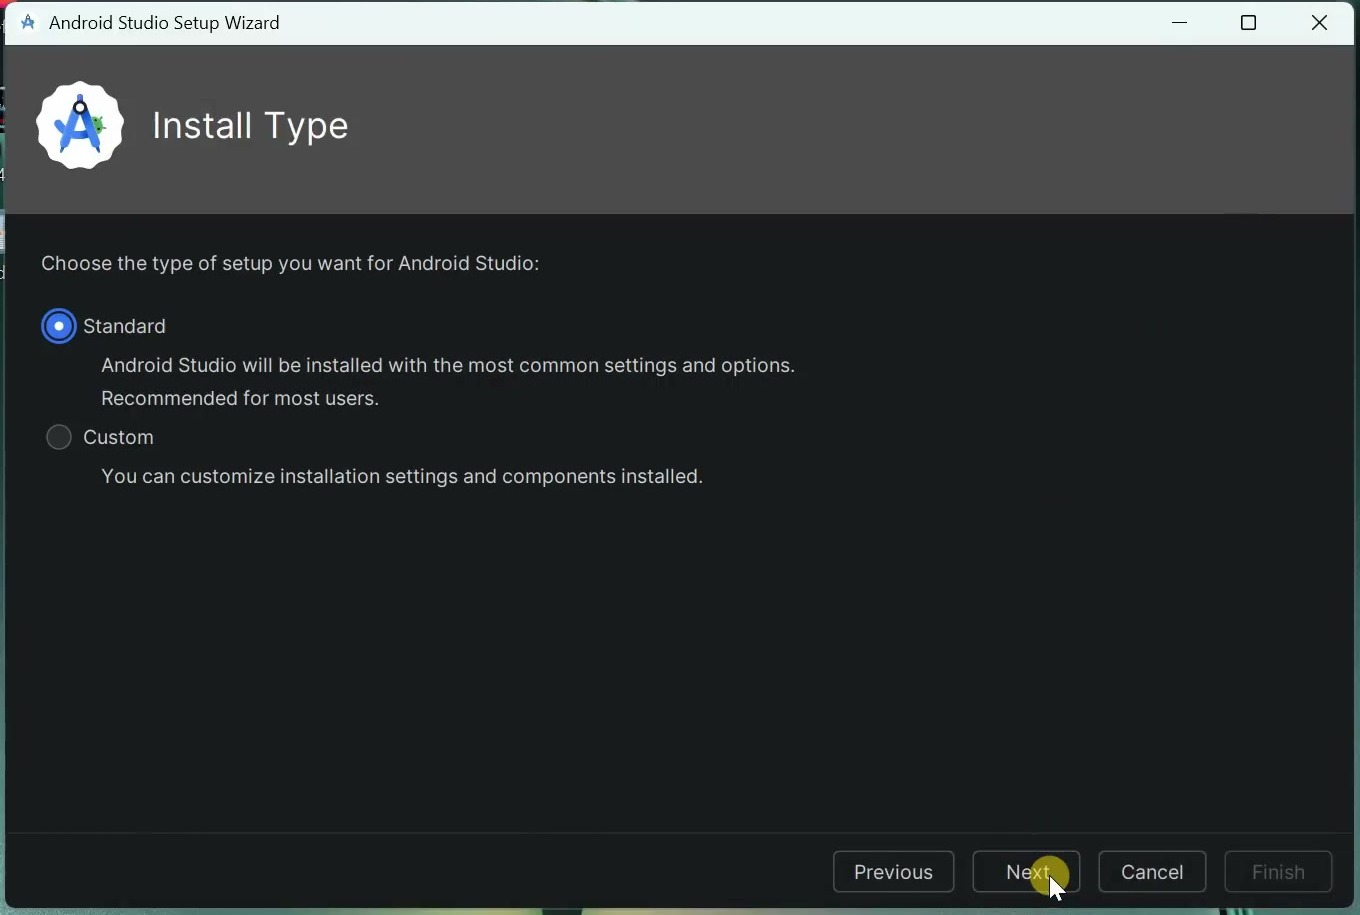
After that, Android Studio will show the components it is going to download. Accept the license agreement and continue.
Now wait until Android Studio downloads and installs all the required components. This may take some time depending on your internet speed.
Once everything is installed, click on Finish.
Step 3: Create an Android TV Virtual Device
Now we need to create the Android TV virtual device.
On the Android Studio welcome screen, click on More Actions. Then click on Virtual Device Manager.
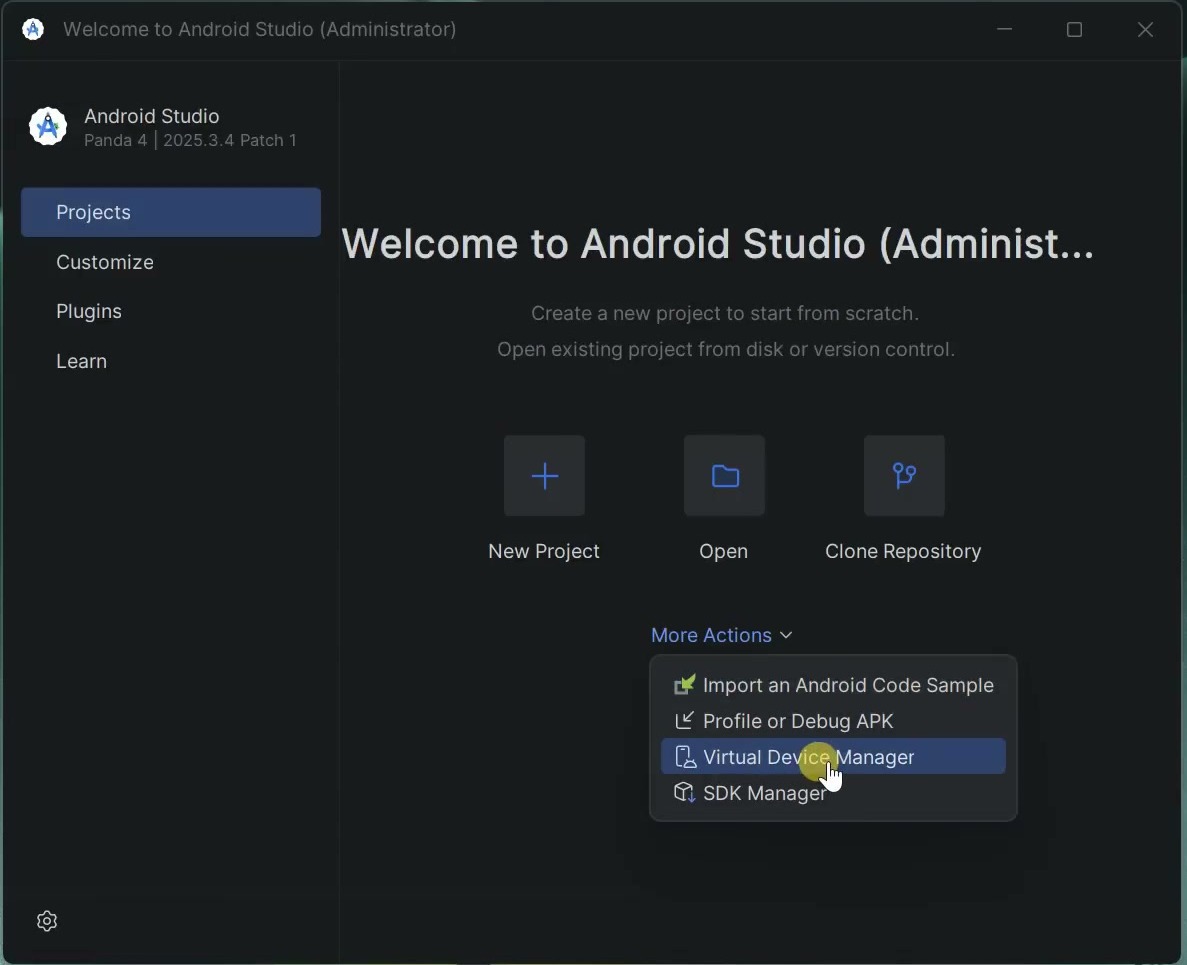
Inside Virtual Device Manager, click on Create Virtual Device.
Since we want to create Android TV, select the TV category from the left side. Now choose Television (1080p). This option will create a Full HD Android TV virtual device.
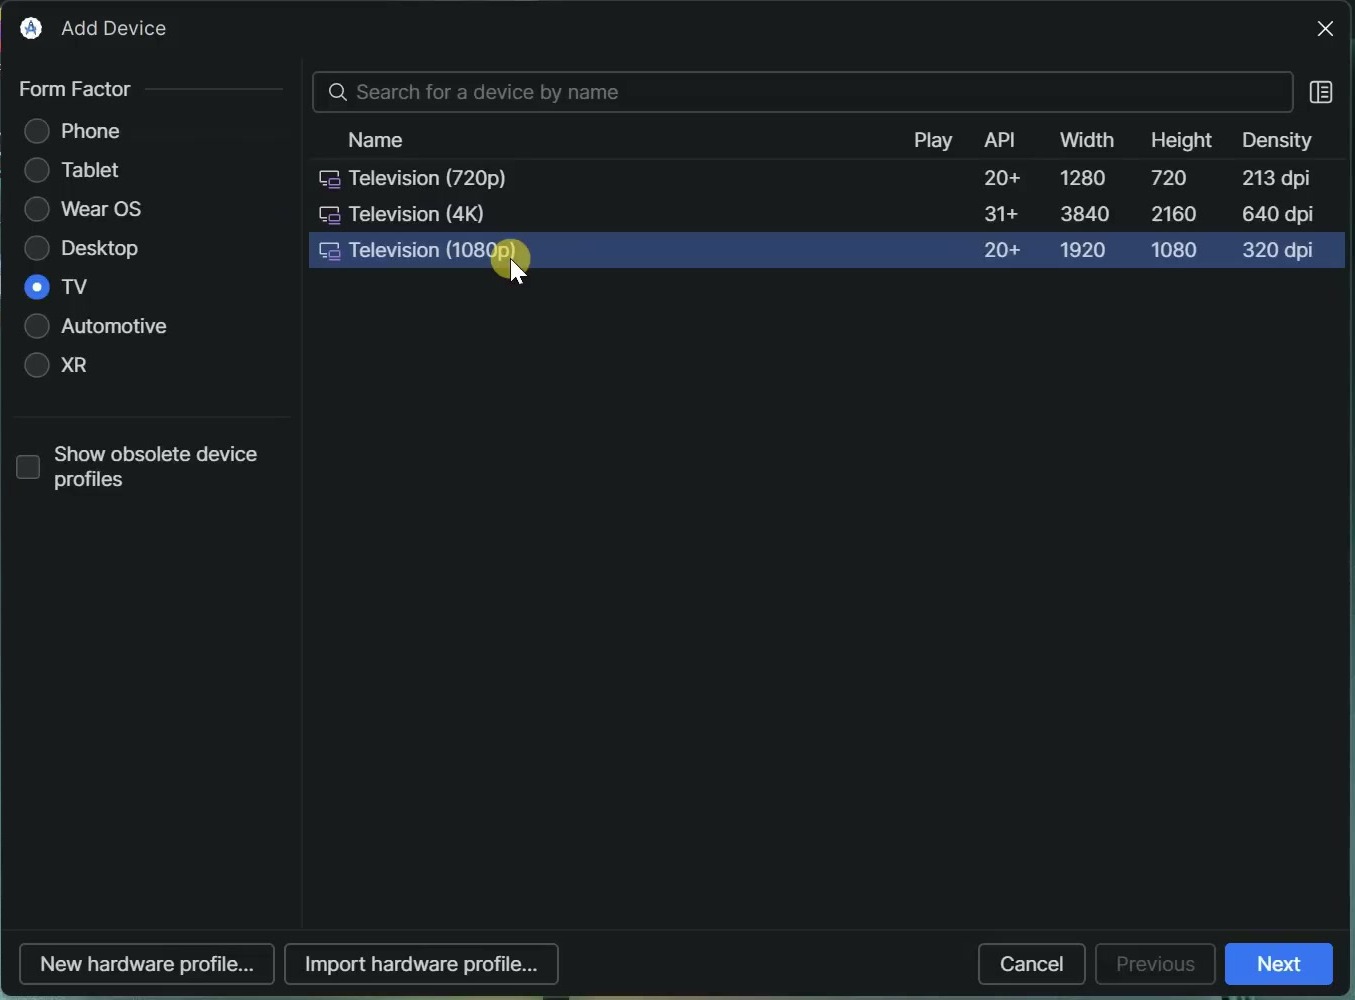
After selecting it, click on Next.
Step 4: Select Android TV System Image
On the next screen, you need to select the Android TV system image. Here, you will see different Android versions available for TV.
In my case, Android 16 was available for TV, so I selected Android 16. If the system image is not already downloaded, click on the download icon next to it and wait until the download is complete.
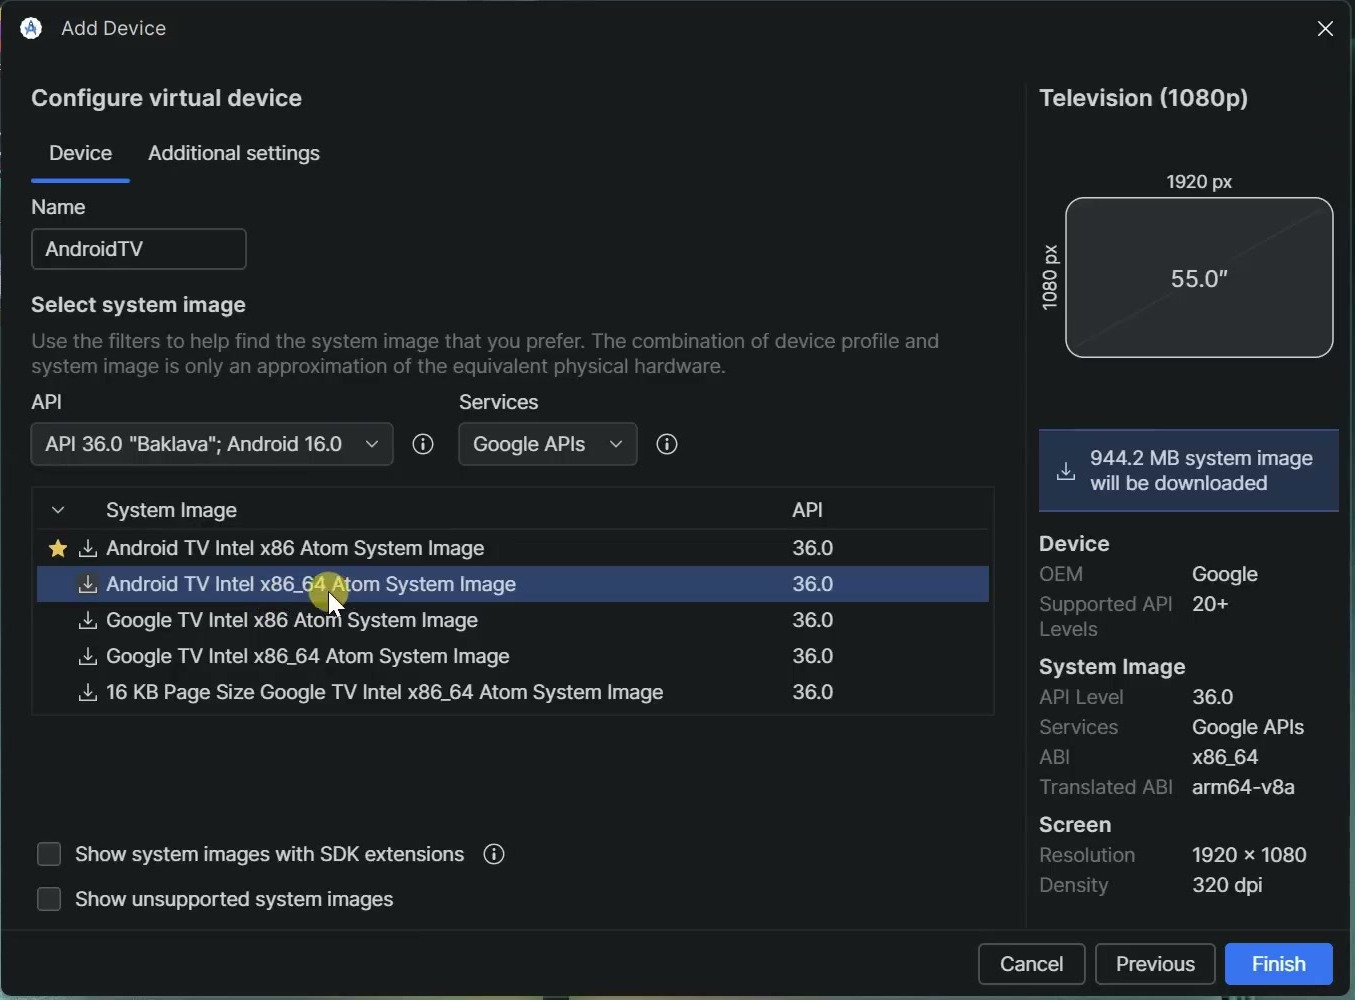
After the system image is downloaded, select it and continue.
Step 5: Rename the Android TV Virtual Device
Now you can rename your virtual device. For example, I will name it:
AndroidTVYou can use any name you want, but remember this name because we will use it later in the AutoHotkey script.
To avoid problems, I recommend using a simple name without spaces. For example, use AndroidTV instead of Android TV.
Step 6: Change Android TV Emulator Settings
Before finishing the virtual device setup, click on Additional settings. Here, we need to change a few settings for better performance and to avoid black screen issues.
Default Boot
First, go to Default boot. By default, it may be set to Quick.
If your emulator is working fine, you can keep it on Quick. But if you face a black screen issue or the Android TV emulator does not open properly, change it to Cold Boot.
Cold Boot starts the emulator fresh instead of loading the previous saved state. This can fix many emulator loading problems.
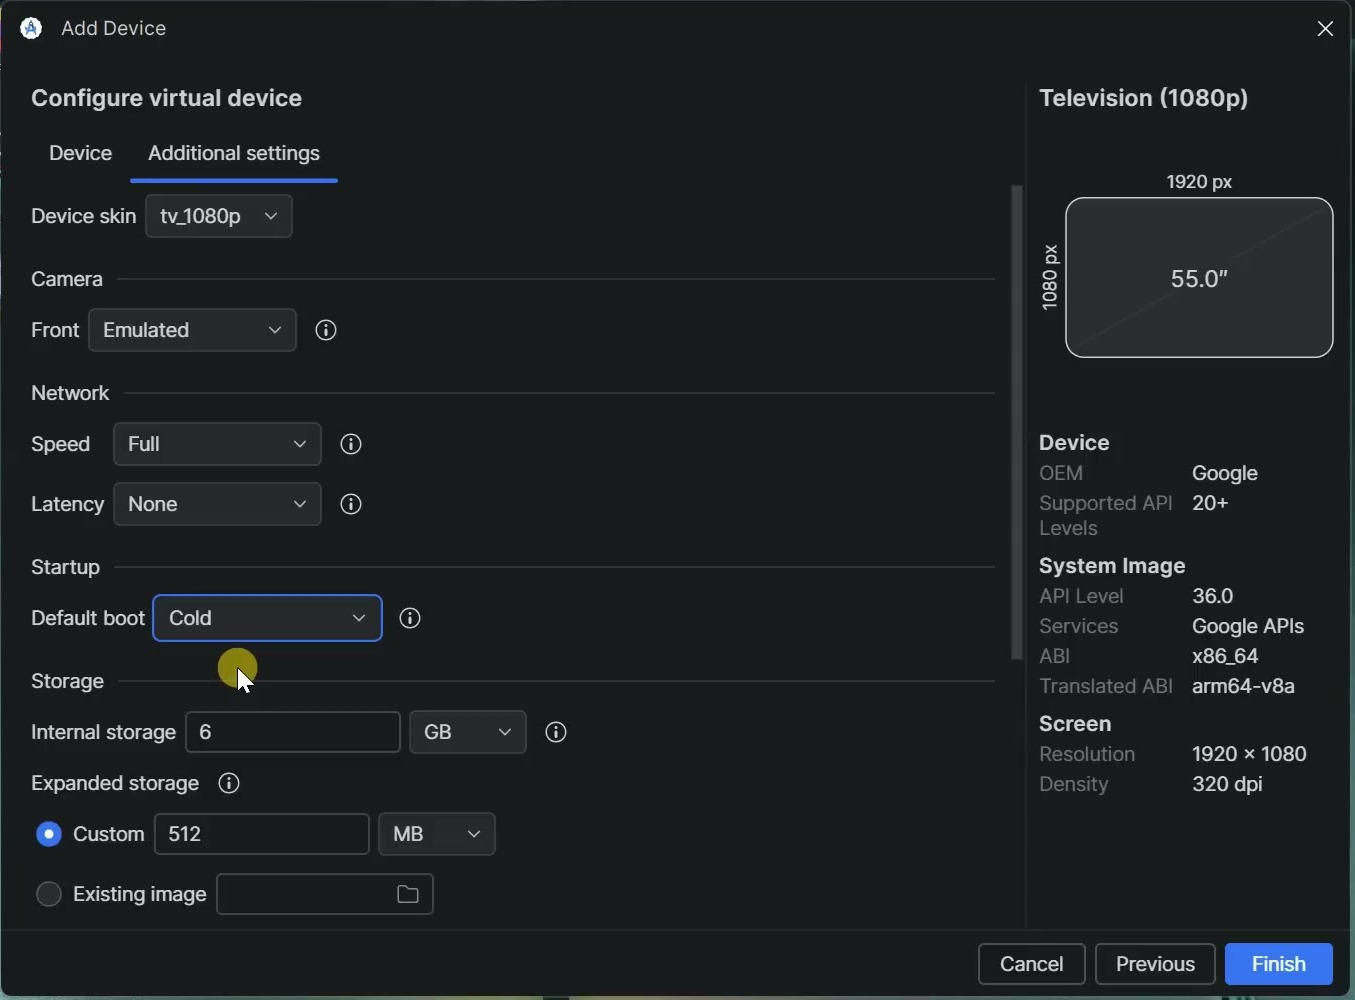
Internal Storage
Next, go to Internal storage. By default, it may be around 6 GB.
I recommend increasing it to 8 GB or 16 GB. If you only want to test Android TV, 8 GB is enough. But if you want to install more apps from the Play Store, 16 GB is a better choice.
CPU Cores
Now go to Emulated Performance. For CPU cores, you can keep it at 4 cores. This is good for most computers.
Do not increase it too much. If you give too many CPU cores to the emulator, your Windows system may become slow.
RAM
Next, check the RAM setting. If it is set to 2 GB, you can increase it to 3 GB or 4 GB for smoother performance.
- If your PC has 8 GB RAM, set emulator RAM to around 3 GB.
- If your PC has 16 GB RAM or more, you can set emulator RAM to around 4 GB.
You can keep the VM heap size as it is. There is no need to change it.
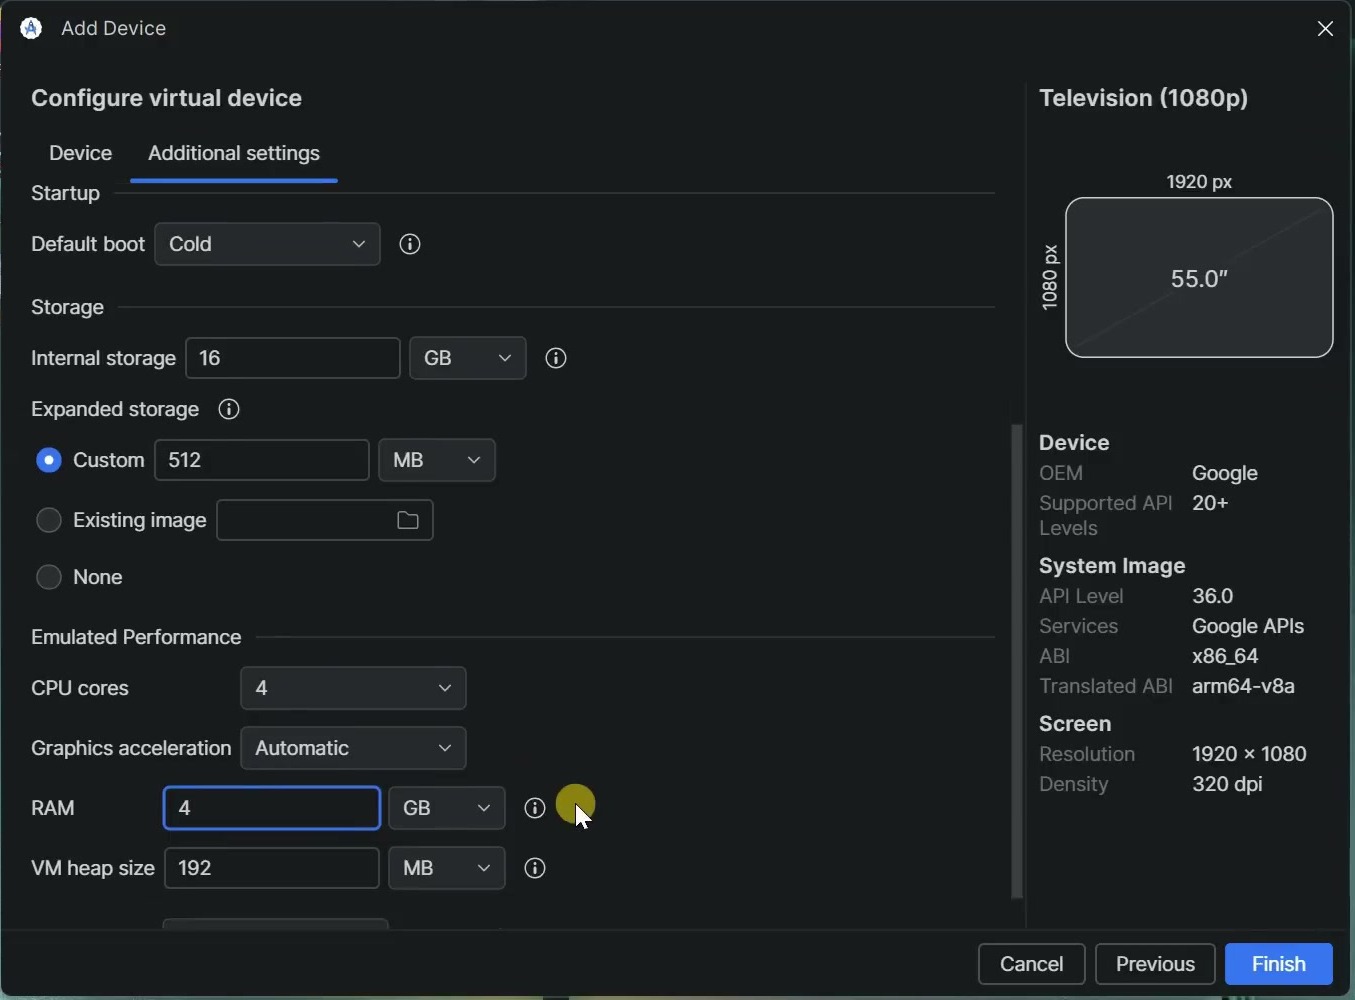
Also, keep Preferred ABI set to Optimal.
After changing these settings, click on Finish.
Step 7: Start Android TV on Windows PC
Now you will see your Android TV virtual device inside Virtual Device Manager.
Click on the Play button to start the Android TV emulator. After a few moments, Android TV will start on your Windows computer.
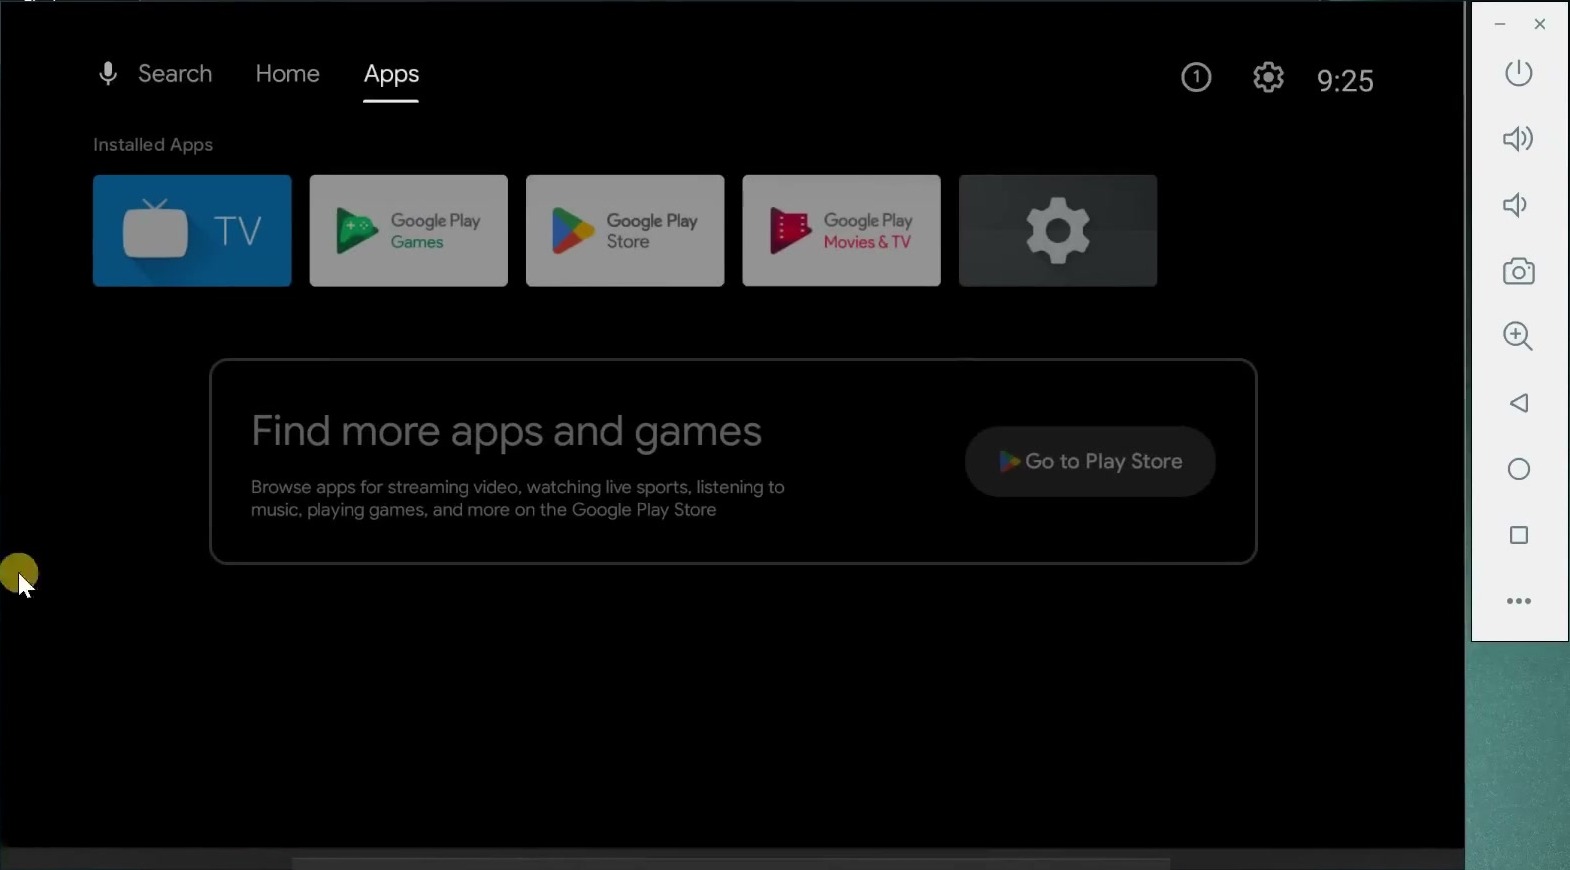
Now you can use Android TV just like a real Android TV device. You can sign in with your Google account, open the Play Store, install Android TV apps, test apps, and explore the Android TV interface.
Step 8: Make Android TV Emulator Fullscreen Using AutoHotkey
By default, the Android TV emulator does not always open properly in fullscreen mode. Even if you maximize the emulator window, it may still show the title bar, borders, and extra spaces.
To make it look more like a proper fullscreen Android TV setup, we can use AutoHotkey. With AutoHotkey, we can run a small script that launches the Android TV emulator and resizes the window to cover the full screen.
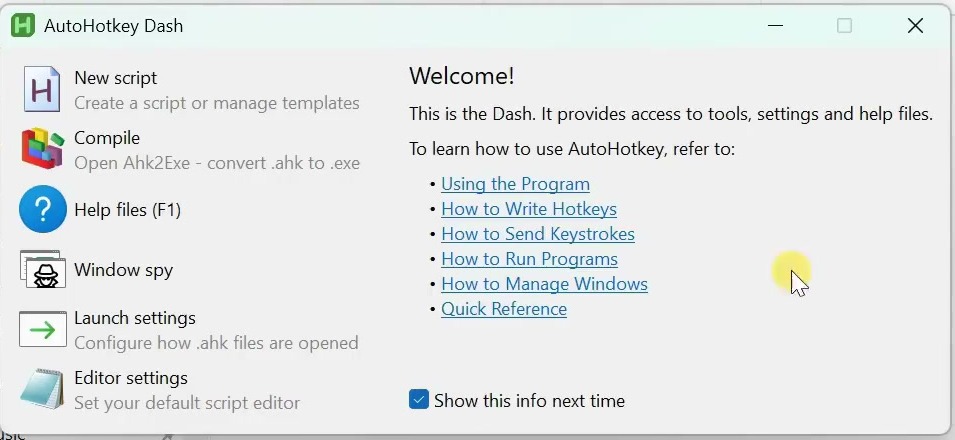
After installing AutoHotkey, go to your desktop. Right-click on an empty area, then go to New and select AutoHotkey Script.
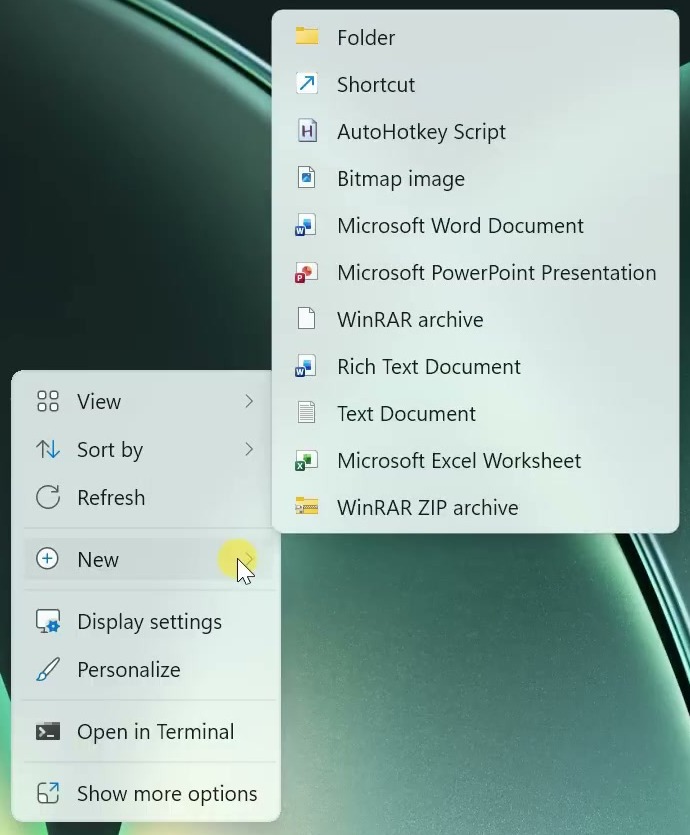
Give the script a name. For example:
AndroidTVAfter creating the script, right-click on it and click on Edit in Notepad.
Step 9: Edit the AutoHotkey Script
Before pasting the script, you need to know two important things.
1. Android Emulator Path
Usually, the Android Emulator is located in this path:
C:\Users\YOUR_USERNAME\AppData\Local\Android\Sdk\emulator\emulator.exeHere, replace YOUR_USERNAME with your Windows username.
2. Android TV Virtual Device Name
You also need your Android TV virtual device name. This is the same name you used while creating the virtual device.
In this guide, I used:
AndroidTVIf your virtual device name is different, replace AndroidTV in the script with your own virtual device name.
AutoHotkey Script for Android TV Fullscreen
Now paste this script into Notepad:
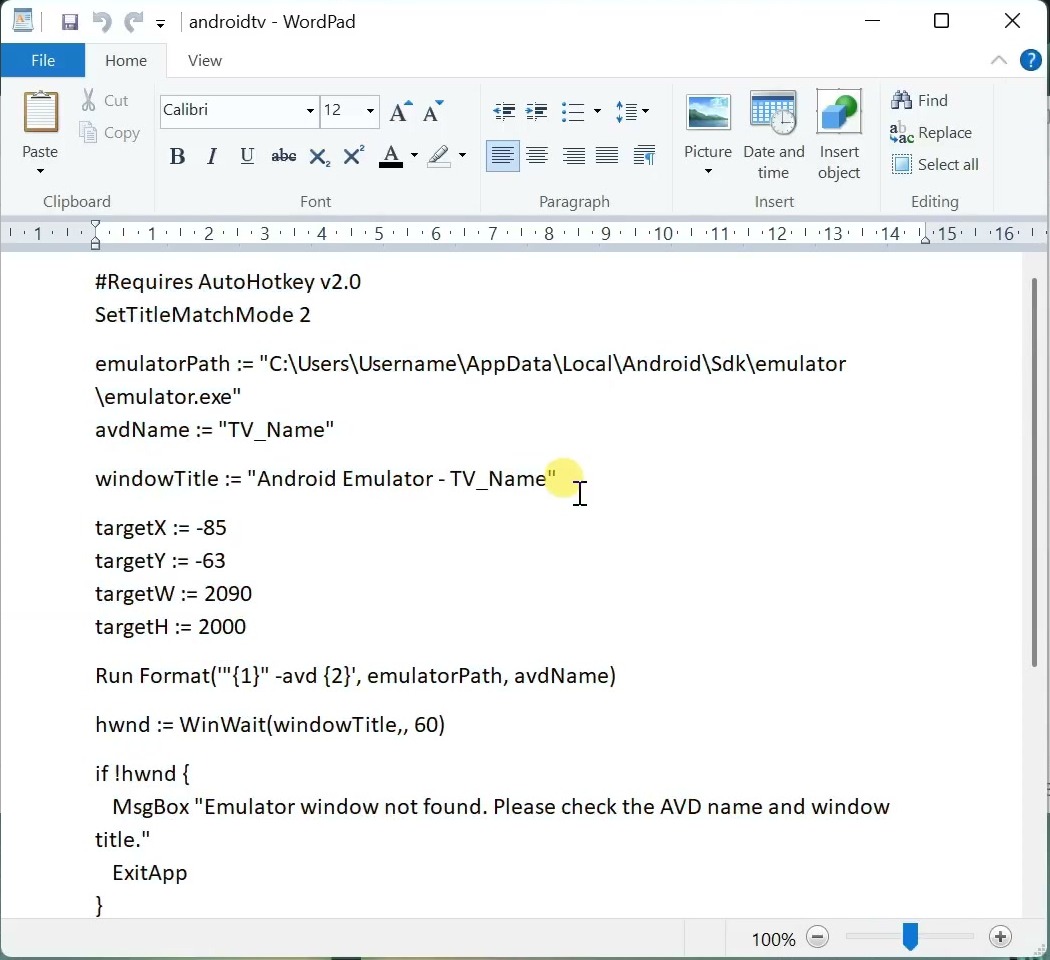
#Requires AutoHotkey v2.0
SetTitleMatchMode 2

emulatorPath := "C:\Users\YOUR_USERNAME\AppData\Local\Android\Sdk\emulator\emulator.exe"
avdName := "AndroidTV"
windowTitle := "Android Emulator - AndroidTV"

targetX := -85
targetY := -63
targetW := 2090
targetH := 2000

Run Format('"{1}" -avd {2}', emulatorPath, avdName)

hwnd := WinWait(windowTitle, , 120)

if !hwnd {
    MsgBox("Emulator window not found. Please check the AVD name and window title.")
    ExitApp()
}

win := "ahk_id " hwnd

WinActivate(win)
Sleep 5000

WinSetStyle("-0xC00000", win)
WinSetStyle("-0x40000", win)

WinMove(targetX, targetY, targetW, targetH, win)
Now replace YOUR_USERNAME with your actual Windows username.
Also, make sure the avdName and windowTitle match your Android TV virtual device name. If your device name is different, update it in both places.
After editing the script, click on Save.
Step 10: Run Android TV in Fullscreen Mode
Before running the AutoHotkey script, close the Android TV emulator if it is already running.
Now double-click on the AutoHotkey script. The script will launch the Android TV emulator and resize it to cover the full screen.
Once Android TV starts properly, you can use it like a fullscreen Android TV setup on your Windows PC.
To go back inside the Android TV emulator, press:
Ctrl + BackspaceWhat Can You Do with Android TV on Windows?
After Android TV starts on your PC, you can sign in with your Google account and open the Play Store.
You can install supported Android TV apps, such as media players, file managers, games, and other TV apps. This setup is also useful for developers who want to test Android TV apps without buying a physical Android TV box.
However, remember that this is still an emulator. Some apps may not work perfectly. Some streaming apps may also have restrictions because they may not support emulator environments.
Performance Tips
If you want better performance, make sure virtualization is enabled on your PC. Also, close unnecessary background apps before running the Android TV emulator.
For basic testing, 8 GB RAM is enough. But if you want a smoother experience, 16 GB RAM or more is recommended.
Also, do not give too much RAM or too many CPU cores to the emulator. If you allocate too many resources to the emulator, your Windows system may become slow.
Fix Android TV Emulator Black Screen Issue
If the Android TV emulator shows a black screen or does not open properly, try these fixes:
- Change Default boot from Quick to Cold Boot.
- Restart Android Studio.
- Restart your computer.
- Make sure virtualization is enabled in BIOS.
- Update your graphics driver.
- Reduce emulator RAM if your PC is becoming slow.
Fix AutoHotkey Script Not Working
If the AutoHotkey script shows an error like emulator window not found, check these things:
- Make sure the Android Emulator path is correct.
- Make sure your Windows username is correct in the path.
- Make sure the AVD name is correct.
- Make sure the window title matches your emulator name.
- Close the emulator and run the script again.
If your Android TV virtual device name is different, update both of these lines:
avdName := "AndroidTV"
windowTitle := "Android Emulator - AndroidTV"
Frequently Asked Questions
Can I run Android TV on Windows 11?
Yes, you can run Android TV on Windows 11 using Android Studio and Android Emulator. You just need to create an Android TV virtual device from the Virtual Device Manager.
Can I run Android TV on Windows 10?
Yes, this method also works on Windows 10, as long as your PC supports virtualization and has enough RAM.
Do I need an Android TV box?
No, you do not need a physical Android TV box. Android TV will run virtually inside your Windows PC using the Android Emulator.
Can I install Android TV apps on PC?
Yes, after starting the Android TV emulator, you can sign in with your Google account and install supported Android TV apps from the Play Store.
Will streaming apps work?
Some streaming apps may work, but some apps may not work properly because they may block or restrict emulator environments.
Is Android TV emulator good for daily use?
It is good for testing apps and experiencing the Android TV interface. But for regular entertainment and streaming, a real Android TV device or smart TV will usually give a better experience.
Conclusion
So that is how you can run Android TV on a Windows PC or laptop. Using Android Studio, you can create an Android TV virtual device and use the Android TV interface directly on your computer.
This method is very useful if you want to test Android TV apps, explore the Android TV interface, or use Android TV without buying a physical Android TV box.
And with the help of AutoHotkey, you can make the Android TV emulator look more like a fullscreen Android TV setup on your Windows computer.