An older Android phone can still feel surprisingly fresh with the right software. If you like the clean design of Google’s Pixel phones but wish you could personalize more of the interface, a custom ROM is worth exploring.
Evolution X is one of the options available for selected Android devices. It combines a Pixel-style experience with extra control over the look and behavior of the system. You can change far more than just the wallpaper, without filling your phone with separate customization apps.
Installing a custom ROM is more involved than installing an ordinary app, but it becomes much easier to understand when you follow the instructions written for your exact phone. The important thing is to use the correct files and take your time.
Before you install Evolution X
First, check whether your phone has an official Evolution X build. A ROM designed for a different model—even a phone with a similar name—may not boot and could leave the device unusable. The model’s codename matters just as much as its marketing name.
You’ll need an Android phone with an unlocked bootloader, a Windows, macOS, or Linux computer, a working USB data cable, and enough storage space to download the ROM and any required recovery images. Charge the phone to around 60–70% or more before starting.
Bootloader unlocking varies by manufacturer and isn’t part of the ROM installation process below. Complete your device manufacturer’s official unlocking procedure first, and check that unlocking is supported. Do not relock the bootloader after installing Evolution X unless the project’s device-specific documentation explicitly tells you it is safe.
Find the correct Evolution X build for your phone
Open the Evolution X website and select Browse Devices. Search for your phone’s exact model or codename, then open its dedicated page.
Visit the Official Evolution X Website
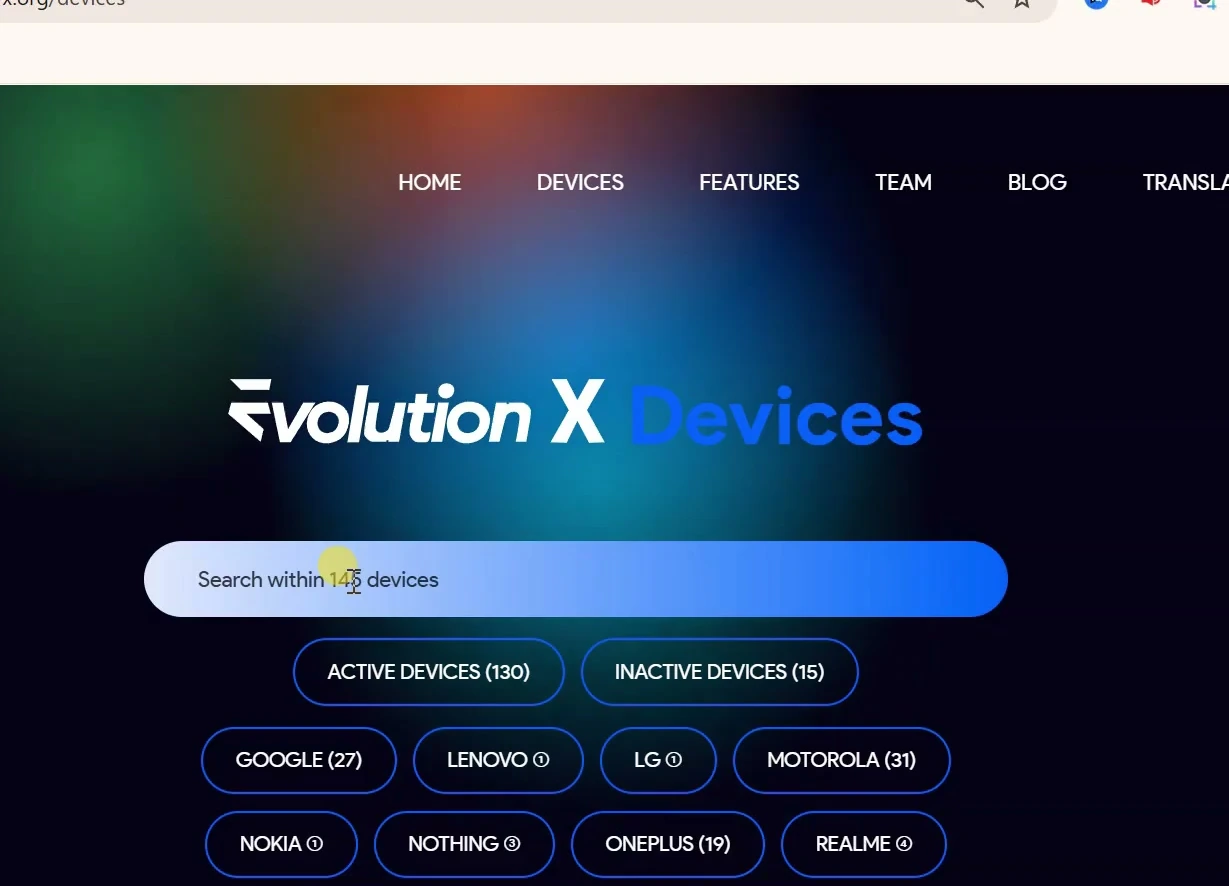
For example, the Xiaomi Pocophone F1 (POCO F1) uses the codename beryllium. Its device page lists the available Android and Evolution X versions, build type, file size, maintainer details, and a link to the installation instructions. On the build shown here, the POCO F1 page lists Android 15 with Evolution X 10.14. Always read the current listing before downloading, since builds and their maintenance status can change.

The POCO F1 listing also marks this build as not maintained. A build can still be listed for download without receiving ongoing updates or support, so check its maintenance status before deciding to install it.
Pay attention to the build type. A GApps build already includes Google apps and services, while a vanilla build does not. Choose the type you want and follow the instructions for that build.
Read the flashing instructions before downloading
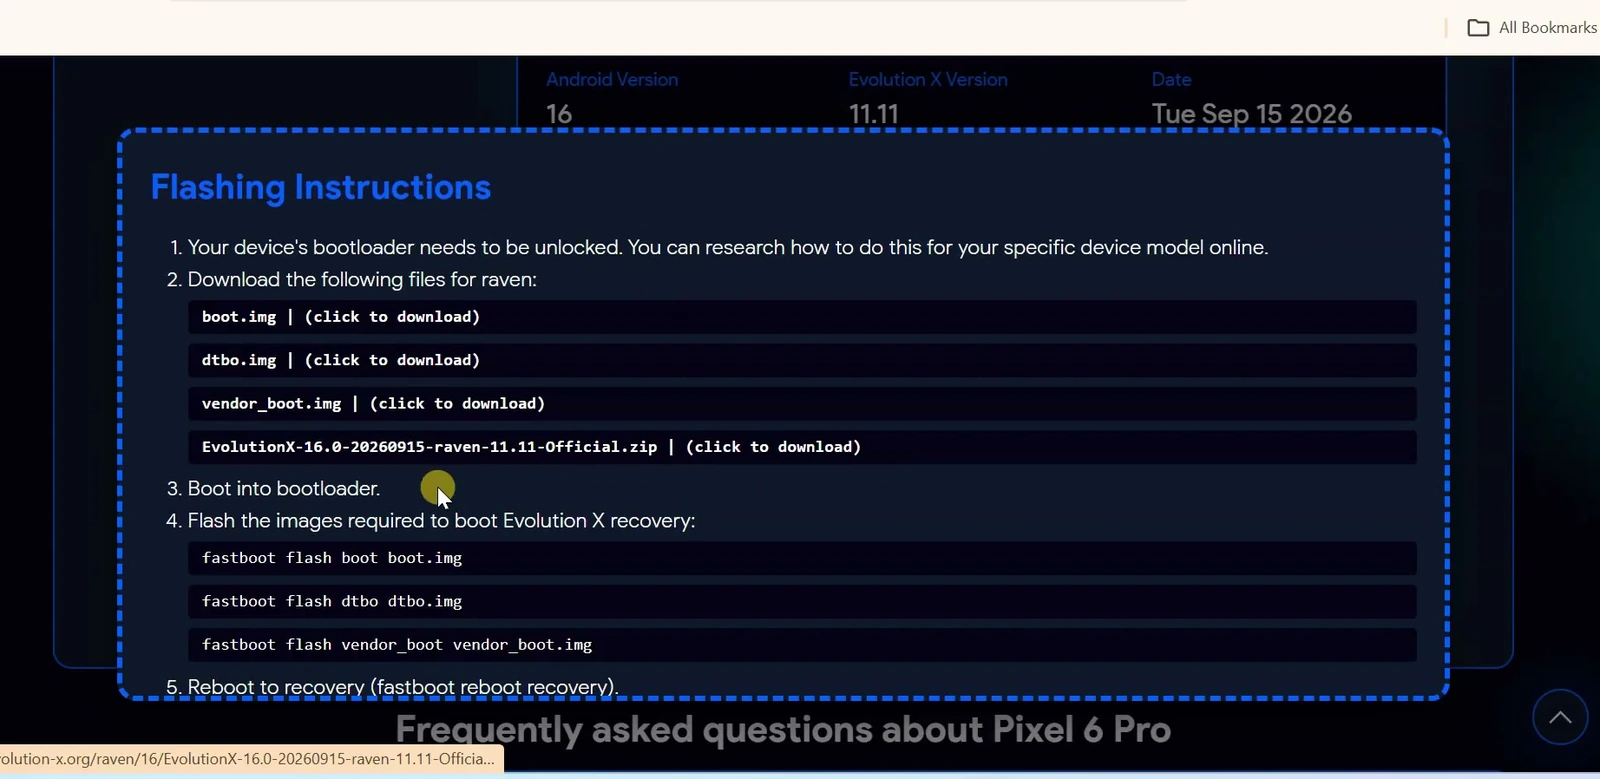
Select Flashing Instructions on your phone’s page. This section tells you which files to download, which partitions may need flashing, and how to install the ROM. Treat it as the authoritative checklist for your device.

The POCO F1 instructions use a recovery.img file and the Evolution X ROM ZIP. Other phones can be very different. For example, a Pixel may need boot.img, dtbo.img, and vendor_boot.img, while another model may require a different combination of images or firmware.
Download the ROM and recovery files
Once you’ve read the instructions, download every file requested for your device. For the POCO F1 example, the first download is recovery.img. The download page provides the recovery image for the selected build.

Next, download the ROM ZIP from the same device page. The POCO F1 package is a large download, so make sure the connection is stable and the file finishes downloading completely. Leave the ROM as a .zip file; you will sideload it later rather than extract it.
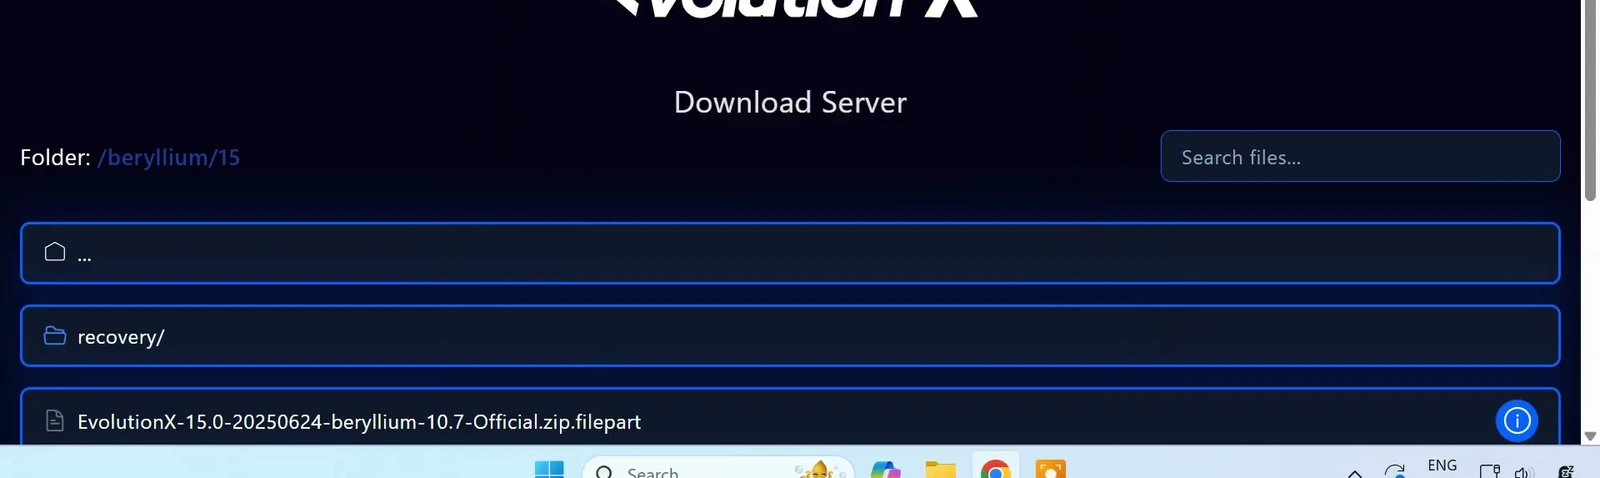
Some devices also require firmware or additional partition images. Download only what your own flashing instructions request. Don’t use old files saved from another device or guess which versions might work.
Install ADB and Fastboot on your computer
Your computer needs a way to communicate with Android during installation. Google’s Android SDK Platform-Tools package provides two utilities for that: ADB, which communicates with Android and recovery, and Fastboot, which works with the phone’s bootloader.
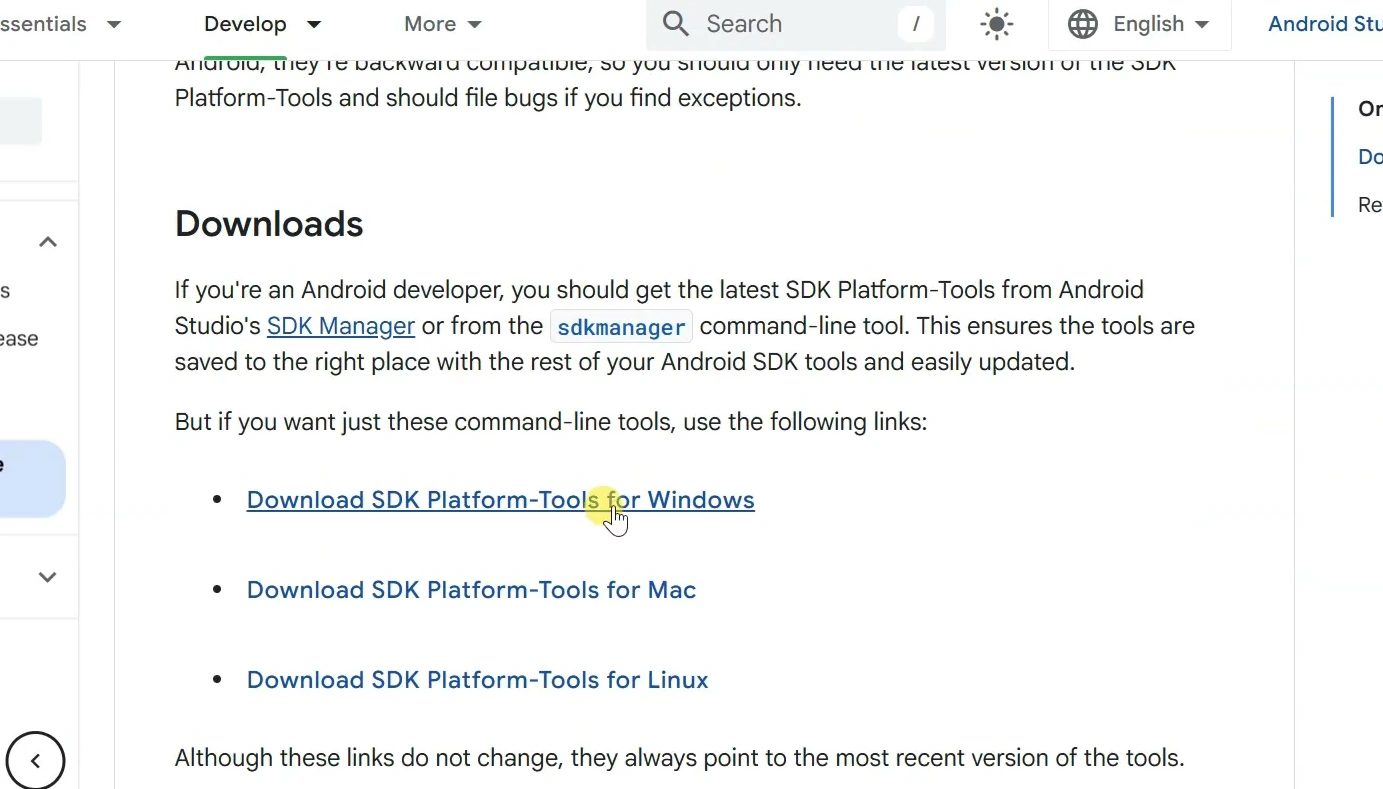
Open the official Platform-Tools download page and choose the version for your computer. On Windows, download the Windows ZIP, accept Google’s terms, and extract the archive into a folder you can easily find.
Download Android SDK Platform-Tools
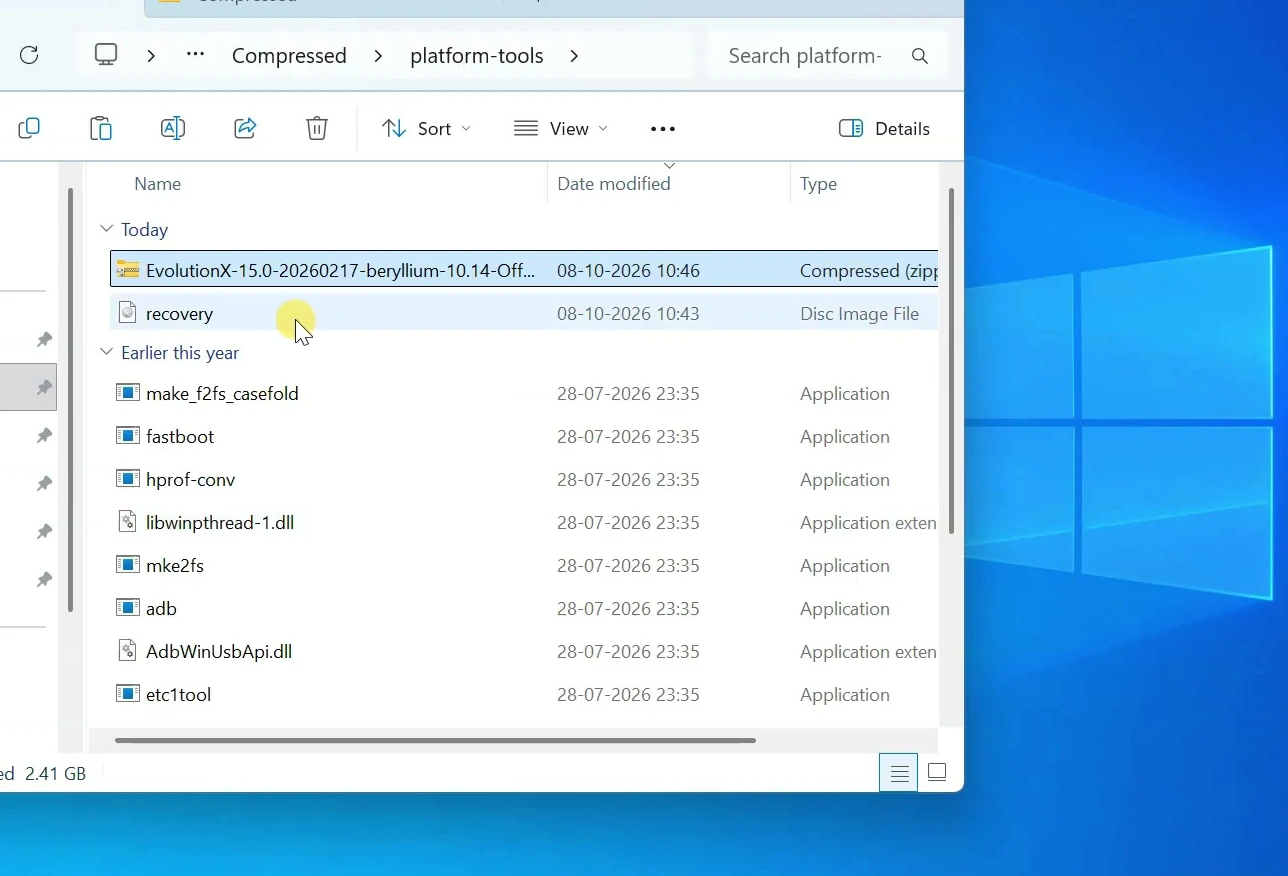
Open the extracted platform-tools folder. You should see the ADB and Fastboot program files inside. Copy your downloaded Evolution X image files and ROM ZIP into this same folder so you can access them without typing long file paths.
Enable USB debugging and connect your phone
To control a running Android device through ADB, first enable its developer settings. On many phones, open Settings, then About phone, and tap Build number repeatedly until developer options become available. The exact location can differ by manufacturer.
Return to Settings, open Developer options, and turn on USB debugging. Connect the phone to the computer with your USB data cable. If Android asks which USB connection to use, choose File transfer.
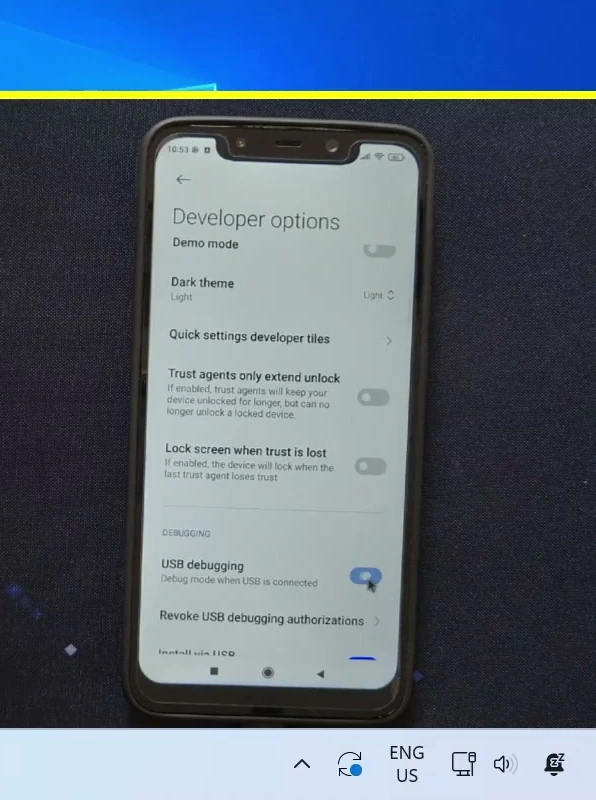
On Windows, open the extracted platform-tools folder in File Explorer. Click the address bar, type cmd, and press Enter. Command Prompt will open directly in that folder.
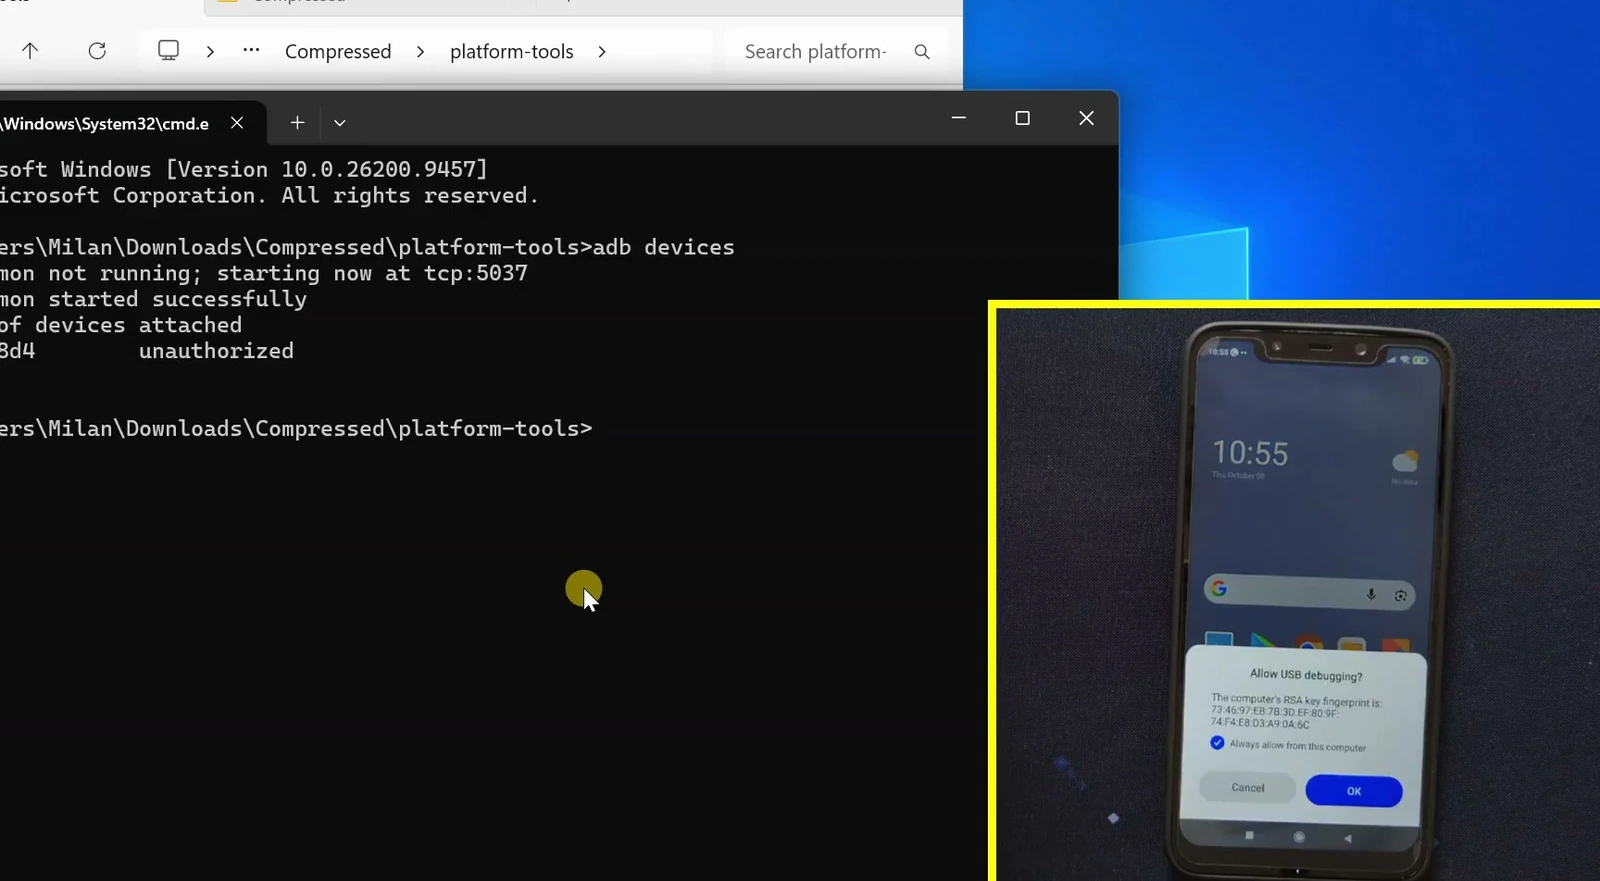
Run the following command to check whether ADB can see your phone:
adb devicesYour phone should display an Allow USB debugging? message. Approve the computer you recognize. If you regularly use this personal computer, you can also select Always allow from this computer. Run the same command again; the phone should now appear with a device serial number instead of unauthorized.
Enter Fastboot mode and check the connection
With ADB working, use the bootloader-reboot command described in your device guide to restart the phone into Fastboot mode. On supported devices, this can be done from the computer; some phones also have a hardware-button combination.
When the Fastboot screen appears, use Platform-Tools to check whether Fastboot recognizes the connected device. A successful check shows a serial number. If the list is empty, stop here and resolve the USB connection or driver issue before attempting to flash anything.
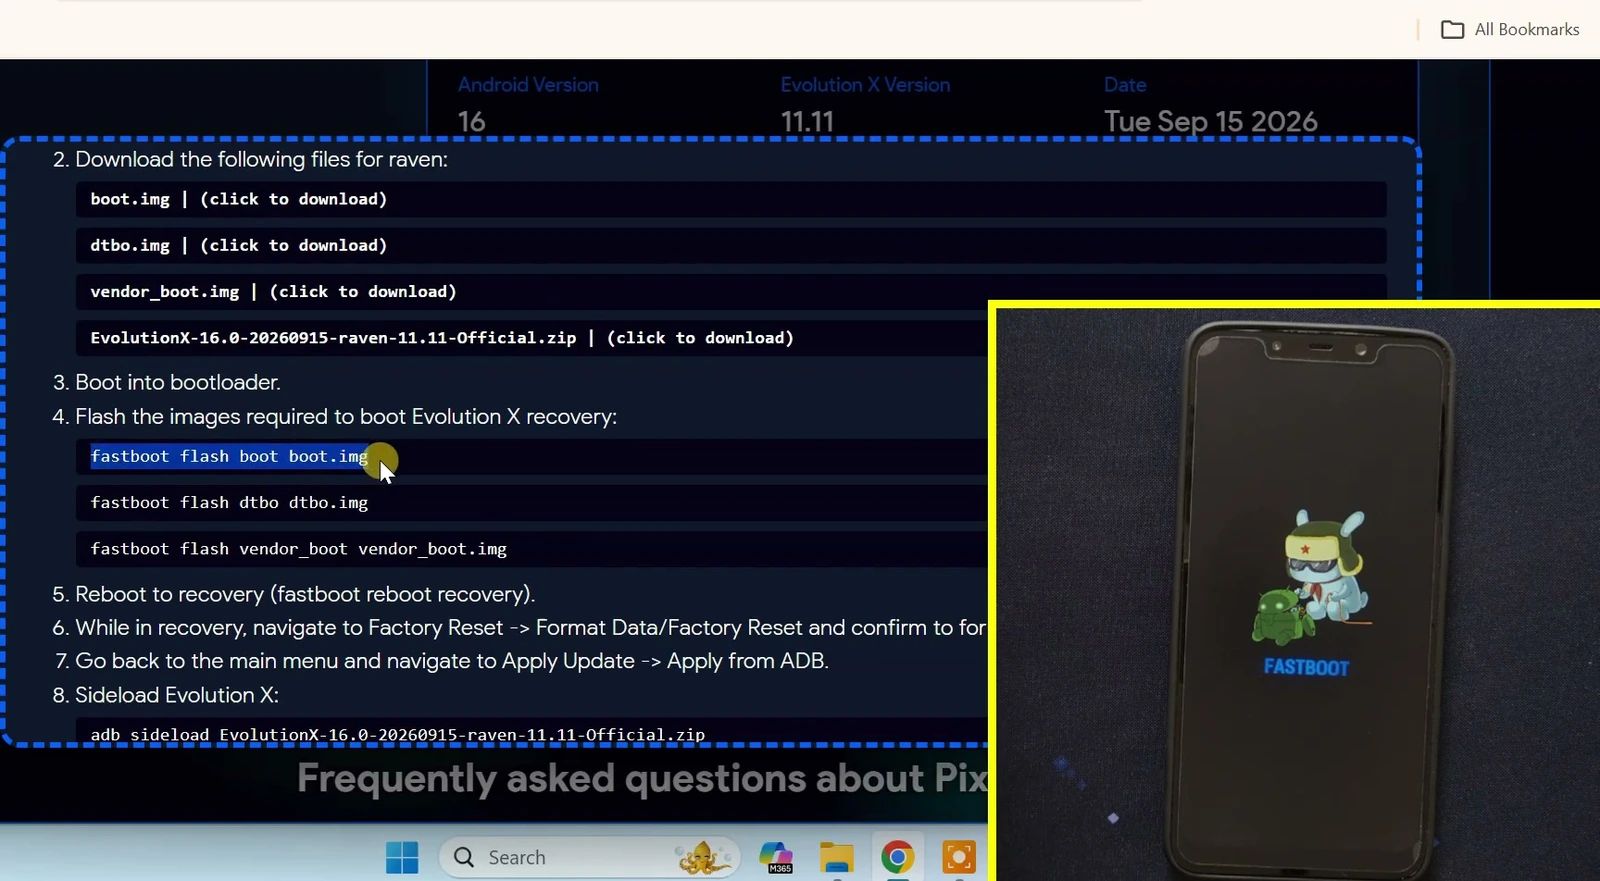
Flash the recovery or boot images listed for your phone
Return to your device’s Flashing Instructions page. Copy and run the exact image-flashing commands listed there, in the order provided. The partition names and number of commands depend on the device.
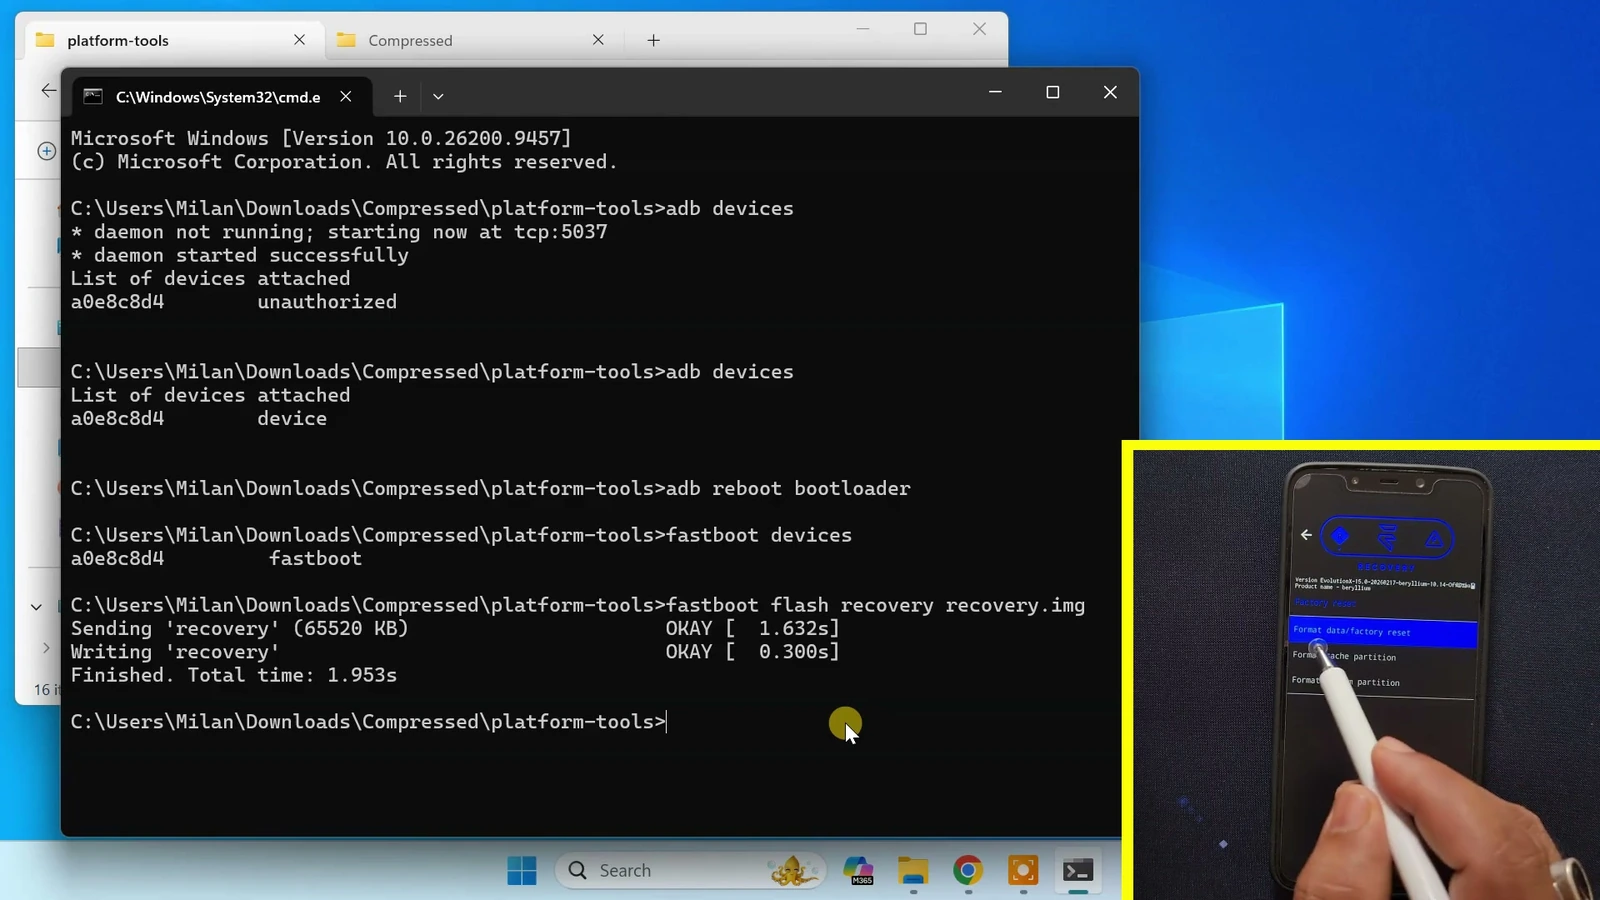
For the POCO F1, the official instructions show a recovery-partition flash using the downloaded recovery.img. When that operation finishes successfully, Fastboot reports OKAY for the transfer and write steps.

On other phones, the instructions might refer to the boot, DTBO, vendor boot, or other partitions instead. Do not substitute commands from a different model. Flashing the wrong partition or image can prevent the phone from starting.
Next, enter Evolution X Recovery using the method shown in your device’s instructions. On the POCO F1, the recovery page provides a reboot-to-recovery command, and the physical Volume Up and Power buttons can also be used to enter recovery.
Factory reset the phone and sideload Evolution X
On a fresh installation, the next step is to erase the old Android user data. In Evolution X Recovery, open Factory reset, select Format data/factory reset, and confirm the action.
After formatting finishes, return to the main recovery screen. Select Apply update, then Apply from ADB. Recovery is now ready to receive the ROM package from the computer.
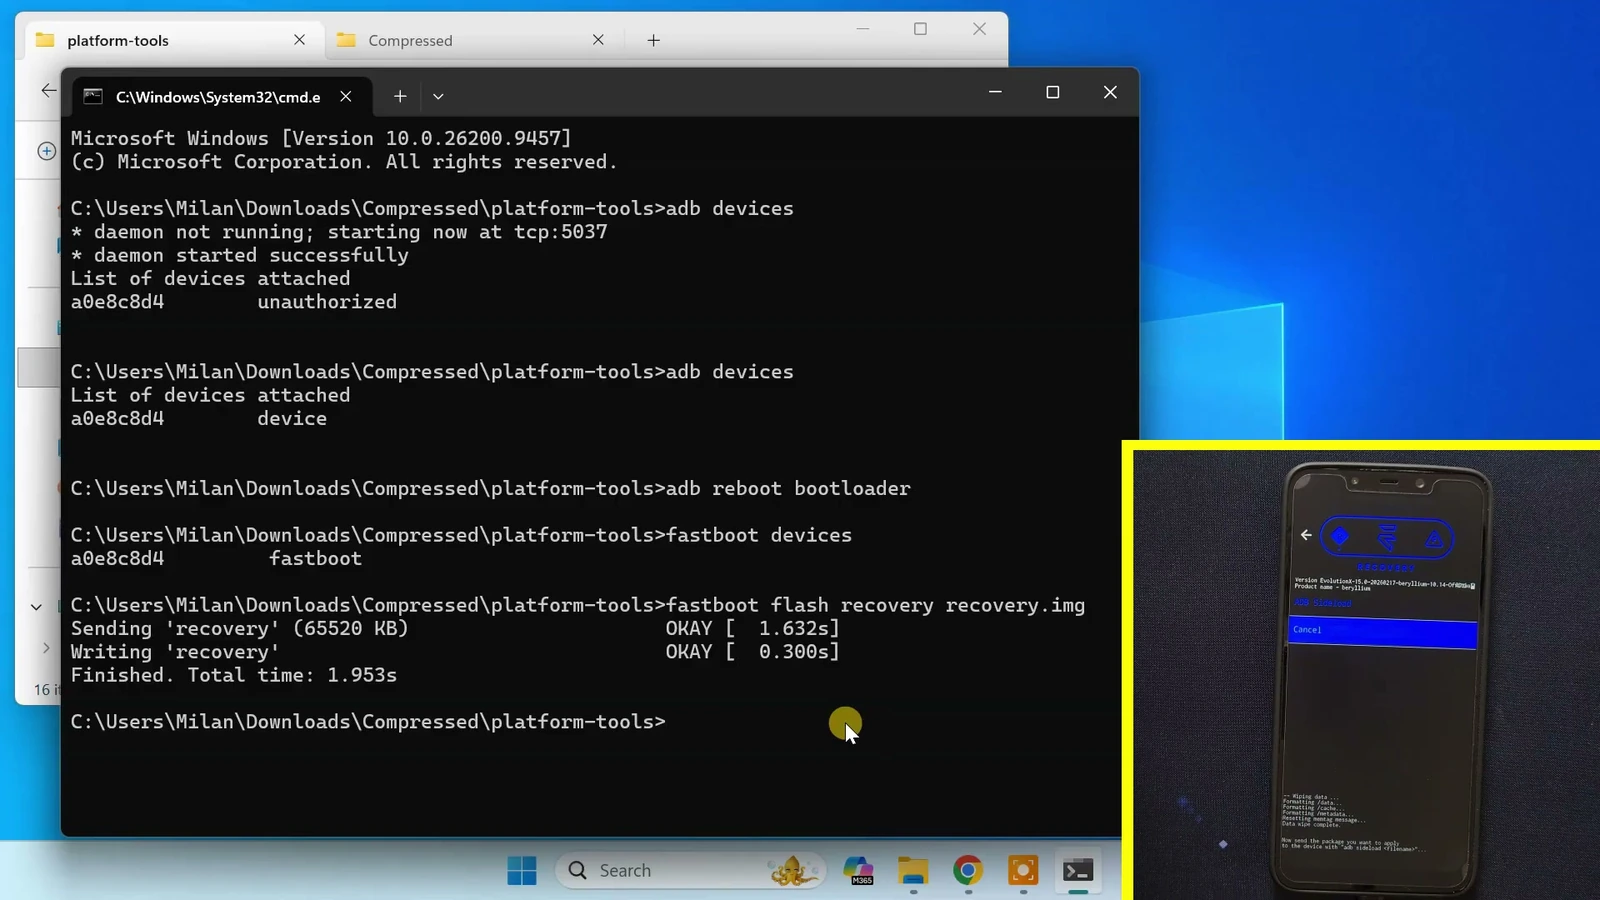
Go back to the computer and copy the ADB sideload command from the official flashing instructions for your device. It must point to the exact ROM ZIP you downloaded. Run that command from Platform-Tools, then let the transfer and installation finish without disconnecting the USB cable.
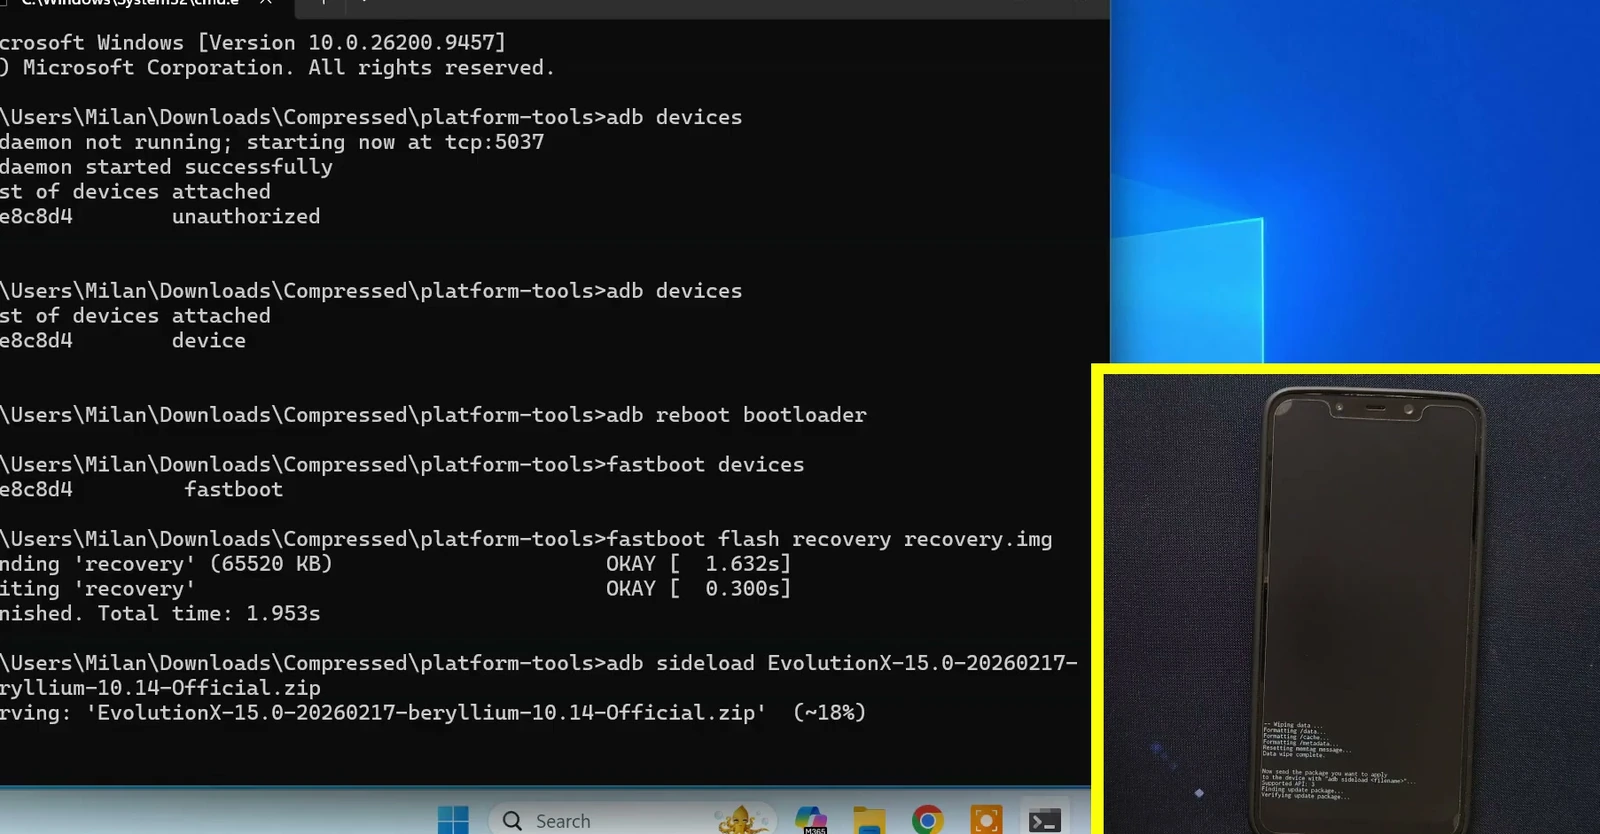
When recovery reports a successful installation, follow any remaining device-specific instructions. Some devices require additional firmware or packages. If you’re using a GApps build, Google apps are already included; a vanilla build may offer the choice of installing Google services separately.
Reboot and check the new Android system
Return to recovery’s main menu and choose Reboot system now. The first startup after flashing a ROM can take longer than a normal reboot, so give it time to finish.
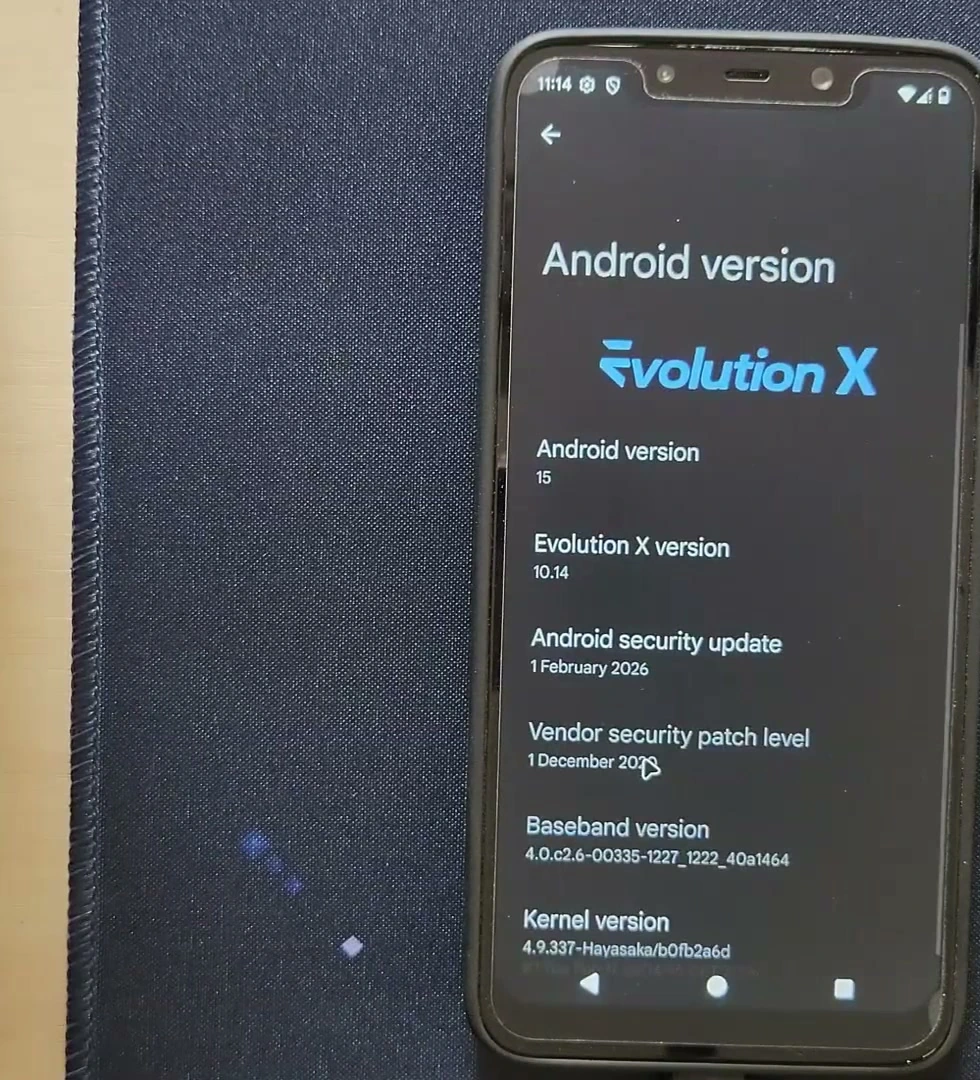
After the welcome screen appears, complete the usual Android setup. Open Settings, then About phone and Android version to confirm the installed system. On the POCO F1 used here, the version page identifies Evolution X based on Android 15.
Explore the Evolver customization settings
The interface has a familiar Pixel-style appearance, but Evolution X includes a dedicated customization area called The Evolver. Open Settings and choose The Evolver to see the available sections.
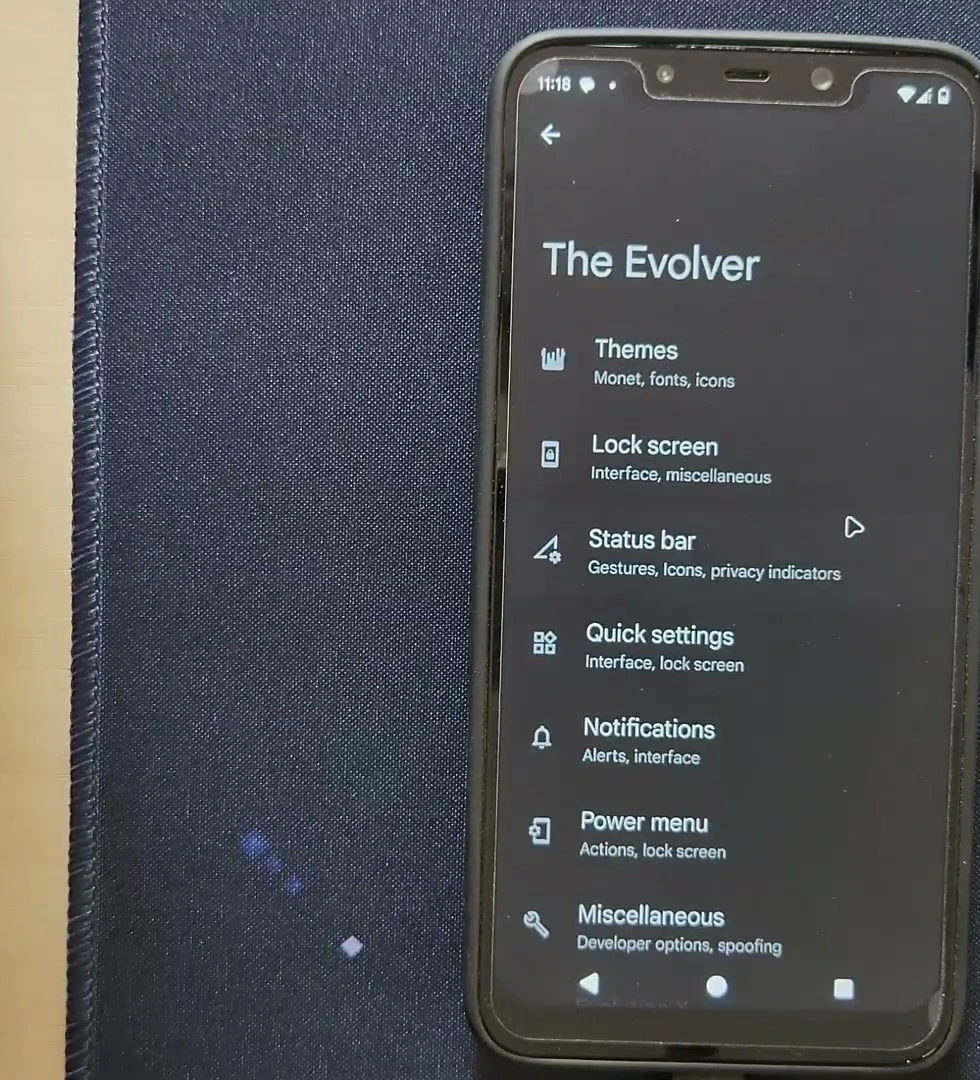
Under Themes, you can change parts of the visual style, such as the font, icon style or shape, and wireless status icons. The Lock screen section offers choices for the clock style, charging information, and shortcuts.
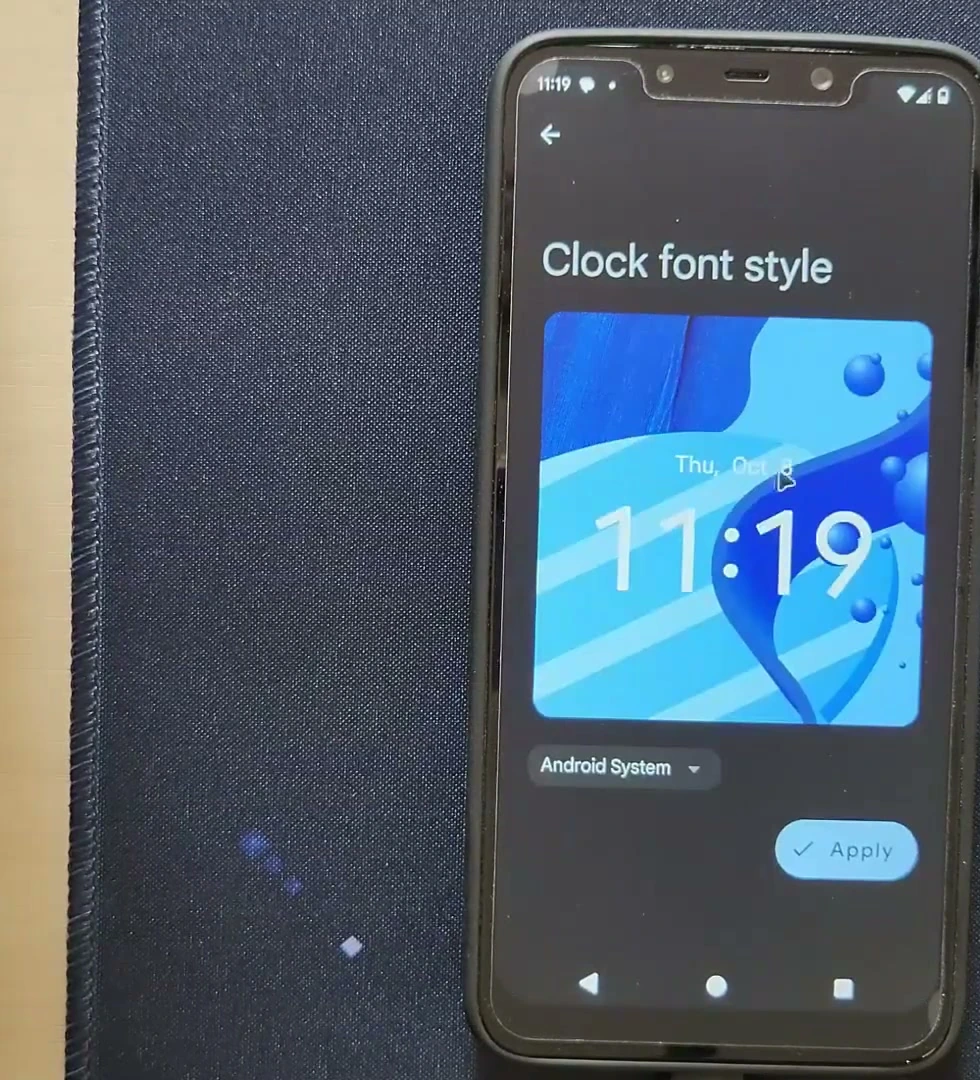
The Status bar area controls elements such as the clock, battery indicator, network speed, and status icons. In Quick settings, you can adjust the tile appearance and layout to suit the way you use your phone.
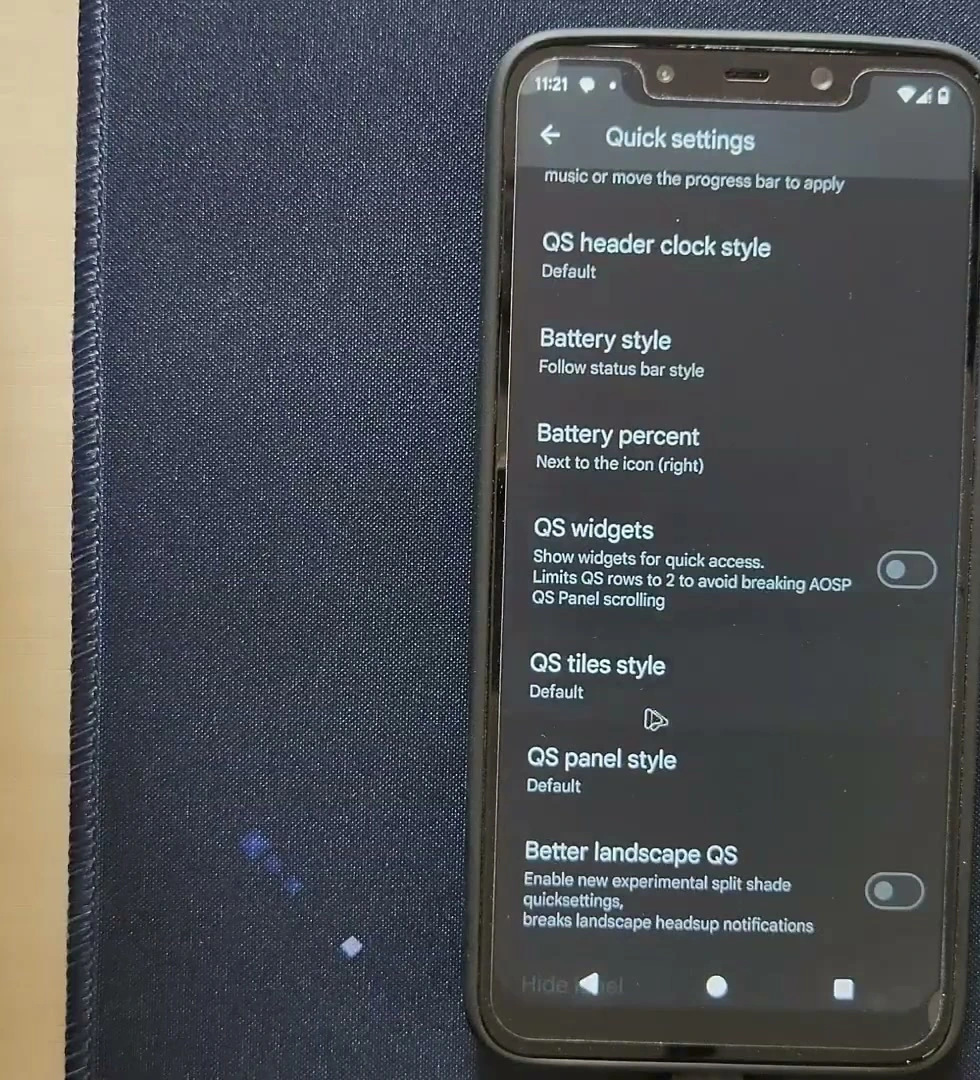
You’ll also find additional sections for notifications, buttons, gestures, animations, the power menu, and more. The exact options may vary between versions and devices, so explore the settings available on your own build.
If something doesn’t work
▸ ADB shows an unauthorized device
Unlock your phone and look for the USB debugging approval prompt. Approve your trusted computer, then check the ADB device list again. Try a different data-capable USB cable if the phone isn’t detected at all.
▸ Fastboot cannot find the phone
Confirm that the phone really is in Fastboot mode. Reconnect the cable, try another USB port, and check for missing USB drivers on Windows. Do not attempt the flash step while the connection is unreliable.
▸ The ROM won’t boot
Revisit the official device instructions and confirm that you used the correct codename, ROM ZIP, recovery or boot images, and any required firmware. Avoid repeatedly flashing random files in an attempt to fix the problem.
▸ Your phone doesn’t appear on the device list
That means you don’t have an officially listed Evolution X build for that model on the project’s website. Don’t use a ROM for a similar phone just because the hardware looks alike.
Once Evolution X is installed, you can use Android normally and personalize it at your own pace. The most important part of a successful installation is not speed; it’s matching every file and flashing step to your exact device.