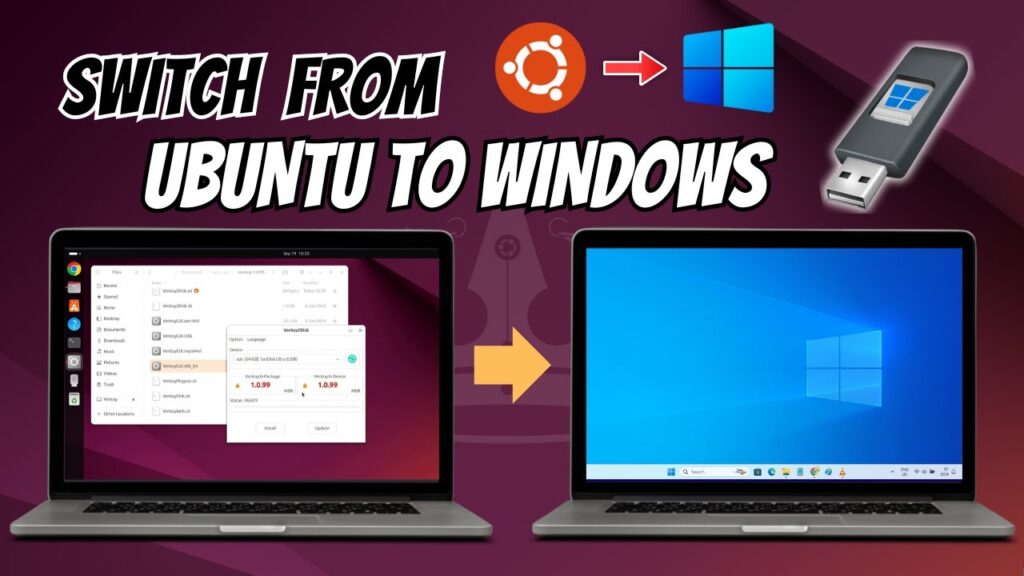
Do you want to install Ubuntu 26.04 LTS alongside Windows 11 on the same computer? In this guide, I will show you how to safely dual boot Ubuntu and Windows 11 without replacing Windows.
With this setup, Ubuntu will be installed on a separate partition. So, whenever you turn on the computer, you can choose whether you want to start Ubuntu or Windows 11 from the boot menu.
This is useful if you want to use Linux for development, privacy, learning, testing, or daily work, but still want to keep Windows 11 for your existing apps, games, files, and settings.
What This Dual Boot Setup Does
In this setup, Windows 11 remains installed on your computer, and Ubuntu 26.04 LTS is installed in the free unallocated space that we create from the Windows C drive.
After installation, the GRUB boot menu appears when the computer starts. From there, you can select Ubuntu when you want to use Linux, or select Windows Boot Manager when you want to use Windows 11.
Your Windows apps, settings, and personal files should remain available as long as you follow the steps carefully and do not select the wrong disk option during Ubuntu installation.
What You Need
Before starting, make sure you have these things ready:
- A Windows 11 computer
- An empty USB drive with at least 8 GB storage
- Ubuntu 26.04 LTS ISO file
- Rufus to create the bootable USB drive
- Enough free space on the Windows C drive
- A backup of your important files
The USB drive will be erased while creating the Ubuntu installer, so copy any important files from it before continuing.
Step 1: Check BitLocker Status
First, we need to check whether the Windows drive is encrypted with BitLocker.
Open the Start menu and search for Manage BitLocker. Open it and check the status of the Windows C drive.
If BitLocker is enabled, make sure your recovery key is saved in your Microsoft account or another safe place. After that, click on Turn off BitLocker and wait until the drive is completely decrypted.
If Manage BitLocker does not appear, or if the C drive already shows BitLocker off, you can skip this step.
After the drive has been completely decrypted, restart Windows once and make sure everything is working normally.
Step 2: Disable Windows Fast Startup
Next, we should disable Windows Fast Startup. This helps prevent Ubuntu access issues and ensures Windows shuts down completely.
Open the Start menu, search for Control Panel, and open it.
Go to Hardware and Sound, then open Power Options.
From the left side, click on Choose what the power buttons do.
Now click on Change settings that are currently unavailable.
Uncheck Turn on fast startup and click on Save changes.
Step 3: Create Free Space for Ubuntu
Now we need to create free space where Ubuntu will be installed.
Right-click the Windows Start button and open Disk Management.
Disk Management will show all physical drives and partitions connected to your computer. In most cases, you will see an EFI System Partition, the main Windows C drive, and one or more recovery partitions.
We only need to reduce the size of the Windows C drive. Before continuing, make sure the C drive has enough available storage.
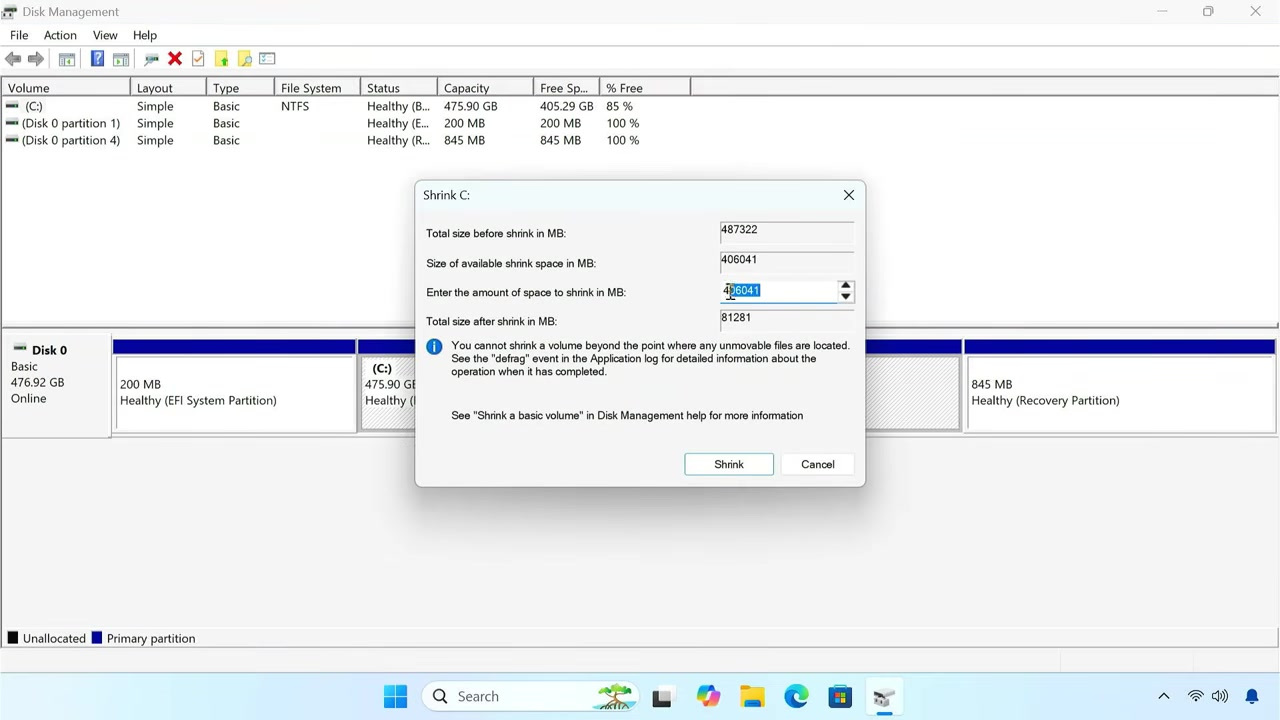
Right-click the C drive and select Shrink Volume.
Windows will now calculate how much space can be removed from the partition.
The amount must be entered in megabytes. You can use these examples:
- 50 GB: 51200 MB
- 80 GB: 81920 MB
- 100 GB: 102400 MB
For example, if you want to allocate 100 GB for Ubuntu, enter:
102400Then click on Shrink.
After a few seconds, a new section marked as Unallocated should appear.
Step 4: Get Ubuntu 26.04 LTS ISO
Now open your browser and visit the official Ubuntu website.
Download Ubuntu 26.04 LTS Desktop. Most computers running Windows 11 with an Intel or AMD processor require the 64-bit AMD64 version.
Wait for the Ubuntu ISO file to finish downloading.
Step 5: Get Rufus
While the Ubuntu ISO is downloading, open a new browser tab and get the latest version of Rufus.
Rufus is a free and open-source tool that we will use to write the Ubuntu ISO file to a USB drive.
Step 6: Create Ubuntu Bootable USB
Connect your USB drive to the computer.
Use an empty USB drive with at least 8 GB of storage. Everything stored on the USB drive will be deleted during this process.
Now open Rufus. If Windows shows a permission prompt, click Yes.
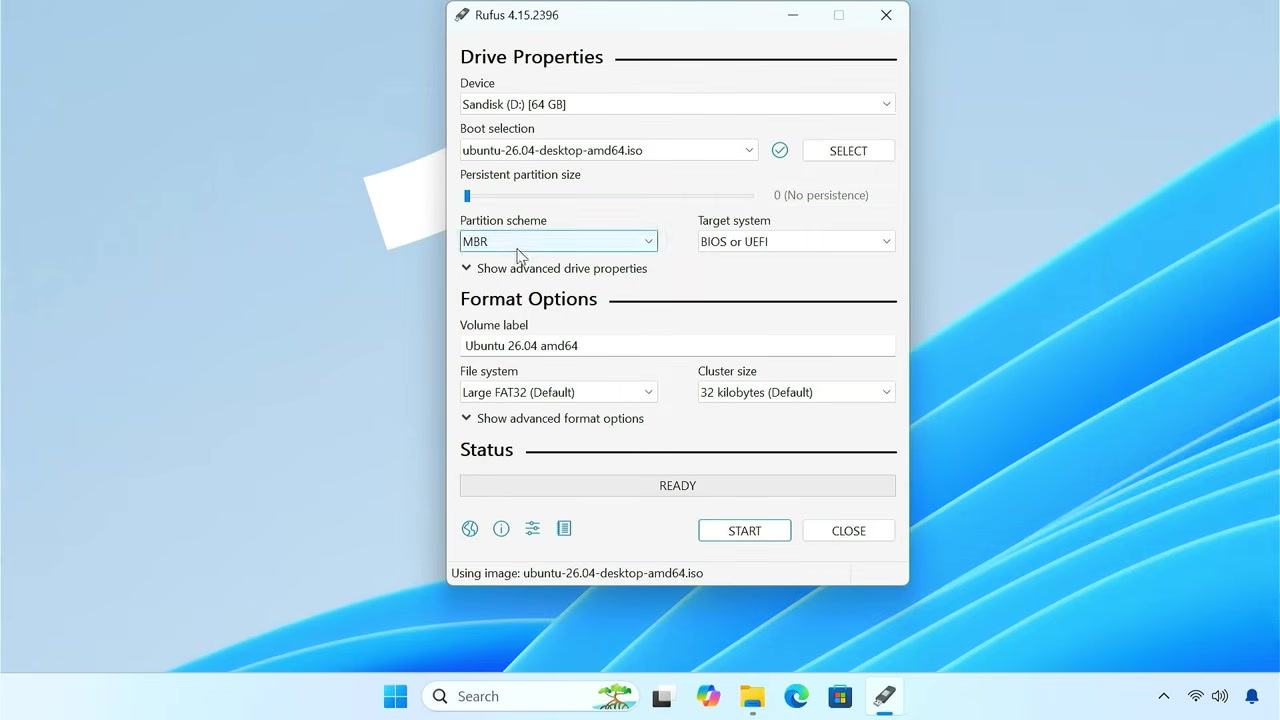
Under Device, select your USB drive. Make sure you select the correct USB drive because Rufus will erase it.
Next to Boot selection, click on Select.
Choose the downloaded Ubuntu ISO file and open it.
Rufus will automatically choose the recommended settings. You can leave the settings at their default values.
Now click on Start.
If Rufus asks you to choose between ISO Image mode and DD Image mode, select the recommended ISO Image mode.
Rufus will warn you that all data on the USB drive will be destroyed. Click OK.
Now wait while Rufus writes the Ubuntu installation files to the USB drive. Once the progress is complete and the status changes to Ready, close Rufus.
The Ubuntu bootable USB drive is now ready.
Step 7: Boot from the Ubuntu USB Drive
Now we need to start the computer from the Ubuntu USB drive.
Open Windows Settings.
Go to System, then open Recovery.
Beside Advanced startup, click on Restart now and confirm the restart.
The computer will now open the Windows recovery menu.
Select Use a device.
Now choose EFI USB Device.
The computer should restart and boot directly from the Ubuntu USB drive. This method lets you boot from USB without manually opening the BIOS.
Step 8: Start Ubuntu Installer
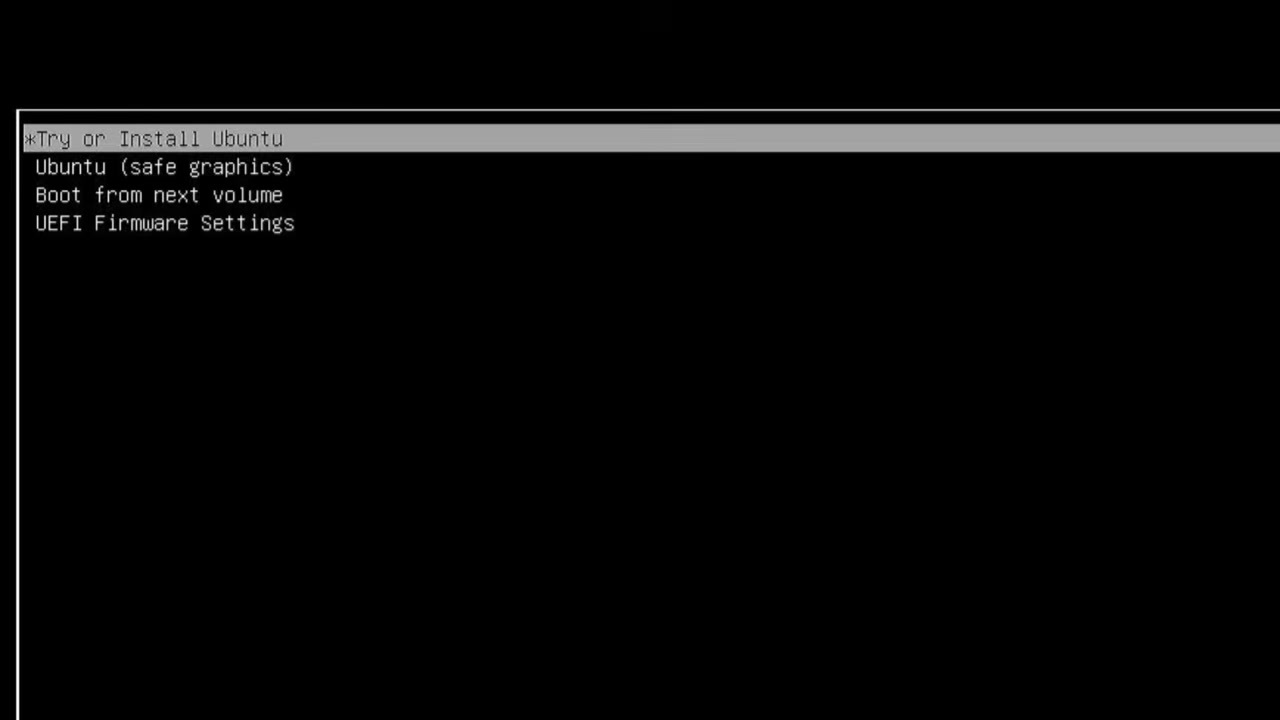
After booting from the USB drive, you should see the Ubuntu startup screen.
Select Try or Install Ubuntu and press Enter.
Wait for the Ubuntu installer to load.
Choose your preferred language and click Next.
On the accessibility screen, enable any features that you require. Otherwise, leave the settings unchanged and click Next.
Now select the correct keyboard layout. You can type inside the test box to confirm that the keyboard is working correctly.
Click Next.
Step 9: Connect to the Internet
The installer will now ask you to connect to the internet.
Select your Wi-Fi network and enter the password. You can also use a wired Ethernet connection.
An internet connection is optional, but connecting now allows Ubuntu to download updates, additional drivers, and supported software during installation.
After connecting, click Next.
Step 10: Choose Install Ubuntu
You will now see the option to try Ubuntu or install Ubuntu.
The Try Ubuntu option lets you test Ubuntu temporarily without installing it.
For this guide, select Install Ubuntu and continue.
Now select Interactive installation.
This is the standard option recommended for most users. The automated installation option is mainly intended for advanced users and organizations.
Click Next.
Step 11: Choose Applications and Third-Party Software
Ubuntu will now ask which applications you want to install.
The Default selection installs the essential applications required by most users.
The Extended selection includes some additional office applications and utilities.
For most users, the Default selection is enough because additional applications can be installed later through the Ubuntu App Center.
On the next screen, enable the option to install third-party software for graphics and Wi-Fi hardware.
Also enable the option for additional media formats.
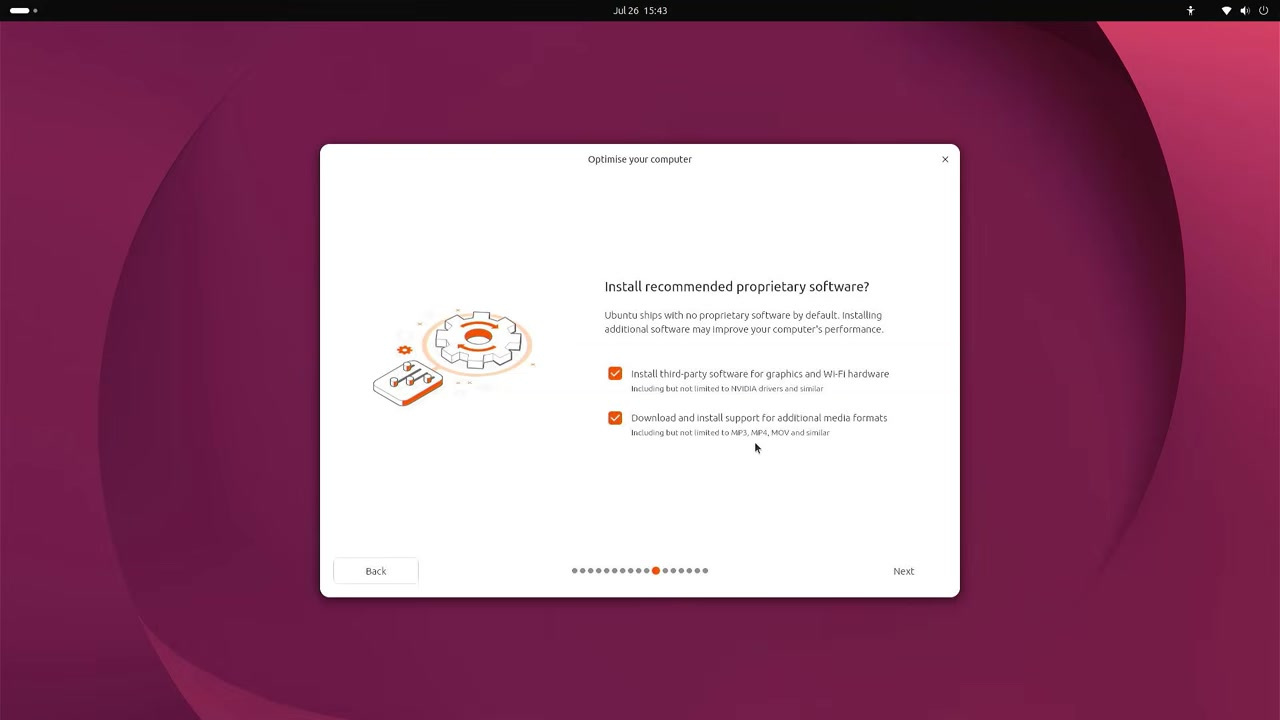
These options can improve device support and install useful drivers and codecs.
Click Next.
Step 12: Install Ubuntu Alongside Windows Boot Manager
Now you will reach the disk setup screen.
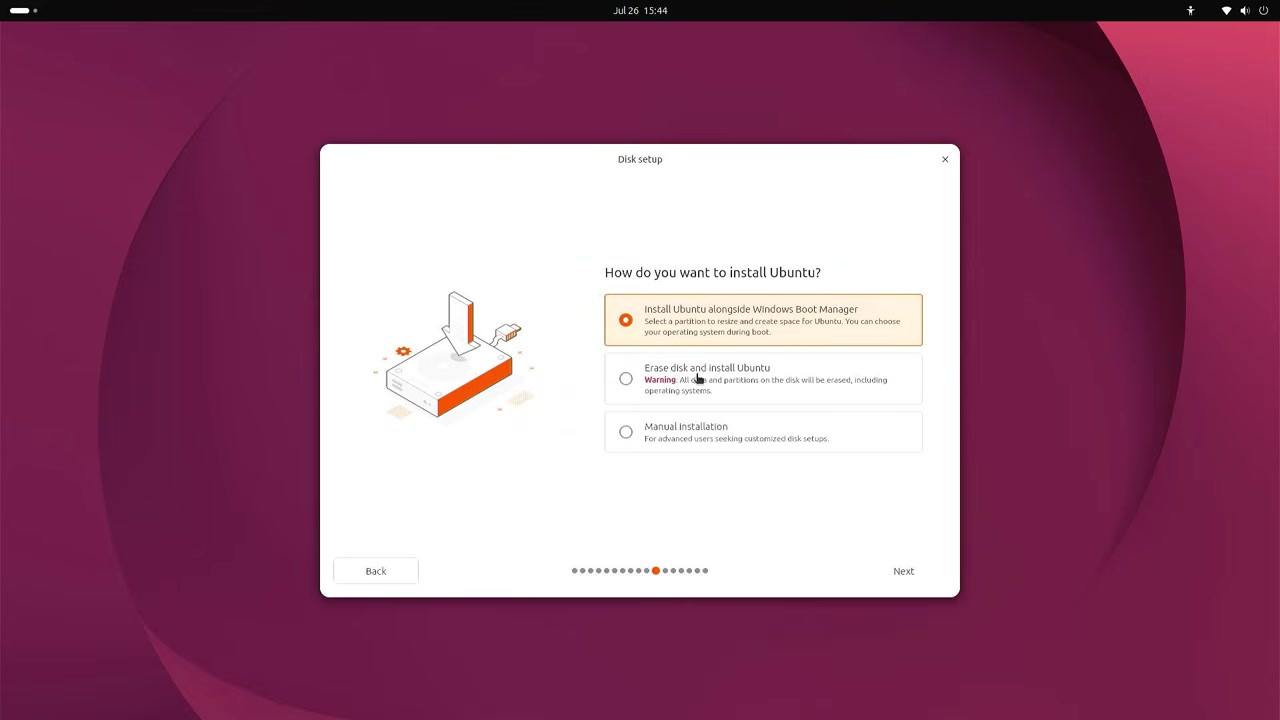
Here, select the option that says:
Install Ubuntu alongside Windows Boot ManagerWhen you select this option, the Ubuntu installer will automatically detect Windows and the unallocated space that we created earlier.
Manual installation is also not recommended for beginners.
So, select the alongside option and click Next.
Step 13: Create Your Ubuntu User Account
Ubuntu will now ask you to create a user account.
Enter your name and choose a name for the computer.
Create a username and enter a strong password.
For better security, keep the option enabled to require the password when logging in.
Click Next.
Step 14: Select Location and Install Ubuntu
Now select your location and time zone.
If the computer is connected to the internet, Ubuntu may automatically detect the correct location.
The installer will now display a summary of the installation.
If everything is correct, click Install.
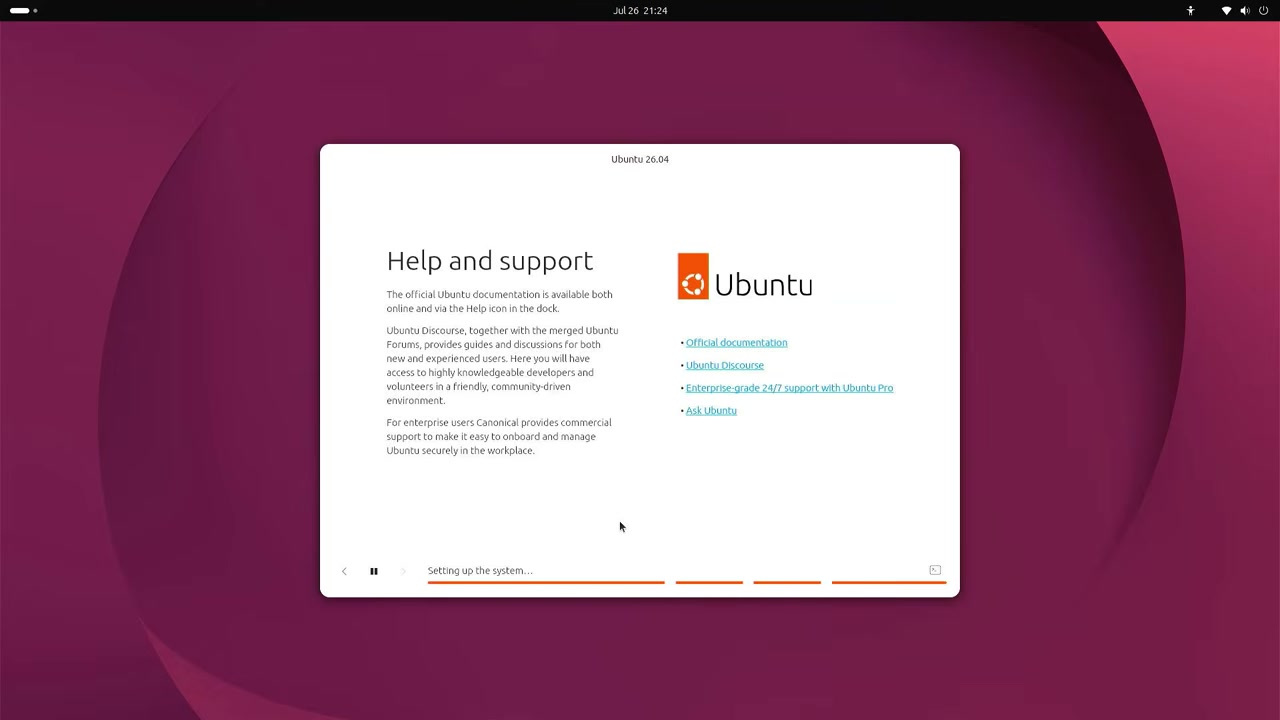
Ubuntu will now create the required Linux partition inside the unallocated space, copy the operating system files, install the selected applications, and configure the GRUB boot manager.
The installation may take several minutes.
Step 15: Restart and Remove USB Drive
Once the installation is complete, click on Restart Now.
When Ubuntu asks you to remove the installation medium, disconnect the USB drive and press Enter.
The computer will restart.
Step 16: Use the GRUB Boot Menu
After restarting, you should see the GRUB boot menu.
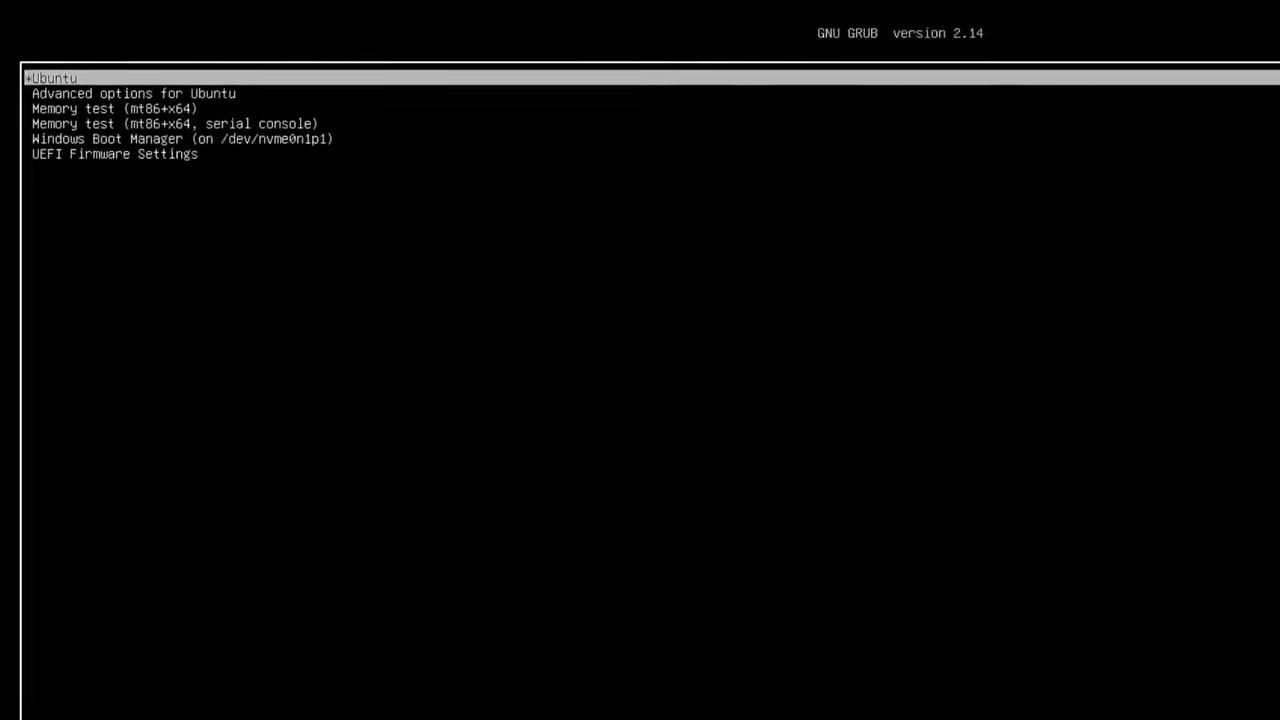
This menu lets you choose which operating system you want to start.
- Select Ubuntu to start Ubuntu.
- Select Windows Boot Manager to start Windows 11.
For now, select Ubuntu and press Enter.
Step 17: Complete Ubuntu Initial Setup
Ubuntu will now start and show the login screen.
Enter the password you created during installation.
After signing in, the Initial Setup application may appear. Keep clicking Next and complete the setup.
After that, the Ubuntu 26.04 desktop will appear.
Step 18: Update Ubuntu After Installation
After installing Ubuntu, the first thing you should do is update the operating system.
Open the application menu and launch Software Updater.
Allow Ubuntu to check for available updates.
If updates are available, click Install Now.
Enter your Ubuntu password when requested.
Ubuntu will download and install the latest system and security updates.
If Software Updater asks you to restart the computer, complete the restart before continuing.
Step 19: Check Important Hardware
Now that Ubuntu is installed and updated, check whether the important hardware is working.
First, connect to your Wi-Fi network. Open the web browser and load a website. This confirms that the Wi-Fi adapter and internet connection are working.
You can also play a YouTube video to check speakers, video playback, and basic graphics performance.
Next, open the quick settings panel and turn on Bluetooth. Connect a Bluetooth device to confirm that pairing and audio are working correctly.
Now open Settings and go to Displays. Check whether Ubuntu has detected the correct screen resolution and refresh rate.
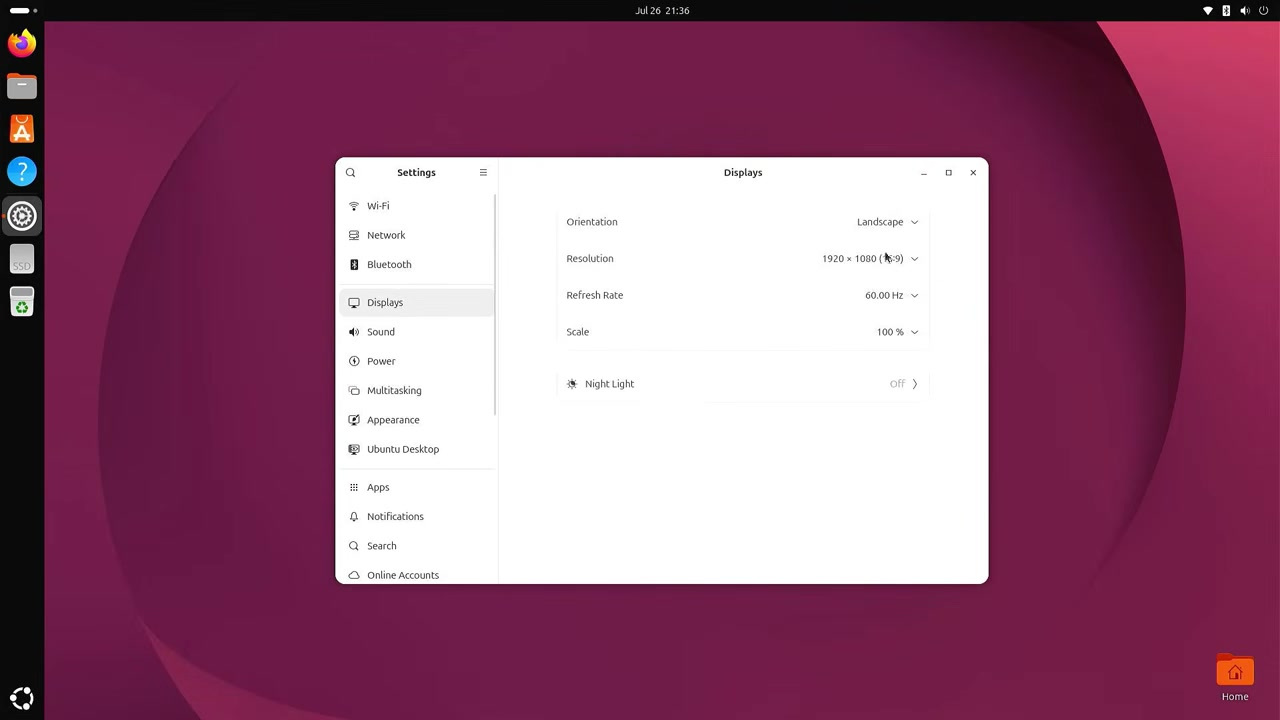
Open the About section to check the detected processor, memory, graphics hardware, storage, and Ubuntu version.
You should also test the keyboard, touchpad, webcam, microphone, USB ports, and external display if you regularly use them.
How to Switch Between Ubuntu and Windows 11
You can restart the computer at any time and use the GRUB menu to switch between Ubuntu and Windows 11.
To use Ubuntu, select Ubuntu from the GRUB menu.
To use Windows, select Windows Boot Manager.
This allows you to keep both operating systems on the same computer and use whichever one you need.
How to Remove Ubuntu and Return to Windows Only
If you later decide that you no longer need Ubuntu, you can remove it and recover the storage space for Windows.
To do this properly, you should remove the Ubuntu boot entry, delete the remaining Ubuntu boot files from the EFI System Partition, and then delete the Ubuntu partition from Disk Management.
Step 1: Remove the Ubuntu UEFI Boot Entry
Start Windows 11.
Open the Start menu and search for Command Prompt.
Right-click Command Prompt and select Run as administrator.
First, check the boot entries stored in the UEFI firmware.
bcdedit /enum firmwareLook for the section where Ubuntu appears beside Description.
In the same section, copy the identifier inside the curly brackets.
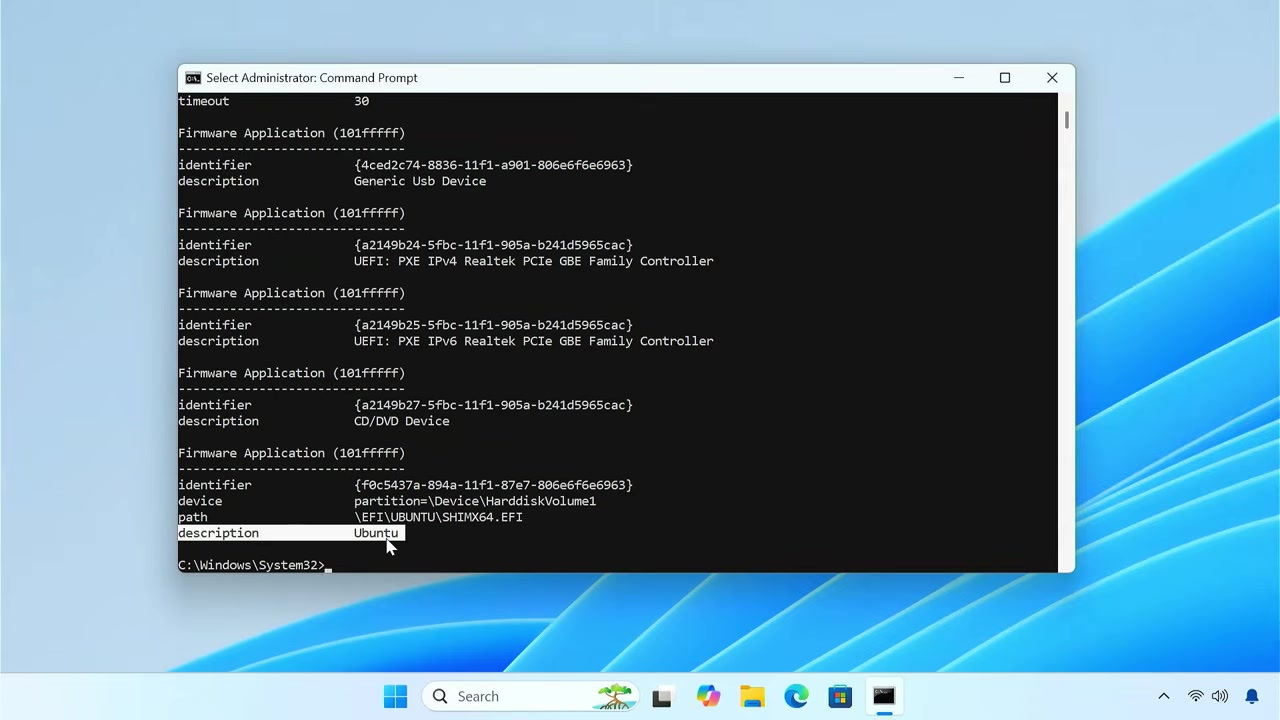
Now use this command format:
bcdedit /delete {ubuntu-identifier}Replace {ubuntu-identifier} with the actual identifier copied from your system.
Windows should display a message confirming that the operation completed successfully. This means the Ubuntu firmware boot entry has been removed.
Step 2: Delete Ubuntu Boot Files from EFI Partition
Next, we need to delete the remaining Ubuntu boot files from the EFI System Partition.
Mount the EFI System Partition using the drive letter Z:
mountvol Z: /SNow go to the EFI directory:
Z:
cd EFI
Here, you may see folders such as Boot, Microsoft, and ubuntu.
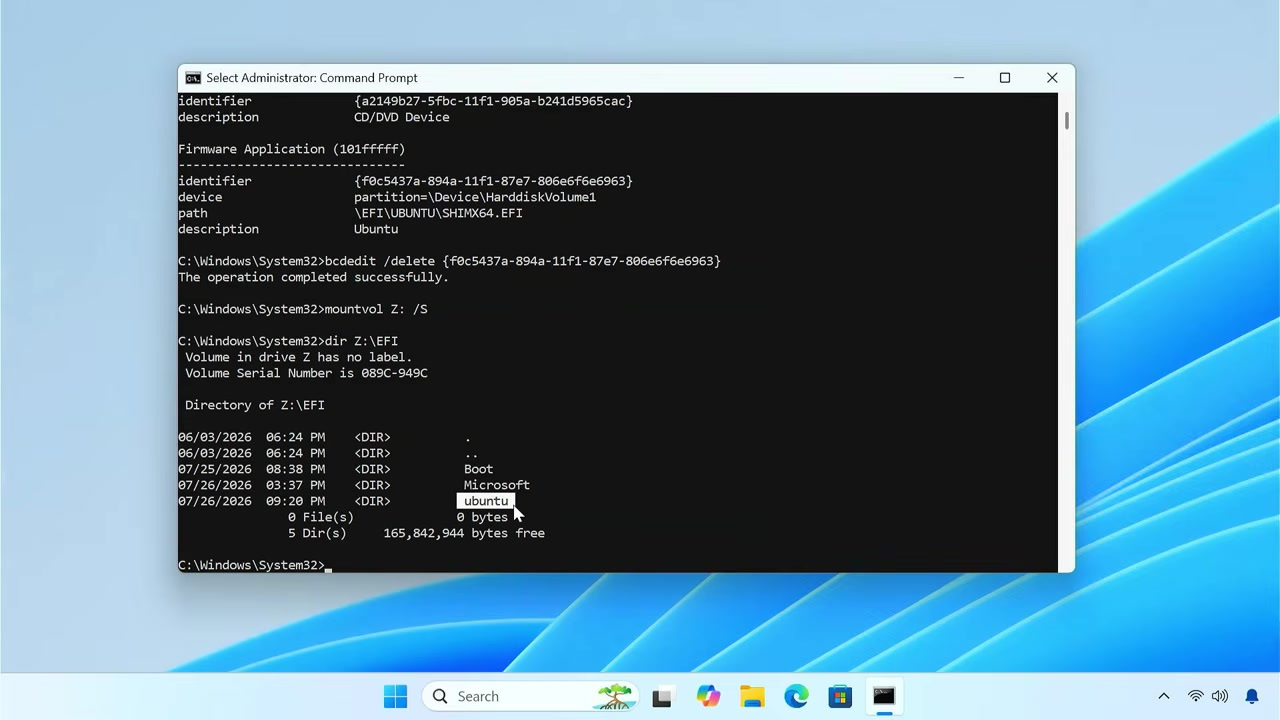
Delete the Ubuntu folder:
rmdir /s ubuntuAfter that, unmount the EFI System Partition:
mountvol Z: /DThe Ubuntu boot files have now been removed.
Step 3: Delete the Ubuntu Partition
Now we can delete the Ubuntu partition and recover the storage space.
Right-click the Windows Start button and open Disk Management.
Find the Ubuntu partition.
Right-click the Ubuntu partition and select Delete Volume.
After deleting the Ubuntu partition, the space should appear as Unallocated.
Step 4: Extend the Windows C Drive
Now right-click the Windows C drive and select Extend Volume.
Click Next.
Select the available unallocated space.
Continue through the wizard and click Finish.
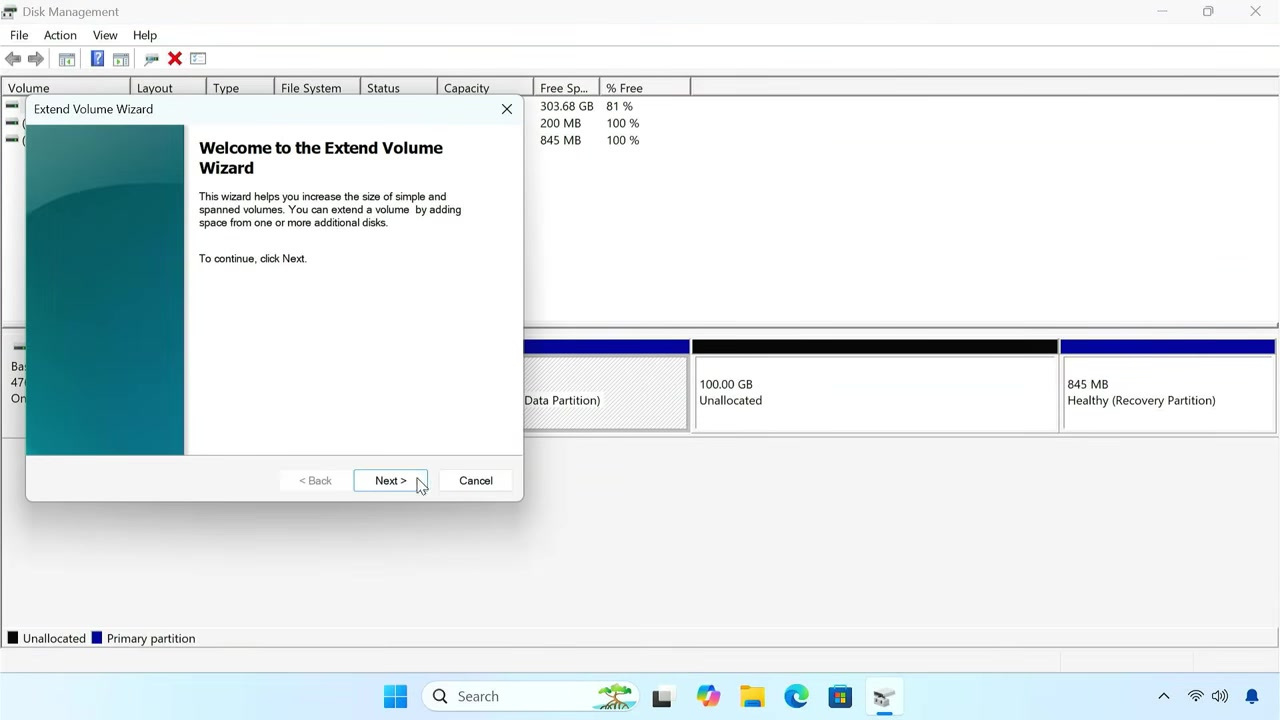
The storage previously used by Ubuntu will now be added back to the Windows C drive.
Step 5: Restart and Confirm Windows Boot
Now restart the computer.
The system should start directly into Windows 11.
You can also enter the BIOS or UEFI settings and check the boot priority list. The Ubuntu entry should no longer appear, and Windows Boot Manager should remain as the main boot option.
Important Notes
Before dual booting Ubuntu and Windows 11, remember these points:
- Back up important files before changing partitions.
- Turn off BitLocker if it is enabled.
- Disable Windows Fast Startup.
- Leave the Ubuntu space unallocated in Disk Management.
- Do not select Erase disk and install Ubuntu.
- Choose Install Ubuntu alongside Windows Boot Manager.
- Do not remove the USB drive while Ubuntu is installing.
- After installation, use GRUB to switch between Ubuntu and Windows.
Troubleshooting
Install Ubuntu Alongside Windows Boot Manager Option Not Showing
If the alongside option does not appear, make sure you created unallocated space from the Windows C drive.
Also make sure BitLocker is turned off and Windows Fast Startup is disabled.
Restart Windows once after making those changes, then boot the Ubuntu USB again.
Ubuntu Cannot Access Windows Drive
This can happen if Windows Fast Startup is enabled or the Windows drive is encrypted.
Disable Fast Startup and check BitLocker status before trying again.
Computer Boots Directly into Windows After Installing Ubuntu
If the system boots directly into Windows, open BIOS or UEFI settings and check the boot priority.
Make sure the Ubuntu or GRUB entry is above Windows Boot Manager.
Wi-Fi or Bluetooth Not Working in Ubuntu
Make sure you enabled third-party software for graphics and Wi-Fi hardware during installation.
After installing Ubuntu, run Software Updater and install available updates.
You can also check Additional Drivers if your hardware needs a proprietary driver.
Want to Remove Ubuntu Later
You can remove Ubuntu by deleting the Ubuntu UEFI boot entry, deleting the ubuntu folder from the EFI partition, removing the Ubuntu partition, and extending the Windows C drive.
Frequently Asked Questions
Can I dual boot Ubuntu 26.04 LTS and Windows 11?
Yes, you can install Ubuntu 26.04 LTS alongside Windows 11 and use the GRUB boot menu to choose between them.
Will installing Ubuntu delete Windows?
No, not if you choose Install Ubuntu alongside Windows Boot Manager. Do not select the erase disk option.
How much space should I give to Ubuntu?
For basic use, 50 GB can work. For a better experience, 80 GB or 100 GB is recommended if you have enough free space.
Do I need to disable BitLocker?
Yes, if BitLocker is enabled on the Windows drive, turn it off and make sure your recovery key is saved before continuing.
Do I need to disable Fast Startup?
Yes, disabling Fast Startup helps prevent Ubuntu access issues and ensures Windows shuts down completely.
Can I remove Ubuntu later?
Yes, you can remove Ubuntu later, delete its boot files and partition, and return the storage space to Windows.
Can I install Ubuntu without using BIOS?
Yes, you can use Windows Advanced startup and select Use a device, then choose the EFI USB Device.
Conclusion
So, this is how you can safely dual boot Ubuntu 26.04 LTS and Windows 11 on the same computer.
First, we checked BitLocker, disabled Fast Startup, created unallocated space from the Windows C drive, downloaded Ubuntu and Rufus, created a bootable USB drive, and installed Ubuntu using the Install Ubuntu alongside Windows Boot Manager option.
After installation, we used the GRUB boot menu to switch between Ubuntu and Windows 11. I also showed how to remove Ubuntu later, recover its storage space, remove the Ubuntu firmware entry, and delete the remaining Ubuntu boot files from the EFI System Partition.
Follow the steps carefully, choose the correct disk options, and always keep a backup before changing partitions.