Updating every Windows application and driver manually can take a lot of time, especially after installing or formatting Windows. In this guide, I will show you how to use a free and open-source tool called Kudu to update apps and drivers on your Windows PC.
Kudu is not just a simple updater. It can also uninstall unwanted programs, remove Windows bloatware, clean junk files, manage startup applications, and optimize your computer for gaming.
So, if you want one tool to update, clean, and optimize your Windows 10 or Windows 11 computer, Kudu can be a useful option.
What is Kudu?
Kudu is a free and open-source Windows optimization tool. It includes multiple features that can help you maintain your Windows PC from one place.
With Kudu, you can update installed software, update device drivers, uninstall unused programs, remove optional Windows bloatware, clean temporary files, scan registry issues, manage startup apps, and enable a game-focused optimization mode.
This is especially helpful after a fresh Windows installation because many apps and drivers may need updates, and doing everything manually can take a lot of time.
What Can Kudu Do?
Kudu includes several useful tools for Windows users:
- Update installed software
- Update device drivers
- Uninstall unwanted programs
- Remove Windows bloatware
- Clean junk and temporary files
- Scan and fix selected registry issues
- Manage startup applications
- Optimize the PC for gaming
You can use only the features you need. For example, you can use Kudu only for software updates, or you can also use its cleaner, uninstaller, driver updater, and startup manager.
Step 1: Get Kudu from GitHub
First, open your browser and search for Kudu GitHub.
Open the official GitHub repository from AdventDevInc. Then go to the latest release and scroll down to the Assets section.
From the Assets section, download the KuduSetup.exe file for Windows.
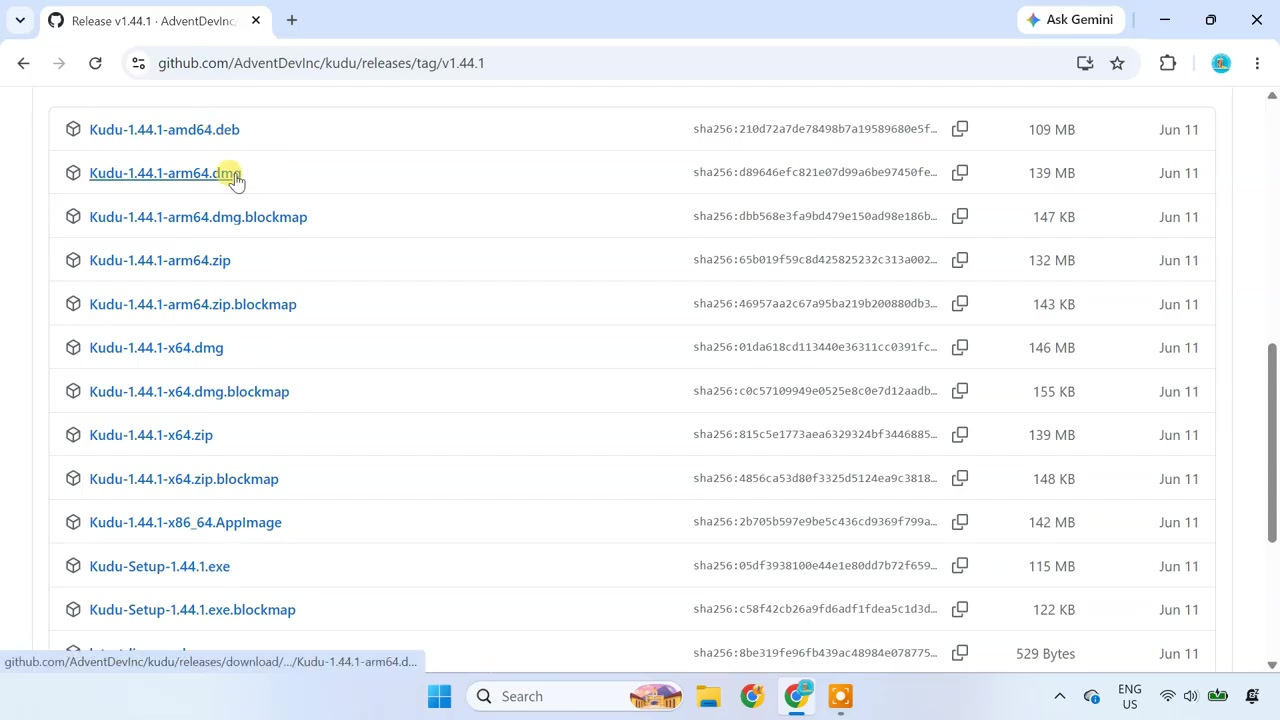
The .exe file is for Windows. The other files are mainly for macOS and Linux, so if you are using Windows, make sure you download the Windows setup file.
Step 2: Install Kudu on Windows
After downloading the setup file, run it on your Windows computer.
Follow the on-screen instructions and complete the installation.
Once the installation is complete, open Kudu.
The main dashboard will show important system information like CPU usage, memory usage, disk usage, completed scans, and the overall health score of your computer.
Step 3: Update Installed Software
Now let’s start with the software updater.
Inside Kudu, click on Software.
Then select Software Updates.
Kudu will scan the applications installed on your computer and check for available updates through package managers such as Chocolatey or Winget.
Once the scan is complete, Kudu will show information such as:
- Number of outdated applications
- Major updates
- Minor updates
- Patches
Select the programs you want to update.
Then click on Update Selected.
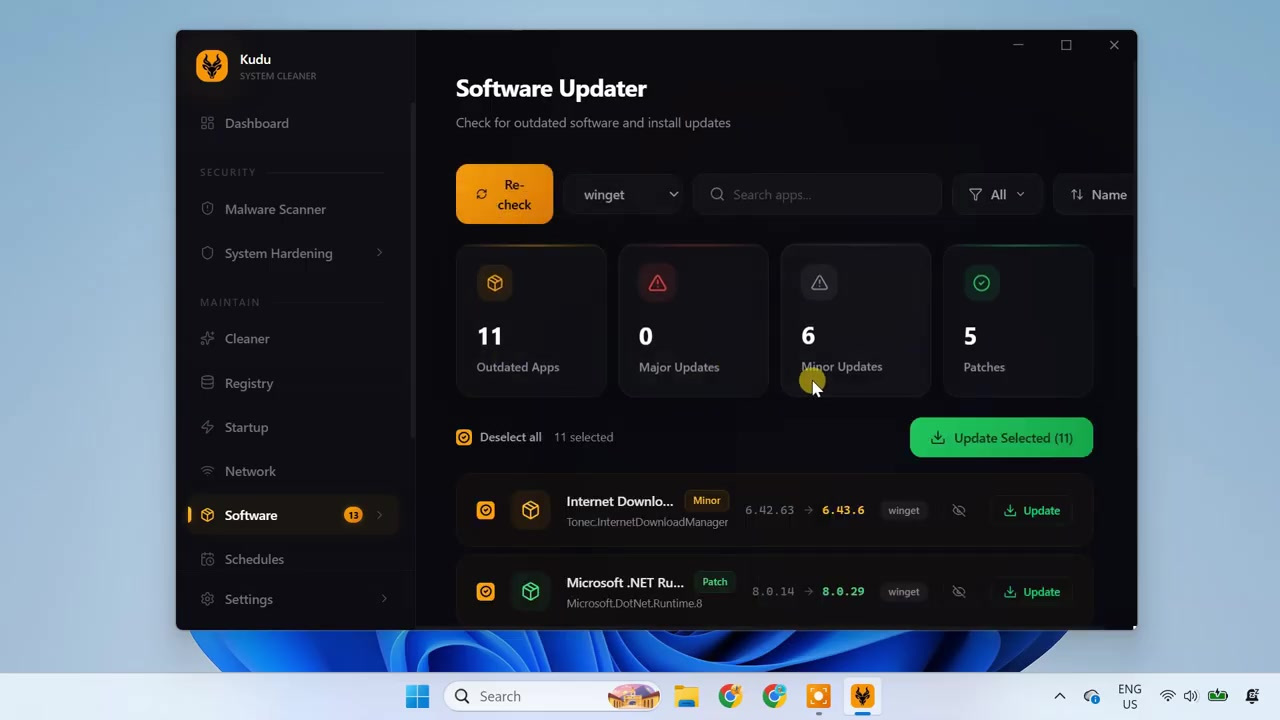
Kudu will download and install the selected updates automatically.
Step 4: Update Windows Drivers
Now return to the Software menu and open Driver Updates.
Click on Scan Drivers.
Kudu will check Windows Update for newer driver packages available for your computer.
When driver updates are found, review the hardware names carefully and select the drivers you want to install.
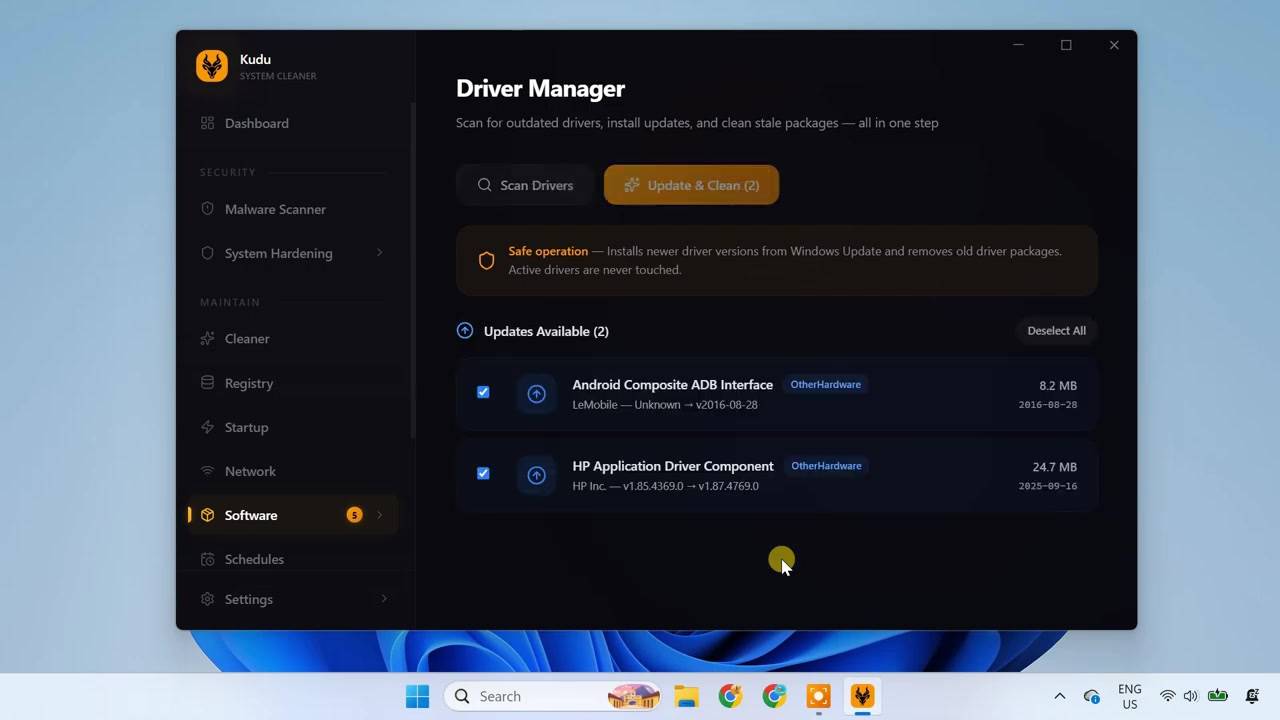
Then click on Update and Clean.
Kudu will install the selected driver updates and remove old driver packages.
After the process is complete, restart your computer.
After restarting, check that your Wi-Fi, sound, Bluetooth, graphics, and other devices are working properly.
Step 5: Uninstall Unwanted Programs
Next, open the Uninstaller section.
This section shows all installed programs on your computer, along with details such as:
- Program size
- Publisher
- Version
- Installation date
Kudu can also identify applications that have not been used for more than 90 days.
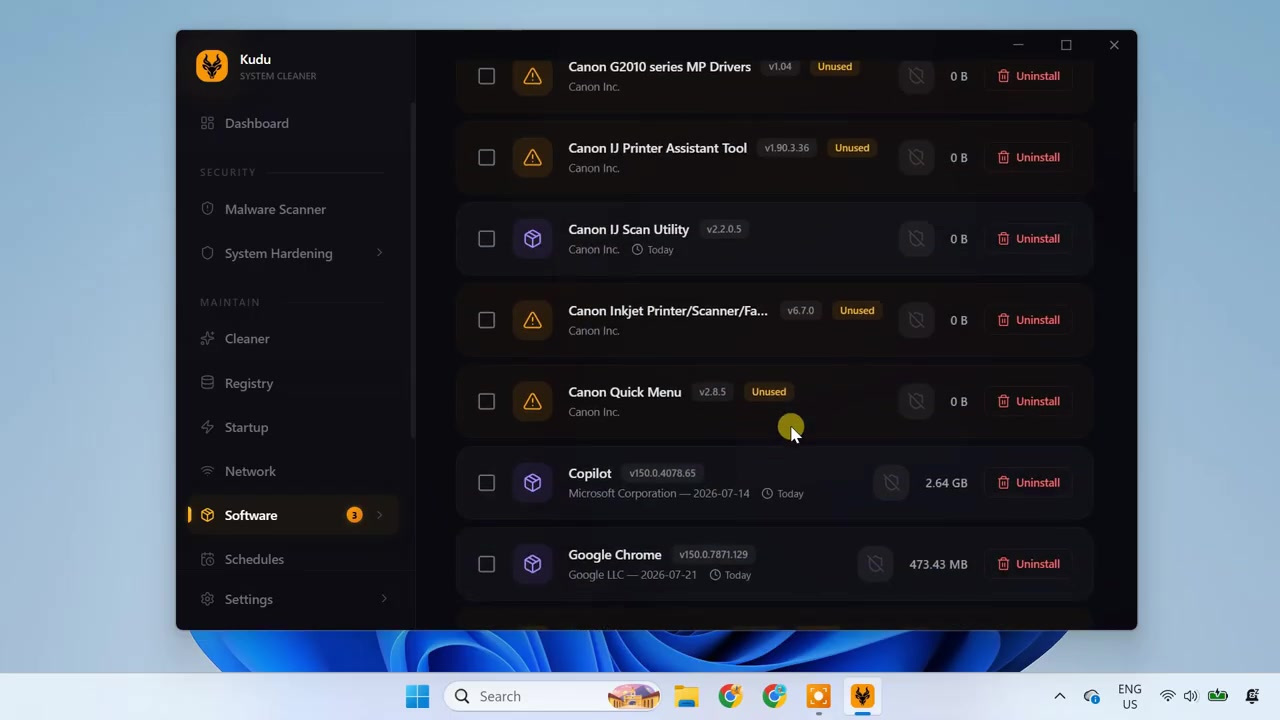
Select an unwanted program and click on Uninstall.
Kudu will run the normal uninstaller for that program. After that, it will also search for leftover files and folders.
This can help you remove unused apps more cleanly than a basic uninstall process.
Step 6: Remove Windows Bloatware
The next option is Bloatware Remover, also called Debloater.
Open this section and click on Scan.
Kudu will detect preinstalled Windows applications such as Bing News, Bing Weather, Clipchamp, gaming apps, and other optional software.
Select only the applications you are sure you do not need.
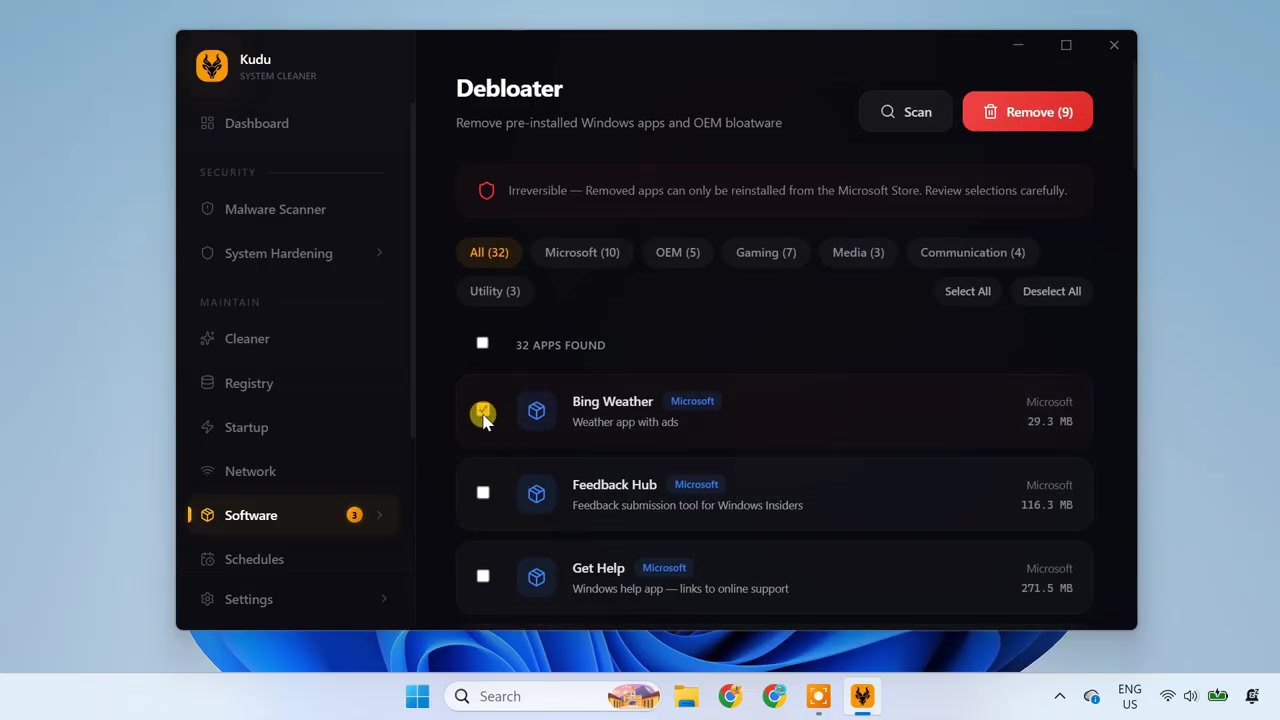
Then click on Remove.
Step 7: Use Game Mode
Kudu also includes a Game Mode.
Open Game Mode and review the available settings.
Game Mode can pause unnecessary Windows services, close background processes, free RAM, block notifications, and apply network or system optimizations while gaming.
You can activate Game Mode manually.
You can also enable Auto-Detect, so Game Mode starts automatically when you launch a game.

After finishing your game, disable Game Mode so the paused services and processes can return to normal.
Step 8: Clean Junk Files
Now open the Cleaner section.
Click on Scan.
Kudu will check temporary system files, browser caches, application caches, gaming files, broken shortcuts, logs, and other unnecessary data.
After the scan is complete, review the detected categories.
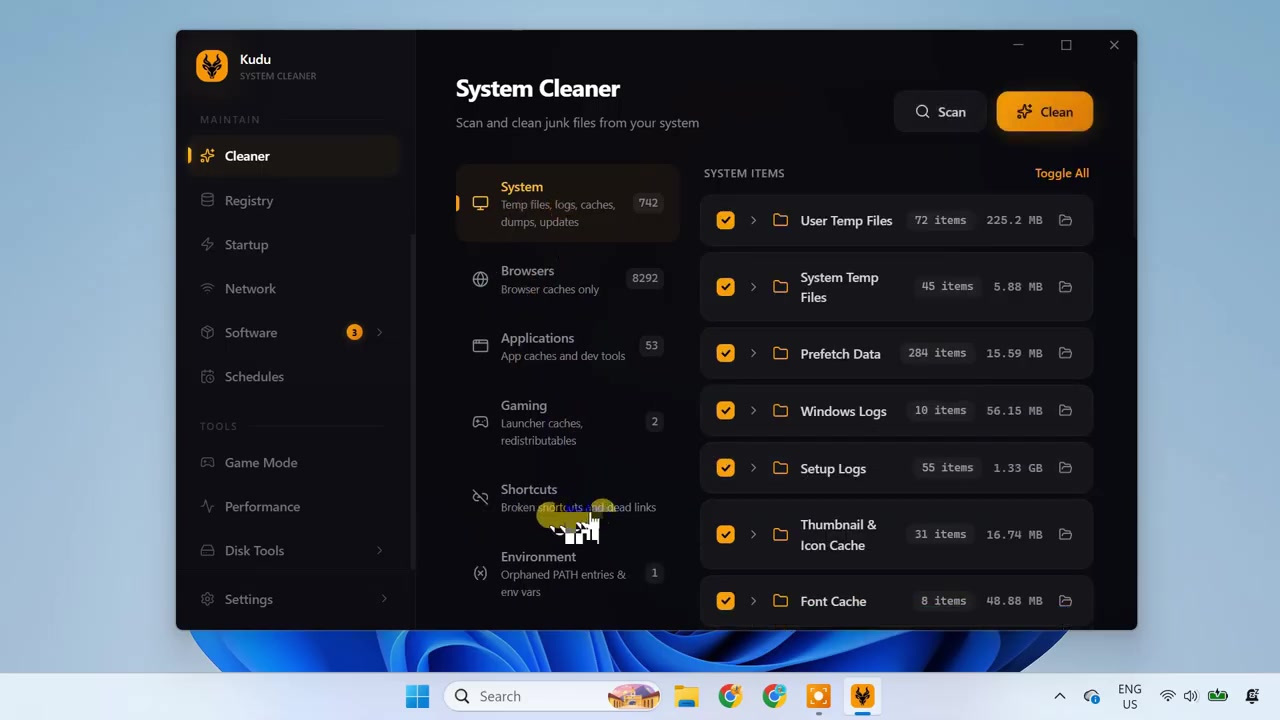
Then click on Clean.
In the test shown in the video, Kudu removed more than 8 thousand files and recovered several GB of storage. However, the amount of recovered space will depend on how long your computer has been running without cleaning.
Step 9: Scan Registry Issues
You can also open the Registry section.
Kudu can scan for broken application paths, leftover uninstall entries, invalid file associations, and some security, performance, and network settings.
A registry backup is created before changes are applied.
However, you should still review the detected items carefully before clicking on Fix.
Step 10: Manage Startup Applications
Finally, open the Startup section.
Kudu analyzes the applications that start with Windows and shows their effect on boot time.
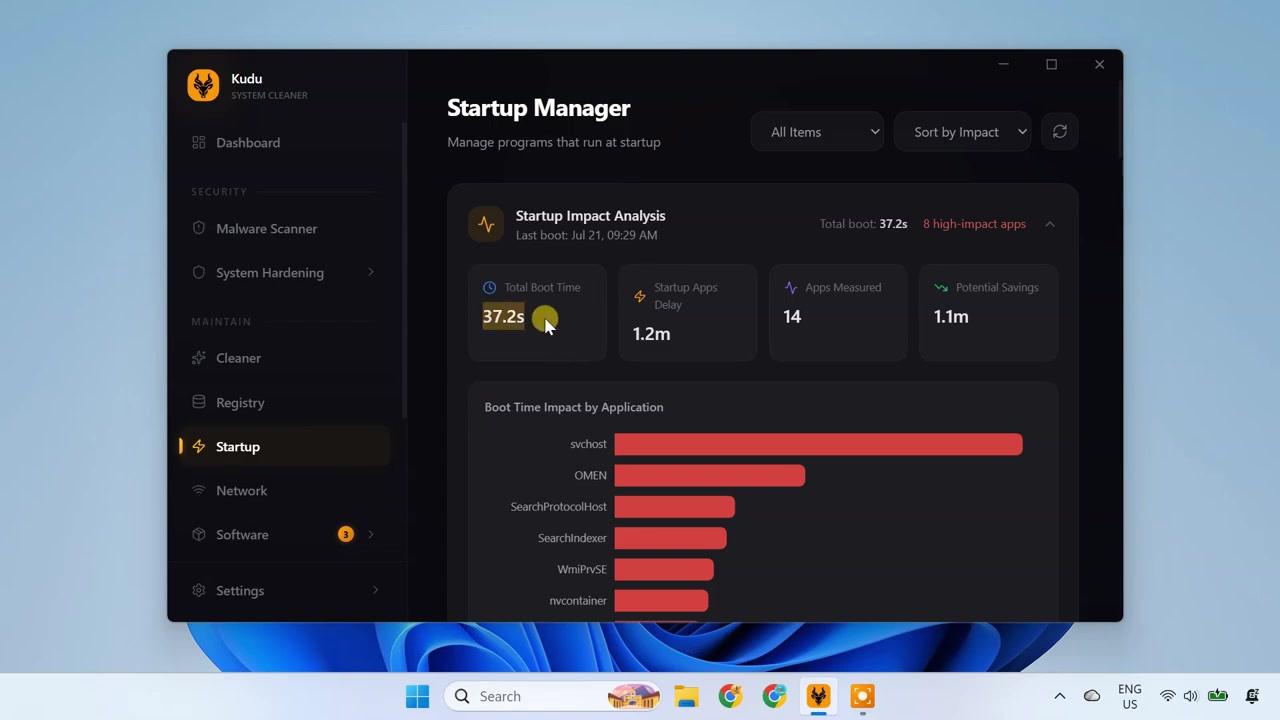
Scroll through the list and disable optional applications that you do not need immediately after starting the computer.
This can help improve Windows startup time and reduce background load.
However, avoid disabling drivers, antivirus software, audio services, graphics utilities, or other hardware-related components.
Best Uses of Kudu
Kudu can be useful in many situations, such as:
- After installing Windows 10 or Windows 11
- After formatting your computer
- When many apps are outdated
- When your PC has too many unused programs
- When you want to remove optional Windows bloatware
- When you want to clean junk files
- When too many apps start with Windows
- When you want quick gaming optimization
Important Notes
Before using Kudu, keep these points in mind:
- Review software updates before installing them.
- Restart the PC after driver updates.
- Do not remove bloatware blindly.
- Be careful while fixing registry items.
- Do not disable important startup items like drivers or antivirus software.
- If an app update fails, update it manually from the official website.
Troubleshooting
Software Update Fails
If a software update fails, it may not be supported for automatic updates through Kudu.
In that case, open the official website of that application and update it manually.
Driver Update Does Not Install
If a driver update does not install, restart the computer and try again.
You can also check Windows Update manually from Windows Settings.
A Device Stops Working After Driver Update
If Wi-Fi, sound, Bluetooth, graphics, or another device does not work properly after updating drivers, restart the computer first.
If the problem continues, roll back the driver from Device Manager or install the correct driver from your PC manufacturer’s website.
Removed App is Needed Again
If you removed a Windows app and later need it again, you may be able to reinstall it from the Microsoft Store.
Startup App Was Disabled by Mistake
If you disabled an important startup app by mistake, open the Startup section again and enable it.
You can also manage startup apps from Windows Task Manager.
Frequently Asked Questions
Can Kudu update Windows apps for free?
Yes, Kudu can scan installed applications and update supported apps using package managers such as Chocolatey or Winget.
Can Kudu update drivers?
Yes, Kudu can check Windows Update for newer driver packages and install selected driver updates.
Can Kudu remove Windows bloatware?
Yes, Kudu includes a Bloatware Remover or Debloater section that can detect optional preinstalled Windows apps.
Is it safe to remove all bloatware?
No. Do not remove everything blindly. Remove only the apps you are sure you do not need.
Can Kudu clean junk files?
Yes, Kudu can scan and clean temporary files, browser caches, app caches, logs, broken shortcuts, and other unnecessary data.
Does Kudu have a gaming mode?
Yes, Kudu includes Game Mode, which can pause unnecessary services, close background processes, free RAM, block notifications, and apply optimizations while gaming.
Should I disable all startup apps?
No. Disable only optional apps you do not need at startup. Avoid disabling drivers, antivirus software, audio services, graphics utilities, and hardware-related components.
Conclusion
So, this is how you can update Windows apps and drivers for free using Kudu.
Kudu is a useful all-in-one tool for updating, cleaning, and optimizing a Windows computer. You can use it to update supported software, check driver updates, uninstall unwanted programs, remove optional bloatware, clean junk files, manage startup apps, and enable Game Mode while gaming.
Just make sure you review every selected item before updating, removing, cleaning, or fixing anything. Used carefully, Kudu can help keep your Windows 10 or Windows 11 computer updated, cleaner, and running smoothly.