VLC Media Player can turn one Windows PC into a simple HTTP video source and play that stream on another PC. The sender reads a local media file, while the receiver opens a network URL in VLC. This avoids uploading the complete file to a cloud drive before playback can begin.
The video demonstrates this with a public IP address and router port forwarding. That endpoint is plain HTTP with no viewer authentication, so anybody who can reach the address and port can request the stream. This updated tutorial keeps the same VLC workflow but carries it through a private, encrypted Tailscale connection instead. No public IP lookup or router port forward is needed.
What You Need
- A Windows PC that stores the video and will act as the sender
- A second computer that will receive the stream
- VLC Media Player from VideoLAN installed on both computers
- Tailscale for Windows installed on both computers
- Enough upload speed at the sender for the video’s bitrate
The steps use VLC 3 on Windows, but the receiving device can use another VLC build that supports the same stream format. Keep both computers awake and connected for the entire session.
Create a Private Connection with Tailscale
Install Tailscale on both computers. After installation, right-click its notification-area icon, choose Log in, and authenticate in the browser. For two computers that you own, add both to the same Tailscale account and tailnet. Tailscale’s Windows installation guide shows the current sign-in flow.
If another person owns the receiver, do not share your account password. Use Tailscale’s machine-sharing feature to share only the sender with that person’s account. In a tailnet with several members or devices, use Tailscale access controls to permit that receiver to reach only TCP port 8080 on the sender.
Find the Sender’s Private Address
For two devices in the same tailnet, open the Tailscale Machines page, select the sender, and copy its Tailscale IPv4 address. It normally begins with 100. and remains stable while the device is registered. You can also open PowerShell on the sender and run:
tailscale ip -4If MagicDNS is enabled, a short sender name can replace the numeric address when both devices are in the same tailnet. For a machine shared across tailnets, the recipient must use the address shown in their own Tailscale view after accepting the share, or the shared machine’s full hostname.tailnet-name.ts.net name. Its recipient-side address can differ from the owner’s view, and a short name is not sufficient. Make sure Allow incoming connections is enabled in the sender’s Tailscale preferences.
Tailscale encrypts traffic between its devices with WireGuard, including traffic that must use an encrypted relay. You do not need to forward port 8080 on the router or reveal the sender’s public IP address.
Create the VLC Stream on the Sender
Add the Video File
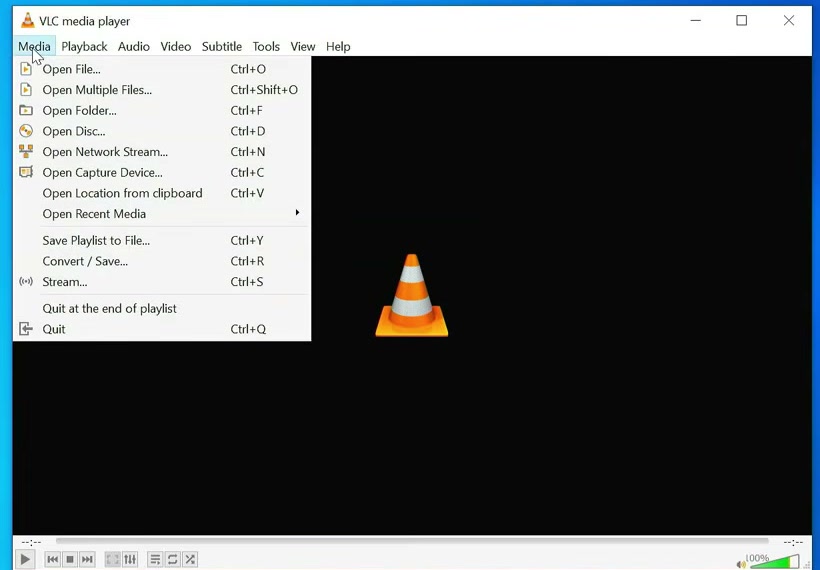
Open VLC on the computer that stores the video. Select Media > Stream, or press Ctrl+S. The narration in the recording says Open Network Stream at this point, but that command is for the receiving computer; the sender needs the Stream wizard.
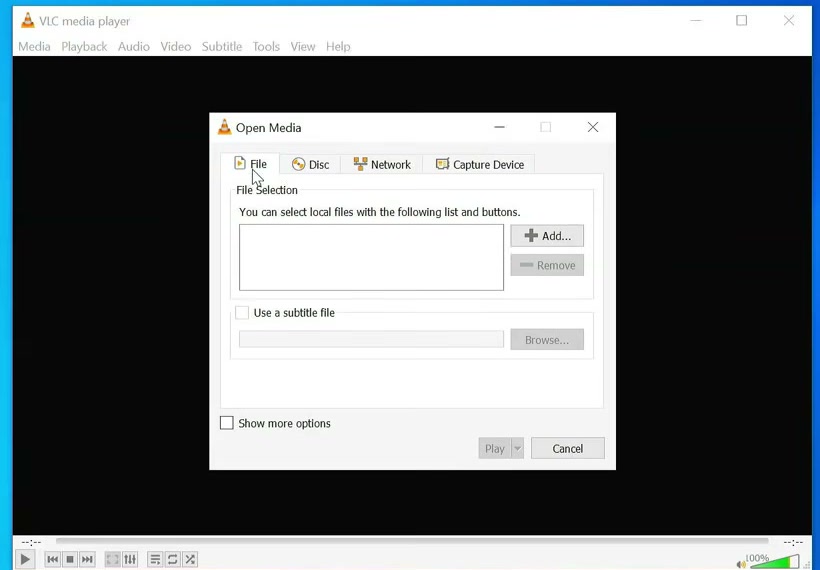
On the File tab, click Add and choose the video you are authorized to transmit. Avoid selecting a removable or network drive that may disconnect during playback. Click the Stream button, then select Next on the Source page.
Add an HTTP Destination
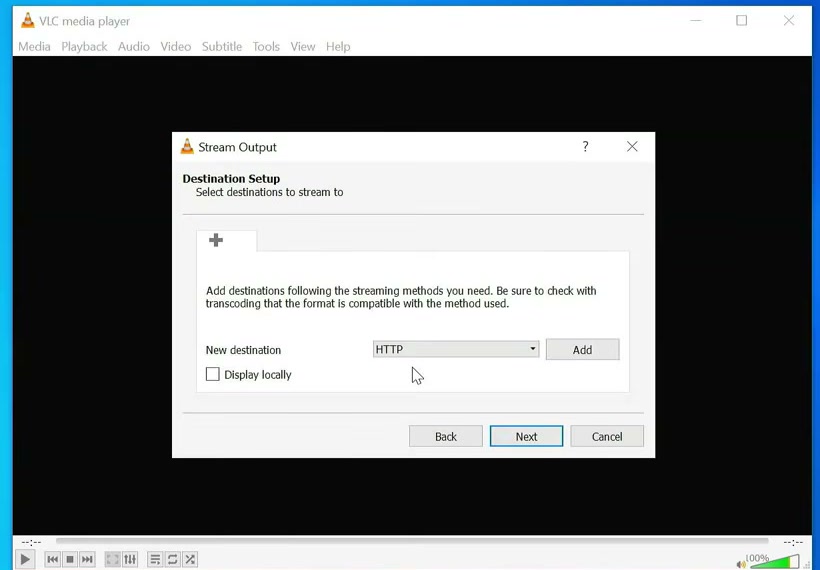
On Destination Setup, choose HTTP from the new-destination list and click Add. This follows VideoLAN’s HTTP streaming workflow. Enable Display locally only if you also want the sender to play the video; it can use additional CPU and graphics resources.
Keep TCP port 8080, or choose another unused TCP port and use that same value everywhere. Enter /video in the Path field. The final receiver URL will look like this:
http://<SENDER-TAILSCALE-IP>:8080/video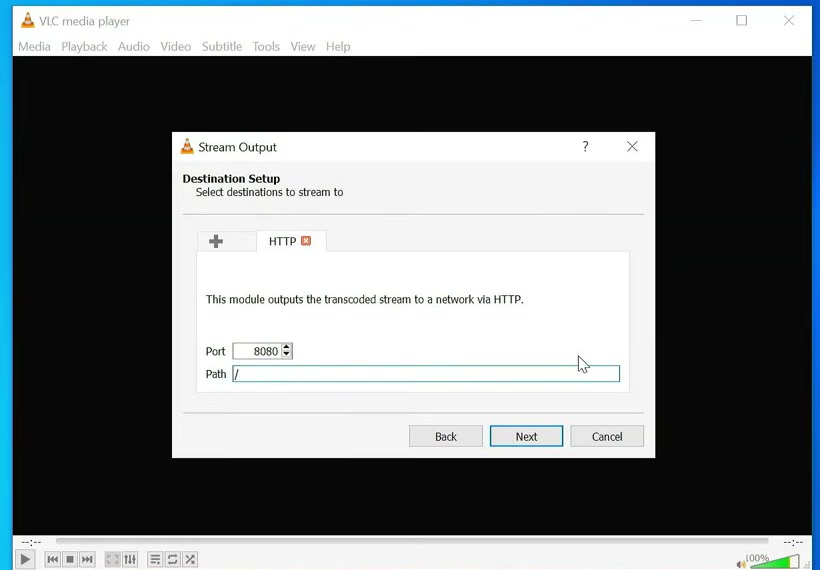
/video to a less obvious name does not authenticate or encrypt VLC’s HTTP server. Tailscale encrypts the internet path; its access policy and a narrowly scoped Windows Firewall rule keep the VLC endpoint restricted.Choose Whether to Transcode
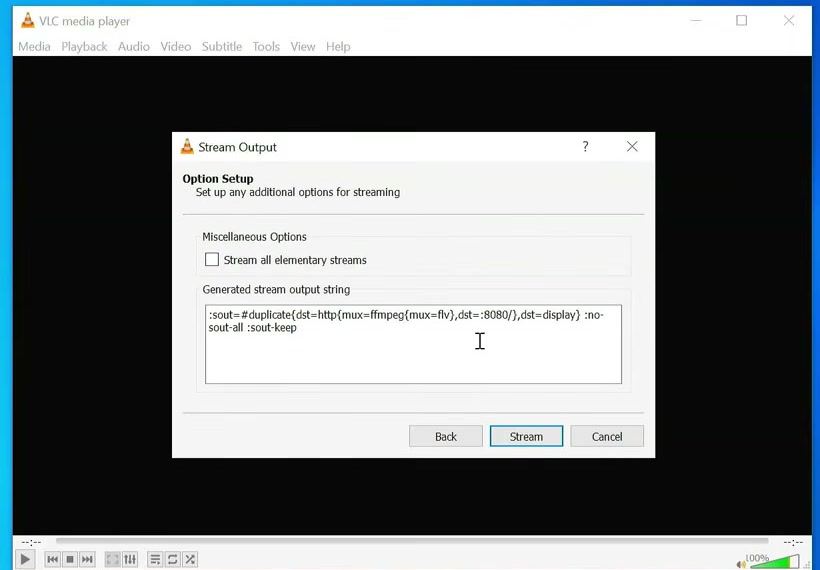
For predictable VLC-to-VLC playback, enable Activate Transcoding and choose a profile such as Video – H.264 + MP3 (TS), then verify that the final output uses the MPEG transport-stream mux. Real-time transcoding needs more CPU, but it produces codecs and a mux that work well together. Disable transcoding only when the source audio and video codecs are valid in the selected output mux and the sender’s upload can sustain the original bitrate. The recording disables transcoding and generates an FLV mux; that combination worked for its source but is not universal.
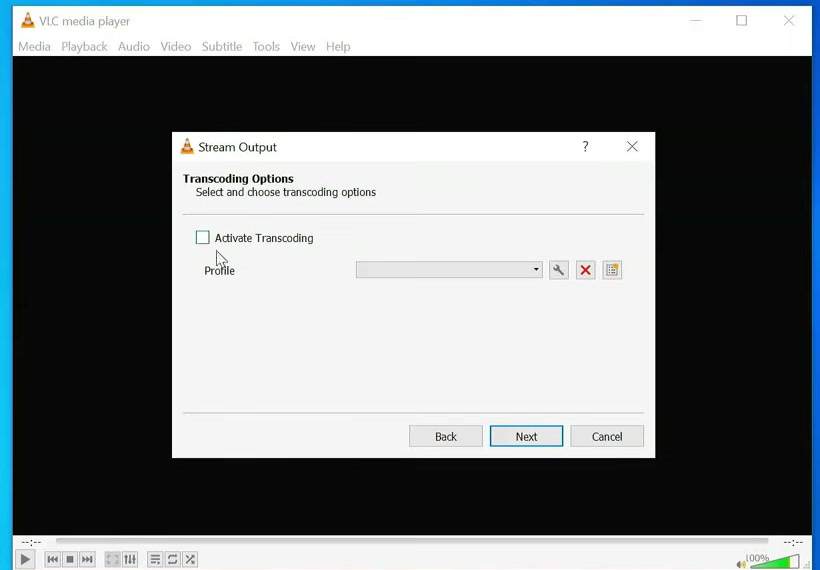
On the final Option Setup page, verify that the generated output includes HTTP access, the intended port and path, and a suitable mux. With the TS profile and path above, look for mux=ts and a destination ending in :8080/video. The recording screenshot instead shows its original FLV/root-path configuration. Click Stream. Keep VLC open; closing it or reaching the end of the file stops the stream.
Allow Only the Receiver Through Windows Firewall
Tailscale normally establishes its encrypted connection without a router change, but Windows Defender Firewall still controls access to VLC. Disable or narrow every overlapping broad VLC inbound allow rule across Public, Private, and Domain profiles; adding a narrow rule does not override a broader one. Then create an inbound Custom rule for the VLC program, choose TCP local port 8080, add only the receiver’s Tailscale IP under Remote IP addresses, allow the connection, and apply it to the profiles in use. This prevents other ordinary LAN clients from reaching VLC if it listens on more than the Tailscale interface. Remove the rule when you no longer use it.
A narrowly scoped application or custom rule is safer than disabling the firewall or opening the port to every address. Microsoft’s firewall guidance recommends closing an exception when it is no longer needed.
Open the Stream on the Receiver
Confirm that Tailscale shows both computers online. Open VLC on the receiving computer and select Media > Open Network Stream, or press Ctrl+N.
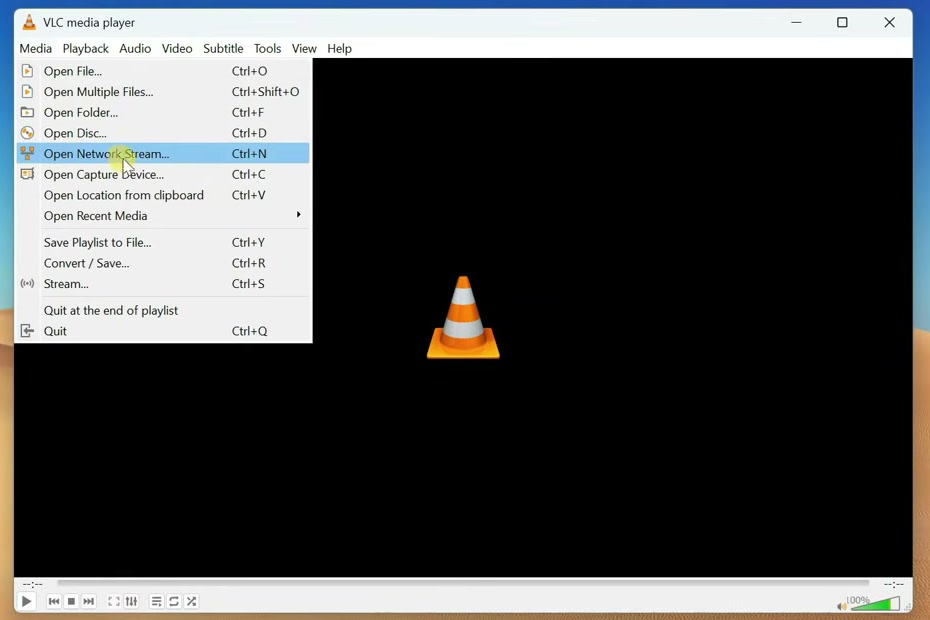
Enter the sender’s Tailscale address, port, and exact path. Replace the placeholder below with the private Tailscale IPv4 address copied earlier:
http://<SENDER-TAILSCALE-IP>:8080/videoIf both devices use the same tailnet and MagicDNS, this short-name form can be easier to remember:
http://<SENDER-NAME>:8080/videoFor a machine shared across tailnets, use the full hostname.tailnet-name.ts.net name or the address displayed to the recipient after accepting the share, not the short name or the owner’s copy of the address.
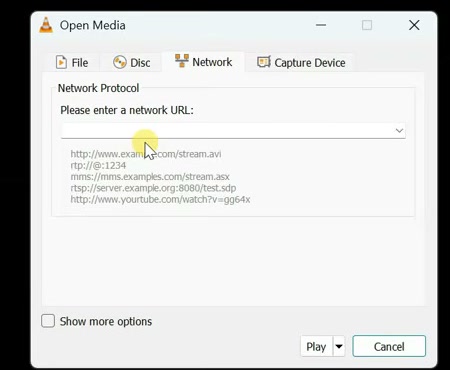
Click Play and allow a few seconds for buffering. The tutorial screenshots stop at VLC’s connection screen because the sample movie contains people; the strict screenshot set does not republish that footage.
Why You Should Not Forward VLC Directly to the Internet
VLC’s standard HTTP wizard is documented for local-network streaming. The direct method in the recording maps TCP port 8080 from the router to the sender and gives the receiver a public-IP URL. That creates an internet-reachable service with no built-in viewer login or TLS protection. The media and requests travel as plain HTTP, and an unexpected visitor can request the same endpoint. CISA’s exposure-reduction guidance likewise recommends removing unnecessary internet-facing services and using protected access such as a VPN.
A random port or unusual path reduces casual discovery but is not access control. Direct forwarding can also fail behind carrier-grade NAT, double NAT, or an ISP that blocks inbound connections. A dynamic DNS name only tracks a changing public address; it does not solve CGNAT or add security.
If a controlled lab test absolutely requires direct forwarding, use non-sensitive authorized media, reserve the sender’s LAN address, forward TCP only, restrict the firewall to the known receiver address, test from a genuinely external connection, and delete both the router rule and firewall exception immediately afterward. For normal internet use, keep the Tailscale method above or use a purpose-built authenticated streaming service.
Troubleshooting
The Receiver Cannot Connect
Check that both computers are online in Tailscale, the sender permits incoming connections, VLC is still streaming, and the URL uses the sender’s Tailscale address rather than its home-network or public address. The port and path must match exactly. If necessary, test reachability from PowerShell on the receiver:
tailscale ping <SENDER-TAILSCALE-IP-OR-FULL-TS.NET-NAME>If the Tailscale ping works but VLC does not, review the narrow Windows Firewall rule and the tailnet’s access policy for TCP 8080.
The Stream Opens but Video or Audio Is Missing
The source codecs may not fit the selected output mux. Return to the VLC Stream wizard, enable transcoding, and try a compatible H.264 profile that uses a transport-stream mux. Confirm that audio is enabled in the selected profile. Update VLC on both computers before changing advanced codec options.
Playback Buffers or Stutters
The sender’s upload speed must remain above the stream bitrate, and every additional receiver consumes more bandwidth. Enable transcoding with a lower resolution or bitrate, stop other uploads, use Ethernet where possible, and keep the sender awake. If the sender cannot transcode in real time, prepare a lower-bitrate copy of the video before streaming it.
Stop Sharing When You Finish
Stop playback on the sender or close VLC to end the HTTP service. Remove any temporary Windows Firewall rule, revoke a shared Tailscale machine when access is no longer needed, and keep router port 8080 closed. The result is a direct VLC workflow that works across the internet without publishing the stream or the sender’s network details to everyone else.