You can run many PlayStation 3 games on a Windows PC with RPCS3, a free, open-source PS3 emulator. Getting a game running involves more than opening its files, though. RPCS3 also needs official PS3 firmware, and some titles require their own configuration to work correctly.
Compatibility and performance vary between games, and your CPU matters a lot even if you have a powerful graphics card. Use only games you legally own, preferably your own dumped PS3 discs or legally owned digital games. The setup below starts with Windows x64 and game files that are already prepared for use with RPCS3.
Download and open RPCS3 on Windows
Open the official RPCS3 download page and download the Windows x64 build. RPCS3 comes as a compressed archive, which you need to extract before launching the emulator.
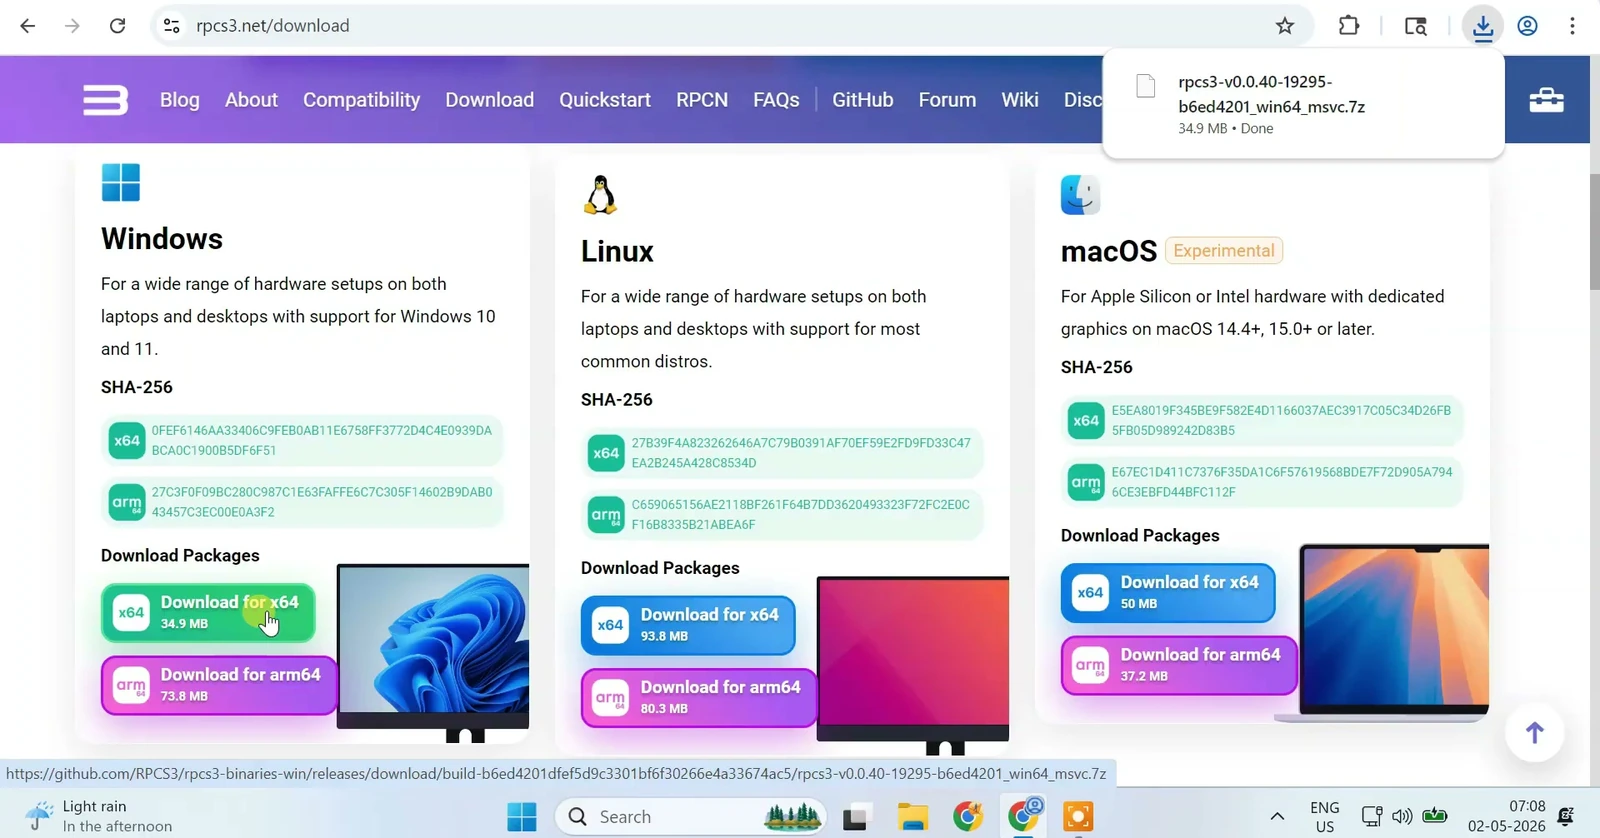
Find the downloaded archive in File Explorer, right-click it, and select Extract All. Finish extracting it, then open the resulting folder. Keep the emulator files together in that folder rather than moving only the application elsewhere.
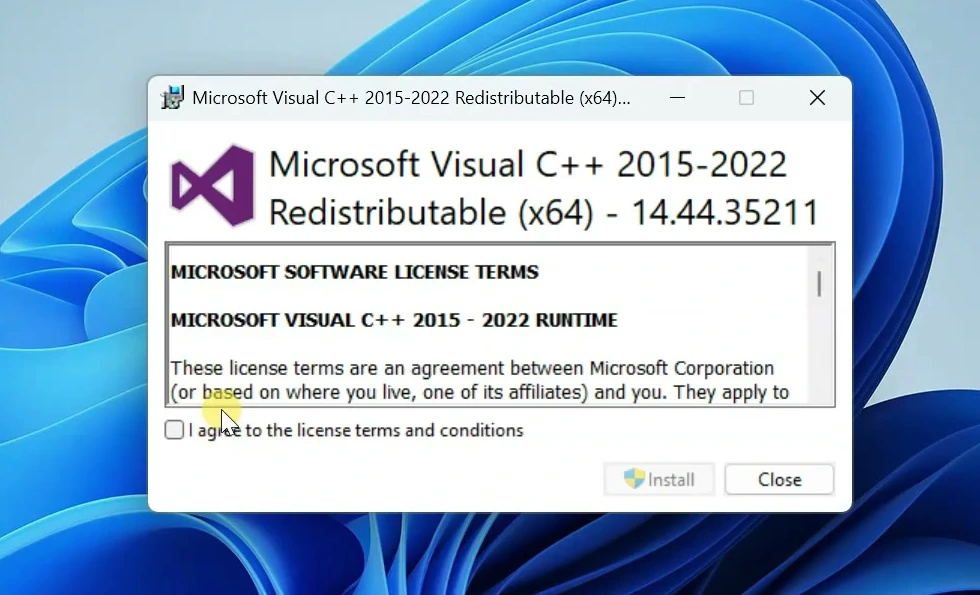
Before launching RPCS3, install its Windows prerequisite, Microsoft Visual C++ Redistributable. Follow the Visual C++ download link on the RPCS3 download page and download the x64 installer. Run it, accept the license terms, click Install, and let setup finish.
Return to the extracted folder and double-click the rpcs3 application. On the welcome screen, read the Quickstart Guide and tick the acknowledgement checkbox, then click Continue. You can also disable Show at startup if you do not want the welcome screen to appear each time.
Install the official PS3 firmware
RPCS3 needs the official PlayStation 3 system software to run games properly. Download it directly from Sony rather than using a firmware file from an unofficial site.
Download official PS3 firmware
On Sony’s support page, expand Update using a computer and click Download PS3 Update. The firmware file is named PS3UPDAT.PUP.
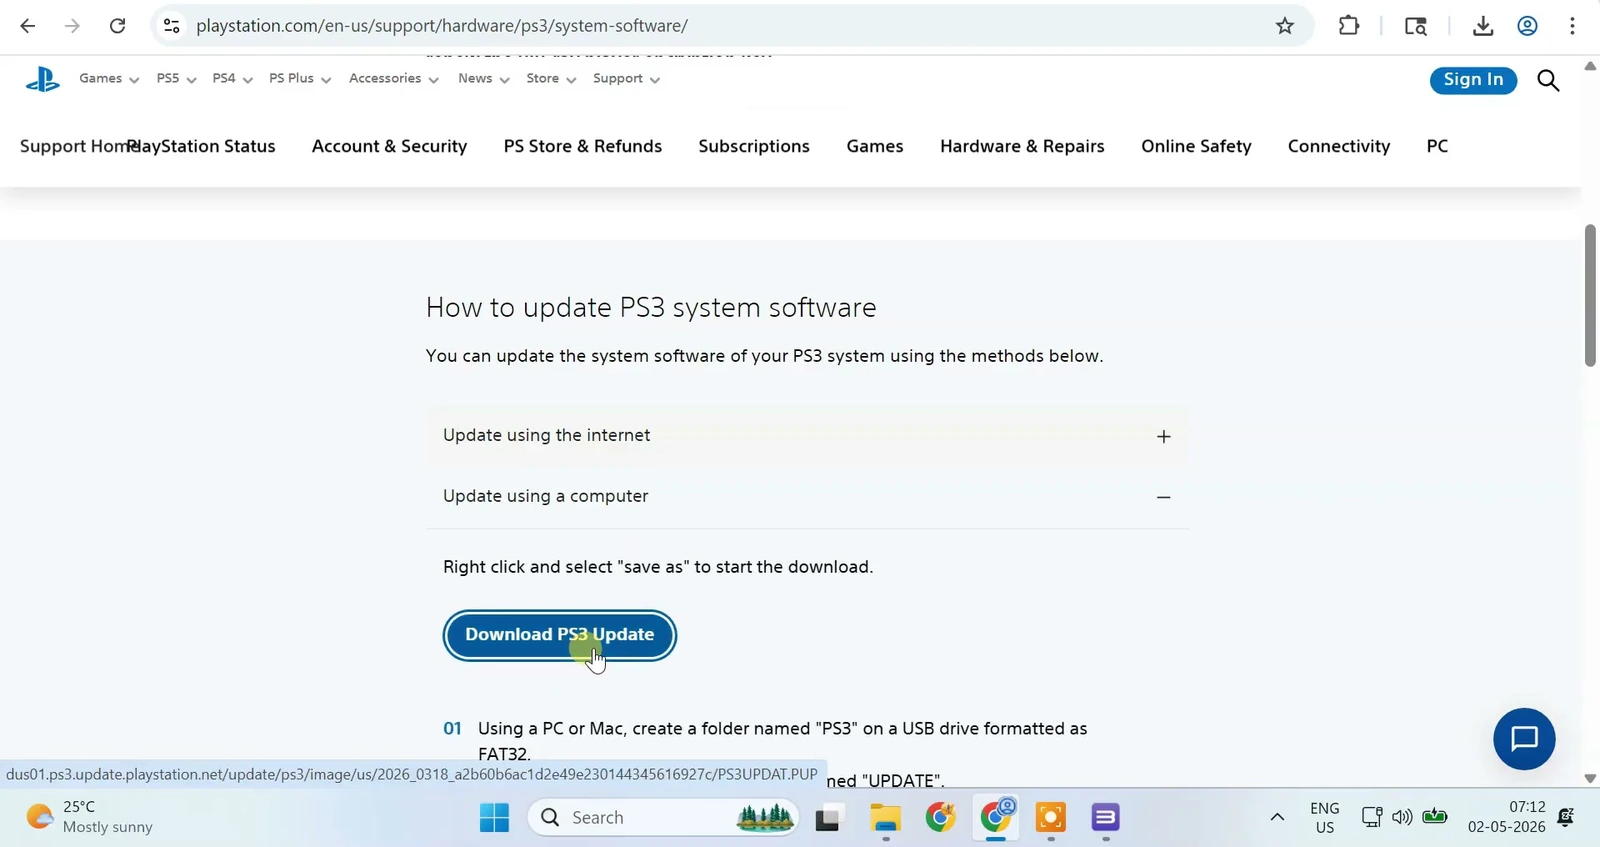
Tip: If the download button does not respond, right-click it and copy its link address. Paste that address into a new browser tab and press Enter to start the download.
Return to RPCS3 and choose File → Install Firmware. Select the downloaded PS3UPDAT.PUP file. If it is not visible in the file picker, change the file type filter to All files and select it again.
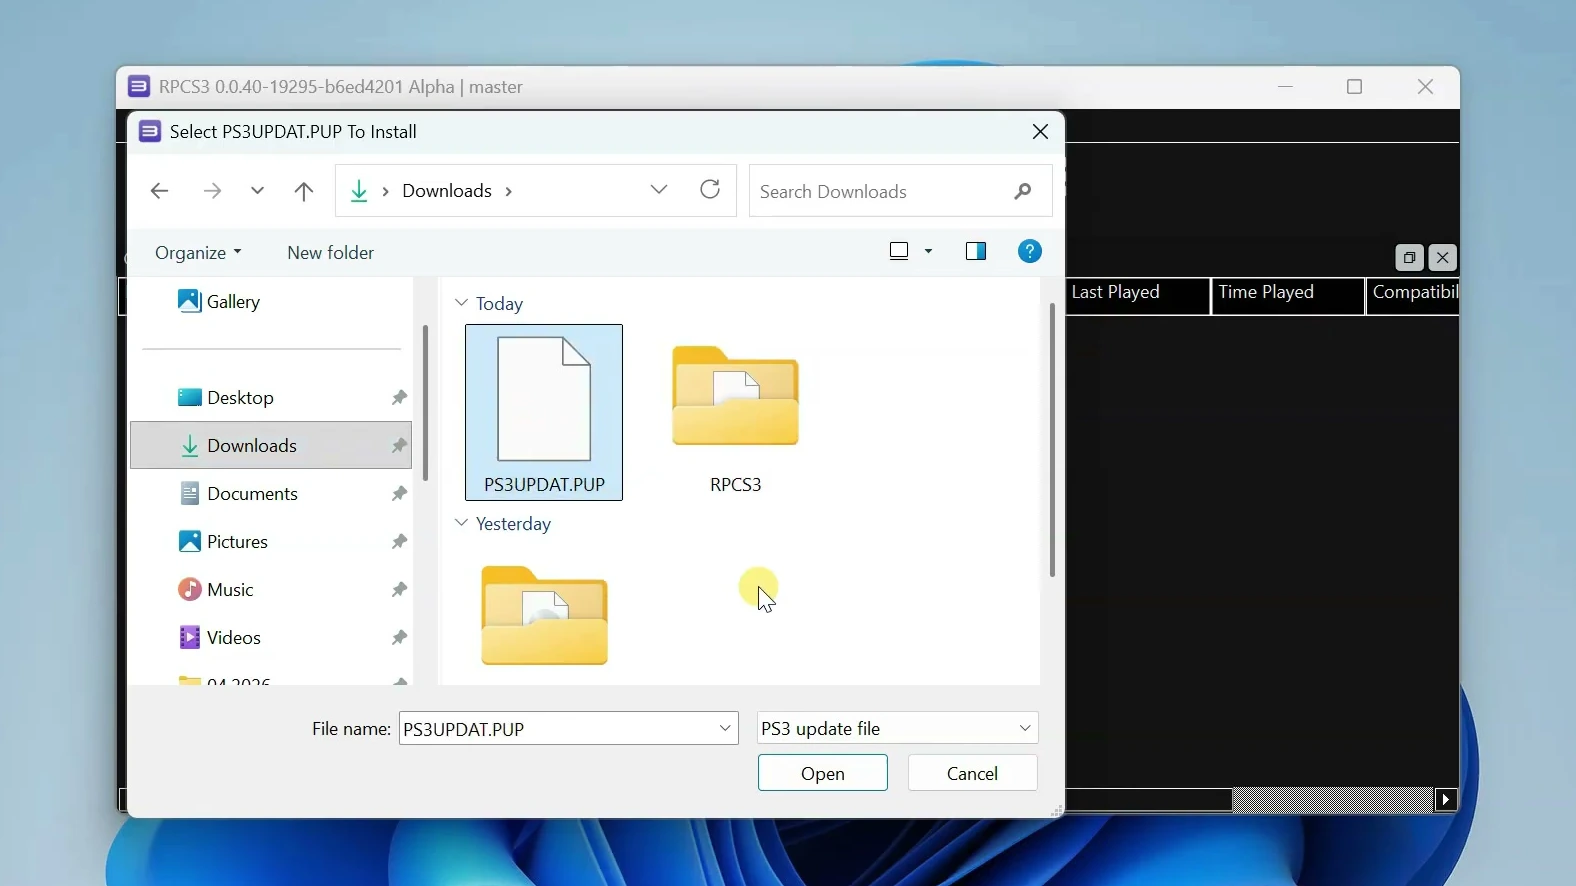
Let RPCS3 finish installing the firmware. A Compiling PPU Modules window may appear during this process. Wait for it to finish before adding games, as compilation can take some time depending on your CPU.
Add your legally dumped PS3 games
Have your own game dump prepared before adding it to RPCS3. For the ISO file-copy method, open the main RPCS3 folder and locate its games subfolder.
Copy your prepared PS3 game ISO files into the games folder and wait until the transfer finishes. Return to RPCS3 and click Refresh. A recognized game should appear in the game list, where you can access its updates, configuration, and controller options.
Install game updates with Rusty PSN
If RPCS3 reports that an update is available for a game, you can use Rusty PSN to find its official PS3 update packages. These updates may fix bugs and improve compatibility, although they do not guarantee better performance in every game.
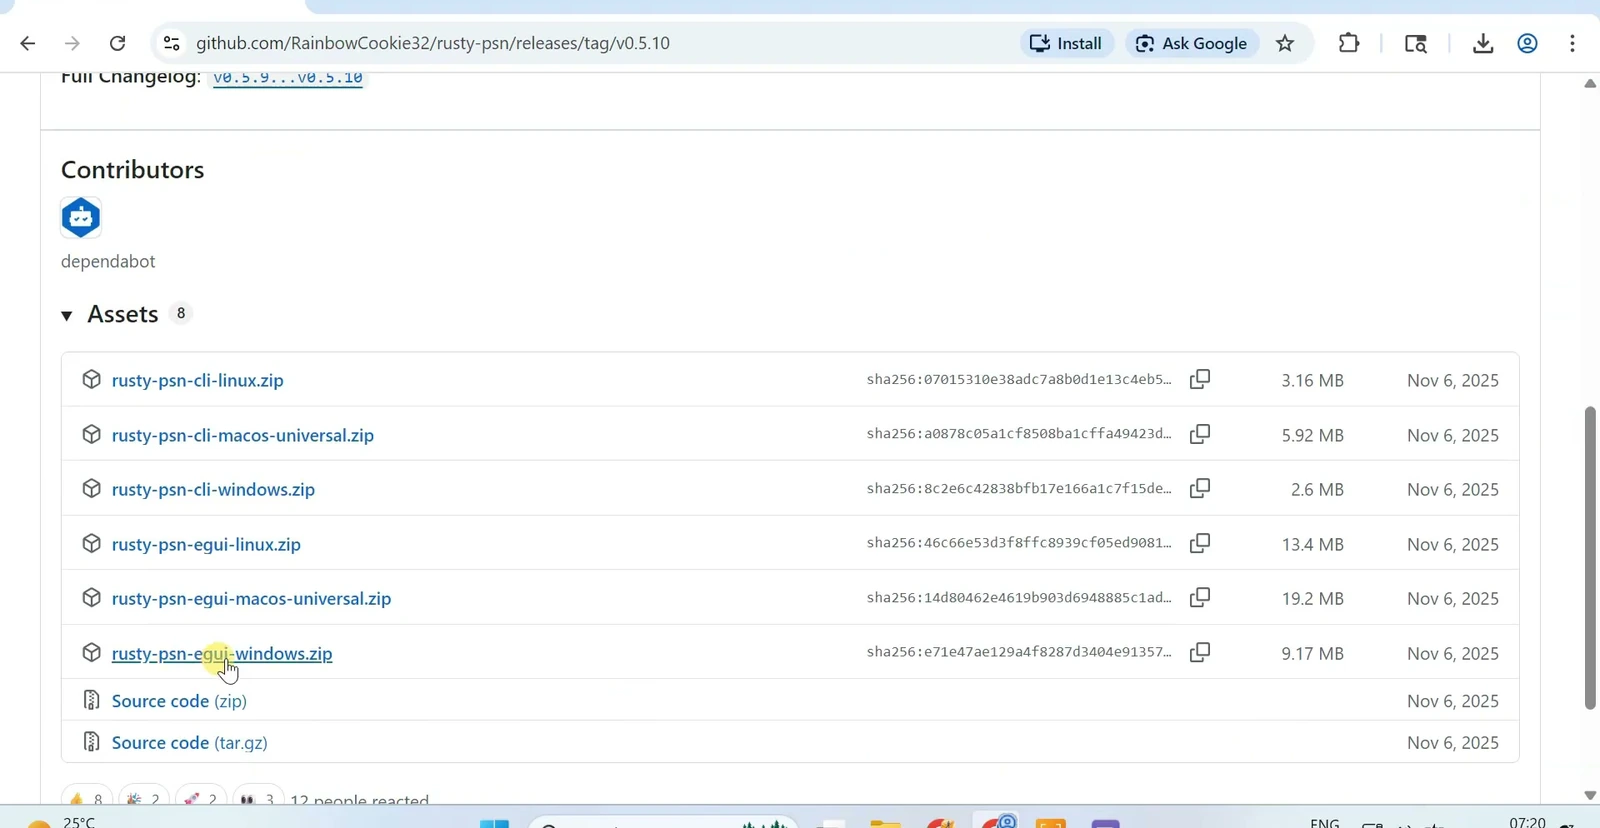
On the official GitHub project page, open Releases and find the Windows GUI ZIP under Assets. Download and extract it, then run the Rusty PSN application from the extracted folder.
Click the gear icon to open Rusty PSN’s settings. Use Pick folder to set the Download Path, then click Save settings. A dedicated update folder inside your RPCS3 folder can help keep the downloaded packages organized.
In RPCS3, right-click the game you want to update and choose Copy Info → Copy Serial. Paste that serial into Rusty PSN’s search box and click Search for updates. Using the serial helps you find updates for the correct release of the game.
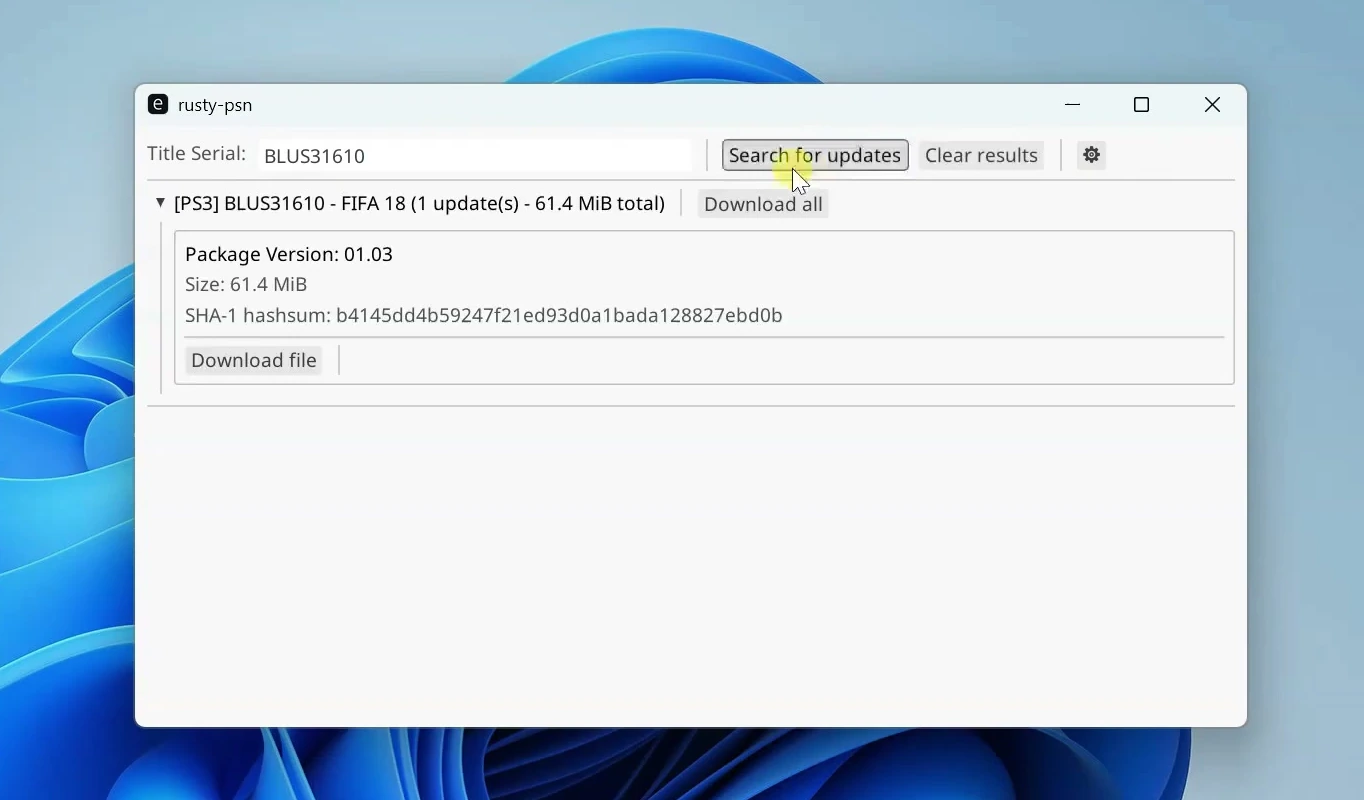
Download all the updates listed for that game and wait for the downloads to complete. You can then install the downloaded PKG files in RPCS3.
- In RPCS3, choose File → Install Packages.
- Open the update download folder, select the game’s update PKG files, and click Open.
- Click Install in the package installation dialog and wait for installation to finish.
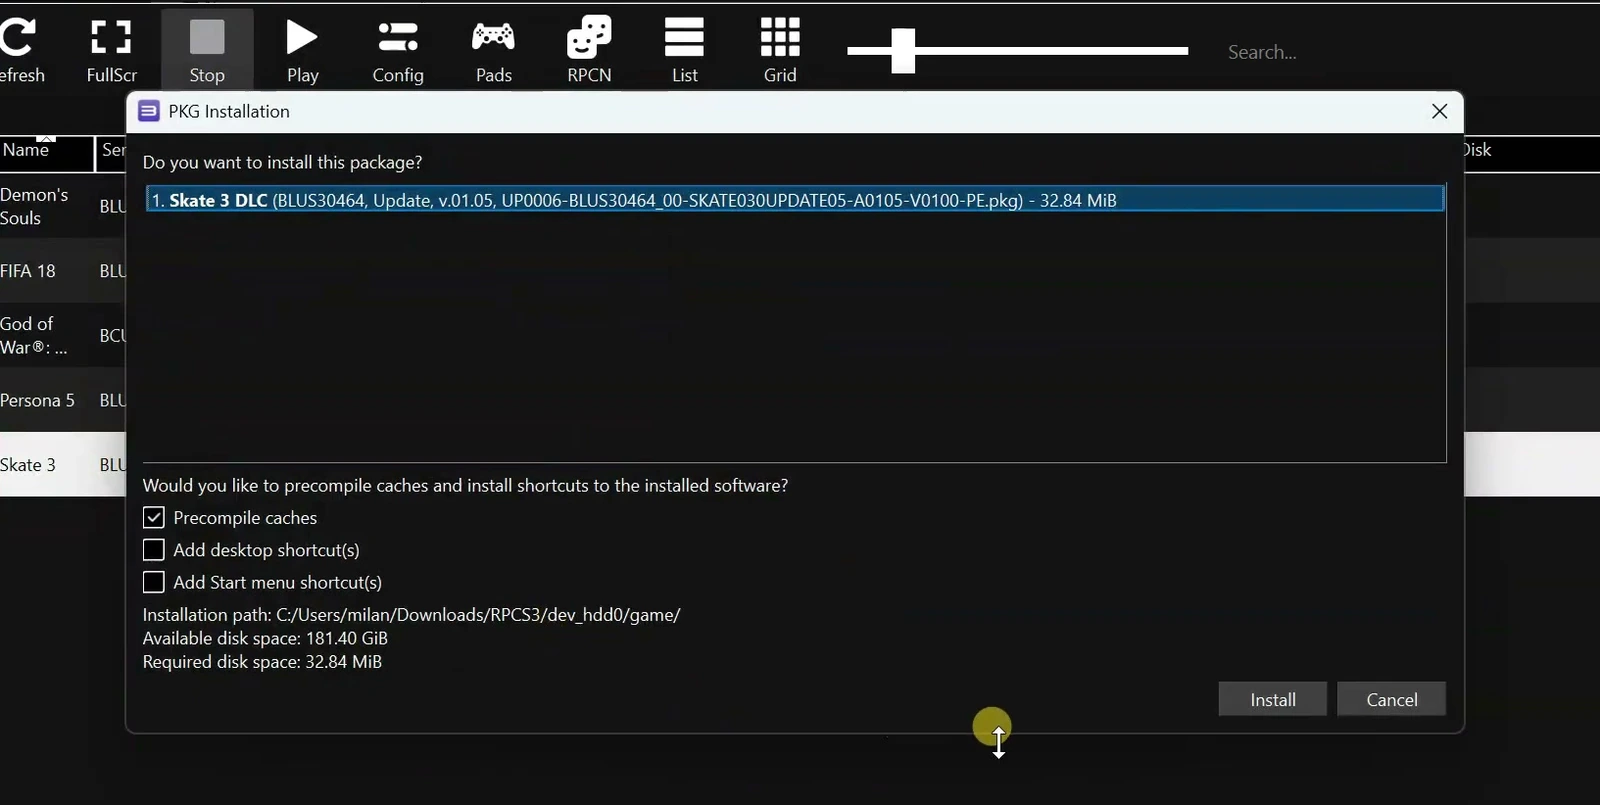
Once all applicable updates are installed, RPCS3 should no longer report an available update for that game. Repeat the serial search and installation process for any other games that need updates.
Use the recommended settings for each game
There is no single best RPCS3 configuration for every PS3 game. Search for your title in the RPCS3 Compatibility List to check its current status, then consult the RPCS3 Wiki for game-specific recommendations. Compatibility can change as the emulator develops.
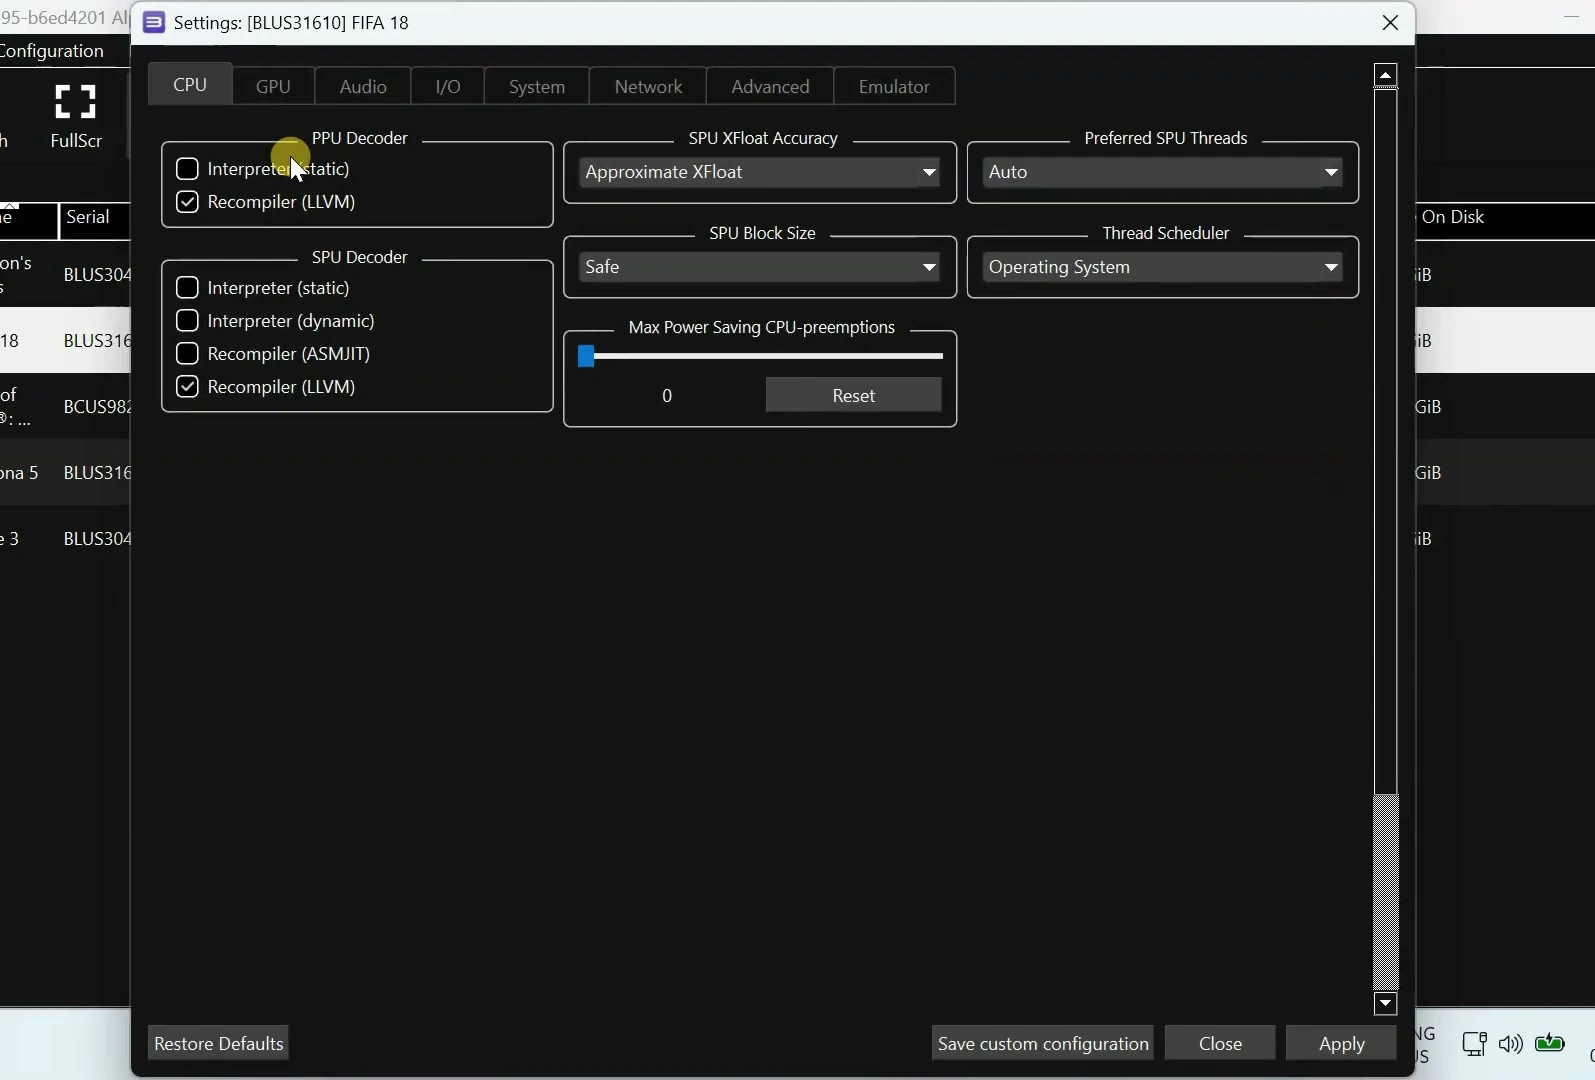
If the game needs changes, right-click it in RPCS3 and choose Create Custom Configuration From Global Settings. This creates a configuration for that game alone, so its special settings will not affect the rest of your library.
Match the recommendations on the game’s Wiki page in the relevant CPU, GPU, or Advanced tabs, then click Apply. Some games can use the defaults, while others need particular SPU settings, a specific renderer, or an advanced option changed. Leave settings alone unless the game’s documentation recommends changing them.
Enable optional game patches
RPCS3 patches can modify how certain games run. Depending on the title, available patches may unlock the frame rate, address graphical problems, add widescreen support, or disable effects that cause issues. They are optional and vary by game.
- Right-click your game and choose Manage Game Patches.
- If RPCS3 asks to download or update the patch list, click Yes.
- Review the patches available for your game and enable only the ones you need.
- Click Apply, then Save. The selected patches should take effect the next time you launch the game.
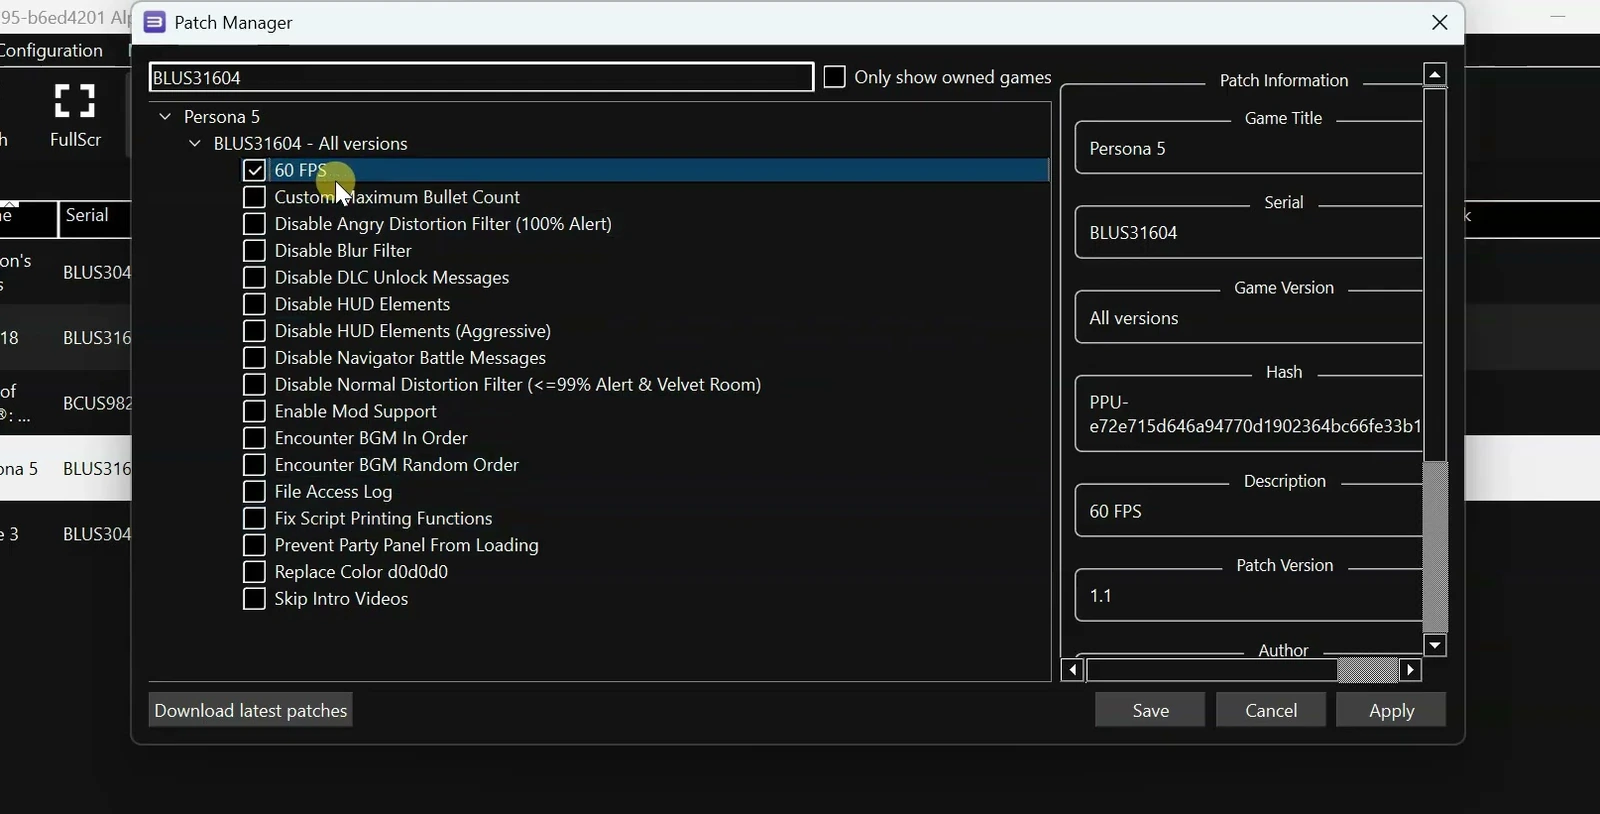
Note: Enable a 60 FPS patch only if one is available for your game. Unlocking the frame rate does not guarantee that your PC can maintain 60 FPS.
Configure your controller
Click Pads at the top of RPCS3 to open Gamepad Settings. Choose the handler that matches your controller so RPCS3 can recognize it and map its buttons.
- For a PlayStation controller, select the matching DualShock or DualSense handler.
- For an Xbox controller or an XInput-compatible third-party controller, select XInput.
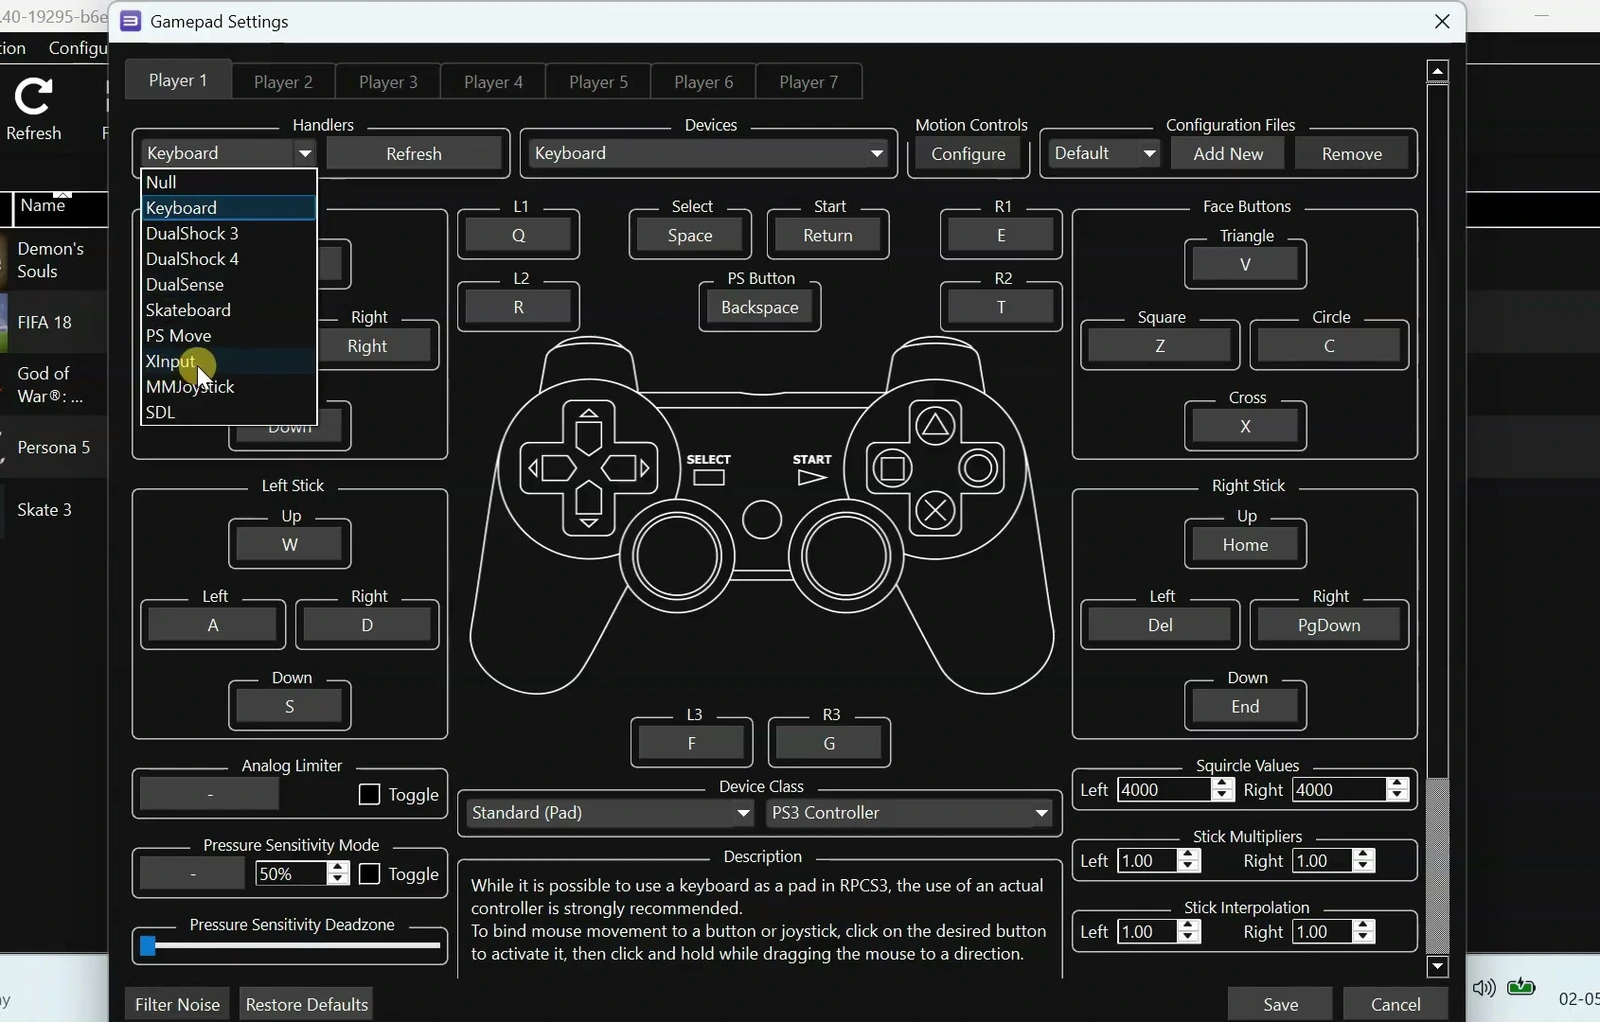
With XInput selected, RPCS3 should detect and map a compatible controller automatically. Check the mappings before saving. To change a control, click its mapping and press the button you want to use on your controller.
For games that support local multiplayer, open the Player 2 tab and configure the second controller in the same way. Click Save when you have finished.
Launch the game
Double-click the game in RPCS3’s list to launch it. On the first launch, you may see Compiling PPU Modules before the game opens. This is normal and can take a while depending on your CPU and the game.
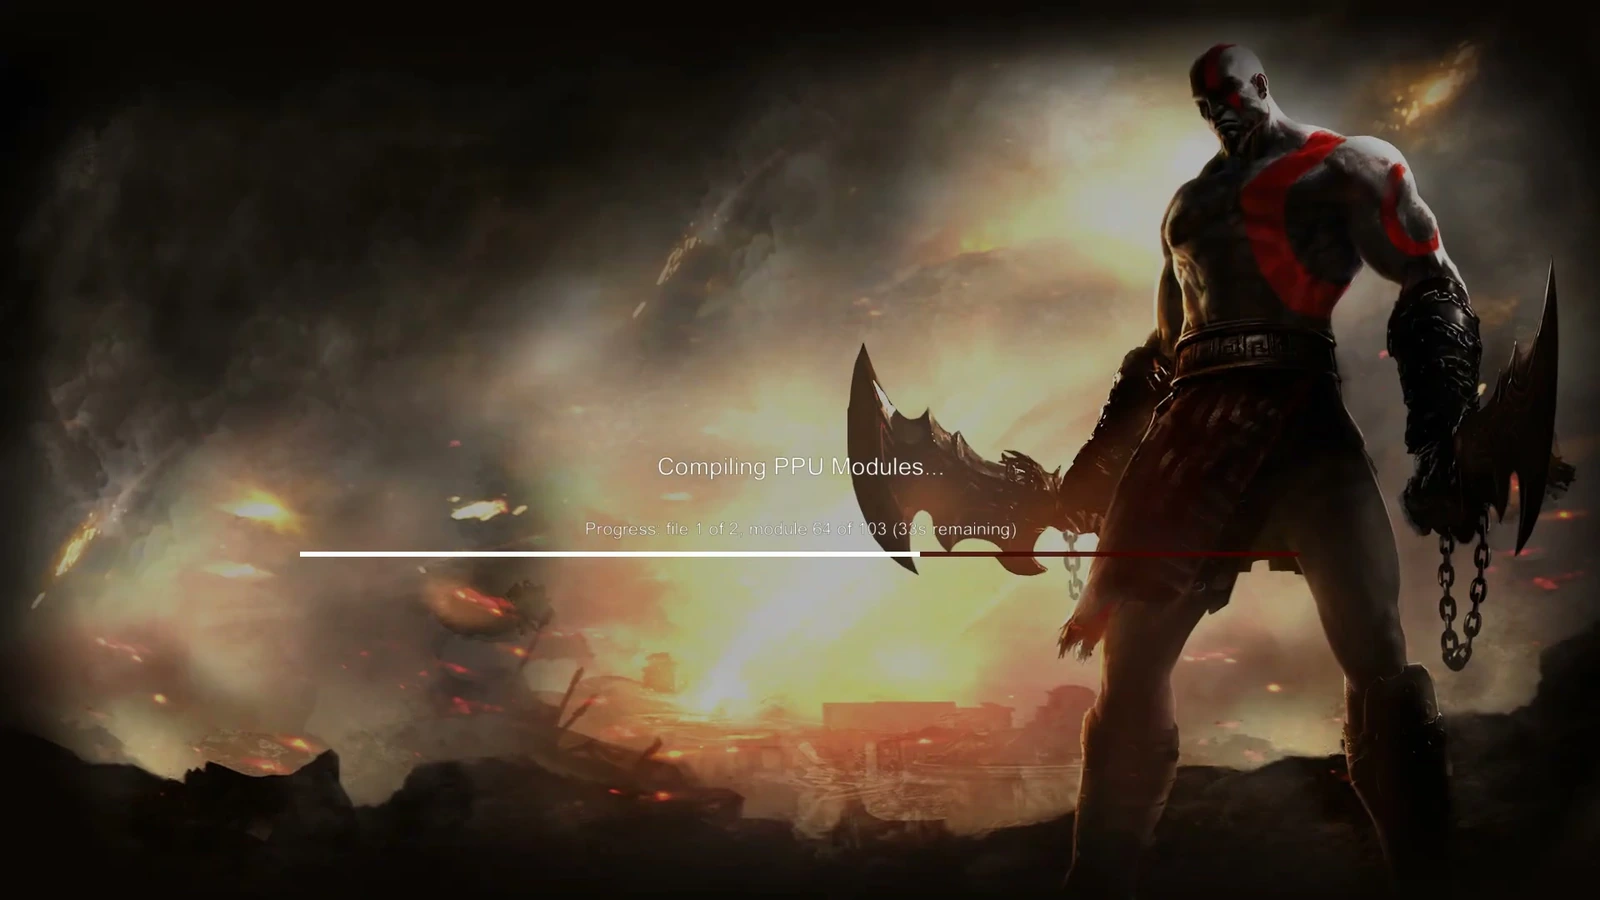
Wait for compilation to finish rather than treating the delay as a crash. Later launches should generally be faster. Once the game opens, check that your controller responds correctly before starting to play.
If the game runs slowly
PS3 emulation is demanding on the CPU, so a good graphics card alone does not guarantee smooth gameplay. If performance is poor, first confirm that the game’s compatibility status and custom configuration support the result you expect.
- Keep a laptop plugged into power while playing.
- Set Windows power mode to a performance-oriented option.
- On a gaming laptop, check Windows graphics settings or your GPU control panel to confirm that RPCS3 is using the dedicated GPU rather than integrated graphics.
These checks can help avoid power or GPU-selection limitations, but they cannot resolve every compatibility problem. A game may launch successfully and still have issues later, so judge its current support by the compatibility entry rather than the opening screen alone.