Moving from Windows to Linux is easier when the desktop already feels familiar. AnduinOS combines an Ubuntu-based system with a Windows 11-style interface: centered taskbar icons, a searchable Start menu, quick settings, and familiar-looking file management. Its Control Panel also brings together drivers, software, appearance settings, and recovery tools.
This walkthrough covers creating the installation USB, installing the system, completing first-run setup, and trying its application and recovery features. AnduinOS remains Linux underneath: Wine and Bottles can run some Windows programs, but they do not guarantee compatibility with every application or game. The automatic disk-installation path shown here also erases the selected drive.
Download the desktop image and prepare your drives
For a typical Intel or AMD desktop or laptop, download the x86-64 desktop ISO from the AnduinOS website. The ARM64 image is for supported ARM devices, while the container edition is intended for Docker or Podman—not a normal desktop installation.
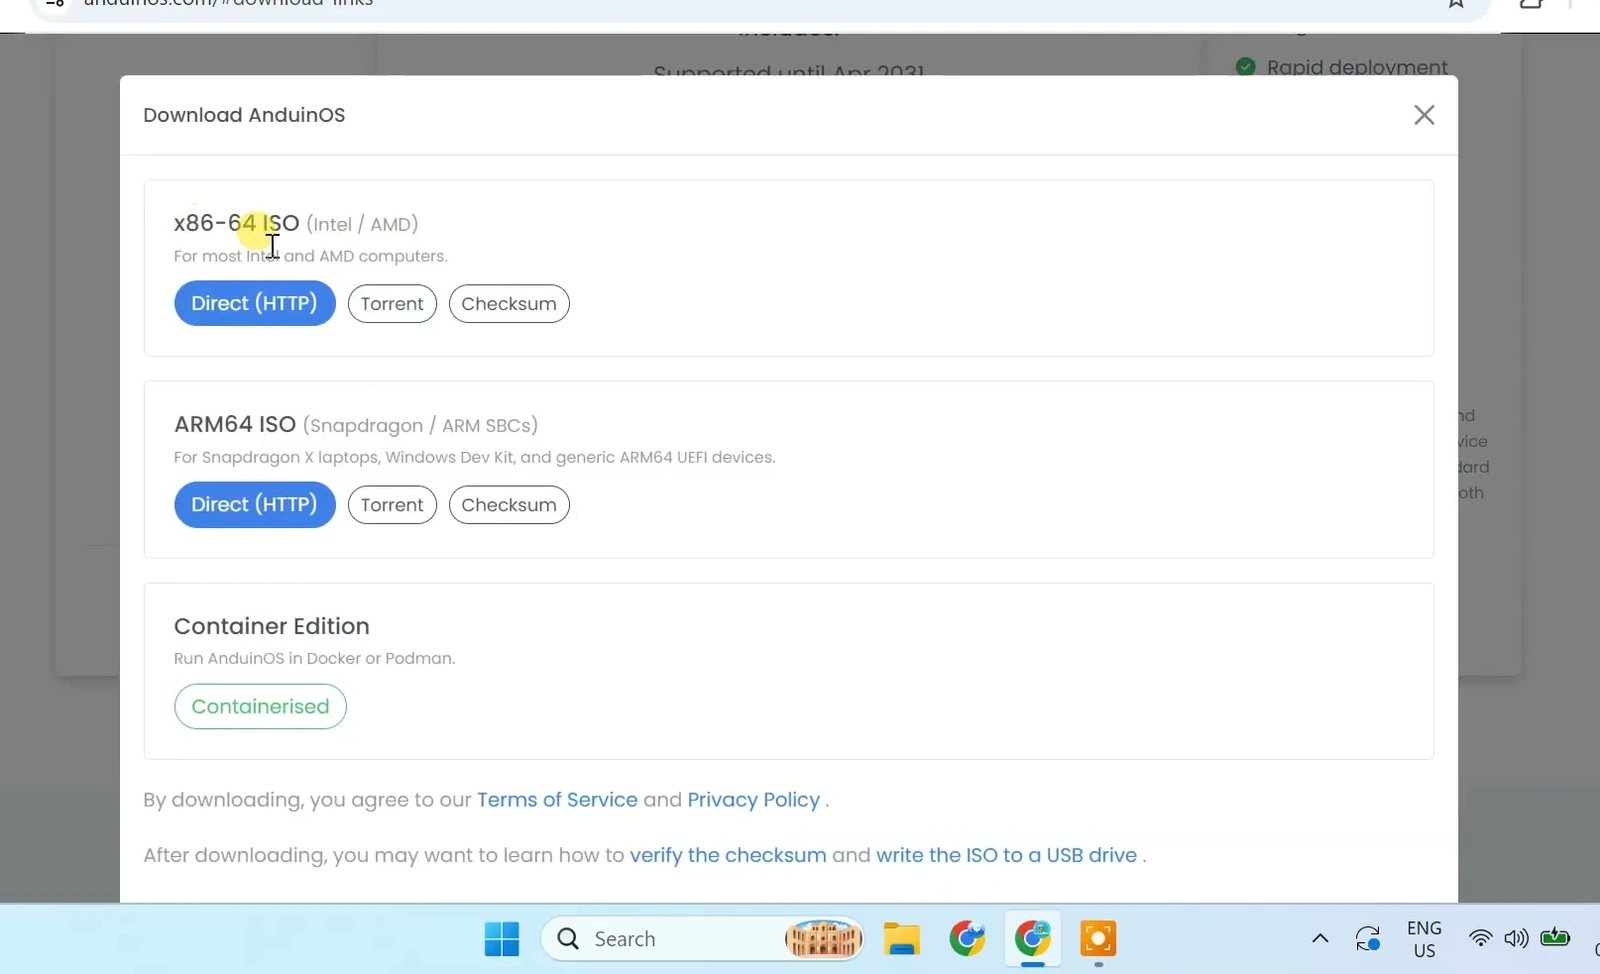
Note: The demonstration refers to both 2.0 and 2.2. Check the release information for the ISO you download rather than treating those labels as one verified release specification. Screens and available features may differ between releases.
- USB drive: Use an 8 GB or larger drive that can be erased.
- USB creation computer: This walkthrough uses Rufus on Windows.
- Network access: Have a connection available so the installer can download updates and additional software.
- Backup: Copy important files from both the USB drive and the intended installation disk to separate storage.
Warning: This is a full-disk installation walkthrough, not a dual-boot guide. Do not follow the automatic installation path on a disk containing Windows or other data you want to keep.
Create the USB with Rufus in DD image mode
Rufus writes the ISO to your USB drive so the computer can boot into the AnduinOS live environment. Download it, connect your USB drive, and open the application.
- Under Device, select the USB drive you intend to erase.
- Click Select and choose the downloaded AnduinOS ISO.
- Leave the remaining Rufus settings at their defaults.
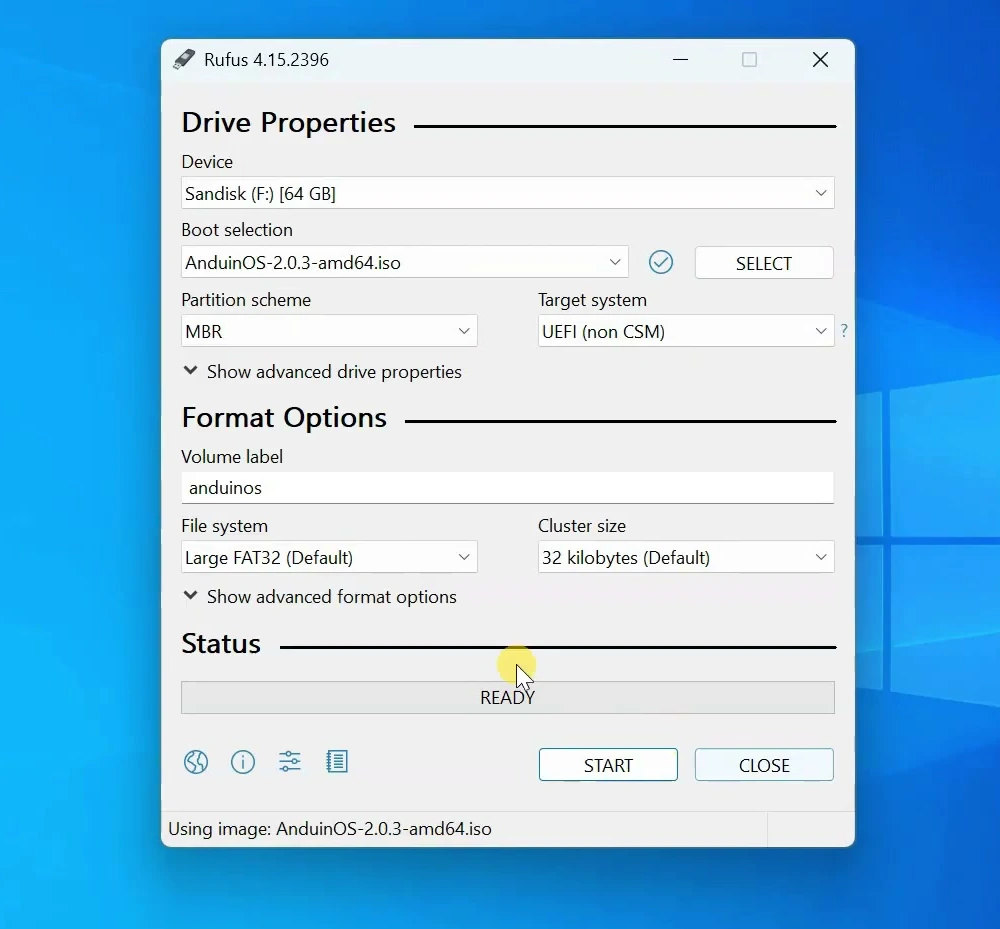
Warning: Check the selected USB device before starting. Writing the image will erase everything on that USB drive.
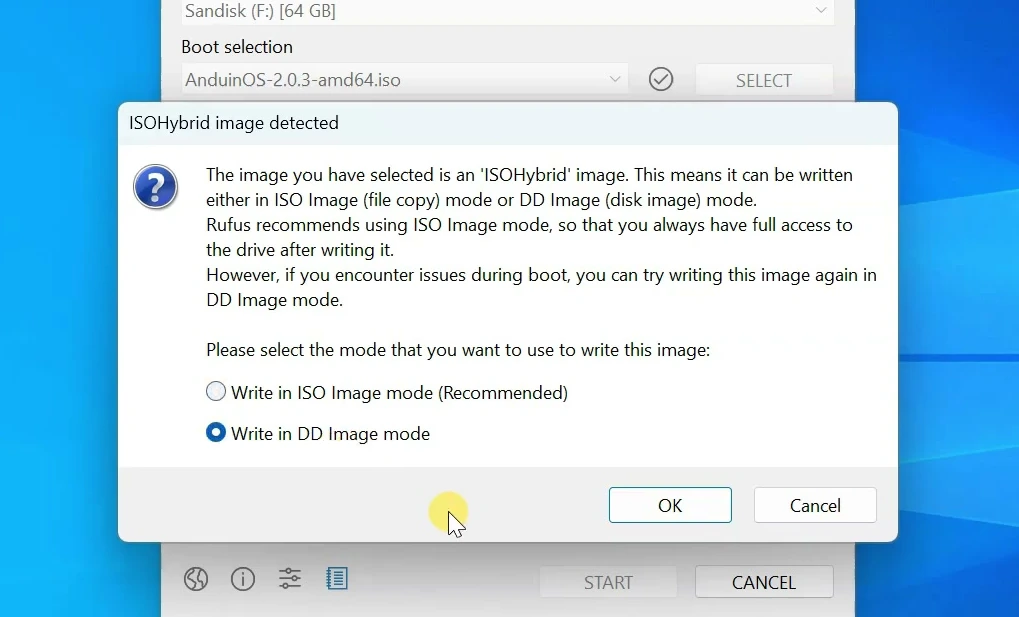
Click Start. When Rufus asks how to write the image, select Write in DD Image mode, confirm, and wait for it to finish. The demonstrated AnduinOS installation specifically uses DD mode rather than ISO mode.
Boot the USB and choose installation options
- Restart the computer and use its boot menu to select the USB drive. The boot-menu key depends on the computer manufacturer.
- At the AnduinOS boot menu, select Try or Install AnduinOS and press Enter.
- Wait for the live desktop to load. The installer opens automatically in the demonstrated flow.
- Connect to your network, then select your language in the installer.
The installer includes a Secure Boot step. In the demonstration, it offers access to the UEFI firmware settings when Secure Boot is disabled, but that step is skipped. You do not need to disable Secure Boot simply to reproduce the shown installation.
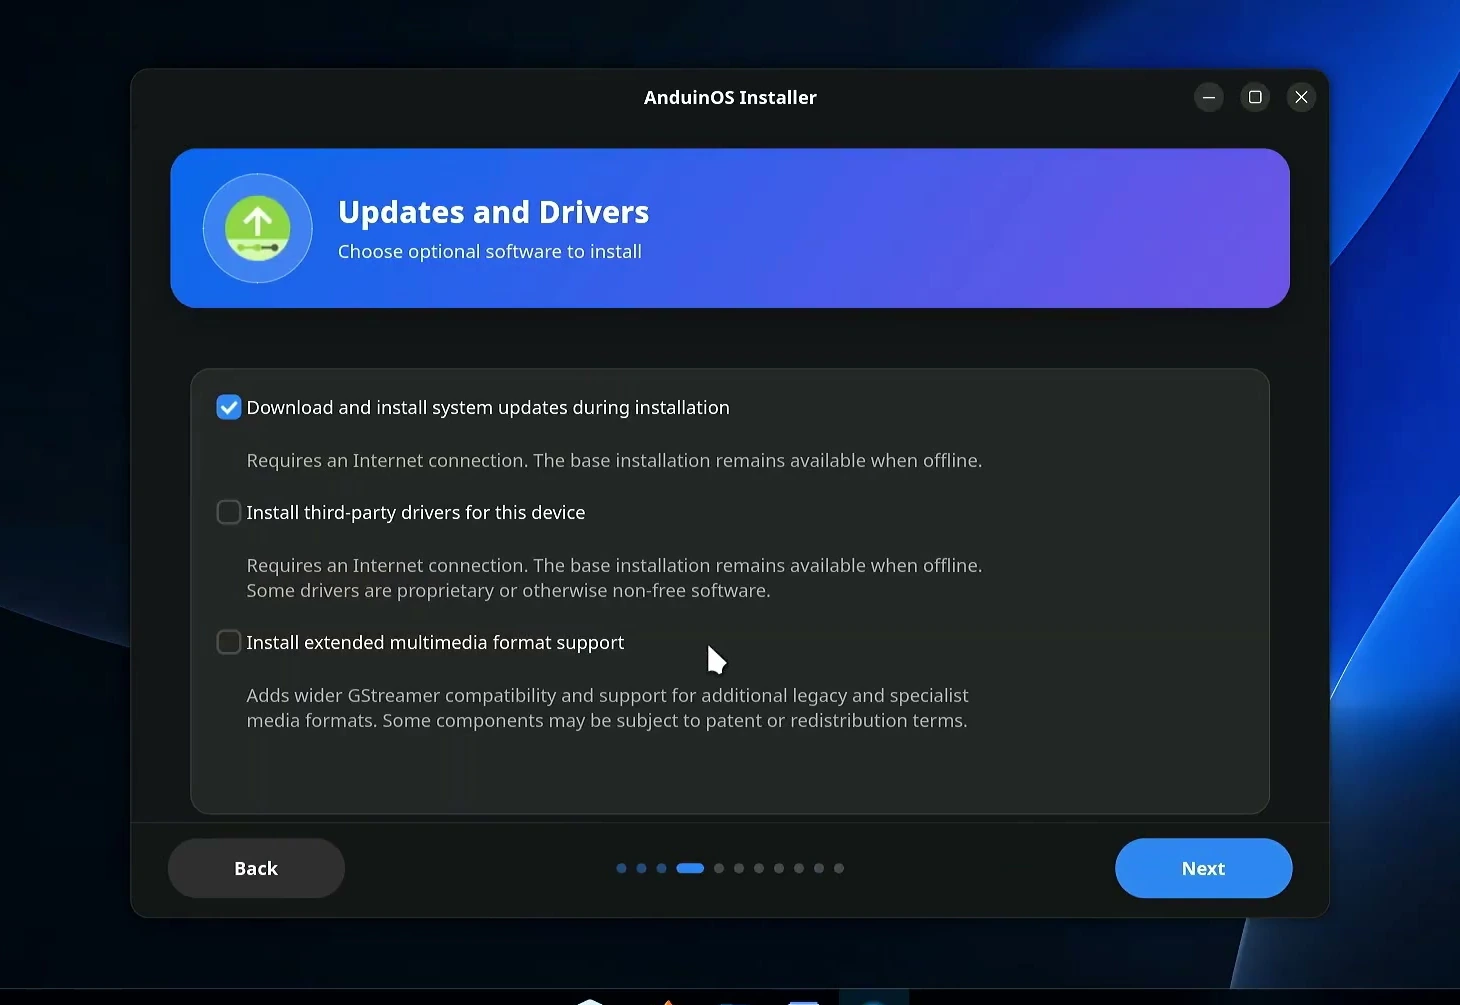
On Updates and Drivers, the demonstrated installation enables all three options below. Doing this during installation reduces the amount of setup needed afterward.
- System updates: Download and install available updates.
- Third-party drivers: Include additional hardware drivers.
- Extended multimedia support: Add the extra multimedia support offered by the installer.
Choose storage and complete the installation
Select the disk where AnduinOS will be installed. Check its capacity and existing partition layout carefully, especially if the computer has more than one drive.
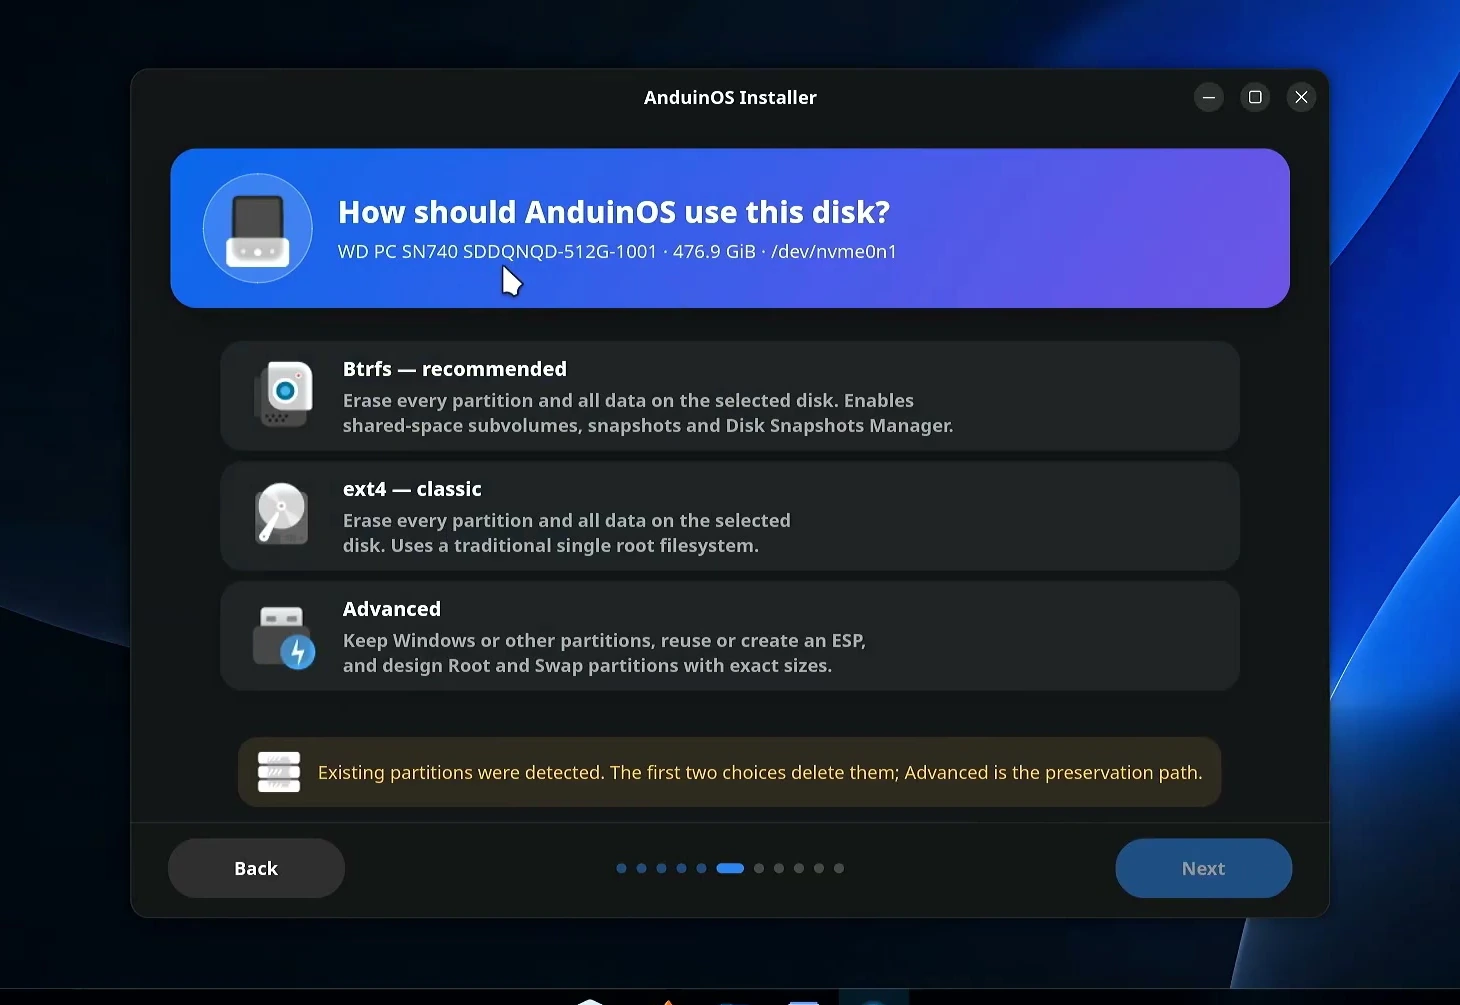
Warning: The automatic storage options erase the selected installation disk. Stop here if you have not backed up its contents or are unsure which drive is selected.
The installer offers three storage approaches. Choose Btrfs to follow this walkthrough and use the snapshot recovery features described later.
- Btrfs: The recommended option, supporting subvolumes and system snapshots.
- ext4: A traditional Linux filesystem; it does not provide the Btrfs snapshot workflow shown here.
- Advanced: Manual partition configuration for users who understand their intended disk layout.
After choosing Btrfs, retain the installer's recommended compression and swap defaults. The values displayed on the demonstration computer are not a requirement for every machine.
Create your account by entering your name, username, password, and computer name. On the following access-options page, review passwordless sudo, automatic login, and remote SSH access. Sudo allows an account to perform administrative actions, while SSH provides remote terminal access.
Important: For most users, keep password protection for administrative commands and leave automatic login disabled. Enable SSH only if you need remote access.
Select your time zone, then review the final summary. Confirm the target disk, storage choice, and account details before accepting the disk-erasure warning.
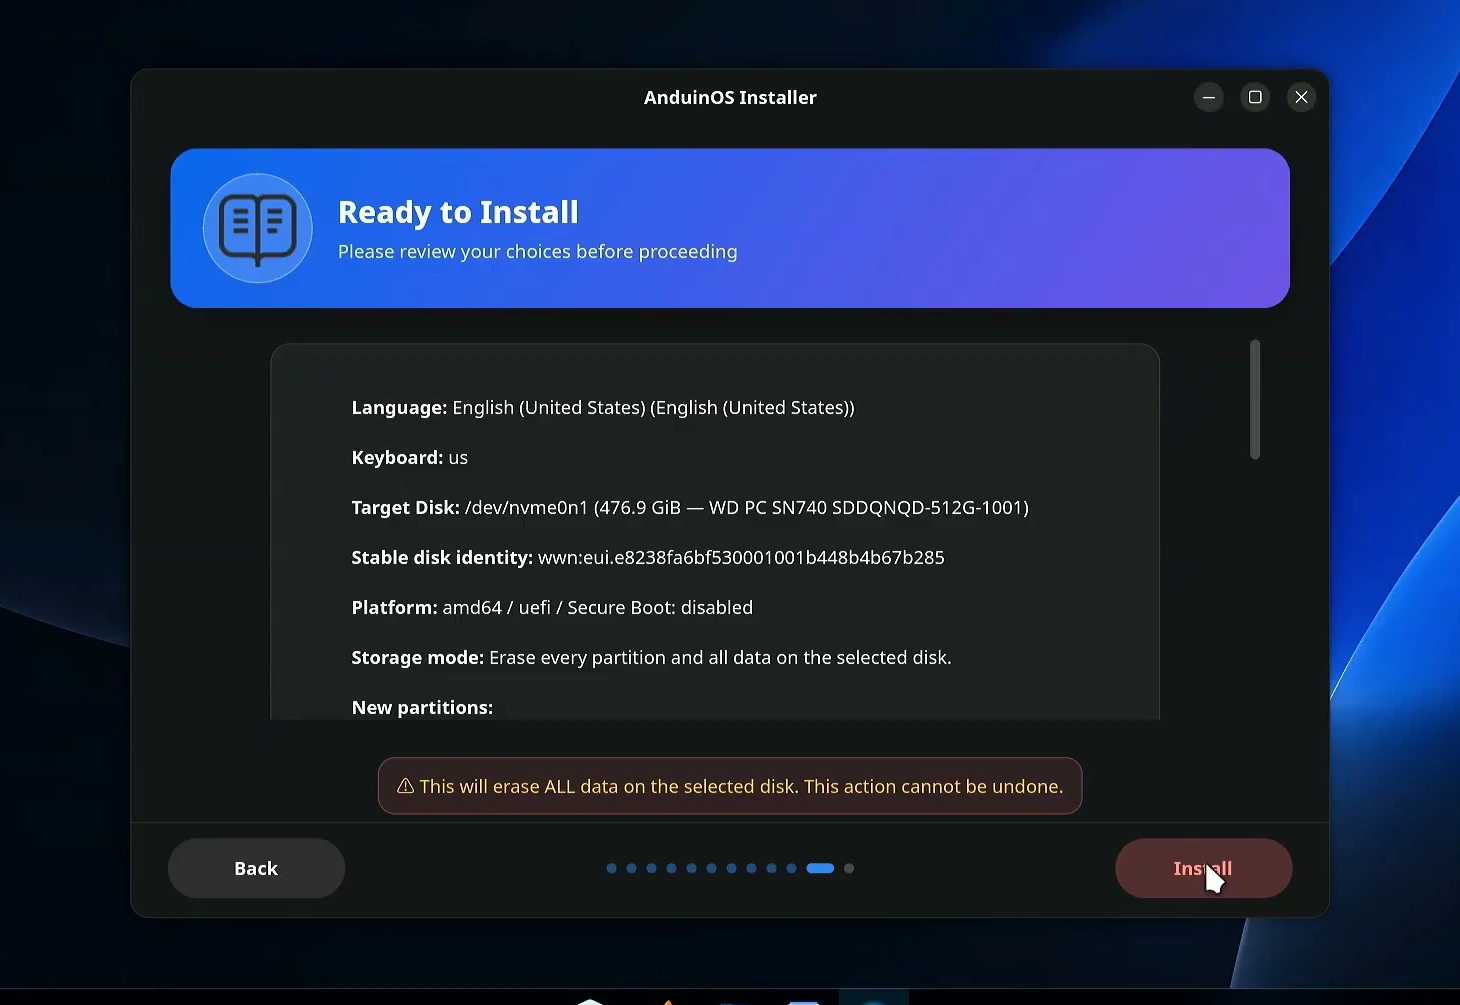
When everything is correct, click Install. Wait for installation to finish, then remove the installation USB and reboot. Log in with the account you created.
Configure the desktop, drivers, and compatibility tools
The first login opens a setup wizard that brings together appearance, security, hardware, and application choices.
- Choose Light or Dark mode and adjust display scaling so text is comfortable to read.
- Select Modern for centered, Windows 11-style taskbar icons, or Classic for a more traditional left-aligned layout.
- Enable the virtual desktop switch button if you want convenient access to multiple workspaces.
- Review the security and privacy choices, including the UFW firewall, location access, and automatic sleep.
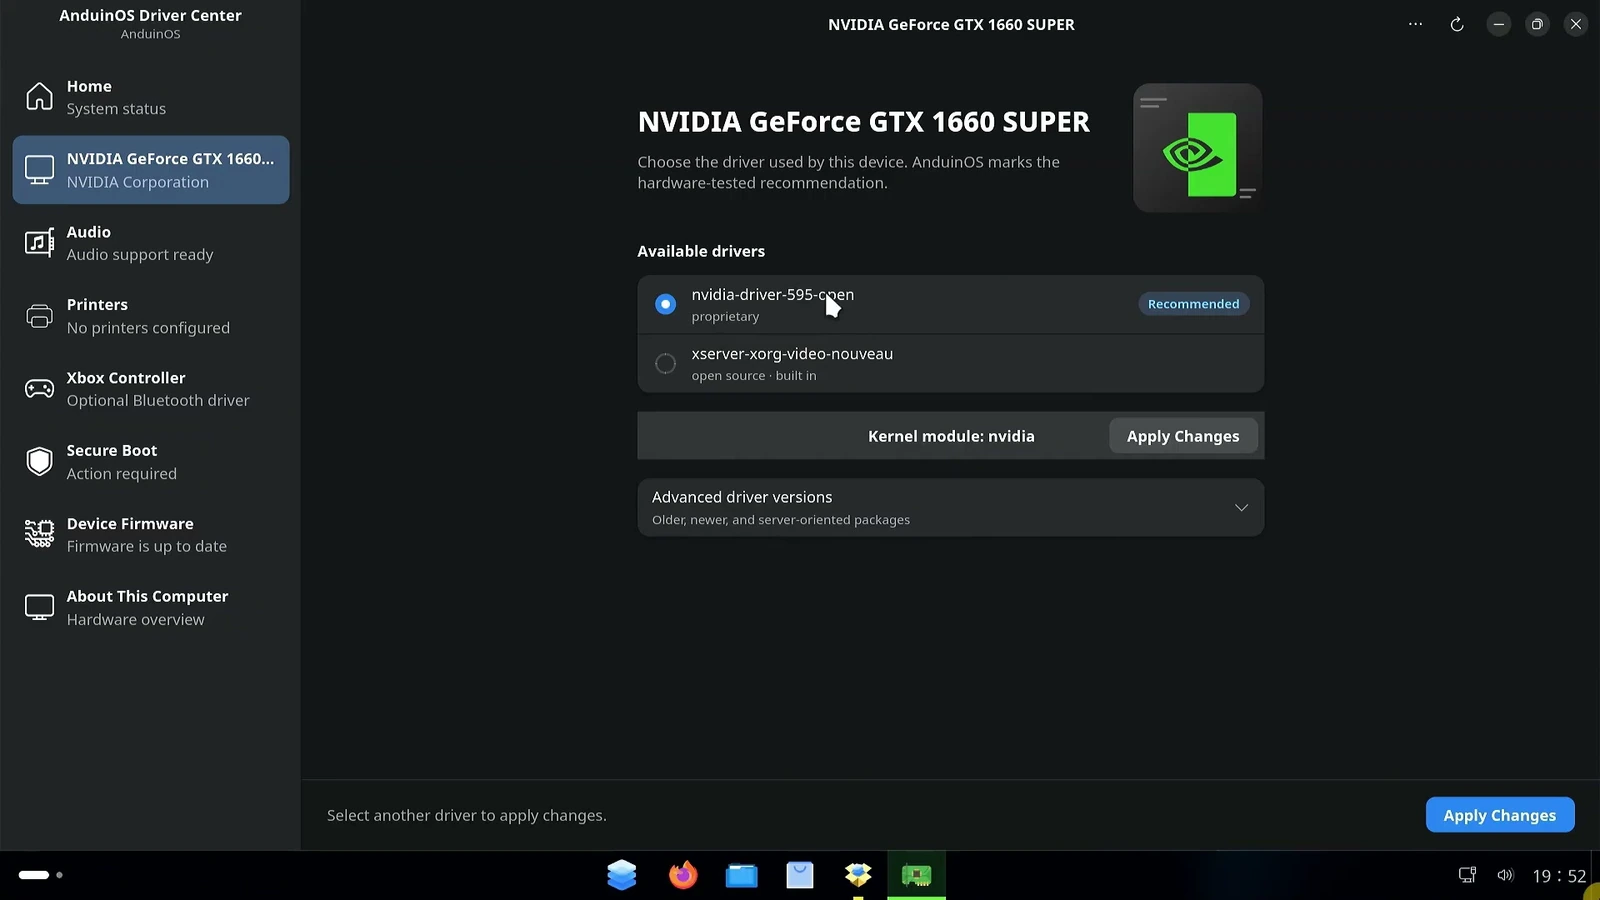
Next, Driver Center scans graphics, audio, printers, Secure Boot, firmware, and other devices. If it offers a driver marked Recommended for your hardware—such as a dedicated NVIDIA GPU—select that driver and restart after installation. The driver shown in the screenshot applies to the detected demonstration hardware, not every computer.
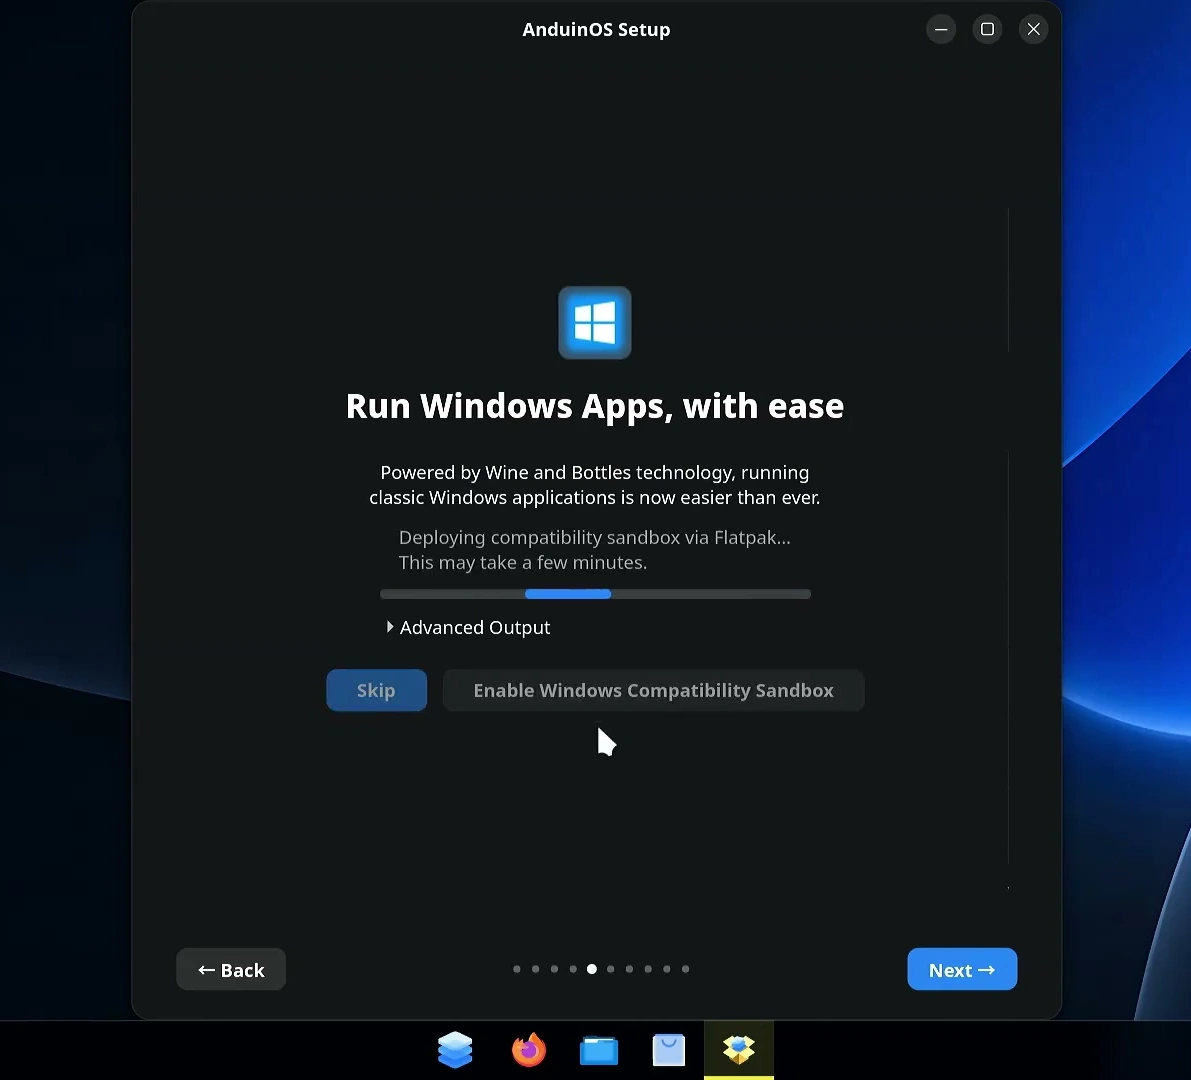
If you want to try Windows applications, enable the Windows Compatibility Sandbox. The wizard installs an environment built around Wine and Bottles through Flatpak. Wine provides Windows compatibility, while Bottles helps manage the environment and its installed programs.
The remaining wizard pages show keyboard shortcuts and popular applications, including Steam, Spotify, OnlyOffice, Thunderbird, Blender, Krita, and OBS Studio. Selecting an application opens its software-store page; it does not mean every listed app is already installed.
Get comfortable with the Windows-style desktop
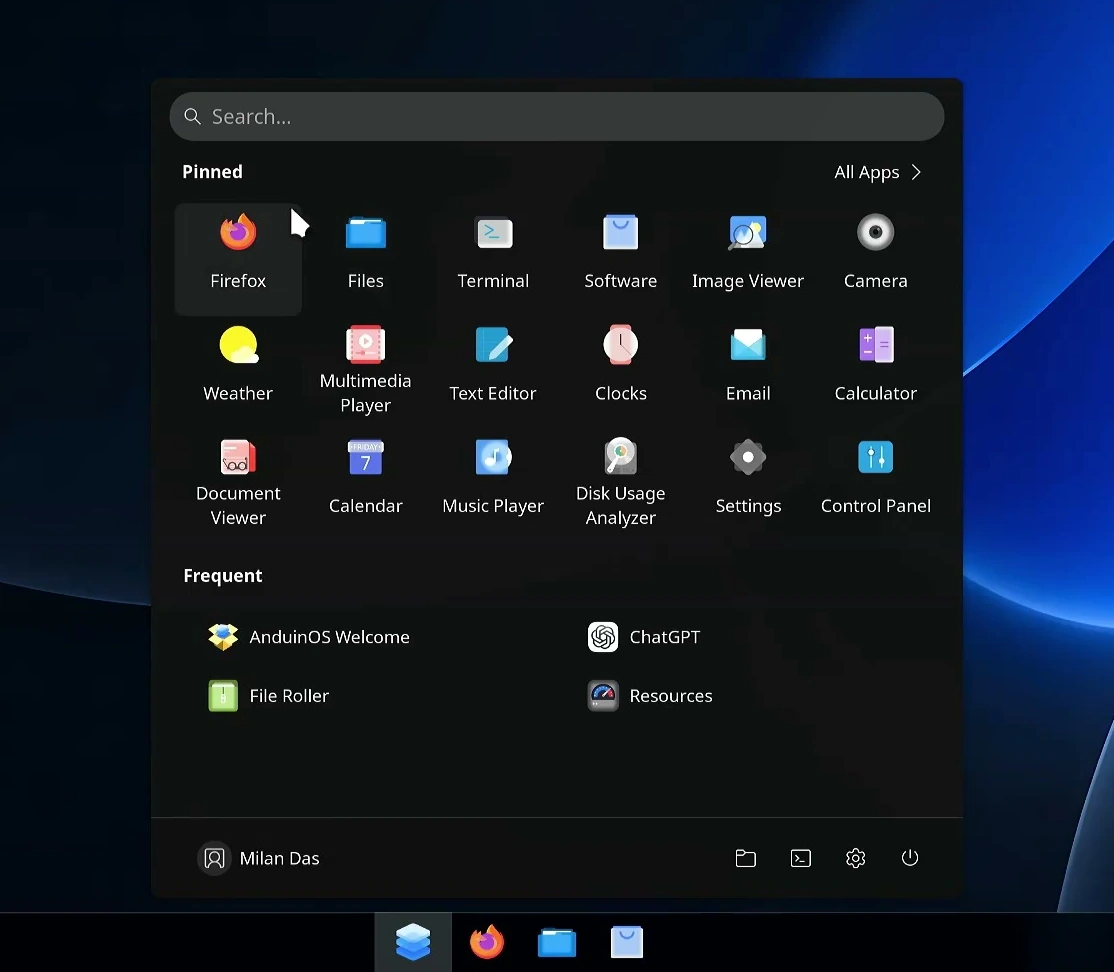
Click the AnduinOS icon to open the Start menu. It includes search, pinned applications, All Apps, account controls, and shortcuts to folders, settings, the terminal, and power options.
The file manager provides familiar folders such as Documents, Downloads, Pictures, Music, and Videos, alongside recent files, network locations, and Trash. There is no Windows-style C drive: files are organized using Linux's filesystem structure.
Open AnduinOS Appearance whenever you want to change the taskbar layout. Beyond the centered and classic styles, it offers a separated style, taskbar placement controls, and appearance adjustments. You can also change the theme, accent color, and wallpaper.
Tip: Useful shortcuts include Super + E for Files, Ctrl + Alt + T for Terminal, Ctrl + Shift + Esc for the task manager, and Super + V for clipboard history. On a typical PC keyboard, Super is the Windows-logo key.
Install Linux applications
Start with the graphical Software store. Search for the application you want or browse categories such as work, creativity, gaming, and learning. Open an application's page and install it from there; you do not need the terminal for this workflow.
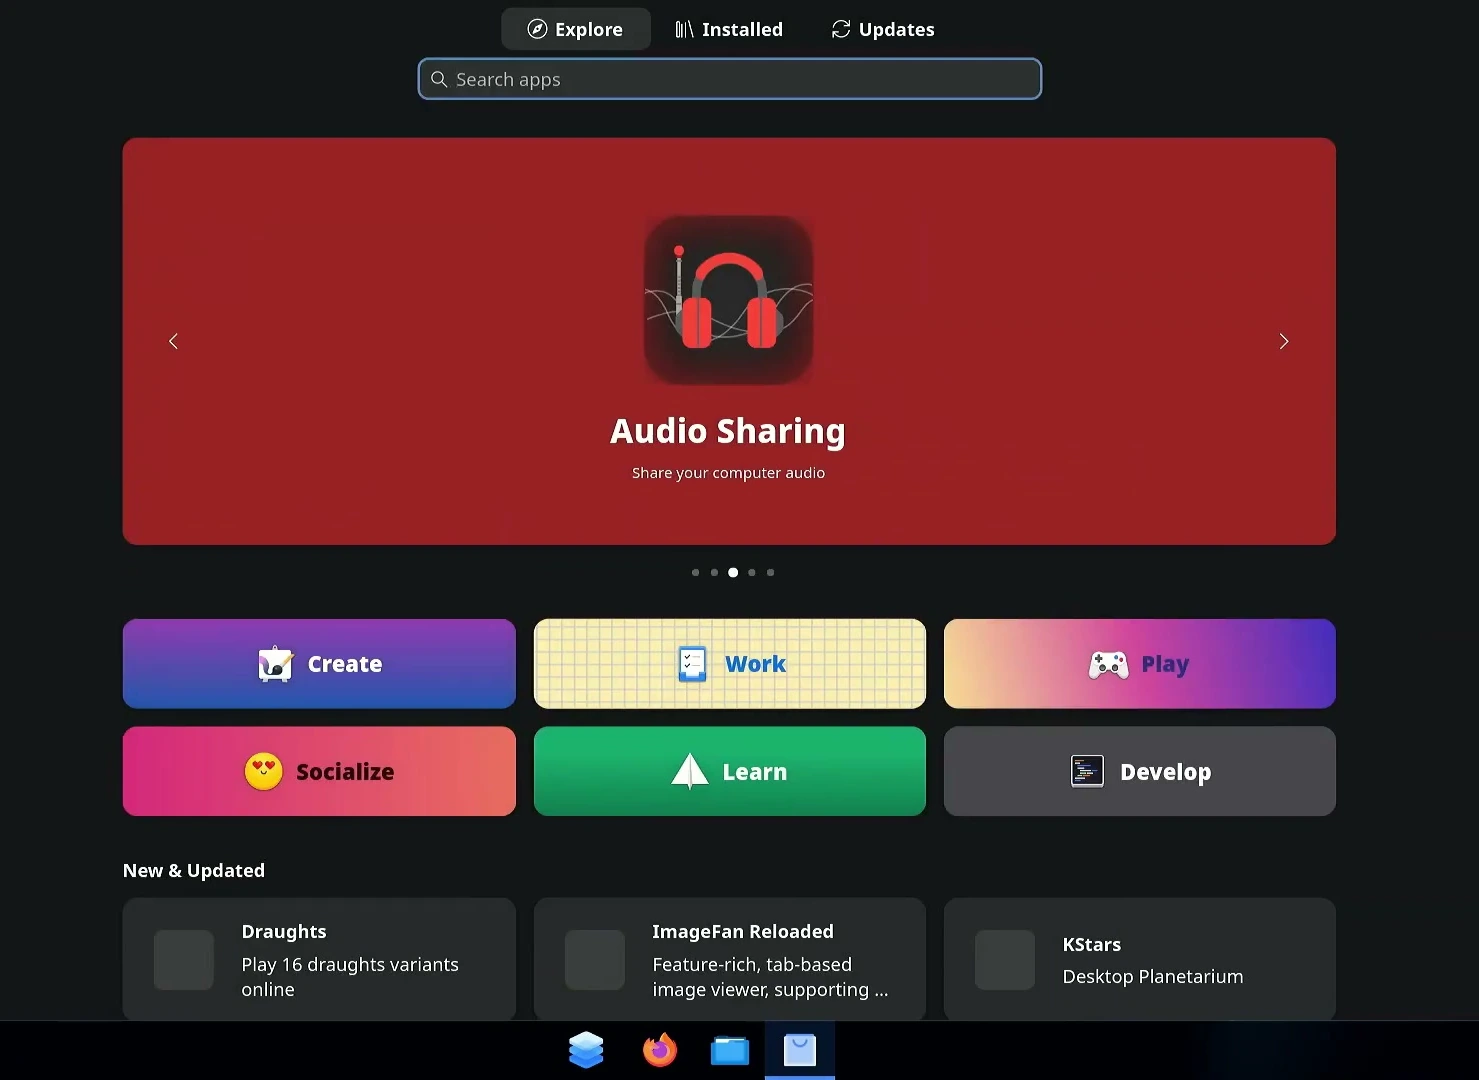
Flatpak is configured for desktop applications. Because AnduinOS is based on Ubuntu, it also provides APT for repository packages and local .deb installers. These are Linux package formats and tools, separate from the Windows compatibility environment.
Before using APT, the demonstration opens Control Panel → Programs → Software Source and selects Switch to Fastest Mirror. This lets AnduinOS choose a package-download server; it does not change which operating system is installed.
AppImages provide another option for portable Linux applications. For an AppImage you trust, open its file properties, enable the permission to execute it as a program, and then double-click it to try launching it.
Try Windows applications and manage them in Bottles
After the compatibility environment finishes installing, you can try supported Windows .exe installers directly from the file manager.
- Obtain the Windows installer from a publisher you trust.
- Double-click its
.exefile. - Allow the Windows application runner to prepare the compatibility environment.
- If the installer opens, follow its setup steps, then launch the application and check the functions you need.
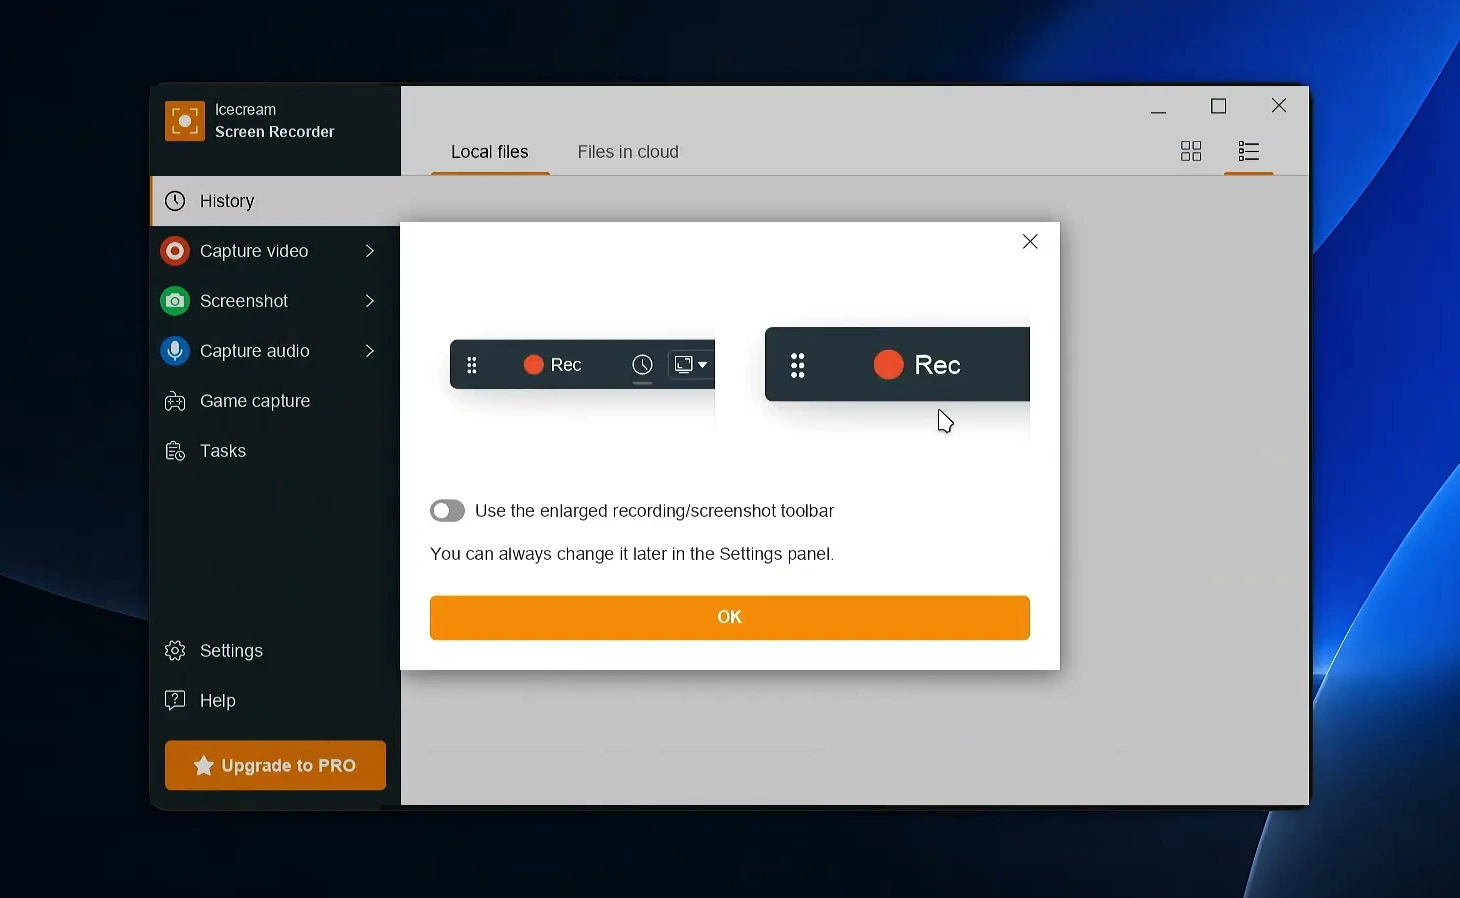
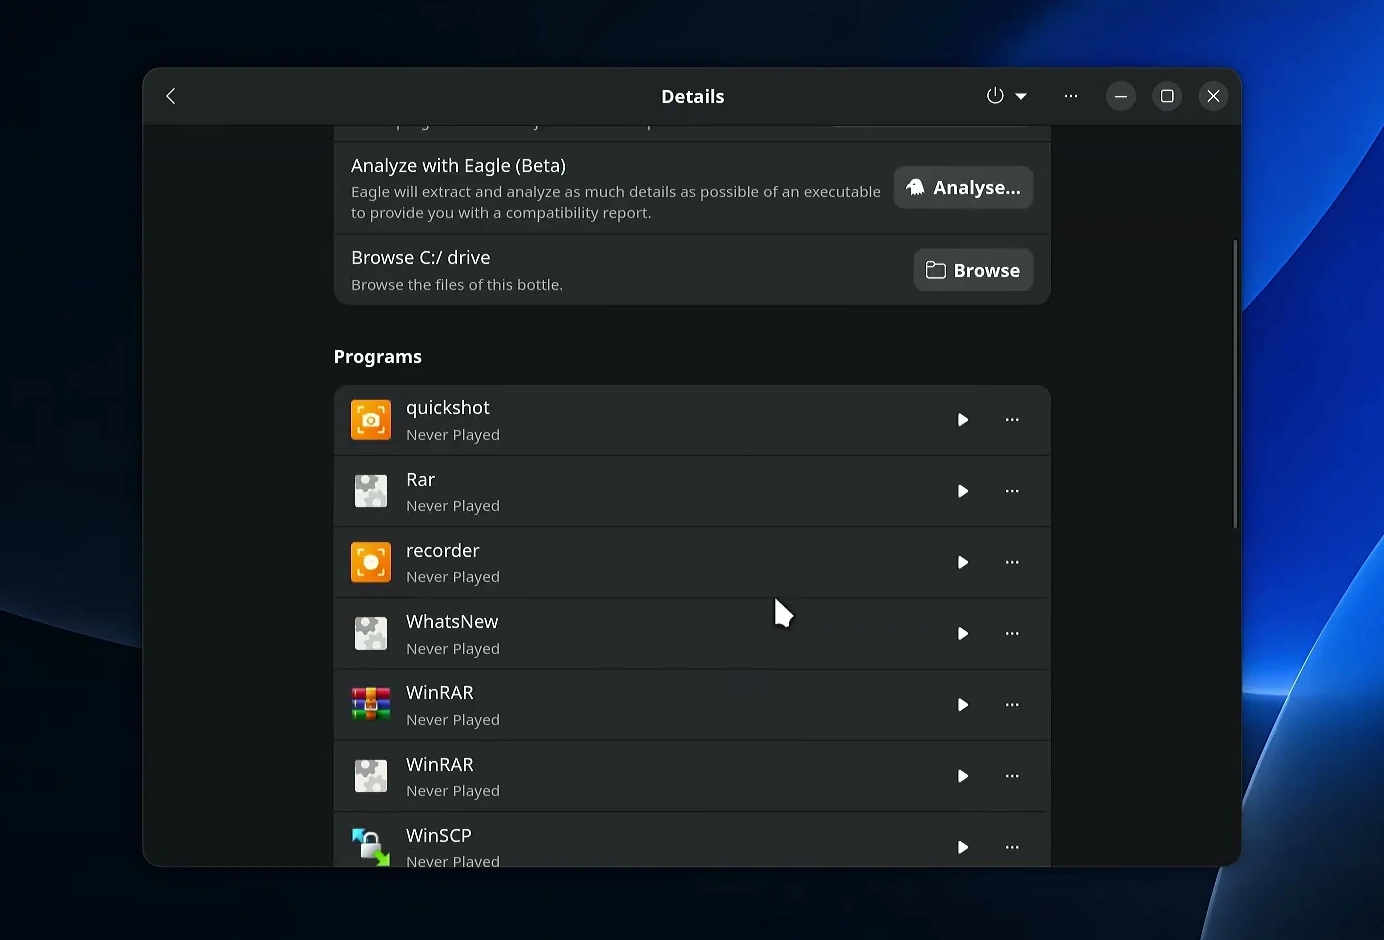
In the demonstrated tests, Icecream Screen Recorder, WinRAR, and WinSCP installed and launched. Icecream Screen Recorder is shown running below, but launching successfully does not establish that every feature works correctly.
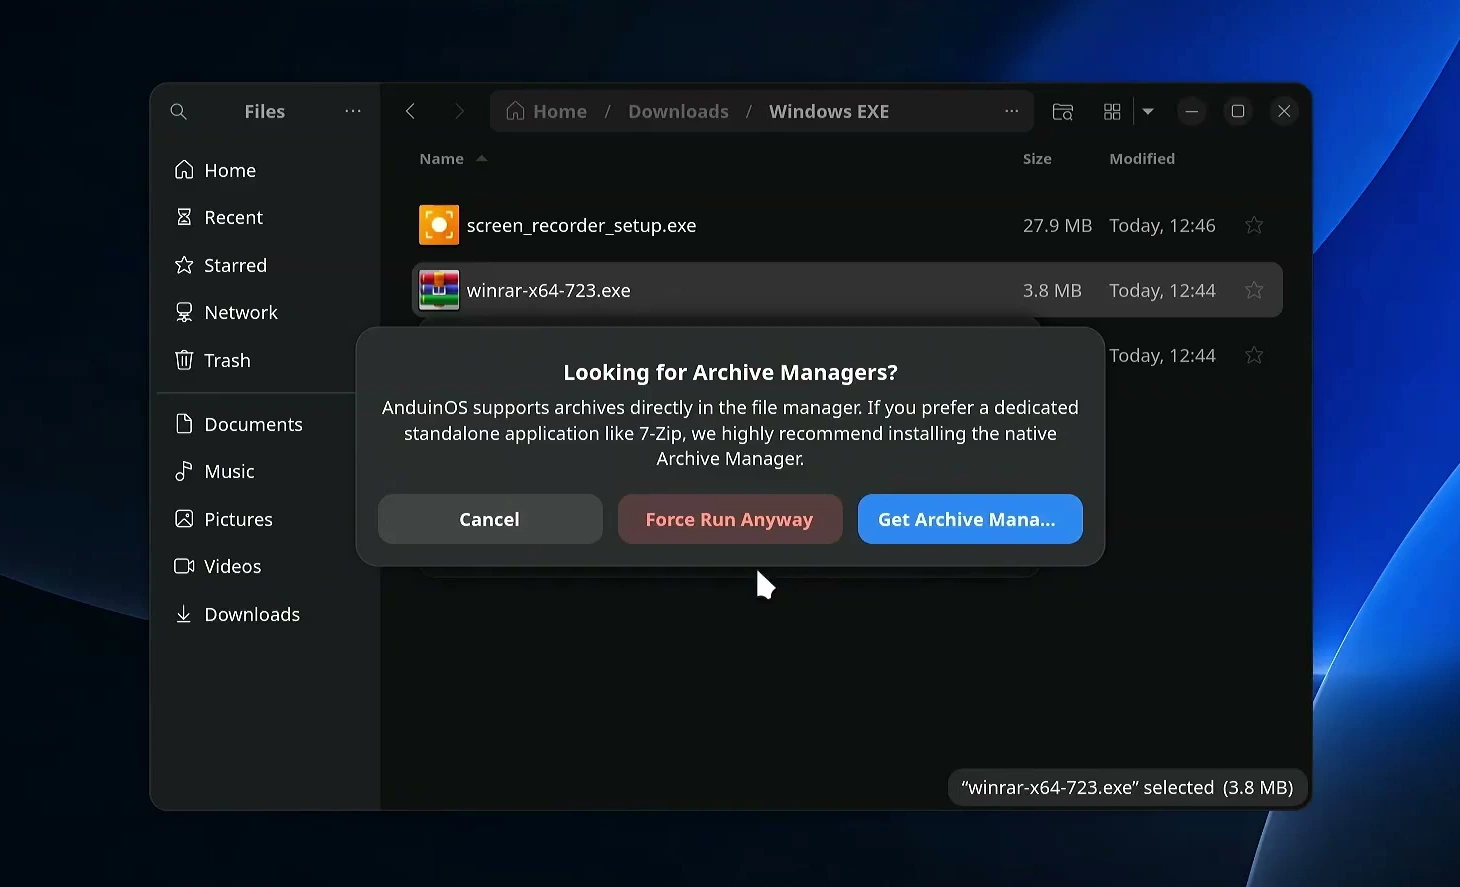
AnduinOS may suggest a native Linux alternative before running an installer. In the demonstration, it recommends a Linux archive manager for WinRAR and FileZilla for WinSCP. Consider the native option first; if you specifically need to test the Windows version, choose Force Run Anyway.
Important: Compatibility depends on the application, especially for complex software and games. If an essential program fails, the three successful launch tests do not establish that it should work. Also, the sandbox label is not a reason to run an untrusted installer.
Open Bottles to find programs added to the environment. From their entries, you can launch them again, adjust settings, add shortcuts, or uninstall them.
Understand snapshots, factory reset, and file backups
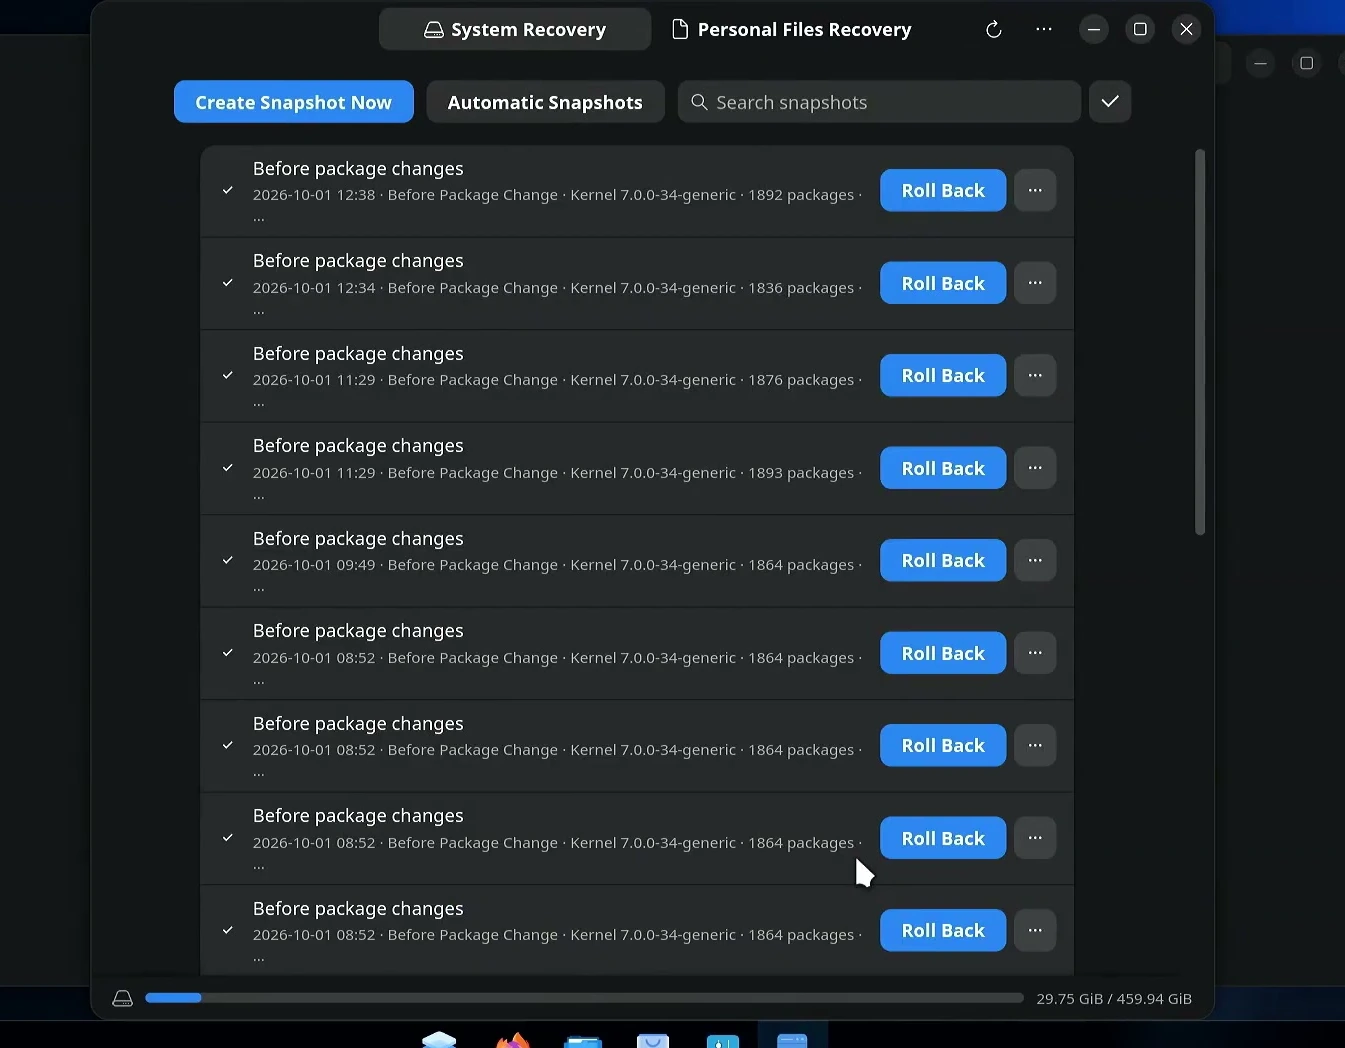
Open Control Panel to access system snapshots and recovery options. With the Btrfs installation used here, AnduinOS can automatically create snapshots before package changes. These preserve an earlier system state that can be selected if a later change causes problems.
In System Snapshots, review the available entries and their dates. The recovery interface provides a Roll Back action for each snapshot. Choose a snapshot from before the problematic change and review any confirmation before proceeding. The demonstration shows these controls rather than a completed rollback test.
The Factory Reset option offers to restore the system to its initial state while keeping personal files by default. Its confirmation also includes Roll back user data, which changes that behavior. AnduinOS states that it creates an additional safety snapshot before resetting.
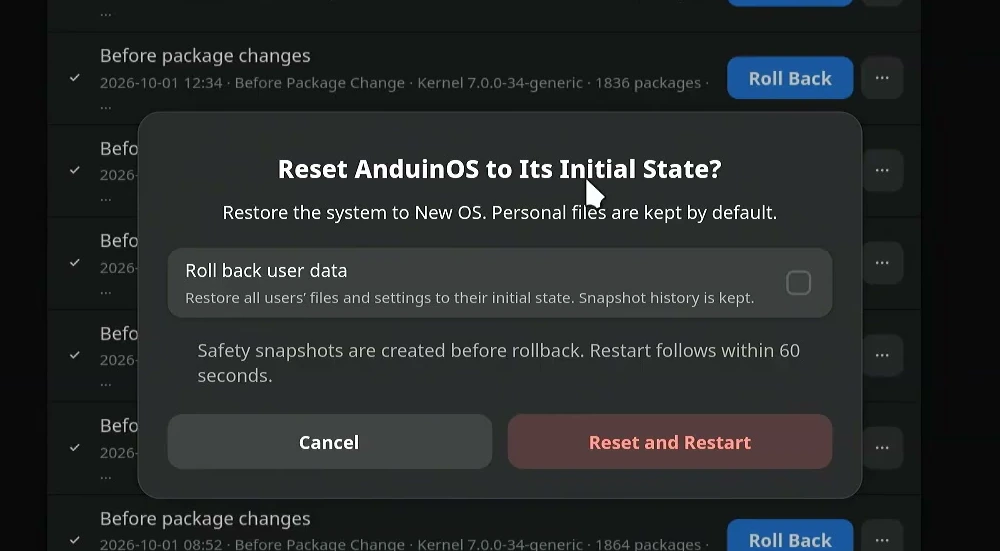
Warning: Back up important files before a reset or rollback. Leave Roll back user data unchecked if you intend to retain current personal files, and read the confirmation carefully. A safety snapshot is not a substitute for a separate backup.
For personal files, AnduinOS also provides a home-folder backup option using Déjà Dup. Use it alongside system snapshots: snapshots help recover from system changes, while a separate file backup protects your documents if the installation drive fails or is erased.