An Android tablet running beside your Windows apps can be useful for trying an app, exploring Android features, or keeping a mobile workspace open on a larger screen. You don’t have to replace Windows or create a dual-boot setup to get that experience.
Android Studio, Google’s official Android development software, includes the Android Emulator. It runs a virtual Android device in a window on your computer. A system image with Google Play support provides the Play Store, so you can sign in and install available apps much as you would on a physical tablet.
Download and install Android Studio
Before downloading, check Google’s Android Studio system requirements for your Windows computer. Pay particular attention to the requirements for running Android Studio together with the emulator. The virtual tablet shares your computer’s RAM, processor, and storage with Windows, so a resource-limited PC may struggle.
You’ll also need an internet connection to download the emulator components and Android system image. Have a Google account ready if you want to install apps through the Play Store.
On the official download page, choose the Windows download and accept the license terms if you agree to them. Open the downloaded installer and keep Android Studio and Android Virtual Device selected. The virtual-device component is needed for this setup.
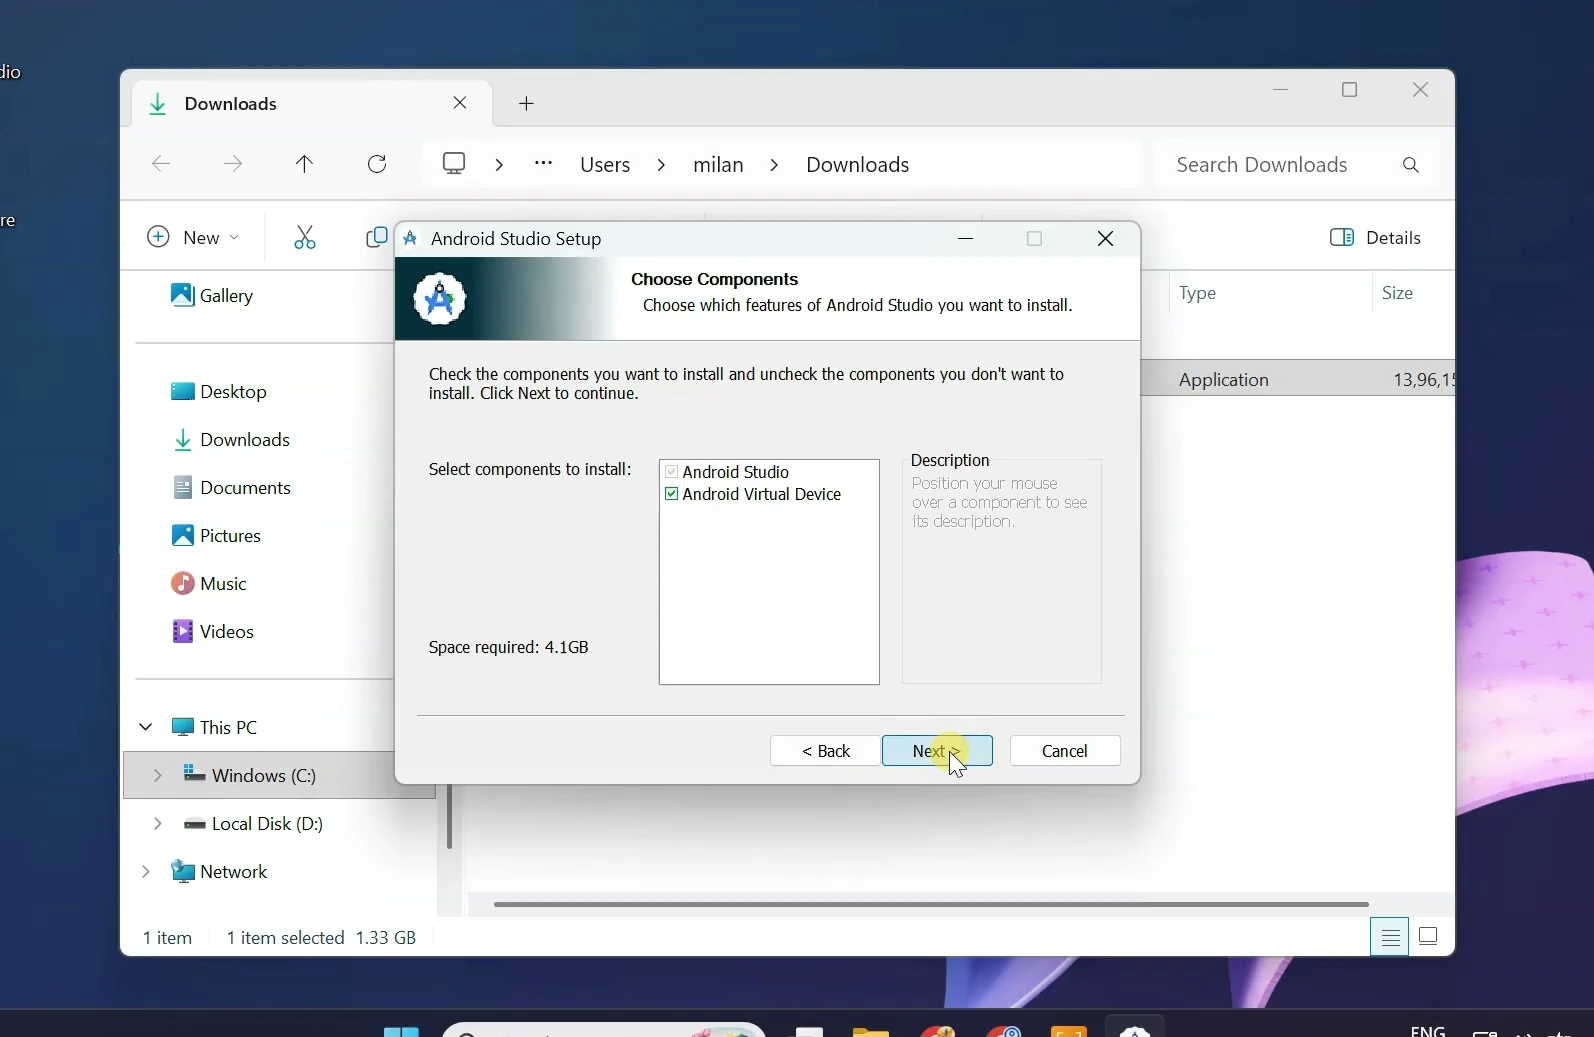
Continue through the installer using the default settings. When installation finishes, leave Start Android Studio checked and click Finish.
Complete the first-run setup
Android Studio’s setup wizard downloads the tools that the emulator depends on. Installing the main application alone does not complete this part of the setup.
- Click Next on the opening setup screen.
- Choose Standard as the setup type, then click Next.
- Review the SDK and emulator components, accept the required license terms if you agree, and continue.
- Wait for the component downloads and installation to finish, then click Finish.
The required components include SDK tools and the Android Emulator. Downloading them can take some time, depending on your connection. Let the setup finish before creating the virtual tablet.
Create a tablet with the Android 17 Google Play image
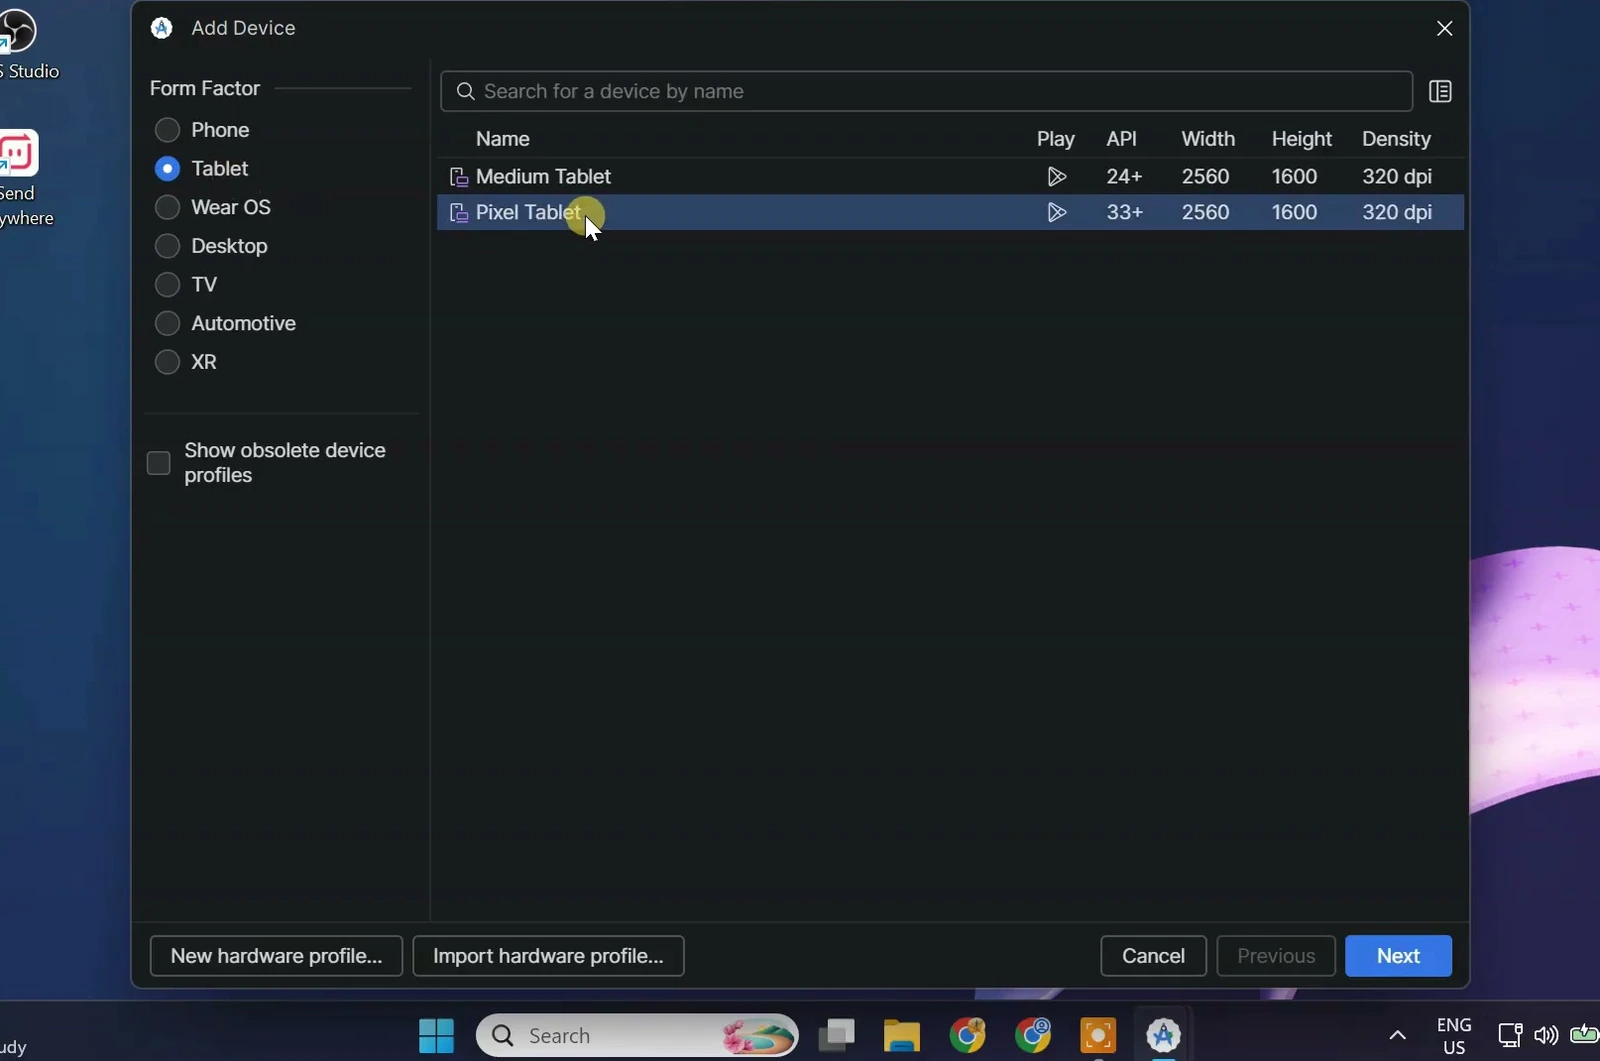
From Android Studio’s welcome screen, open More Actions → Virtual Device Manager. Choose Create Virtual Device, select the Tablet category, and highlight Pixel Tablet. Click Next to choose the Android software that will run on it.
The system image contains the Android operating system for your virtual device. In the image selector, look for API 37.0 / Android 17.0 and select the Google Play Store services filter. Check that the image you choose includes Google Play support before downloading it.
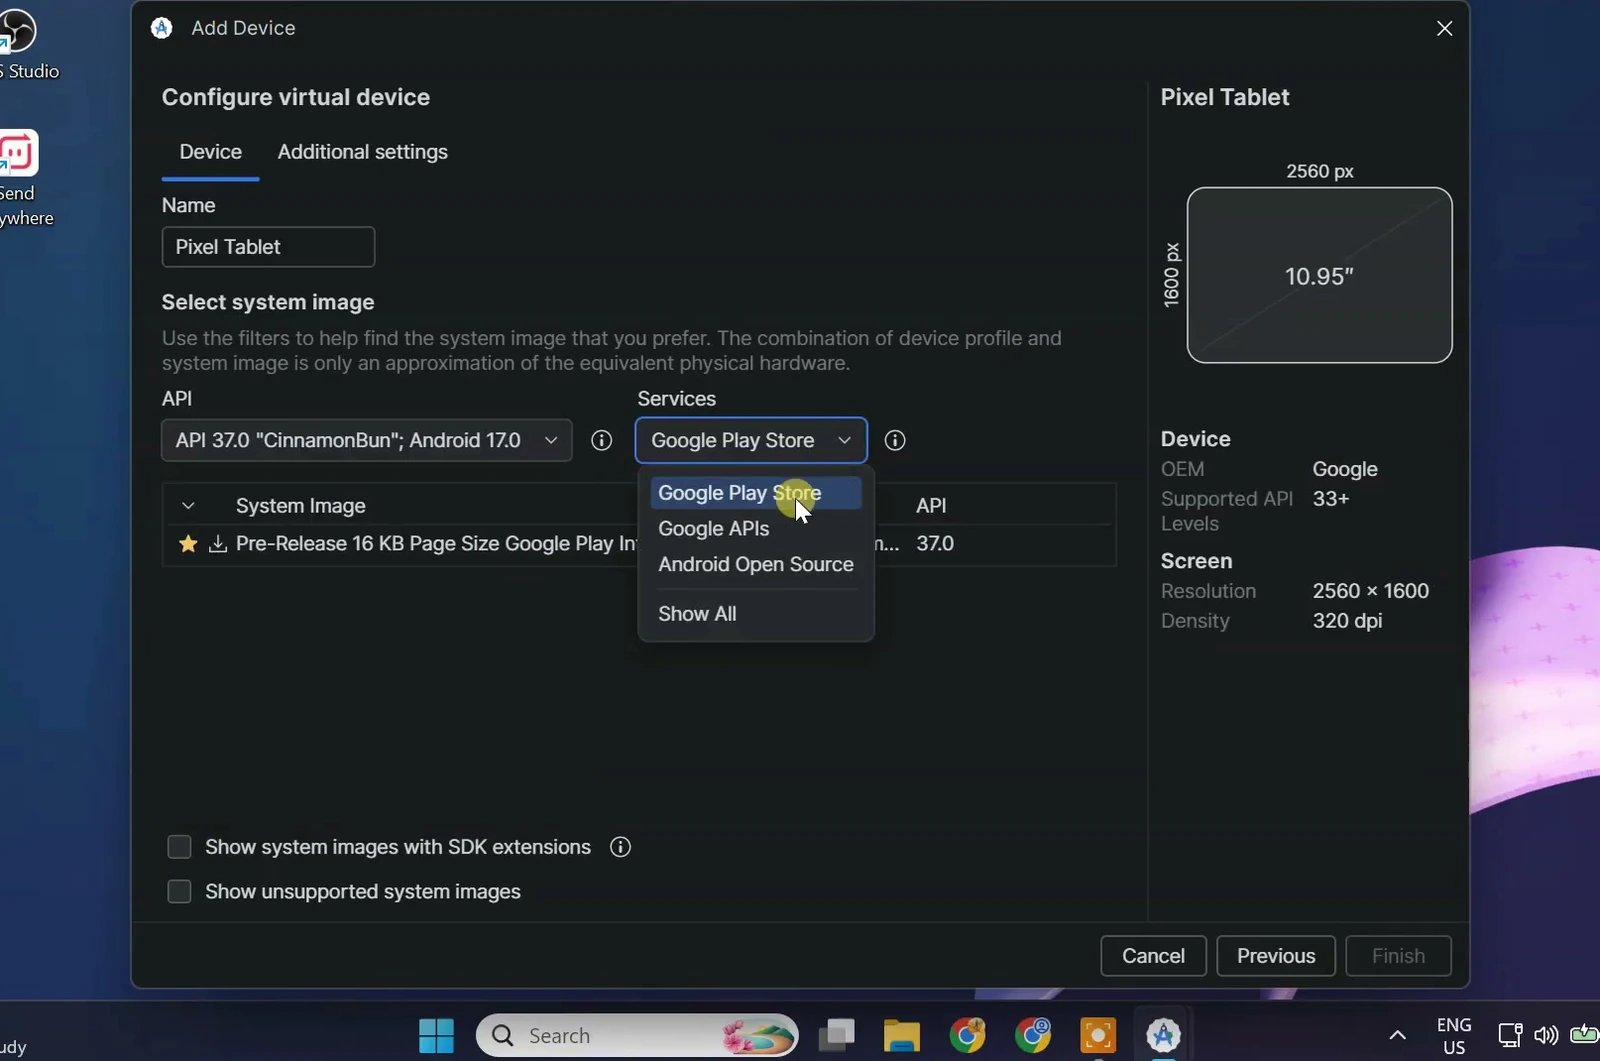
Important: Check the image list in your installed copy of Android Studio. Available downloads can change. If Android 17 with Google Play support is not listed, you cannot complete this Android 17-specific setup using the available images. Choosing another Android release will run that release instead.
Google Play support is essential here. An image without it will not provide the Play Store installation experience described below. If the selected image has not been downloaded, use its download option and wait for installation to complete, then continue to the virtual-device configuration screen.
Balance emulator resources with Windows
Open Additional settings to review memory, processor, storage, and startup options. Giving Android more resources leaves fewer for Windows, so avoid treating the largest available values as the best settings.
- RAM: Around half of your system memory is a starting point, not a requirement. For example, a PC with 16 GB could allocate around 8 GB, provided enough memory remains for Windows and your other applications.
- CPU cores: Adjust the allocation according to your processor, but do not assign all available cores to the emulator. Leave processing capacity for Windows.
- Internal storage: Keep the default capacity if it suits your needs, or increase it for more apps and games. A 50 GB setting is an example, not a required size.
- Default boot: Select Quick so subsequent launches can start faster after the initial boot.
- Orientation: Select Landscape for a layout that fits a typical PC screen.
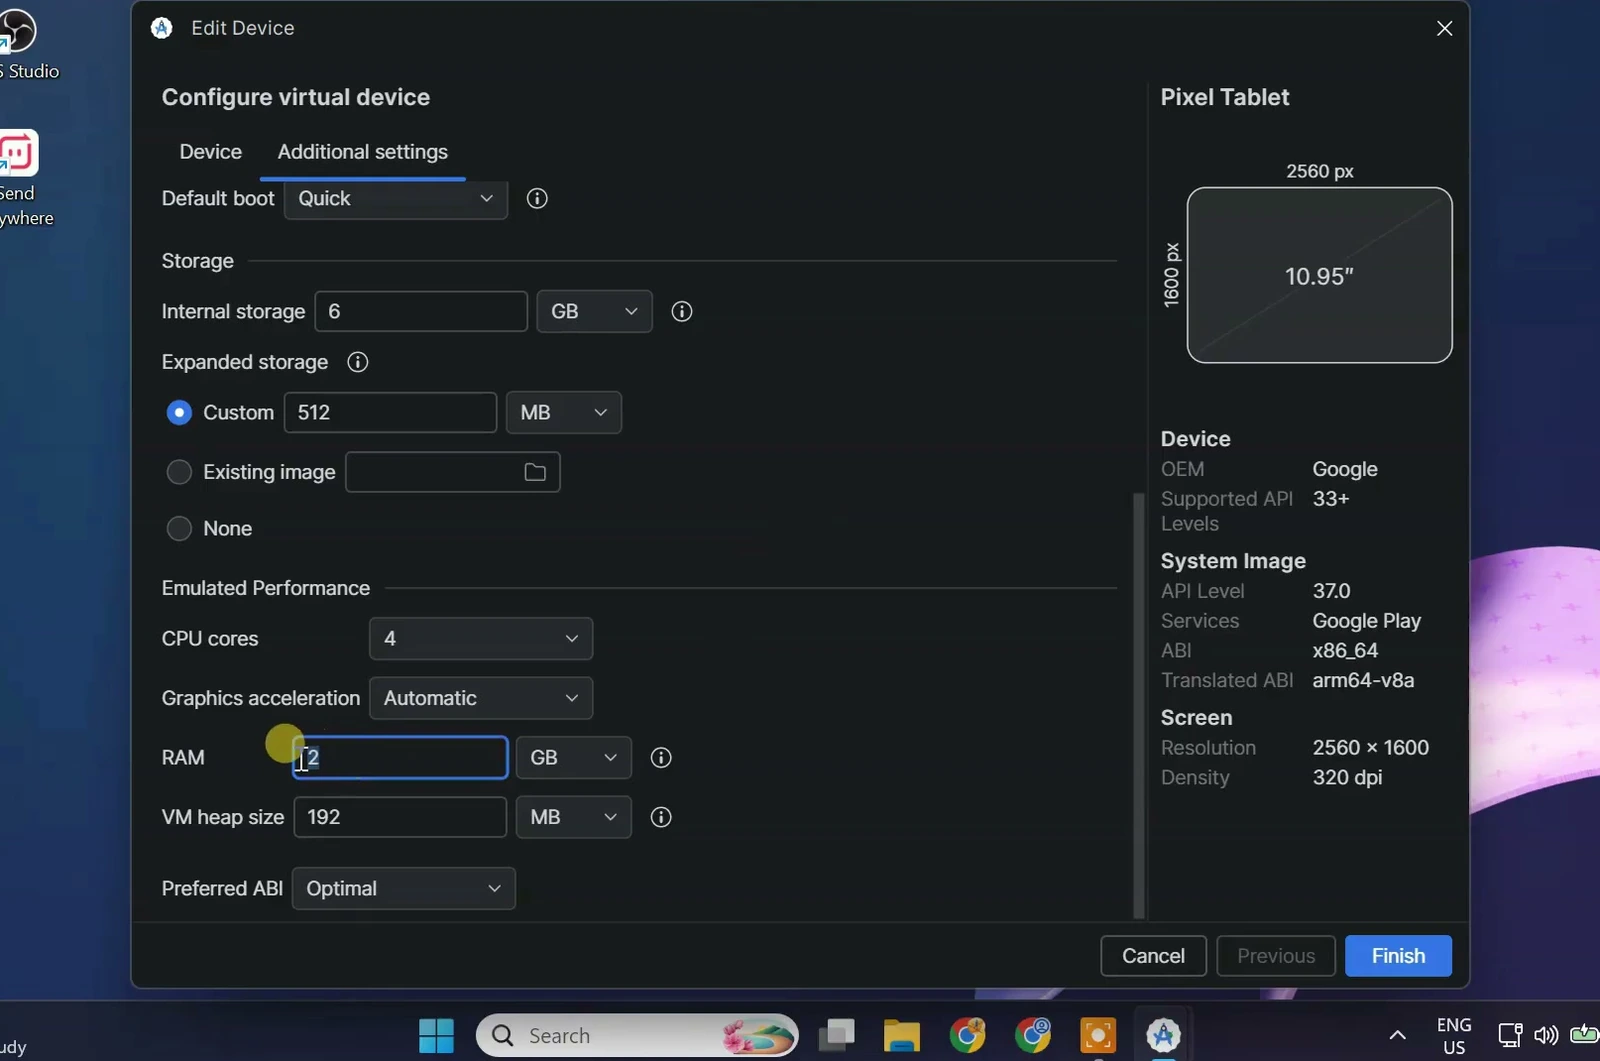
Check the startup options before saving the device. Landscape changes the initial orientation, while Quick boot controls how the emulator starts on later launches.
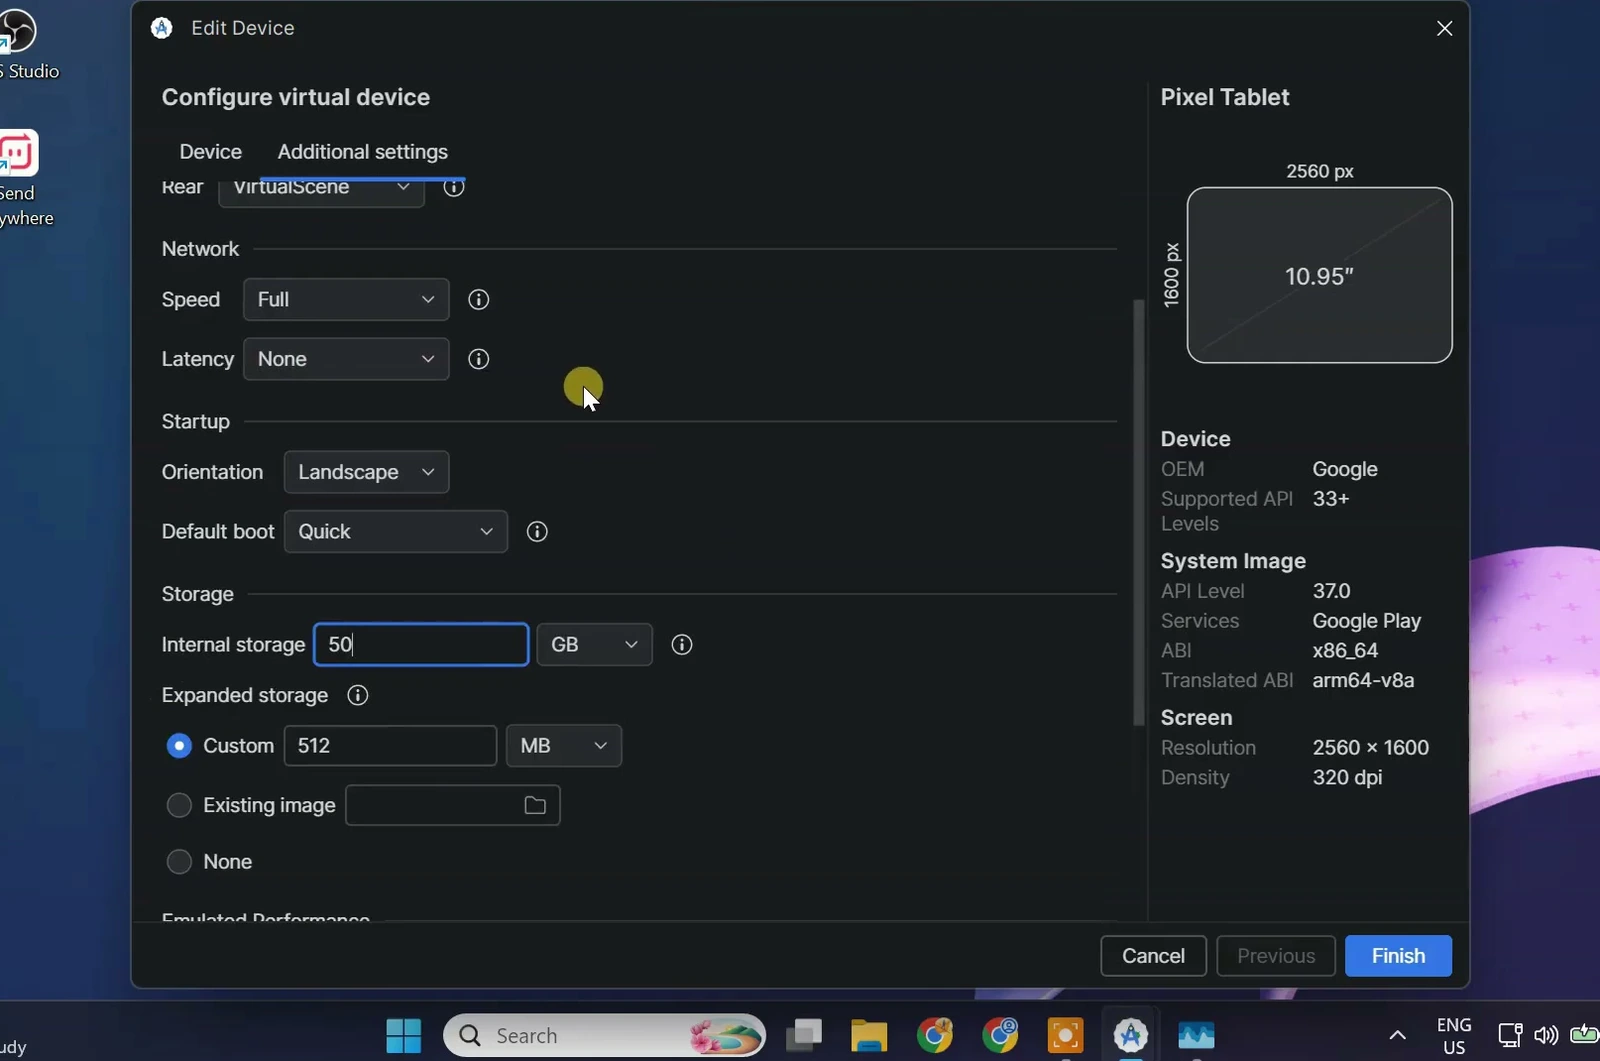
Click Finish to save the virtual tablet and return to Device Manager.
Start Android and install apps from Play Store
Find your Pixel Tablet in Device Manager and check its listed Android version. Click the Play button beside it to launch the emulator. The first boot takes longer because the Android system is starting for the first time. Wait for the home screen before opening apps.
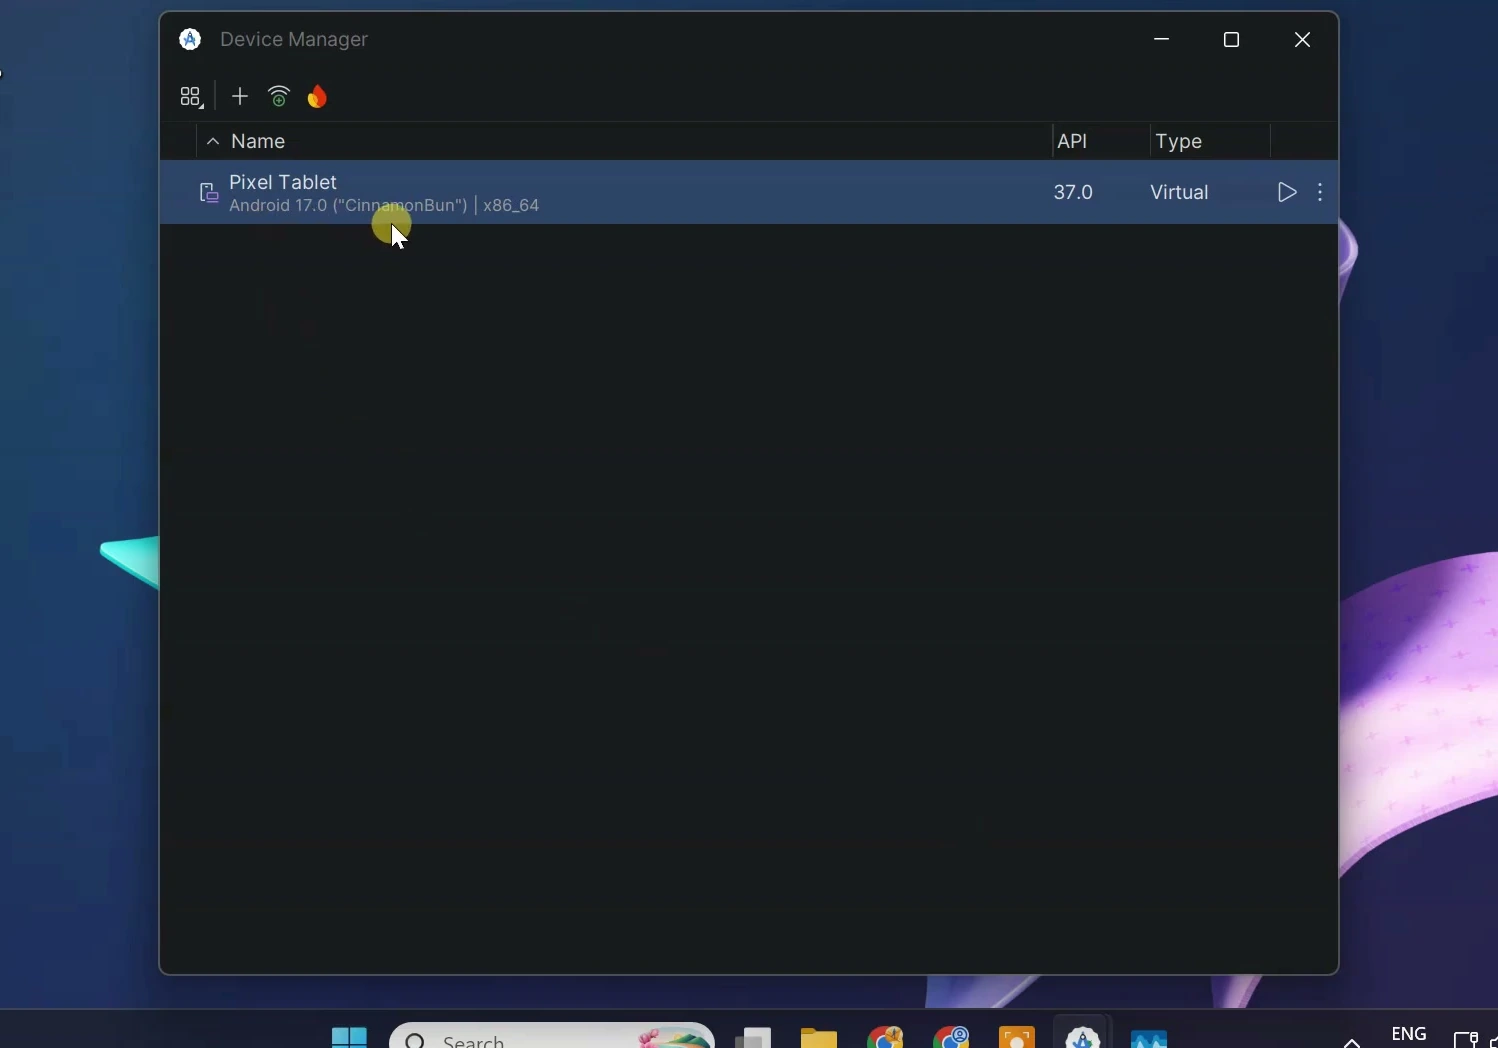
Complete any basic Android setup prompts, then open Play Store and sign in with your Google account. Search for an app, open its listing, and click Install if it is available for the virtual device. Once installation finishes, open the app to check that it works as you need.
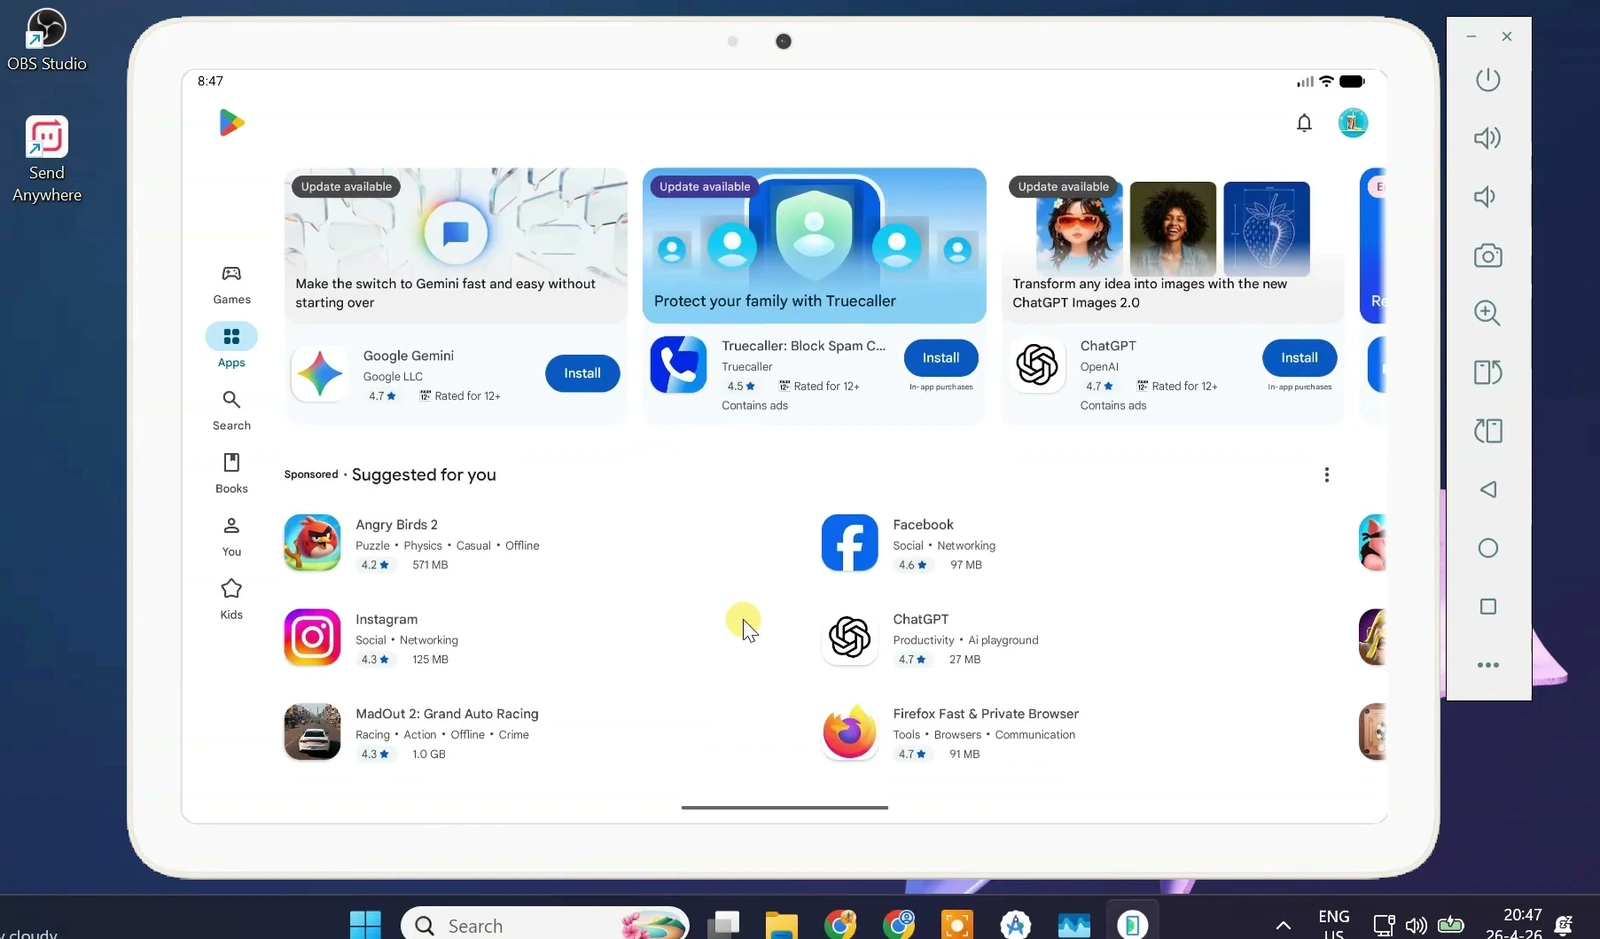
Resize the emulator window to suit your desktop. For later sessions, return to Device Manager and launch the same virtual tablet. With Quick boot selected, subsequent starts should be faster than the initial launch.
What to expect from this virtual tablet
This setup is better suited to app testing, productivity, and general Android use than to demanding PC-style gaming. Performance depends on your computer’s available resources and the apps you run. If Windows becomes sluggish while Android is open, review the emulator’s RAM and CPU allocation rather than increasing it further.
Games may launch, but heavy titles and games that need dedicated keyboard-and-mouse mappings may not work as expected. Mouse input still stands in for many touch actions. A successful installation is therefore only the first check; controls and performance matter too.