An older Windows PC can feel slow even when its hardware is still capable of doing useful work. Limited RAM, background services, and heavier desktop software can make everyday tasks less enjoyable than they should be. But replacing the computer isn’t necessarily the only way to give it another purpose.
One interesting alternative is to run Android on your PC. PrimeOS takes the familiar Android experience and gives it a desktop-style interface, so you can use apps with a monitor, keyboard, and mouse instead of a touchscreen.
I installed PrimeOS 2.1.3 on an older Dell OptiPlex to see how practical that idea really is. The result was an Android desktop that felt surprisingly comfortable for several everyday tasks, although there were some limitations worth knowing about.
What I used for the PrimeOS installation
My test computer was a Dell OptiPlex 7060 Micro with an Intel Core i3-8100T, Intel UHD Graphics 630, and just 4 GB of RAM. It was originally running Windows 10. With almost nothing open, Windows was already using around 70% of the available memory.
I decided to replace Windows on this PC with PrimeOS rather than upgrade the hardware. I used a separate 64 GB SanDisk USB drive to prepare the installer and installed the operating system on the PC’s approximately 512 GB SSD.
PrimeOS is based on Android, but it is not guaranteed to work on every PC. Graphics, networking, sound, boot firmware, and individual Android apps can behave differently depending on the hardware. I recommend experimenting on a spare computer rather than a machine you rely on for important work.
Download the PrimeOS ISO file
First, we need the PrimeOS installation image. An ISO file contains the operating system files that we’ll put on a bootable USB drive.
Open the PrimeOS project page on SourceForge, choose Files, and open the 64-bit folder. For my installation, I downloaded PrimeOS-2.1.3-64-bit-20220719-BETA.iso. Make sure you’re selecting an actual ISO file rather than an update package or Windows installer for another edition.
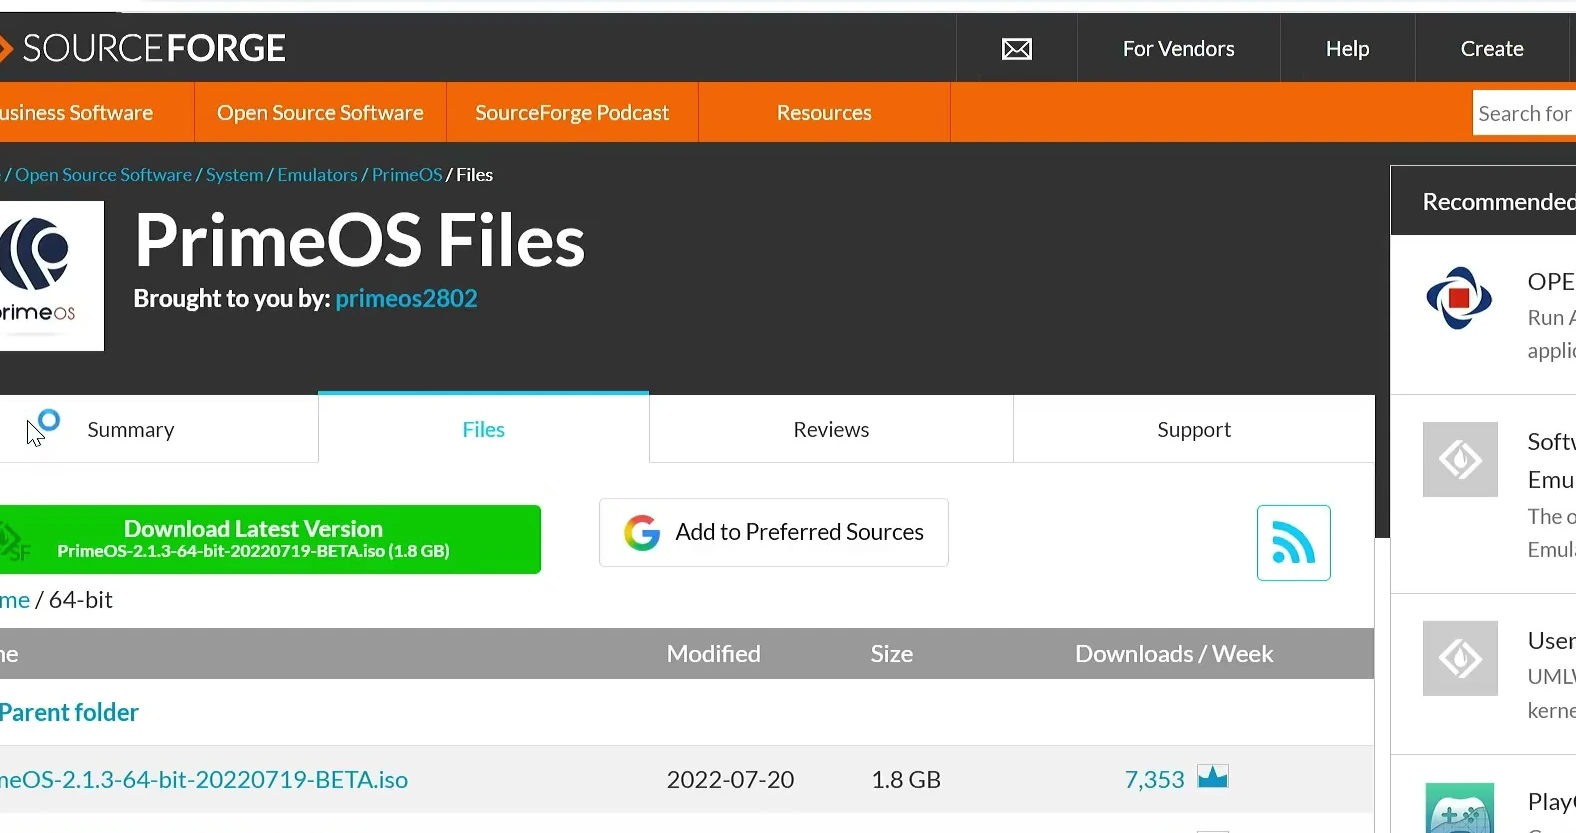
This is a beta build of PrimeOS 2.1.3, which uses Android 11. It isn’t a promise of compatibility with newer PCs or every application available on Google Play.
Create a bootable PrimeOS USB with Rufus
After the ISO finishes downloading, prepare a USB installer using Rufus. It’s a Windows utility that writes operating system images onto USB drives so a computer can boot from them.
Connect your flash drive, download Rufus from its official website, and launch it.
Under Device, select the correct USB drive. Click SELECT next to Boot selection and open the PrimeOS ISO you downloaded. For my Dell, I chose MBR under Partition scheme and kept the remaining options shown in Rufus. Your boot firmware may require different settings, so use the configuration compatible with your PC rather than assuming MBR is right for every system.
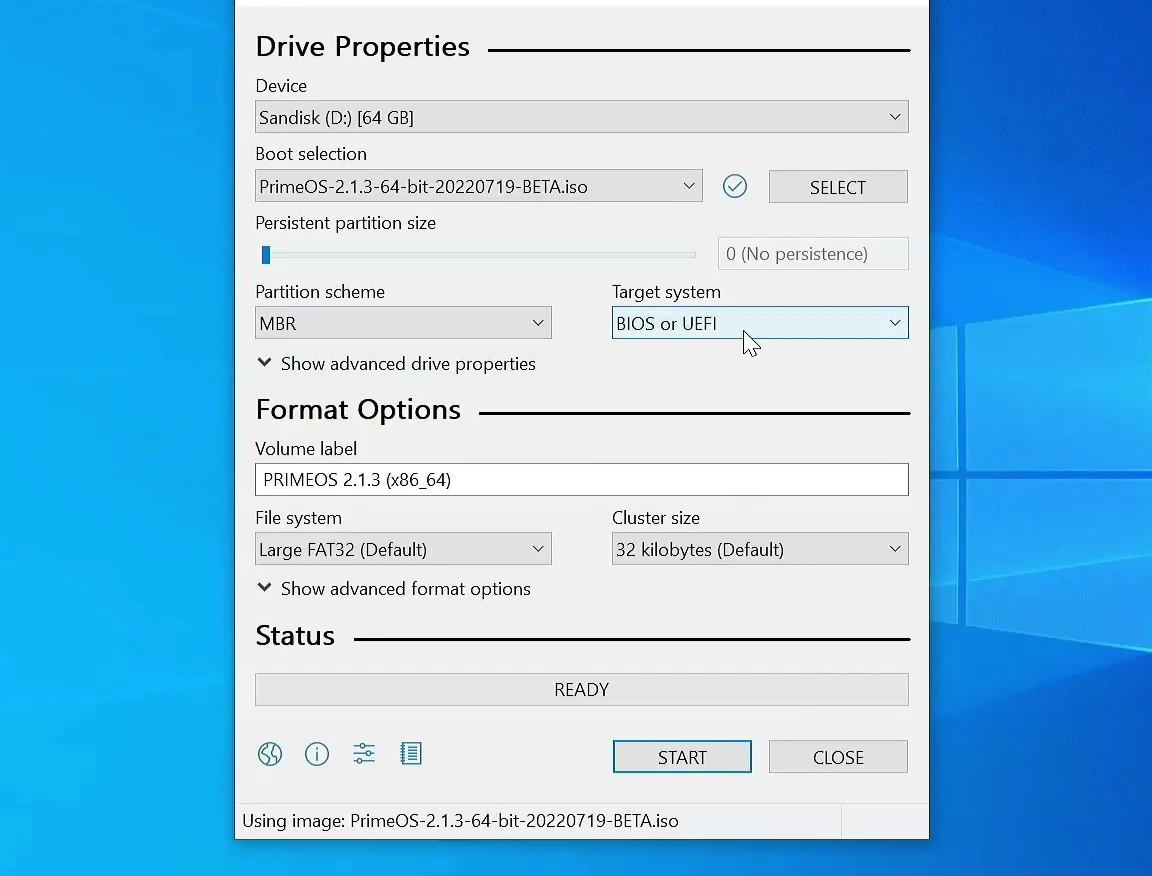
Click START. With this older PrimeOS ISO, Rufus may ask to download additional Syslinux files. Allow it to download the files it needs. If you’re asked to choose between ISO and DD writing modes, keep the recommended ISO Image mode, as I did.
Confirm the USB erase warning and let Rufus write the image. When its status changes to READY, close Rufus and leave the USB connected.
Boot the PC from USB
Restart the computer and open its boot-device menu. On my Dell OptiPlex, I pressed F12 during startup. The key can be different on other computers, so check your manufacturer’s boot-menu instructions if F12 doesn’t work.
Choose the USB drive. PrimeOS will show a boot menu with a Live option for trying the operating system without installing it, and other choices for installation.
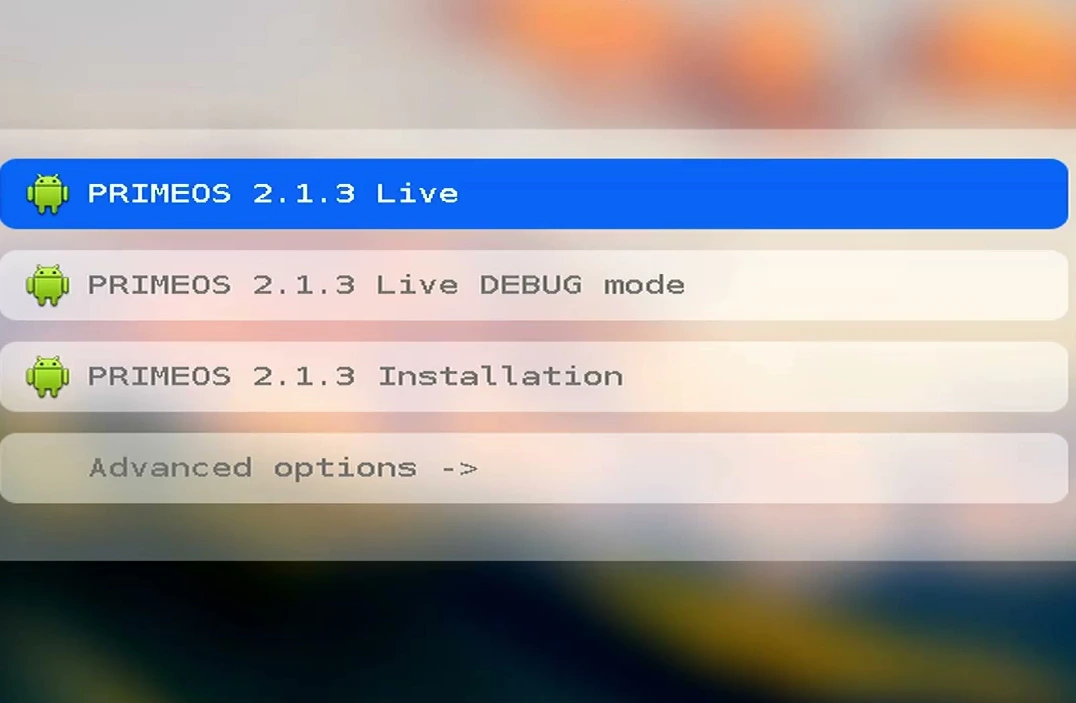
If you’re unsure whether PrimeOS supports your hardware, try Live mode first. I wanted a full SSD installation, so I opened Advanced options and selected PrimeOS 2.1.3 Auto Install to specified hard disk.
Choose the destination SSD and install PrimeOS
The automatic installer now lists the connected storage devices. This is the most important selection in the process because the drive you choose will be wiped.
On my computer, the internal approximately 512 GB SSD appeared as sda (Matrix 512GB), while the approximately 64 GB SanDisk installation USB appeared as sdb. I selected the internal SSD, not the USB drive.
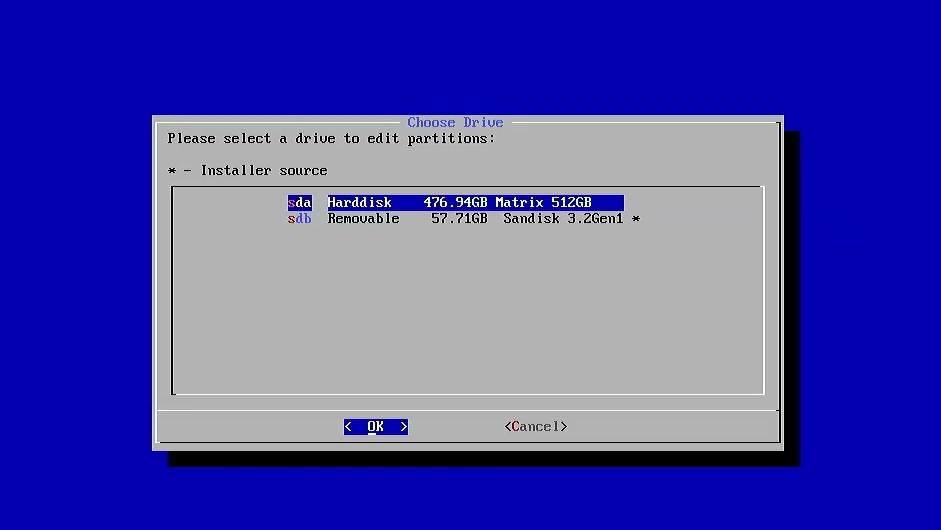
After selecting the drive, PrimeOS displays a final warning that it will erase the entire disk. Only choose Yes if you’ve already backed up your data and deliberately want to replace what’s on that drive.
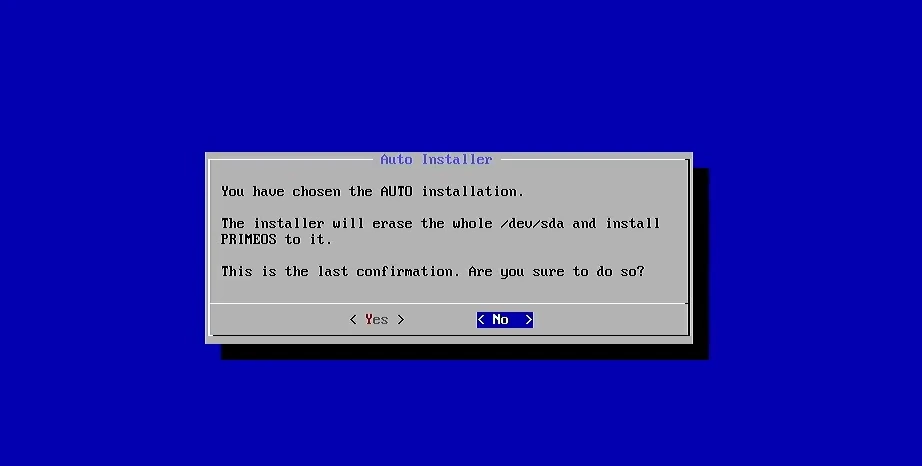
The automatic installer then creates the required partitions, formats the destination, and copies the PrimeOS files. For this method, I didn’t need to create partitions manually.
When installation finishes, choose Reboot. Remove the installer USB during the restart so the computer starts from its SSD instead. If everything goes as expected, a PrimeOS 2.1.3 boot entry will appear.
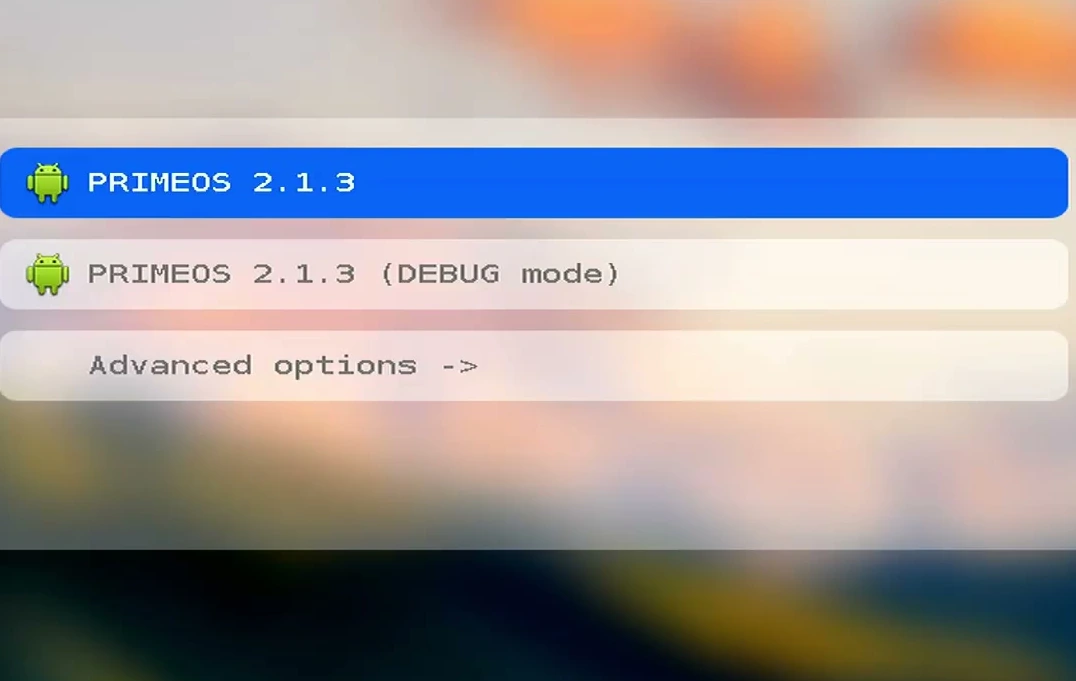
Complete the first-time setup
At the PrimeOS welcome screen, click Proceed, enter a username, select your time zone, and accept the license terms after reviewing them. PrimeOS will complete its initial configuration and prepare the included Google apps.
Once setup finishes, you’ll arrive at an Android desktop. Mine opened with a wallpaper, desktop shortcuts, and a taskbar across the bottom of the screen.
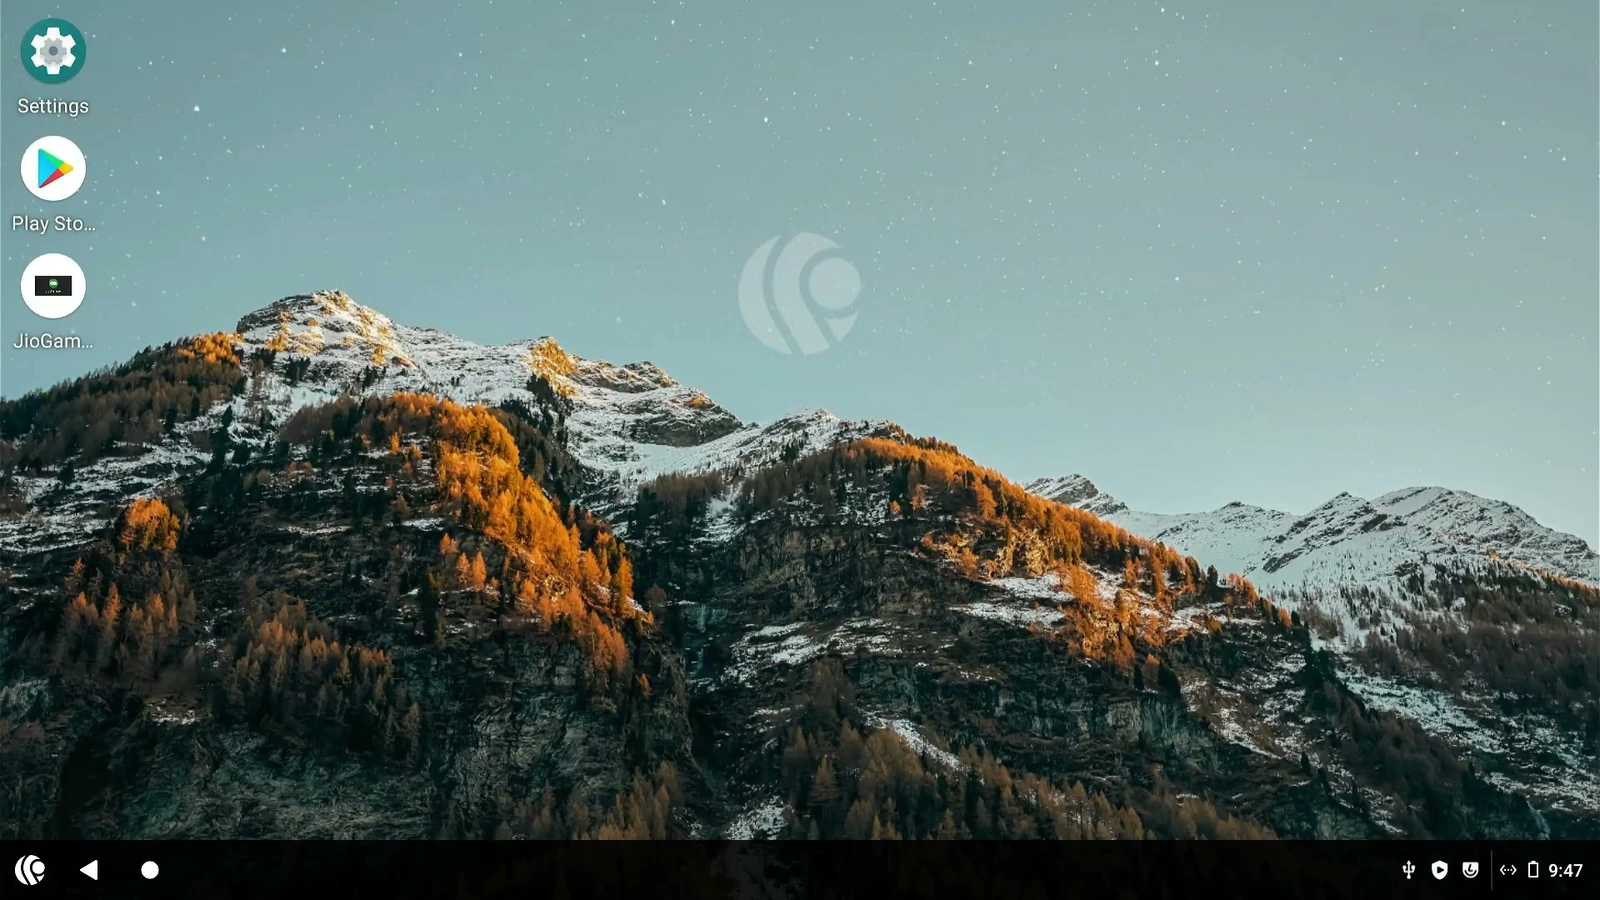
The app launcher looks a little like a Windows Start menu, with an application list and search field. Android’s usual navigation controls are still present, but you also get familiar desktop features such as app windows and taskbar shortcuts.
Explore the desktop, settings, and multitasking
Open Settings or Files and you’ll notice that supported apps appear in movable windows rather than always filling the whole screen. I could drag them around, resize them, minimize them, and open more than one at a time.
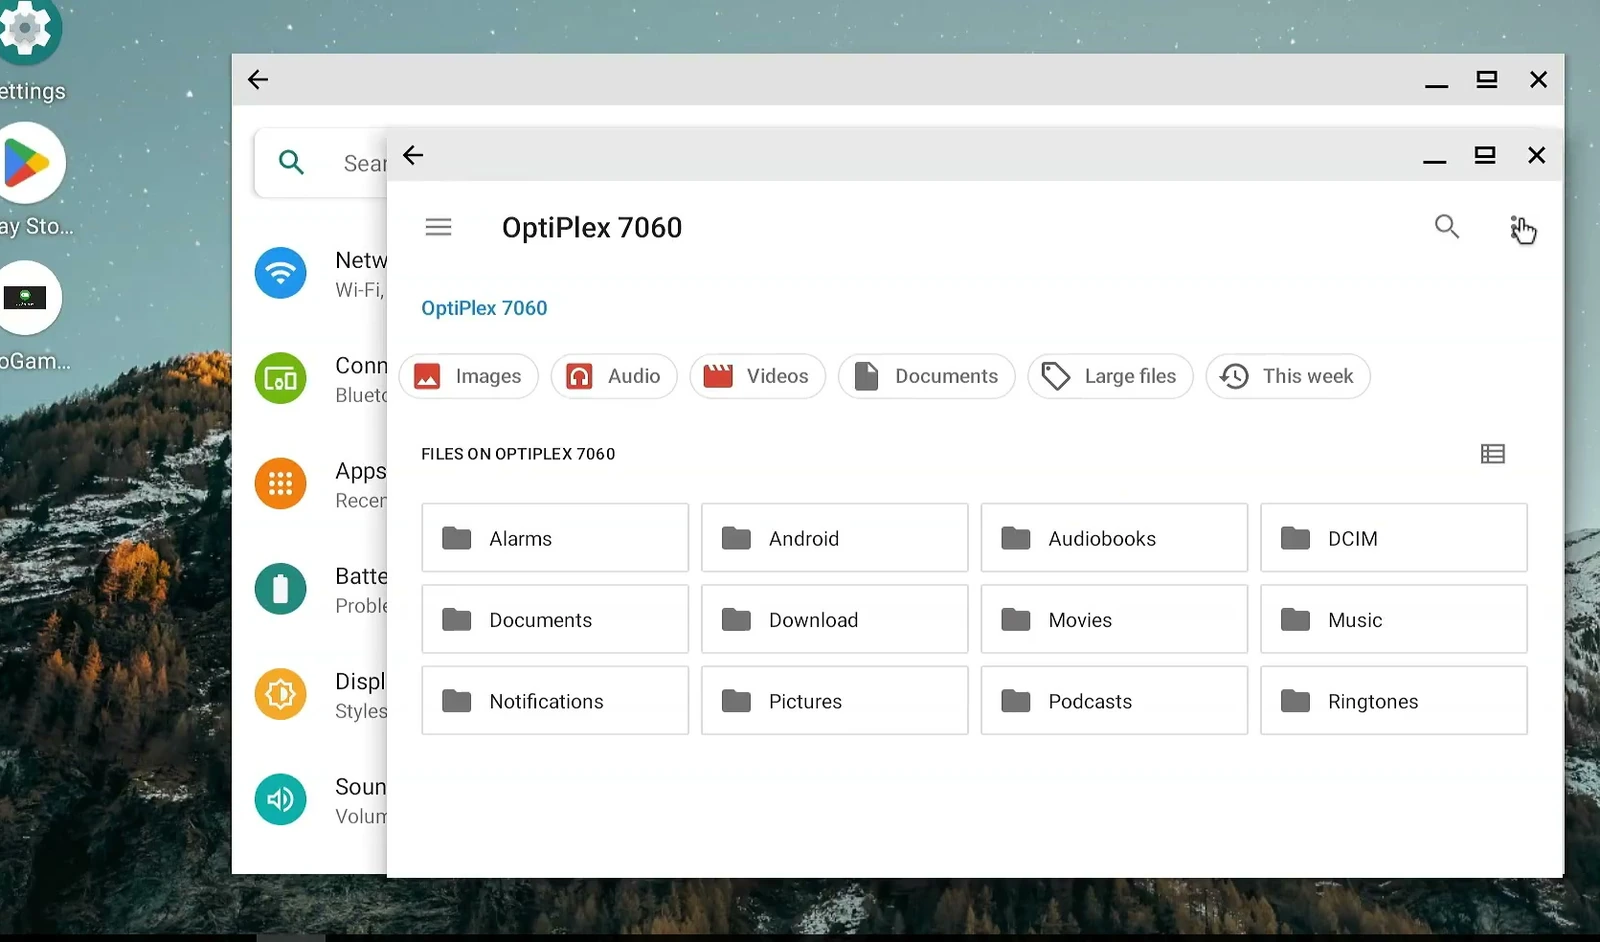
Running applications appear on the taskbar, and Alt + Tab makes it easy to switch between supported windows. It feels closer to a lightweight desktop environment than to simply mirroring a phone.
PrimeOS also includes a settings area called Prime Hub. It contains desktop-specific options such as mouse click behavior, app compatibility, and scroll sensitivity. I noticed that my mouse wheel was scrolling in the opposite direction from what I was used to on Windows. Changing Invert mouse scroll direction solved that annoyance.

You can also open Android’s notification panel and quick settings, with controls for things like rotation, notifications, and screen recording. Some toggles may appear even when your PC lacks the corresponding hardware.
Install Android apps from Google Play
One of the nicest parts of this setup is that the Google Play Store was already included in my PrimeOS installation. I opened it, signed in with my Google account, and installed apps without hunting for APK downloads.
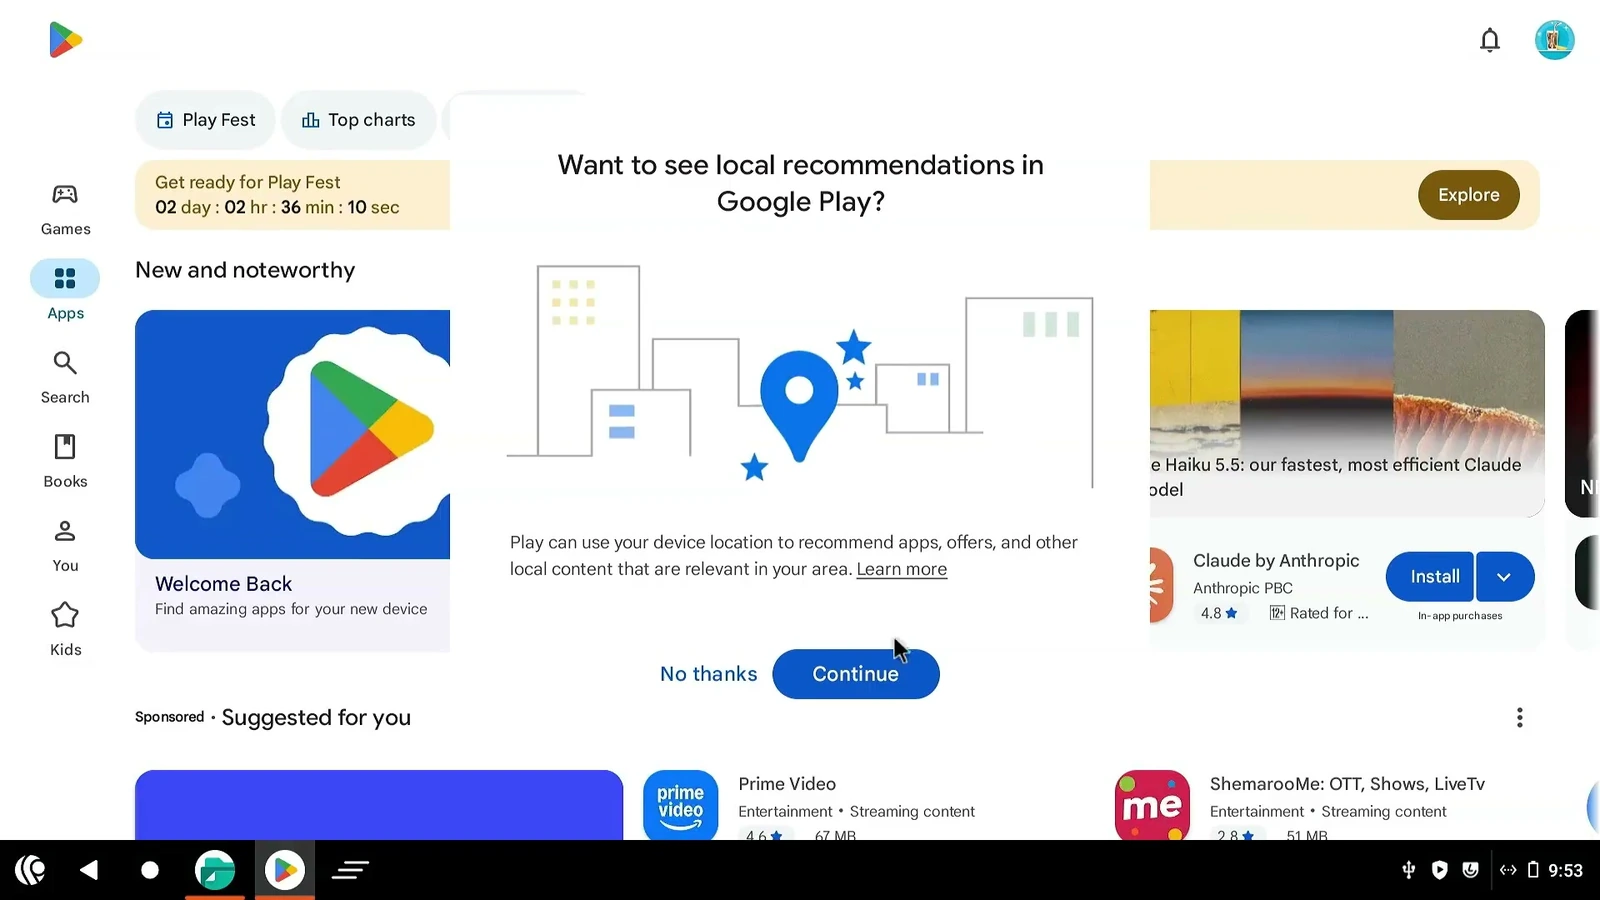
I started with Chrome and YouTube, then added a hardware information app called DevInfo. I also installed or tried apps such as Spotify, Telegram, Gmail, Google Drive, Facebook, Instagram, and Google Maps.
Some apps created desktop shortcuts after installation, which made the system feel more like a conventional PC. Keep in mind that Play Store availability and individual app compatibility can change, especially on an older Android build.
How PrimeOS performed with just 4 GB of RAM
I wanted to know whether Android was genuinely using this old hardware more comfortably, not just looking different. In DevInfo, PrimeOS reported Android 11, about 3.63 GB of usable RAM, my Intel Core i3-8100T with four CPU cores, and Intel UHD Graphics 630.
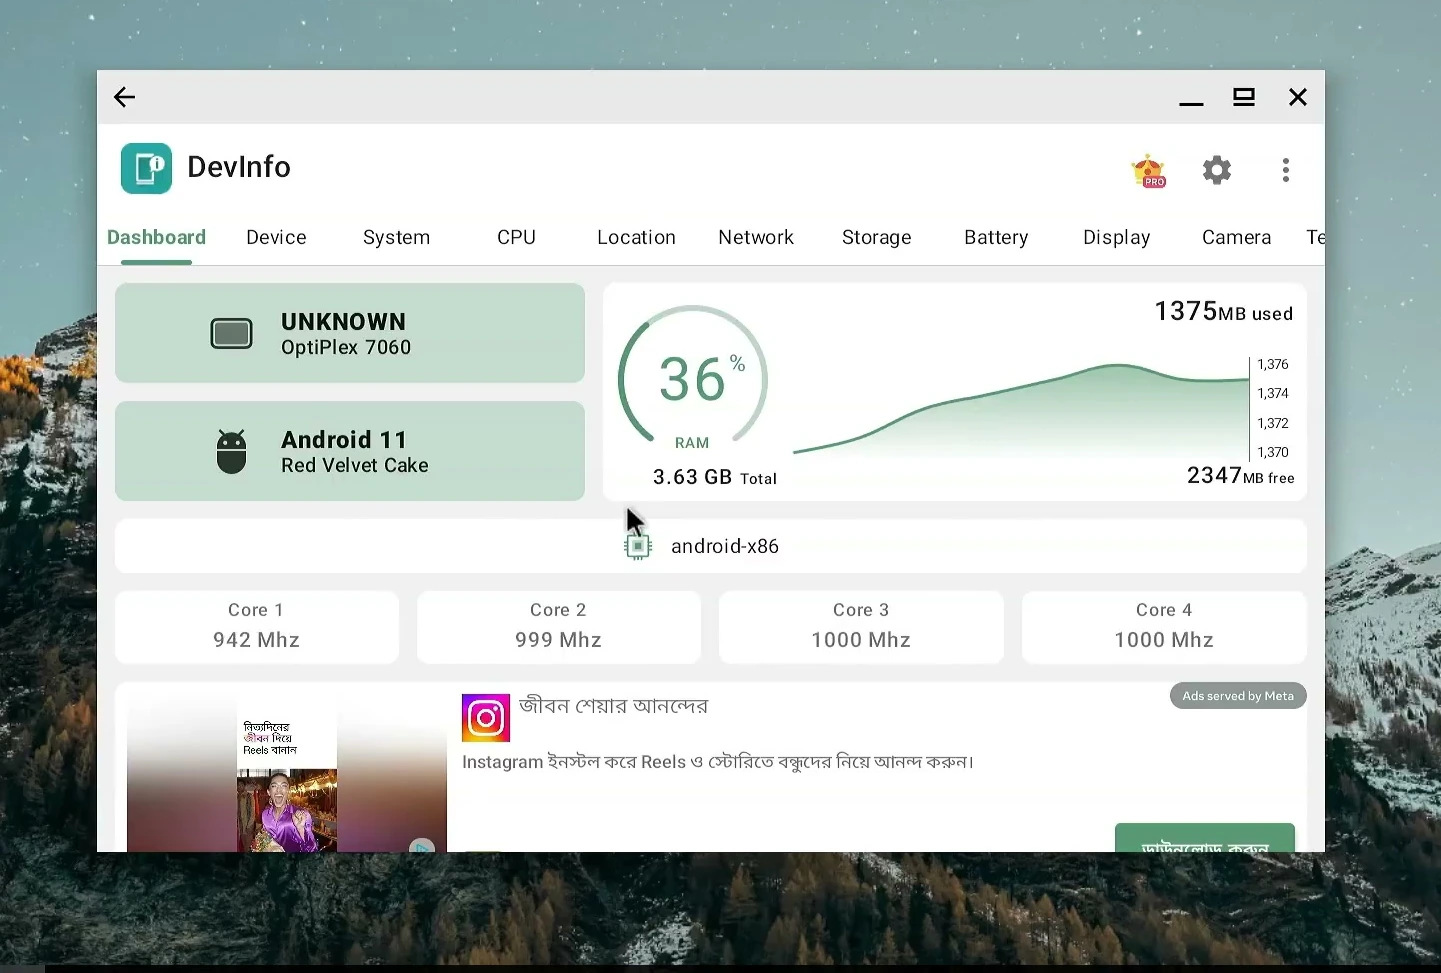
At idle, the memory reading was around 36%, or roughly 1.3 GB. That left plenty of headroom for basic apps on this particular system. It’s not a perfectly controlled comparison against Windows, but it explains why the desktop felt relatively light.
DevInfo has a floating CPU and RAM monitor, which I enabled so I could watch the system while using other apps.
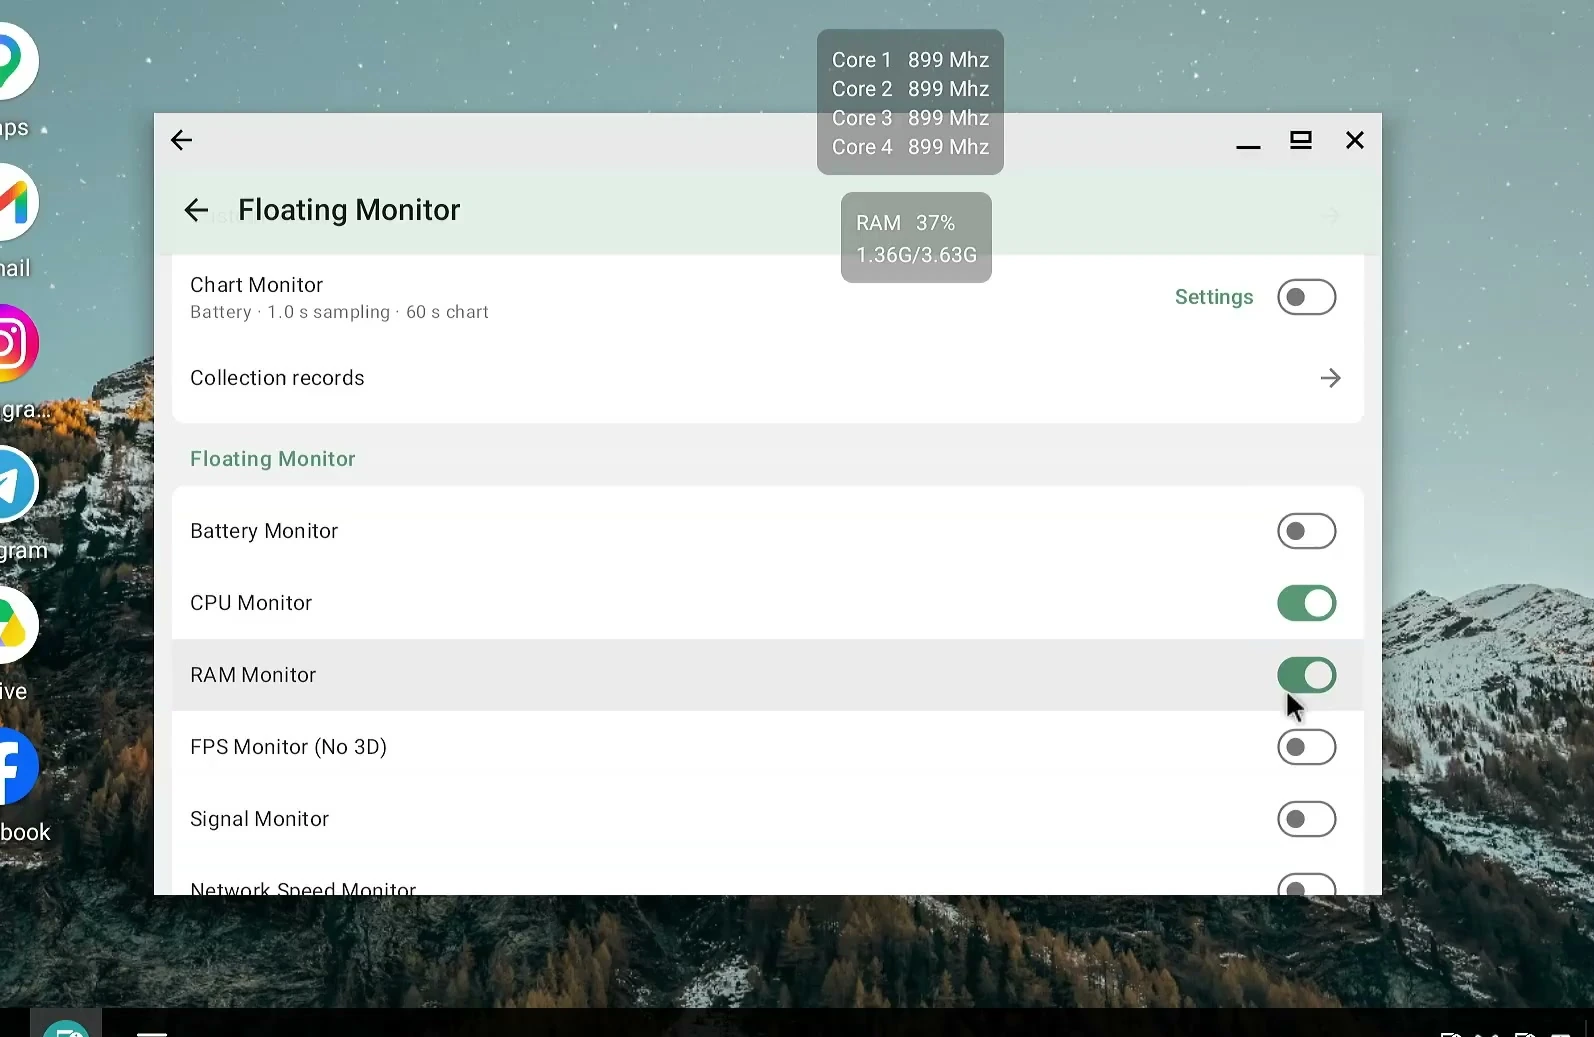
With Chrome and Reddit open, pages loaded quickly and scrolling was responsive. RAM usage generally stayed around 40–50%. Opening several Android apps together also worked well: I had multiple windows visible and saw memory use around 52%, approximately 1.9 GB of the reported usable RAM.
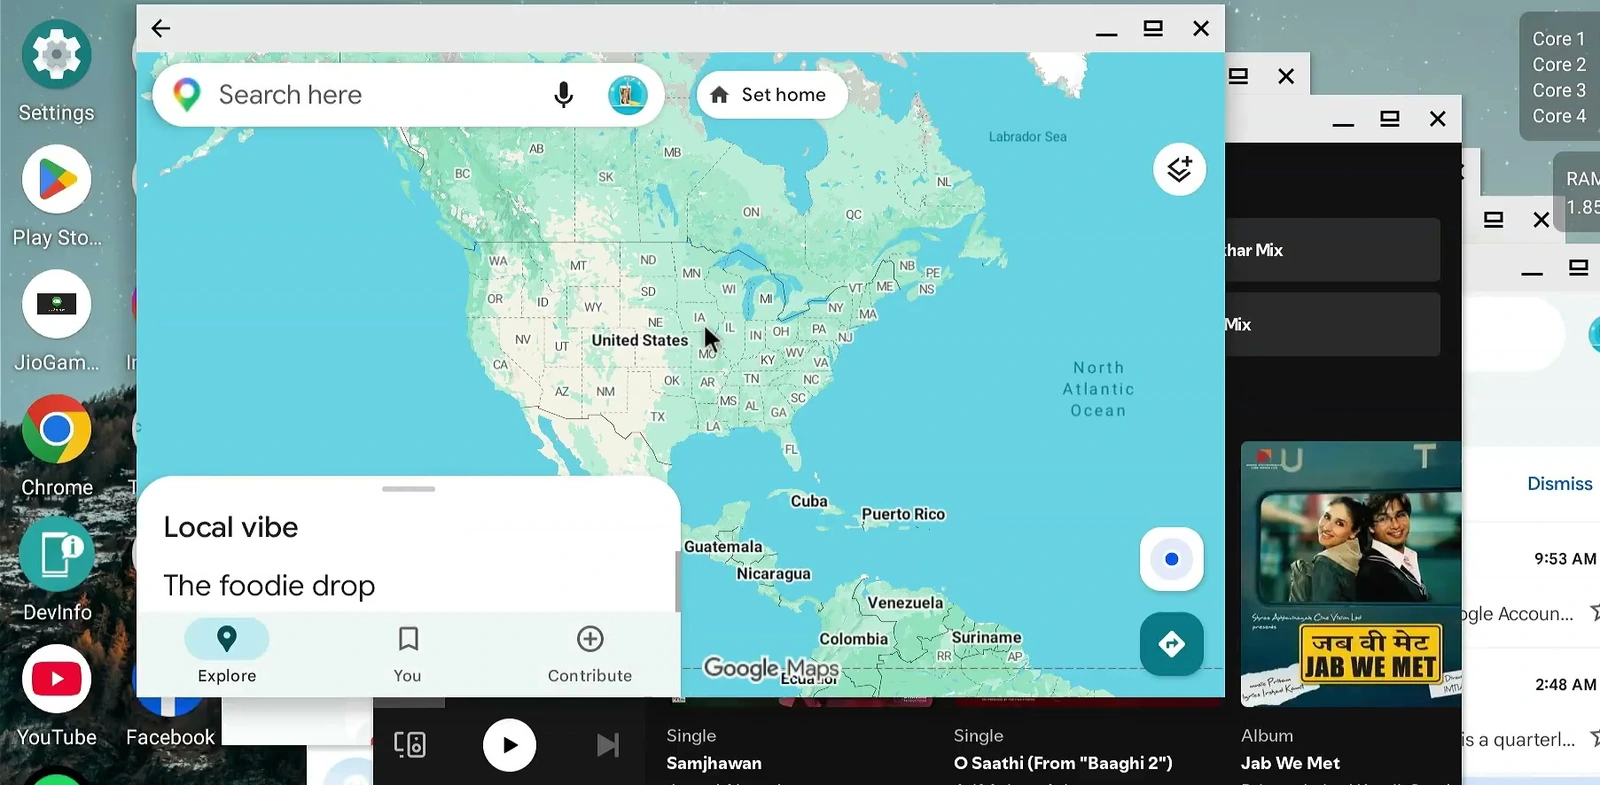
Those numbers reflect my own setup and the apps I happened to run. A different PC, background workload, or PrimeOS build may produce quite different results.
Browsing, YouTube, and media controls
Web browsing was one of the more pleasant surprises. Chrome felt responsive, and ordinary sites didn’t make the machine struggle in my testing.
I also played YouTube in Chrome. 1080p and 1440p playback were smooth on my machine. I pushed it to 4K as well. The video was watchable, although I noticed occasional small stutters, with memory use around the 50–60% range.

Since this desktop doesn’t have the physical volume buttons you get on an Android phone, I used the Volume panel option in quick settings to bring up an on-screen volume slider. The notification panel also offered media playback controls.
Some streaming apps didn’t work properly
Not every Android app behaved as well as Chrome or Gmail. Netflix installed and launched on my system, but I couldn’t get it into a usable state.
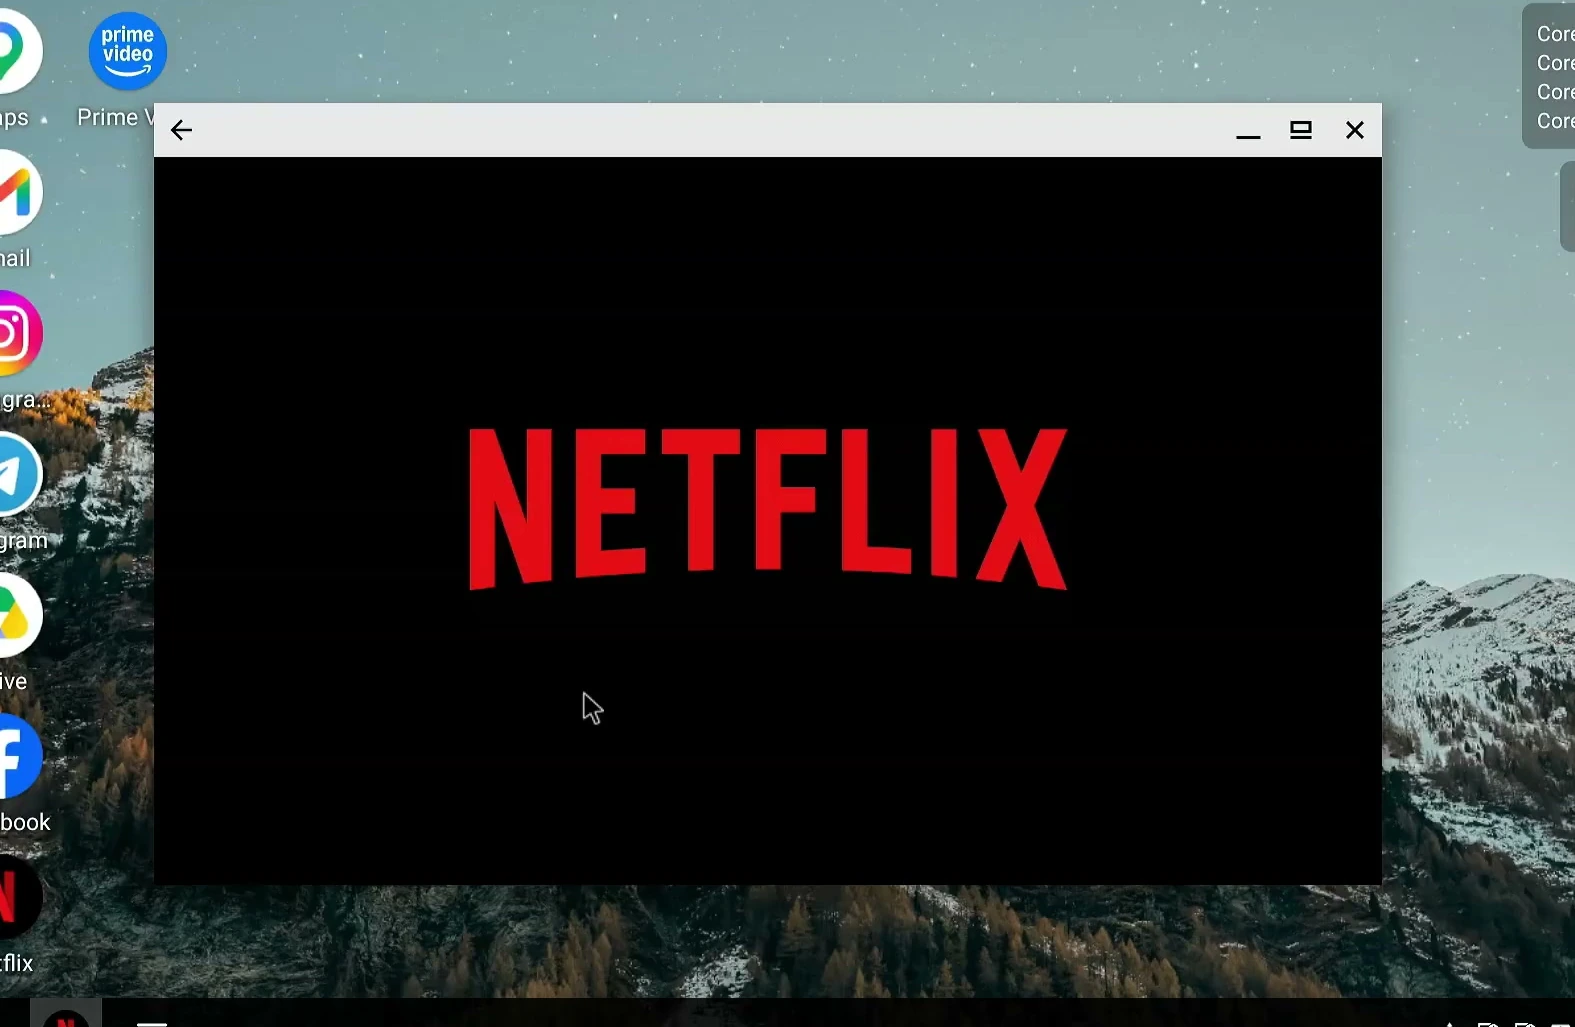
Prime Video went a little further. I could sign in, browse the catalogue, and open individual movie pages, but the actual video failed to play.

Protected streaming services often rely on DRM capabilities and device certification, which can be limited on unofficial Android-for-PC builds. I can’t confirm the exact cause of these failures on my machine, but they’re a good reason not to assume every streaming subscription will work just because the app installs.
Play Android games with a keyboard and mouse
PrimeOS includes a Gaming Center that brings installed games together. Its most useful feature is the keyboard-and-mouse mapping system, which lets you assign physical controls to places where a game expects touchscreen input.

I first installed Subway Surfers from Google Play. It ran smoothly in a window, and its controls felt responsive on this 4 GB PC. It’s a relatively lightweight game, but it was a good starting point.

For a more demanding test, I installed Free Fire MAX. It launched successfully, and I was able to join a match. In the mapping editor, I assigned keyboard controls for movement, jumping, crouching, weapons, and other actions, while mapping the mouse for aiming and shooting.
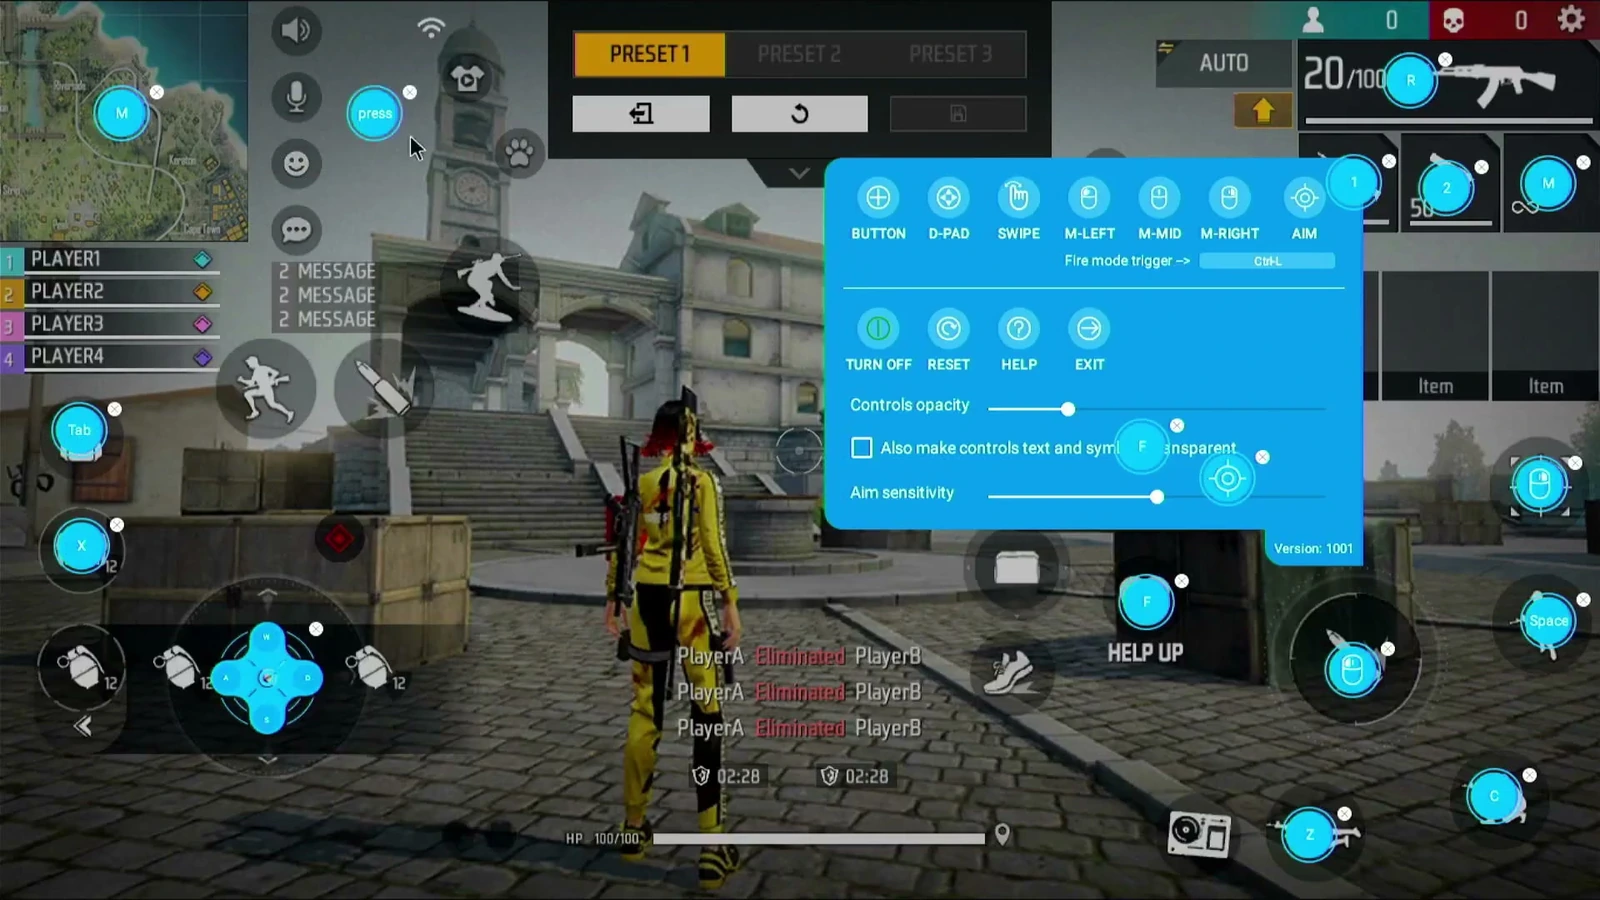
It took a little adjustment to get the layout comfortable, but I could actually play Free Fire MAX on the Dell’s Core i3, 4 GB RAM, and integrated graphics.

Don’t expect every modern Android game to run this well. Some titles have higher hardware demands, compatibility restrictions, or rules around emulated and mapped input. Check the game’s policies and set your expectations according to your own system.
Is PrimeOS worth installing on an old PC?
For my Dell OptiPlex, PrimeOS turned out to be a fun and surprisingly usable alternative to Windows. The desktop interface felt familiar, Google Play made installing apps convenient, and everyday browsing and light multitasking worked well with only 4 GB of RAM.
The experience wasn’t perfect. Wi-Fi and Bluetooth weren’t available on my hardware, and protected streaming apps were unreliable. Those are meaningful compromises if you want to use the PC as your main computer or media center.
But if you have a spare desktop and want to try Android apps or some lighter games on a larger screen, PrimeOS is worth exploring. Just check compatibility first, keep a backup of your files, and take extra care when choosing the installation drive.