When colleagues need to work in the same spreadsheet, moving it to OneDrive or SharePoint is not the only option. Excel’s Share Workbook (Legacy) feature allows multiple users to open and edit one workbook stored in a shared folder on your local network.
This method uses Windows desktop Excel with the legacy sharing command available, and computers connected to the same Wi-Fi or Ethernet network. Unlike modern live co-authoring, changes are exchanged when users save—not as each person types. You need to enable sharing in Excel and give colleagues permission to edit the folder containing the file.
Enable legacy workbook sharing in Excel
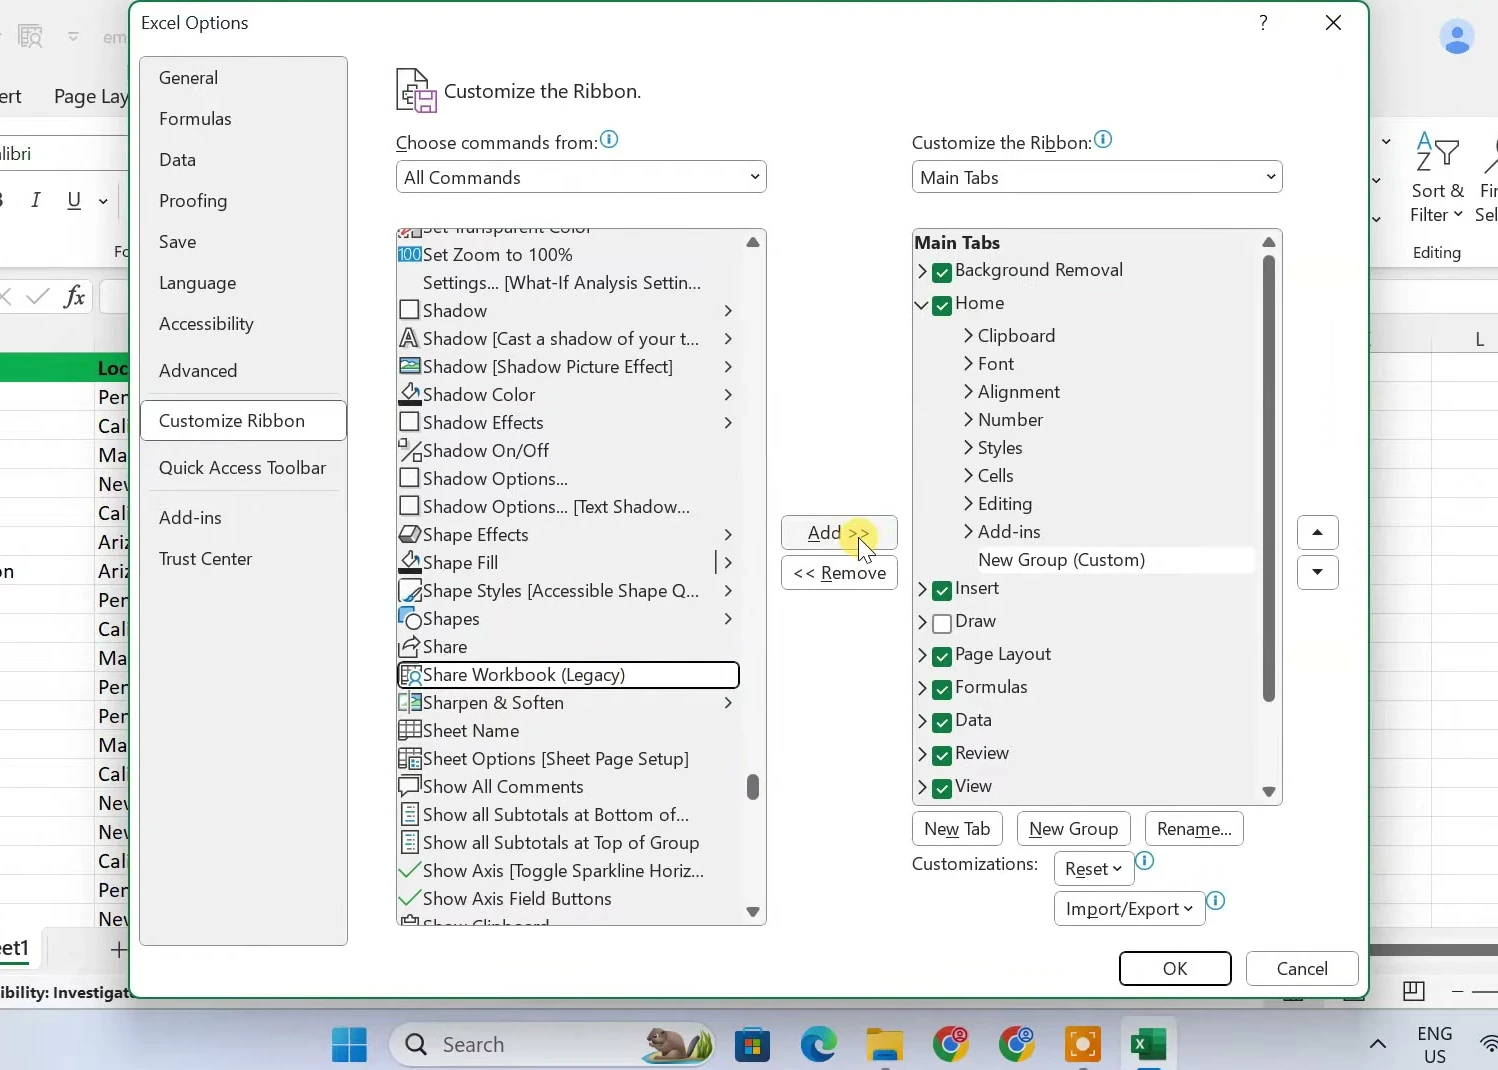
First, add the legacy sharing command to Excel’s ribbon so you can use it on the workbook.
- Open Excel and go to File → Options → Customize Ribbon.
- On the right, under Main Tabs, expand Home and click New Group. Select the new custom group.
- On the left, set Choose commands from to All Commands.
- Find and select Share Workbook (Legacy), then click Add to place it in the custom group.
- Click OK to save the ribbon changes.
The Share Workbook (Legacy) button should now appear on the Home tab. Next, enable it for the file you want to share.
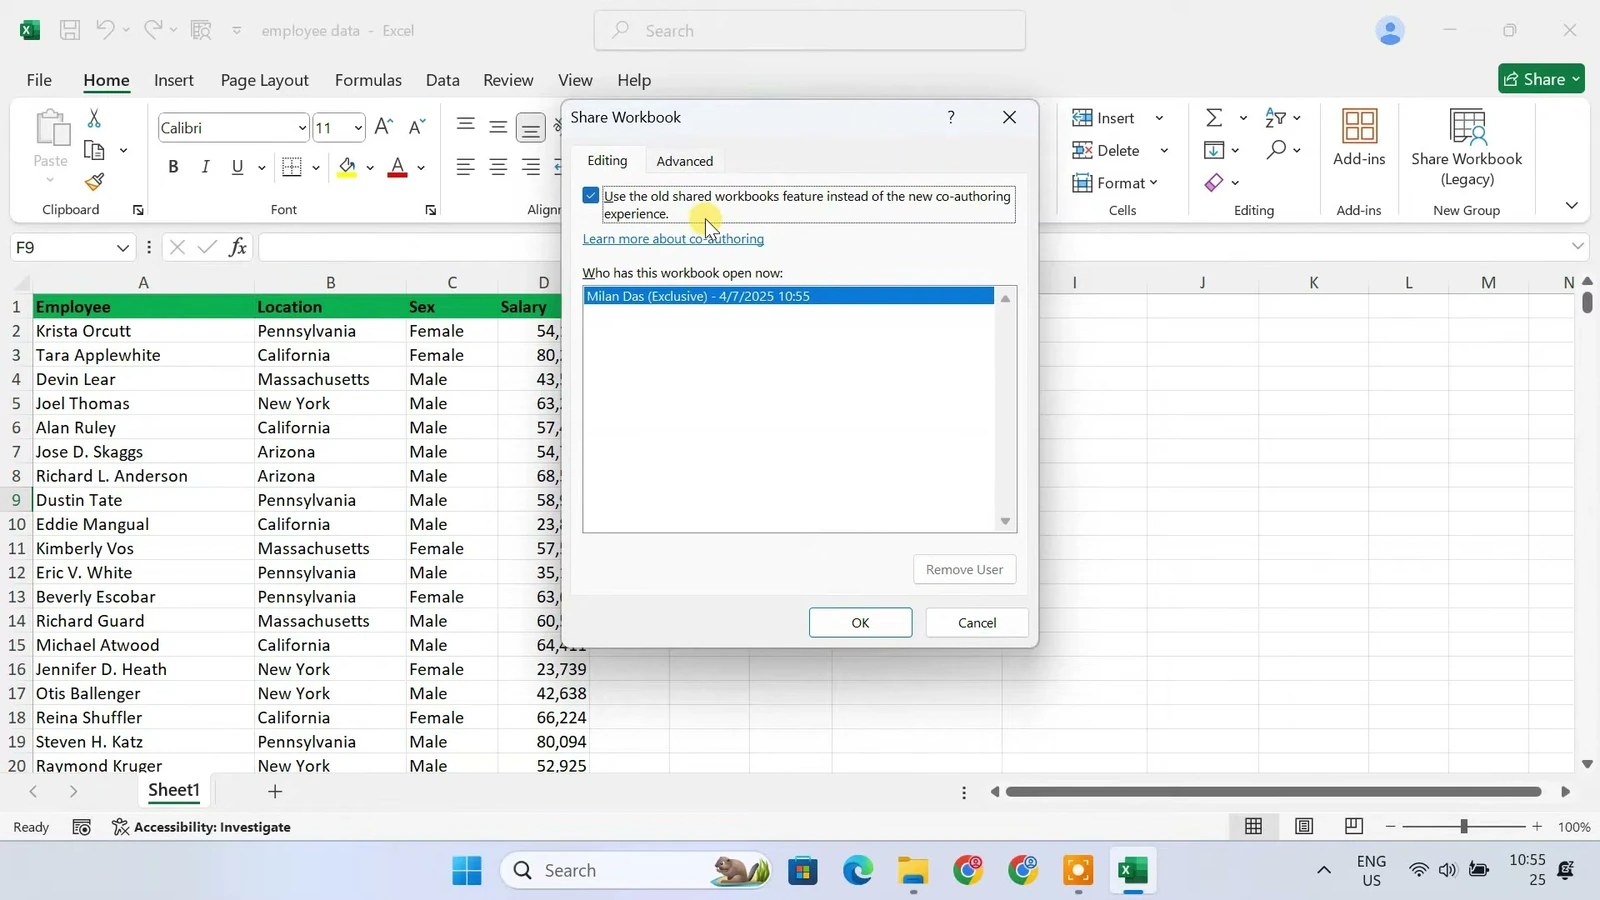
- Open the workbook your colleagues will edit.
- On the Home tab, click Share Workbook (Legacy).
- Select Use the old shared workbooks feature instead of the new co-authoring experience.
- Click OK, then confirm the prompt to save the workbook.
Put the workbook in a shared Windows folder
Legacy sharing prepares the workbook for multiple editors, but it does not make the file accessible from another computer. For that, create a folder on the PC that will host the workbook and share it through Windows.
Warning: The setup below grants Everyone broad editing permissions, including Full Control at the share level. Use a dedicated folder on a trusted network, and do not include unrelated or sensitive files. These permissions can allow other users to change or remove files in the shared folder.
Save and close the workbook. Create a folder with a recognizable name, such as Shared Excel Files, and move the prepared workbook into it.
- Right-click the folder and select Properties.
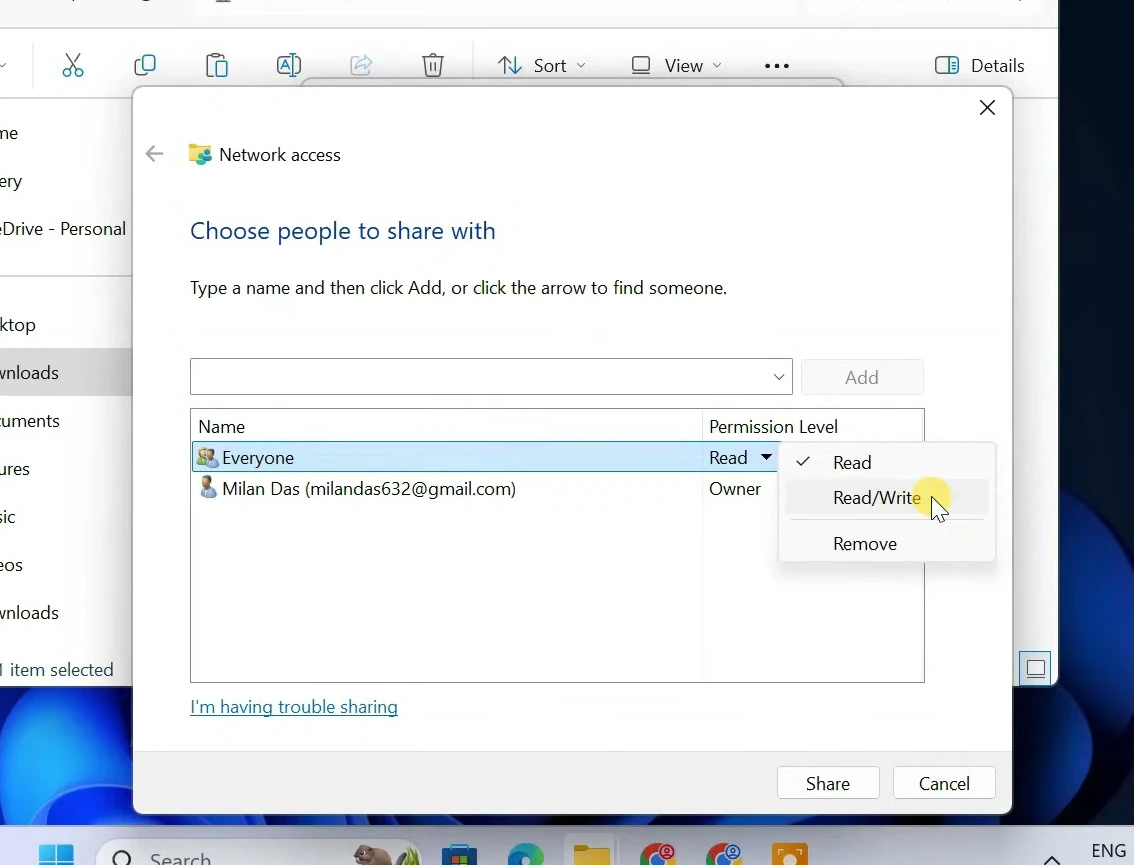
- Open the Sharing tab and click Share.
- Choose Everyone from the dropdown and click Add.
- Set the permission level beside Everyone to Read/Write, so other users can edit rather than only view the workbook.
- Click Share, then Done when Windows confirms that the folder is shared.
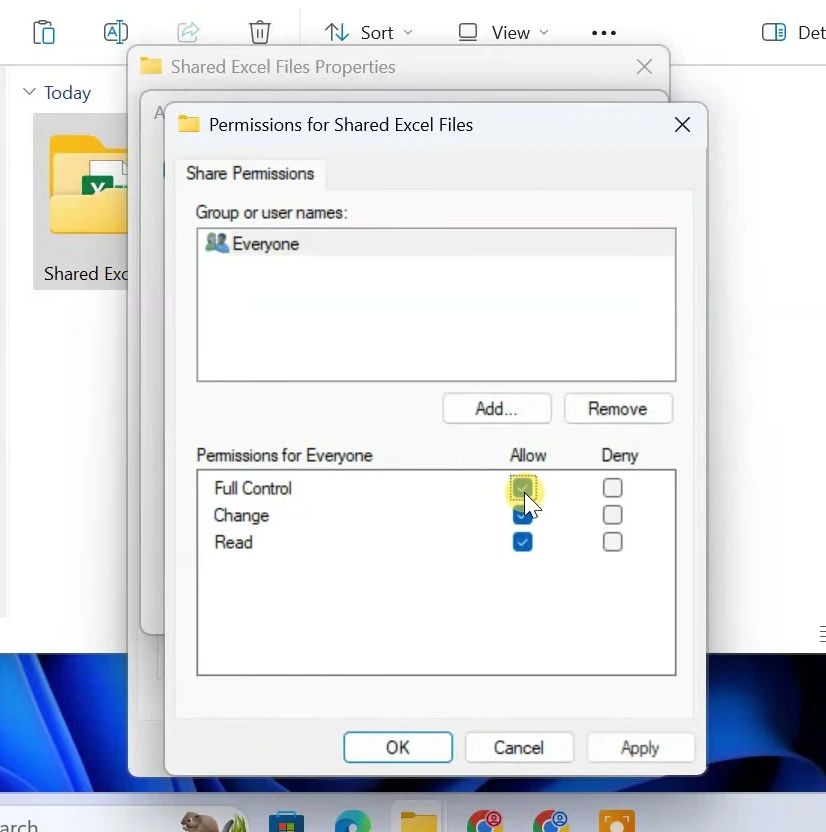
Next, configure the share-level permissions in the same folder’s Sharing tab.
- Click Advanced Sharing and select Share this folder.
- Click Permissions and select Everyone.
- Under Allow, select Full Control.
- Click Apply, then OK, and confirm the remaining dialogs.
Find the host PC’s local IP address
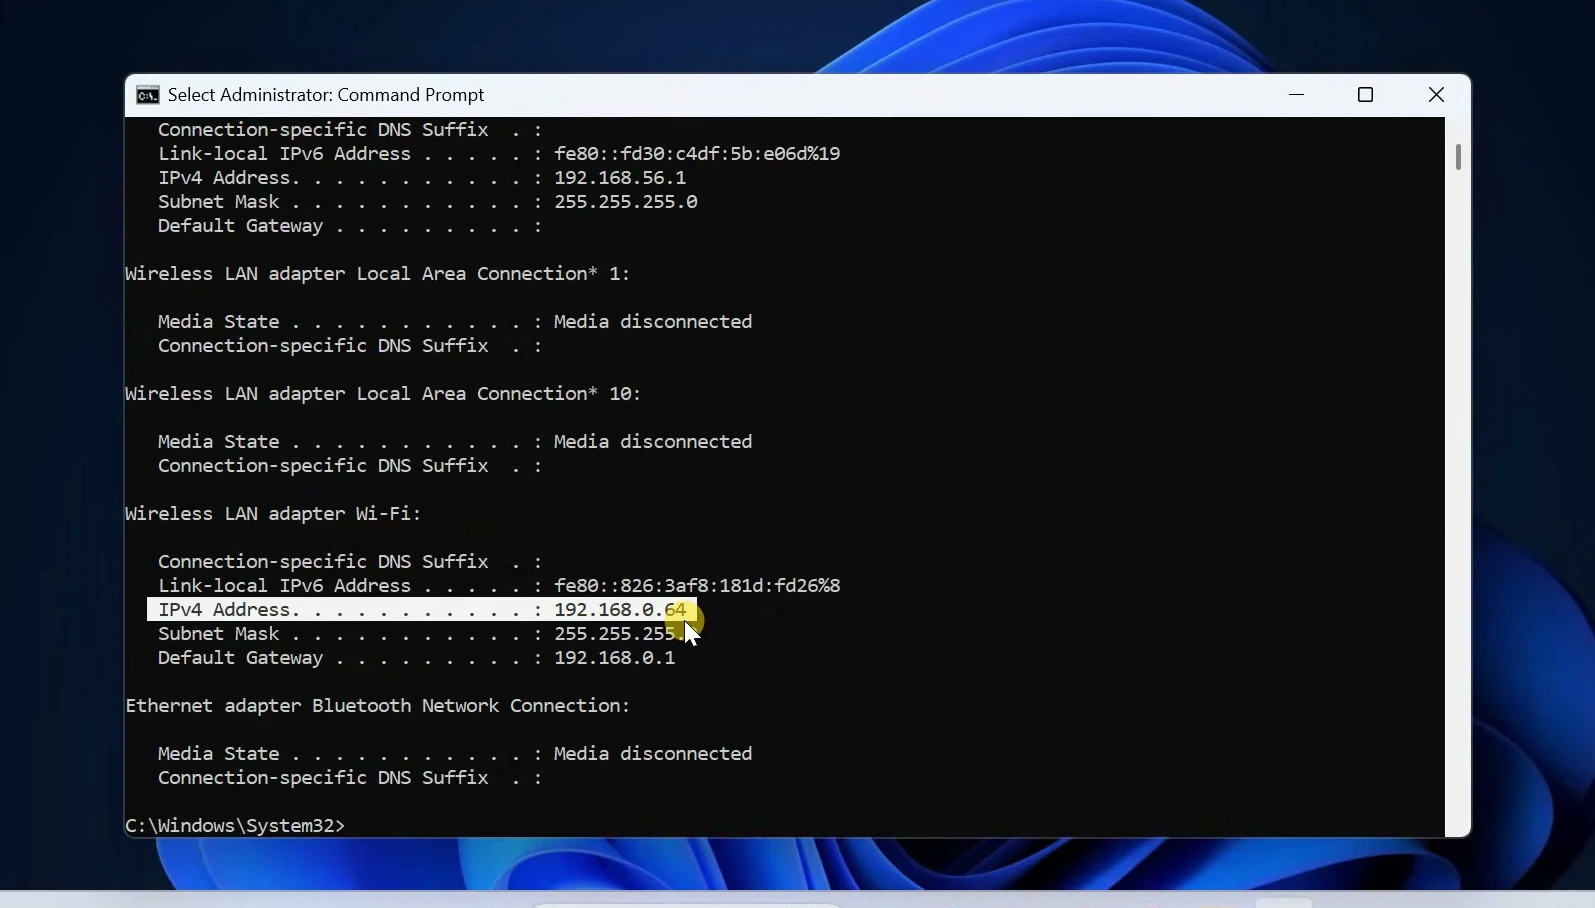
The host PC is the computer containing the shared folder. You need its local IPv4 address so colleagues can connect to it from File Explorer. On that PC, open Command Prompt and display the network configuration, using the screenshot below as a reference.
Find IPv4 Address under the active Wi-Fi or Ethernet adapter and note it down. If several adapters appear, use the one connected to the same local network as the other computers.
Open the shared workbook from another PC
On another computer connected to the same network, open the workbook directly from the shared folder. Each participant needs Excel installed; copying the file to their own PC would create a separate workbook rather than keep everyone working in the same file.
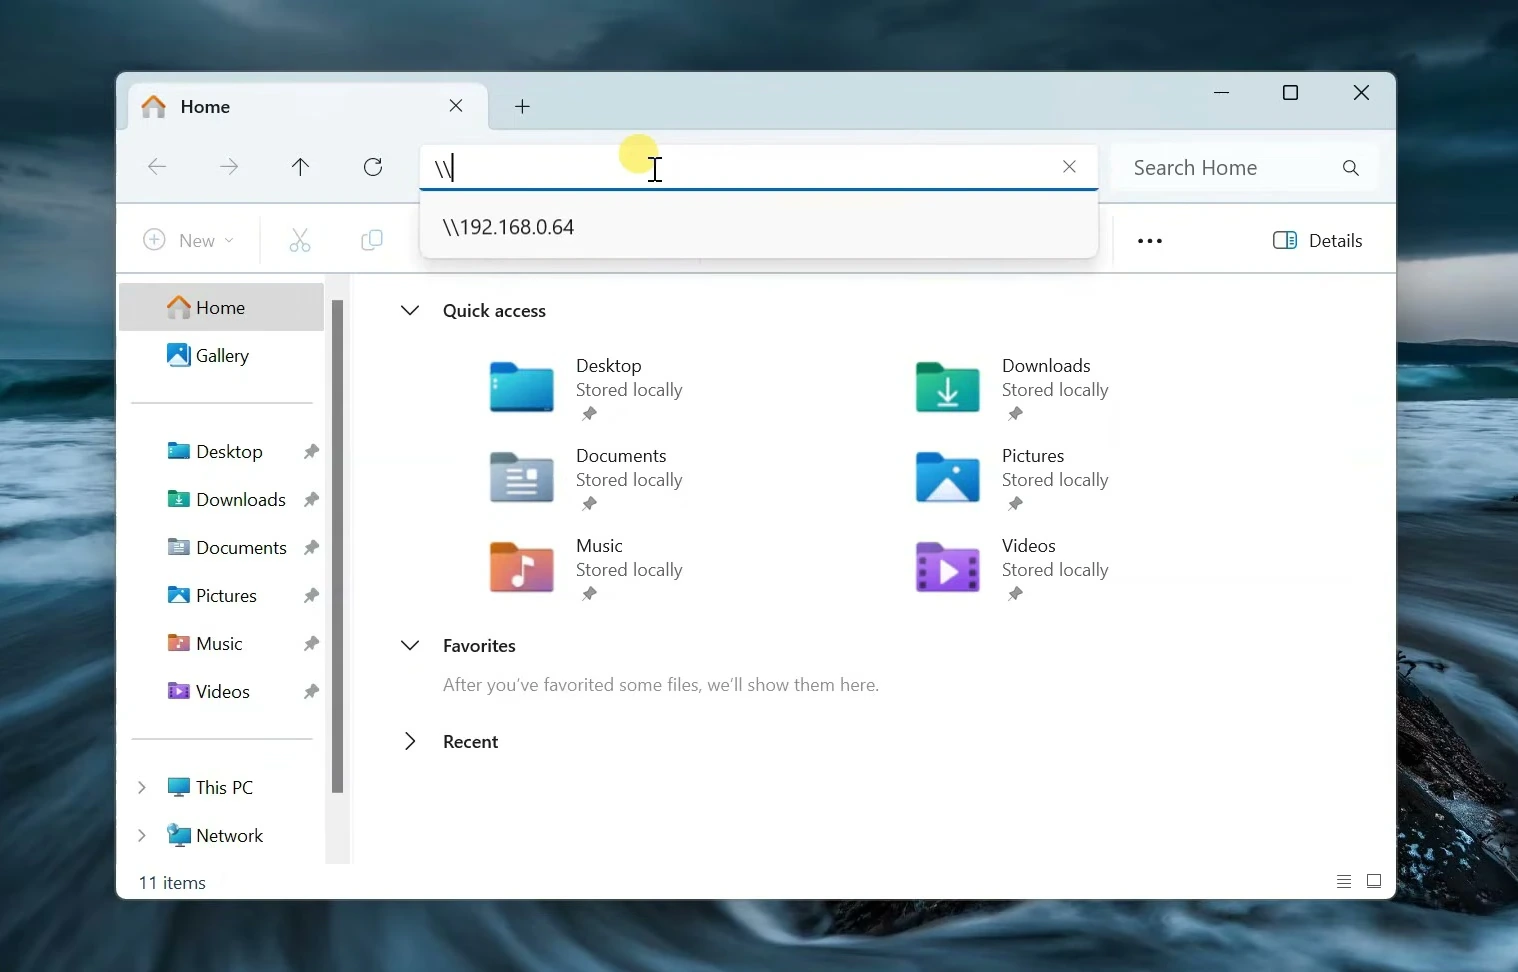
- Open File Explorer.
- In the address bar, enter two backslashes,
\\, immediately followed by the host PC’s IPv4 address. Press Enter. - If Windows requests network credentials, enter the username and password for an authorized account on the host PC.
- Open the shared folder and double-click the Excel workbook.
Important: Keep the host PC switched on and connected to the network while others use the workbook. The Everyone permission setting does not necessarily eliminate the Windows sign-in prompt.
Verify that saved changes reach other users
Test the setup with two users before relying on it for regular work. Both should open the same workbook from its shared location.
- Keep the workbook open on the first computer.
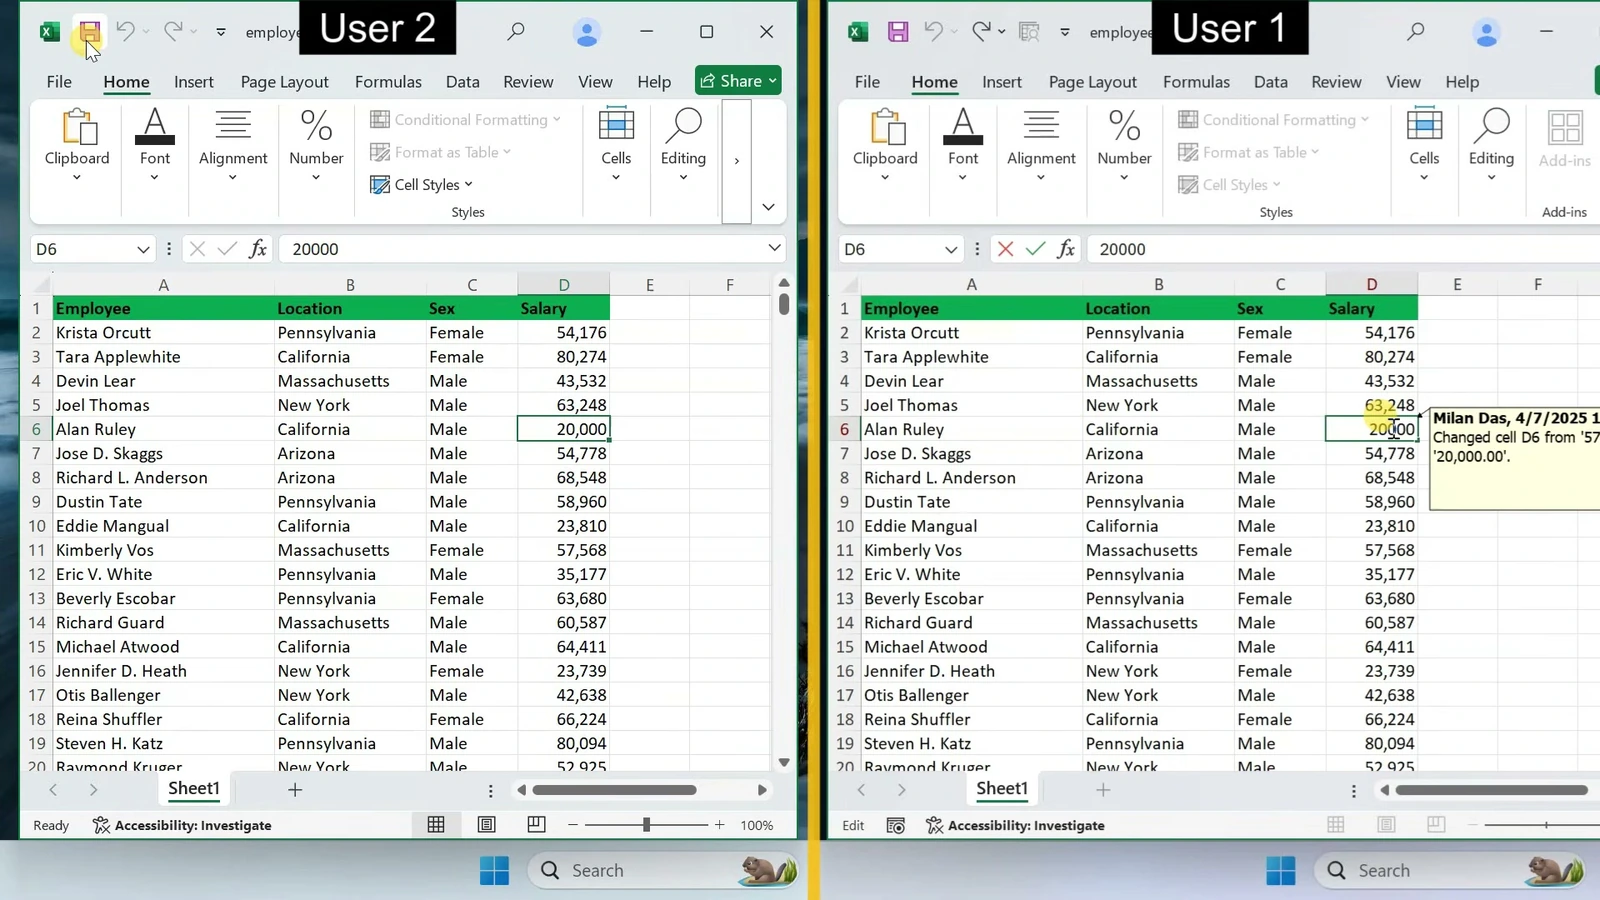
- On the second computer, change a cell and save the workbook.
- Check the first computer. When Excel displays a notification that the workbook has been updated with changes made by others, click OK.
- Confirm that the changed value appears in the first user’s workbook.
Tip: Ask everyone to save frequently and avoid editing the same cell at the same time. Legacy sharing is save-based collaboration, not a guarantee that competing edits will merge without conflicts.