Googlebook OS looks almost like a conventional desktop at first glance. There’s a taskbar, an app launcher, and separate windows for applications—but underneath, it’s Android. It’s an unusual combination, especially if you’re used to running Android apps inside an emulator.
I wanted to see how it would work on a regular PC, so I used the community-developed gbOS86 project to try it on my Dell OptiPlex 7060. Googlebook OS isn’t officially supported as a replacement for Windows on ordinary computers, and getting it onto one takes more than downloading an ISO. Still, the prospect of an Android-based desktop on older hardware was interesting enough to explore.
Check whether your PC is compatible
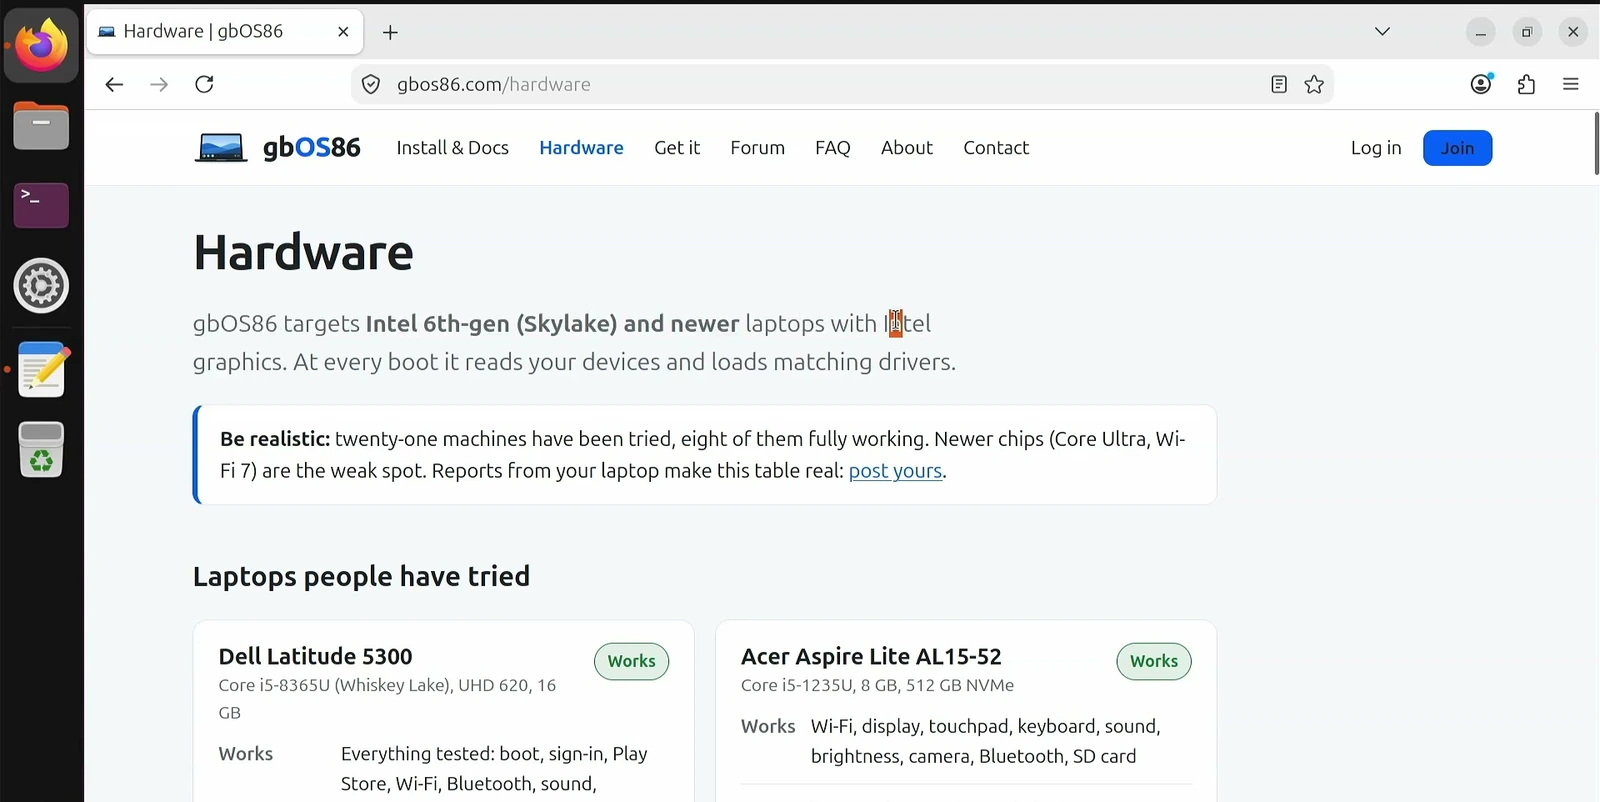
Before downloading anything, visit the gbOS86 project website and open its Hardware section. Googlebook OS is different from ChromeOS Flex, and gbOS86 is not an official Google installation method. The project maintains its own compatibility information for ordinary PCs.
The project recommends an Intel 6th-generation or newer processor with supported instruction sets and compatible Intel graphics. Its tested-device list is especially useful because a compatible CPU alone doesn’t guarantee working Wi-Fi, audio, Bluetooth, or graphics on your particular computer.
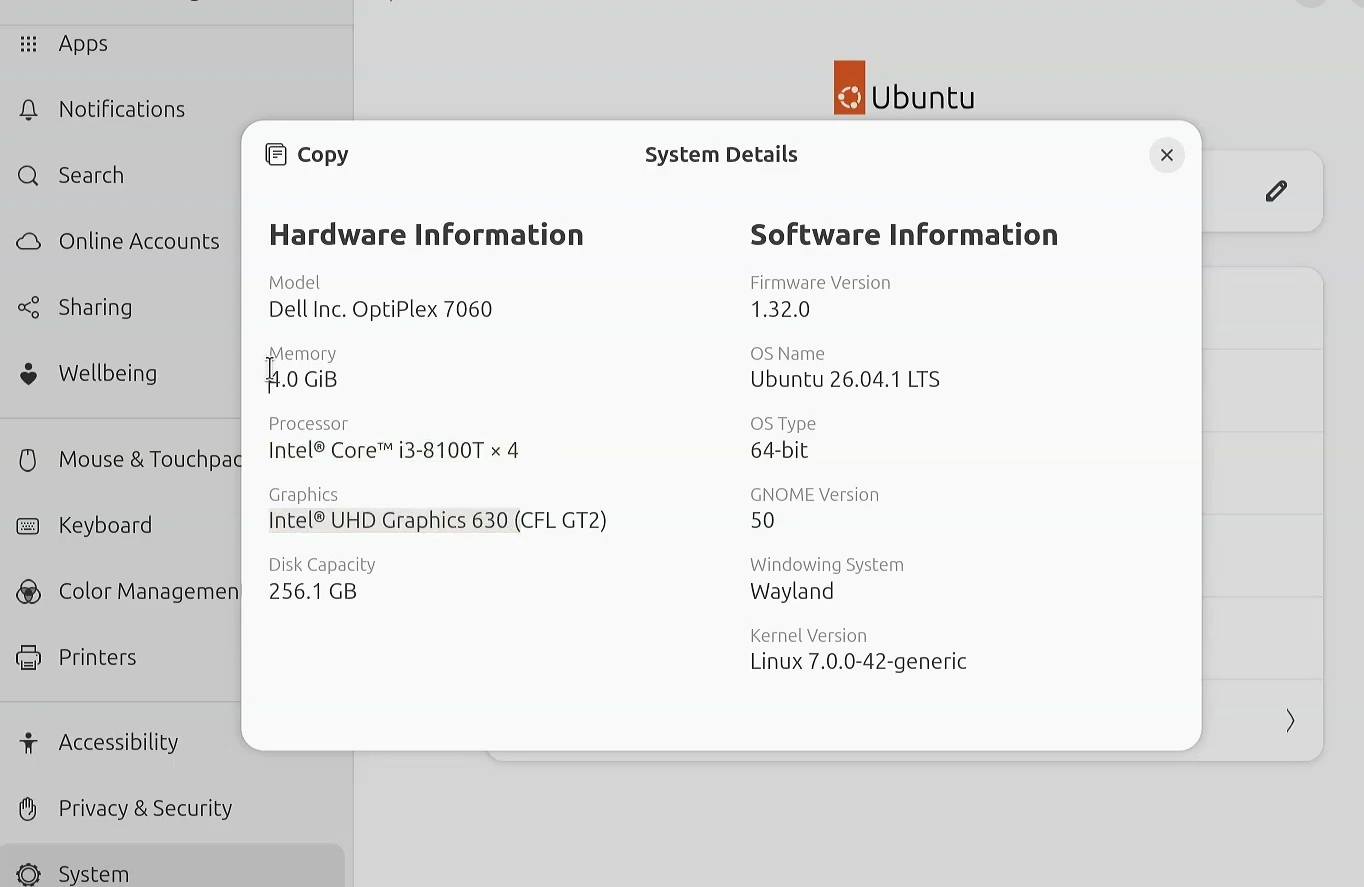
I used a Dell OptiPlex 7060 with an Intel Core i3-8100T, Intel UHD Graphics 630, 4 GB of RAM, and a 256 GB SSD. It was a modest machine, but it met the project’s basic processor and graphics requirements.
You also need a USB drive of at least 8 GB. I used a 64 GB SanDisk stick. Keep a separate Linux or macOS environment available for building the installer image; I used Ubuntu for that part. Your image-building computer and the PC you eventually install on do not have to be the same machine.
Build the Googlebook OS image on Ubuntu
gbOS86 doesn’t offer a ready-made Googlebook OS ISO. Instead, it provides build tools that download a public Google recovery image and prepare the files needed for compatible PC hardware. That’s why the download page contains a terminal command rather than a conventional installer button.
For the build, prepare a Linux or macOS computer with Git, Python 3, Docker and the other utilities required by the project. Docker must be running, and the project recommends roughly 35 GB of free storage. On Ubuntu, I installed the dependencies first, signed out and back in for my Docker permissions to take effect, and checked that Docker could start a test container.
Once the dependencies are ready, open Terminal and run the two commands supplied by the project. The first downloads the gbOS86 repository and enters its folder. The second starts the image builder.
git clone https://github.com/linuxkid473/gbos-x86 && cd gbos-x86
./build.sh
The repository also contains the source code and additional technical documentation if you want to inspect what the build process changes.
View the gbOS86 GitHub Repository
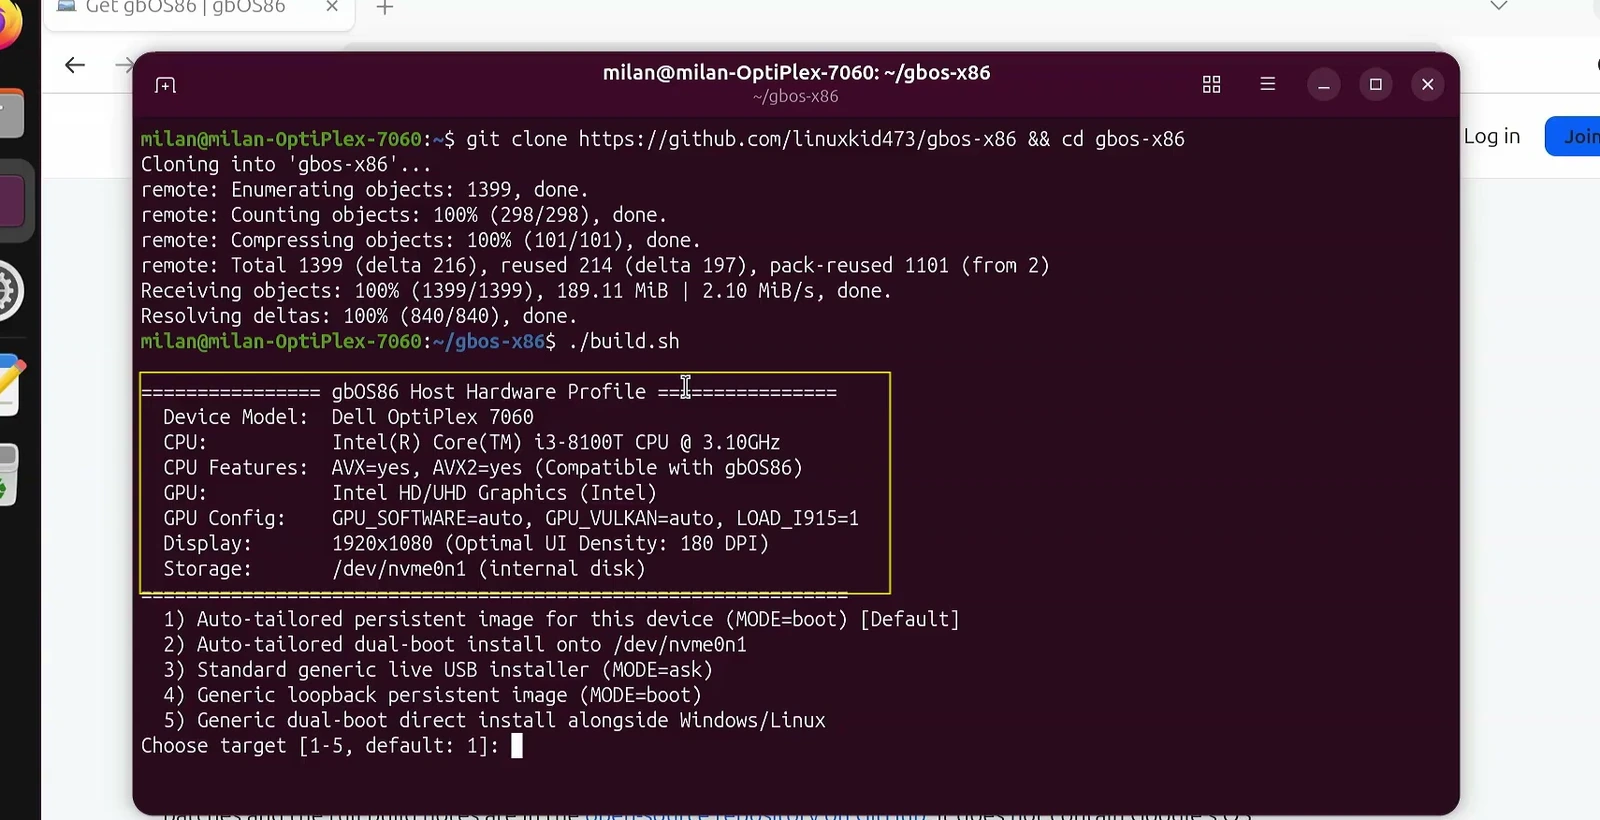
The script checks the host computer’s processor, graphics, display and storage, then offers several image types. For this installation I chose option 3: Standard generic live USB installer. It creates a bootable USB image that can start a temporary desktop or launch the internal-drive installer.
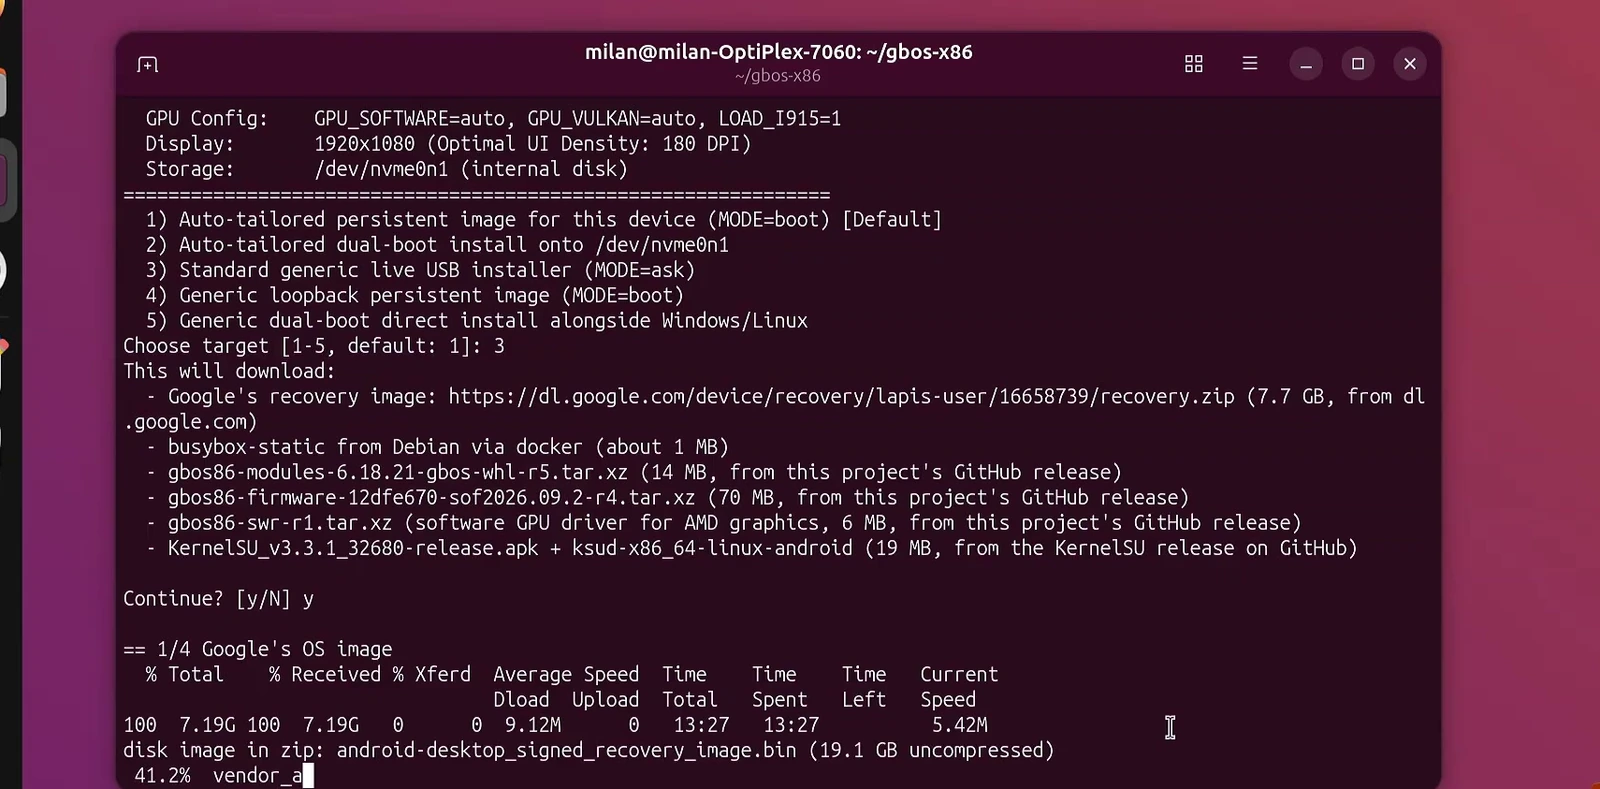
After selecting the image type, the builder lists the files it needs. My build downloaded a Google recovery package of approximately 7.7 GB along with the supporting components. Review that list, enter Y if you’re happy to proceed, and allow the download and assembly stages to finish.
When the build completes, open the gbos-x86 project folder and look inside dist. The generated file is an .img disk image rather than an ISO. Mine was about 6.7 GB. Its exact name and size can change between builds, so use the file produced on your own computer.
Create a bootable USB drive with balenaEtcher
Now that the image exists, it needs to be written to a USB drive. Simply copying the .img file onto the stick won’t make it bootable. I used balenaEtcher, which can flash the entire image directly.
On Ubuntu, I downloaded the Linux AMD64 .deb package from the project’s releases page, opened it through the App Center, and installed the application. If you’re using a different operating system, choose the appropriate release for that system.
Launch balenaEtcher and choose Flash from file. Browse to the generated image in the gbos-x86 dist folder and select it.
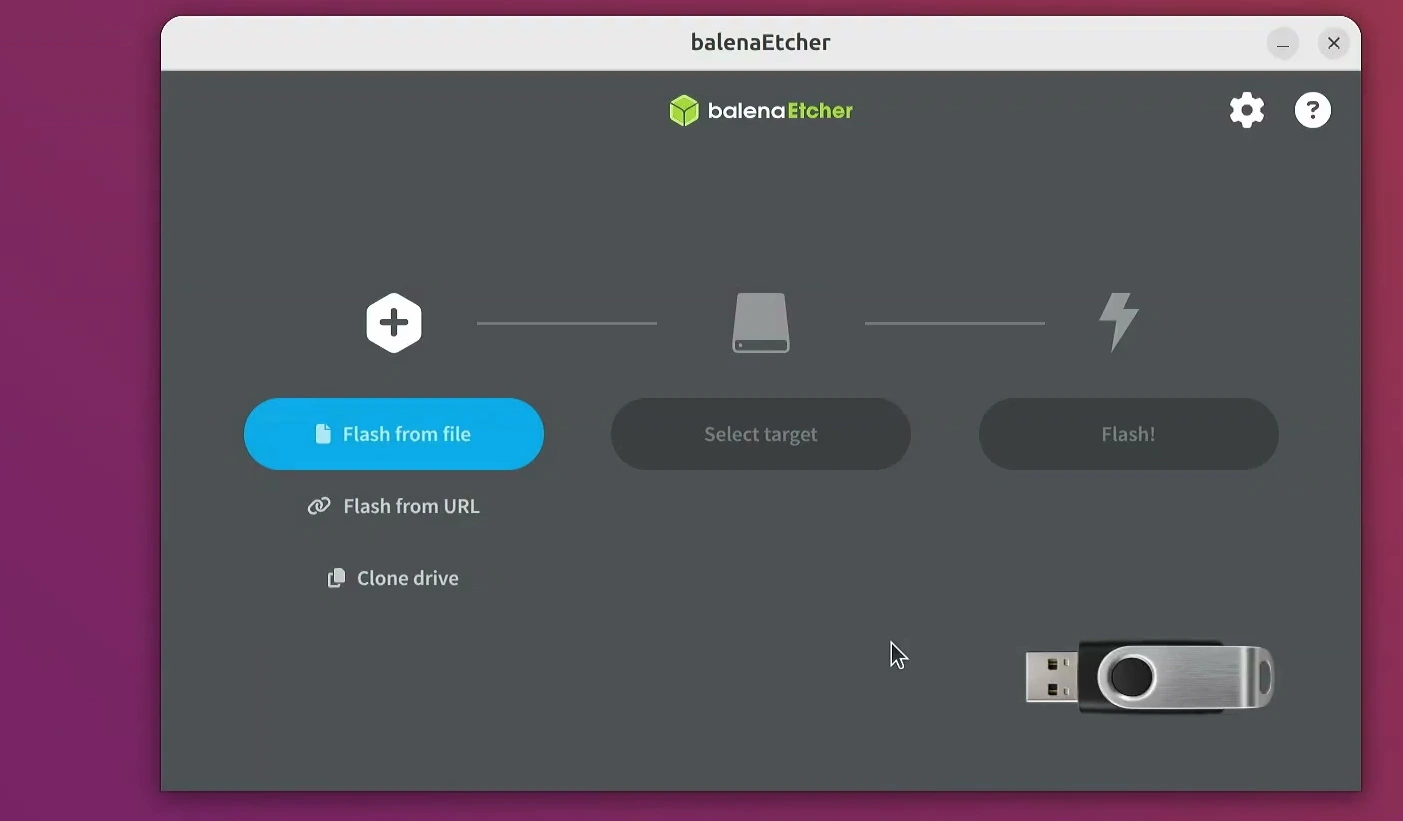
Next, click Select target and choose the correct USB flash drive. I selected my 64 GB SanDisk device. Double-check the name and capacity because a PC can have more than one removable or external drive connected.
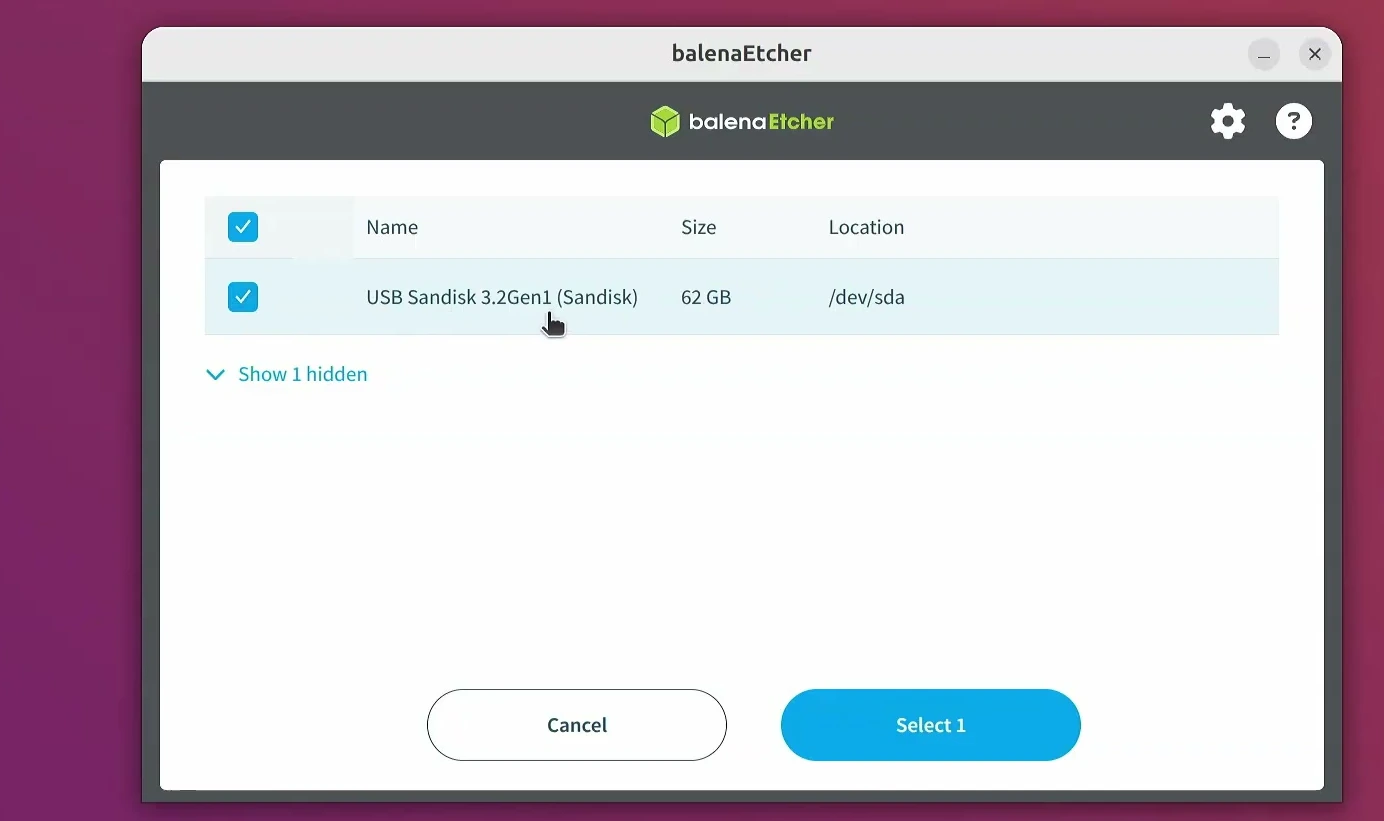
Once the correct USB is selected, Etcher shows it as the destination for the image. Check that selection one last time before starting.
Click Flash and let Etcher write and verify the image. Once it reports completion, safely disconnect the USB drive. The installer stick is ready.
Boot the computer from the USB installer
Connect the prepared USB to the PC where Googlebook OS will run, then restart it. On my Dell OptiPlex I opened the UEFI firmware settings, checked the Secure Boot configuration, and selected the USB drive in the boot sequence.
If Secure Boot prevents the installer from starting, the gbOS86 instructions recommend disabling it temporarily. Some PCs also provide a one-time boot menu, so you may not need to permanently change the boot order.
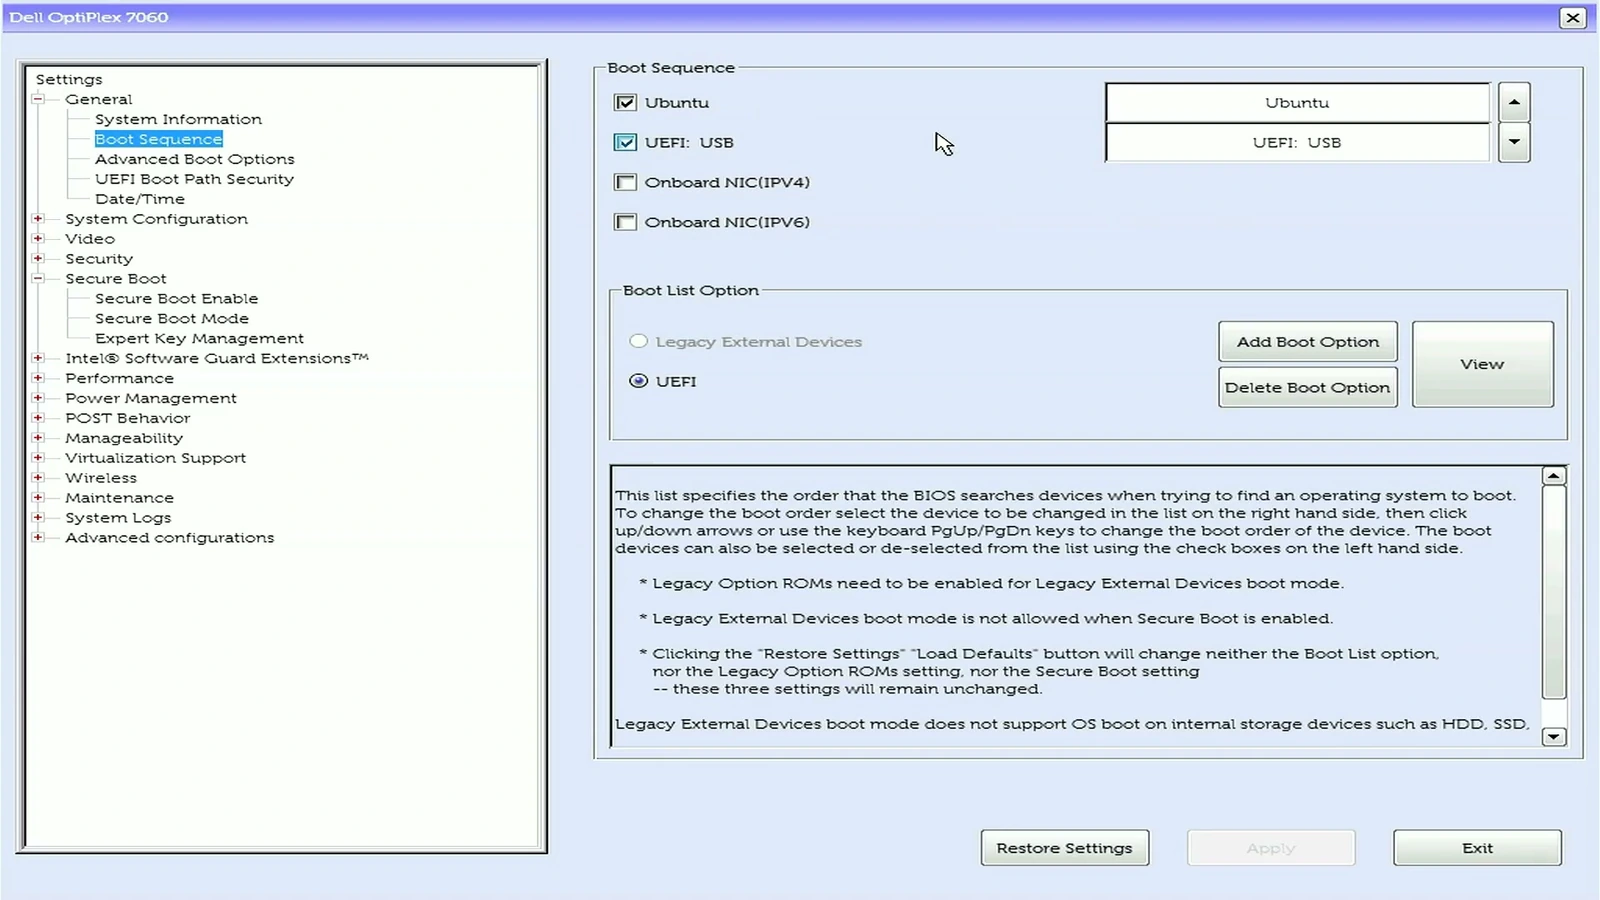
Save the changes and boot from the USB. After the initial loading screen, the gbOS86 boot menu appears. On the standard installer, option 1 runs the system in live mode, while option 2 opens the internal-drive installation or update process.
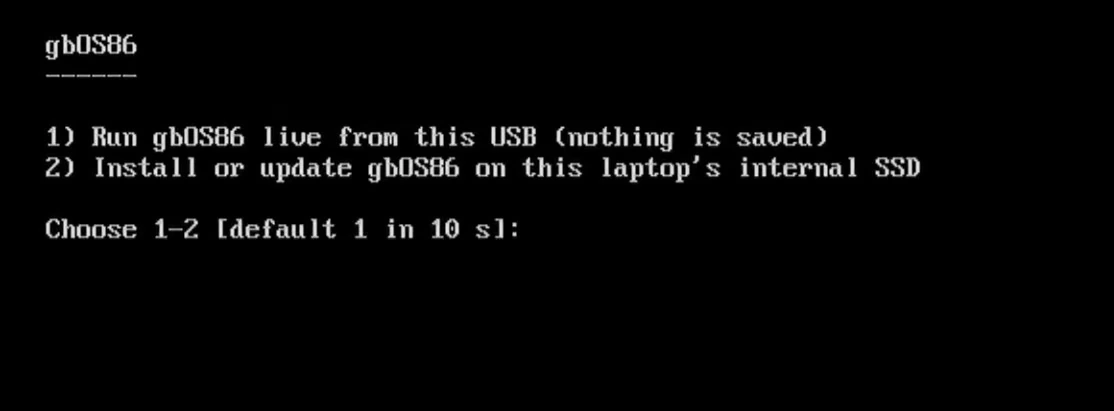
If this is your first attempt on the hardware, start with live mode. It lets you check display output, keyboard, network and other important features before touching the internal storage. I had already tested live mode on my Dell, so I returned to the menu and selected the installation option.
Install Googlebook OS on the internal SSD
The installer scans for storage devices and displays their names and capacities. My PC showed both its 256 GB internal NVMe SSD and the SanDisk USB stick. I selected the internal SSD, taking care not to confuse it with the installation media.
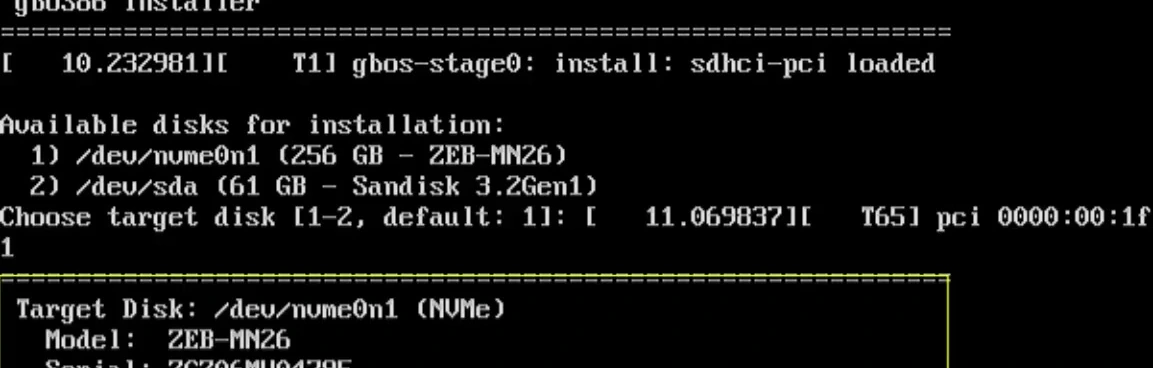
Next, the installer shows the selected drive’s model, serial number, existing partitions and available space. Below that, it offers different installation modes:
- Dual-Boot: Install into suitable unallocated space while keeping the existing operating system. This requires preparation and enough free space.
- Full clean install: Erase the selected internal disk, including its partitions, and install Googlebook OS.
- Live desktop: Run from the installer without making a permanent installation.
The dual-boot path has additional partitioning requirements. If you want to keep Windows or Linux, read the project’s installation guide and prepare the necessary unallocated space before choosing that mode.
Read the Official gbOS86 Installation Guide
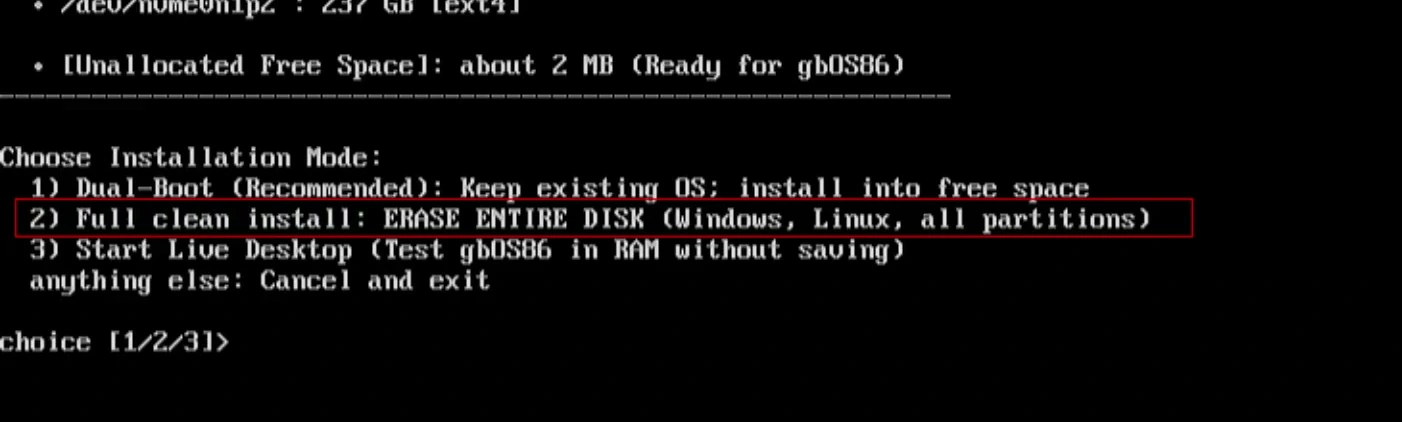
Pause here and decide whether you intend to keep the current operating system or replace it. The next choice determines what happens to the data on this drive.
I wanted to replace the Ubuntu installation on my Dell completely, so I chose option 2: Full clean install. The installer then required me to type the SSD’s exact serial number as confirmation. This is an important safeguard: copy the serial shown on your own screen, not a value from another computer.
After confirmation, the installer creates the necessary partitions, copies the operating system and supporting files, and verifies the result. Let it finish before restarting. When prompted, remove the USB drive so the next boot comes from the internal SSD.
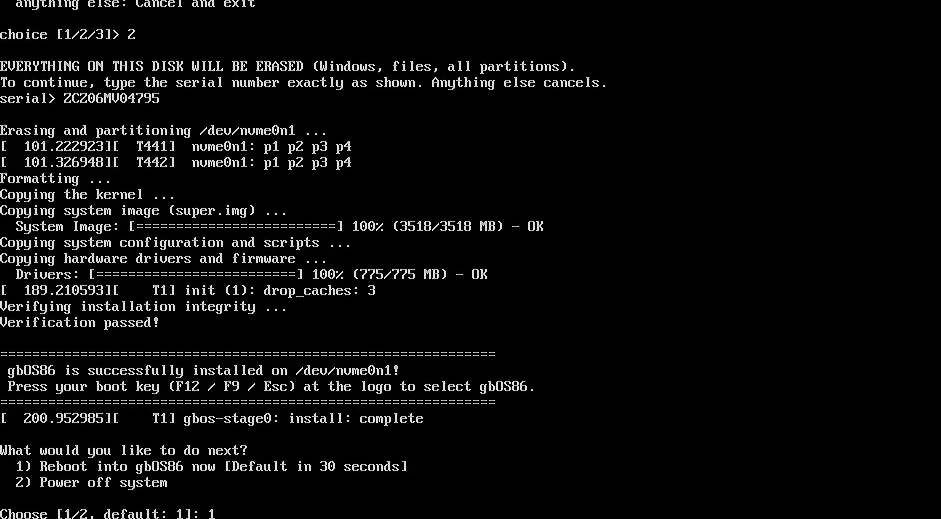
My Dell then started Googlebook OS directly from its internal SSD. At that point the installation portion was complete, and I could begin using the desktop without the installer USB attached.
Get familiar with the Googlebook OS desktop
The desktop feels closer to a conventional computer than a phone-sized Android interface. There’s a taskbar along the bottom, a launcher for installed apps, and windows you can move and resize. Open the launcher to find applications such as Chrome, Gmail, YouTube, Gemini and the system utilities.
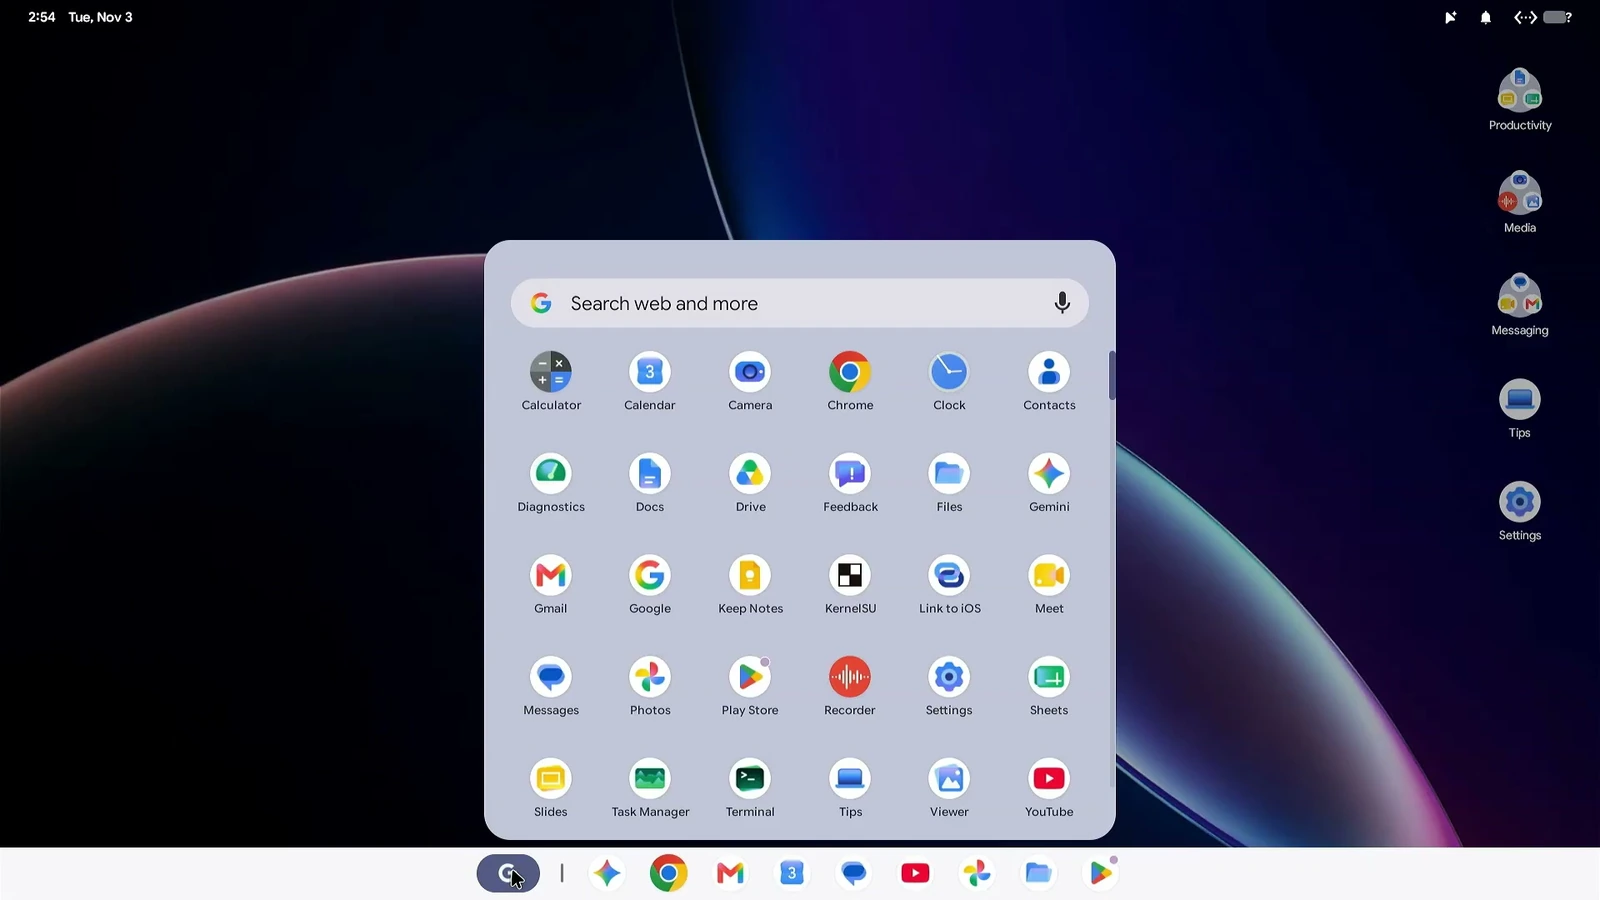
The Google Play Store is particularly useful. I could browse Android apps and install them directly on the PC. I also used the file manager to view local files, folders, and Google Drive, while the quick-settings panel provided familiar controls for Wi-Fi, Bluetooth, volume and brightness.
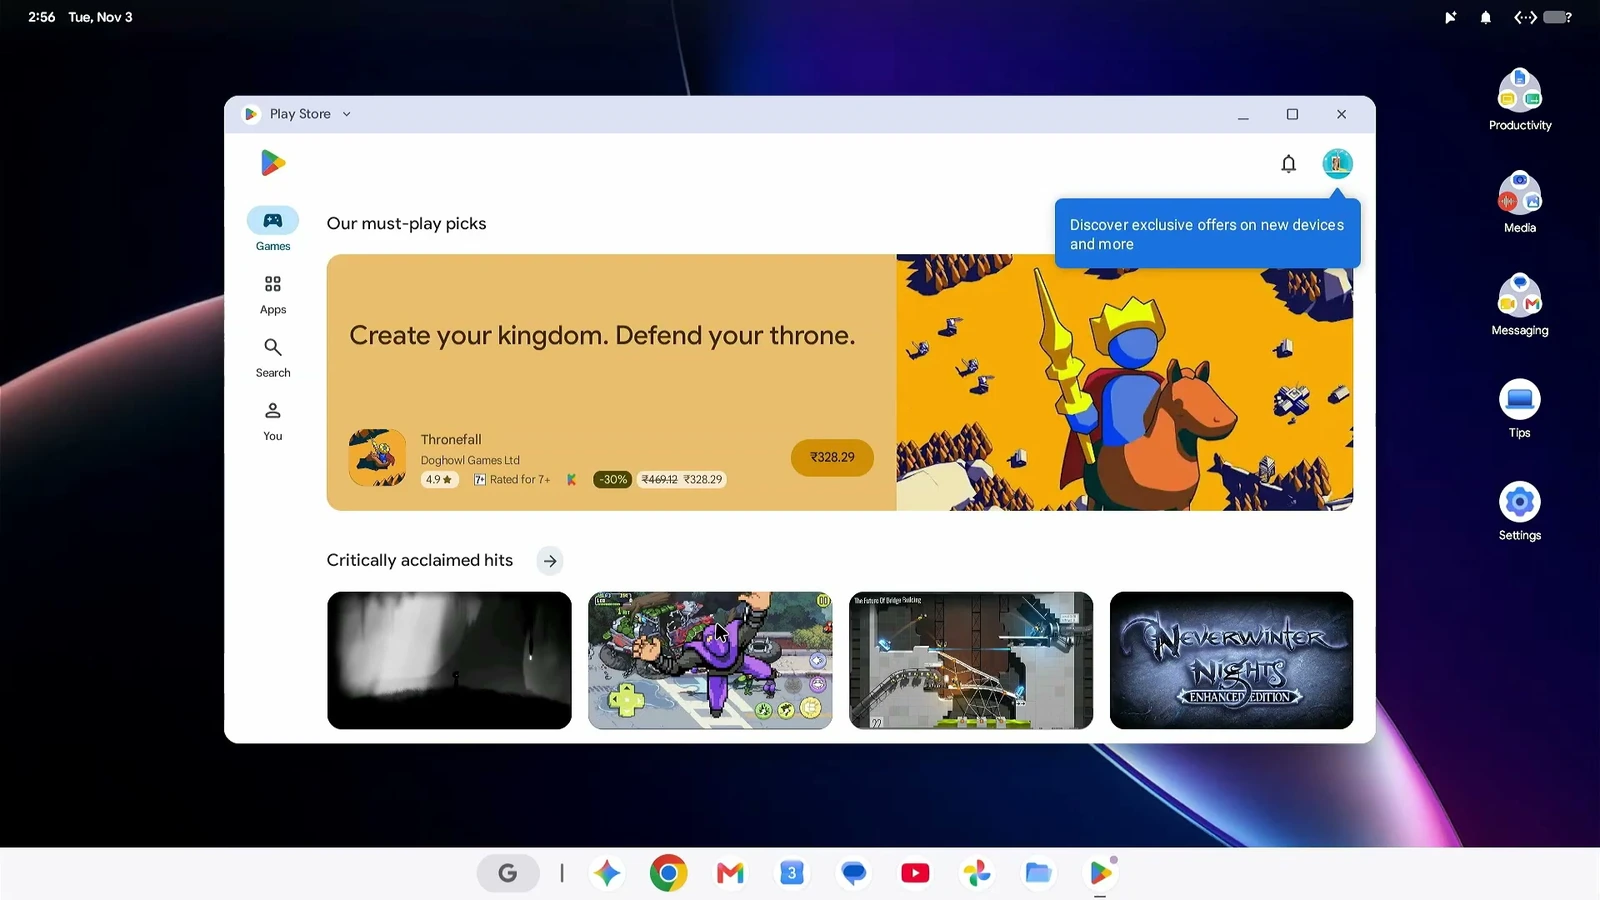
Open Settings to manage connected devices, installed applications, notifications and other system options. The About device page reports hardware and system details; the build I tested identified itself as based on Android 17. A task manager is also available for checking running applications and resource use.
Customize wallpapers, shortcuts and widgets
The desktop isn’t limited to a single default look. Under Settings, open Wallpaper & style to choose a different wallpaper, adjust interface colors, and change supported icon styles and shapes. I tried a different desktop background and experimented with the appearance settings.
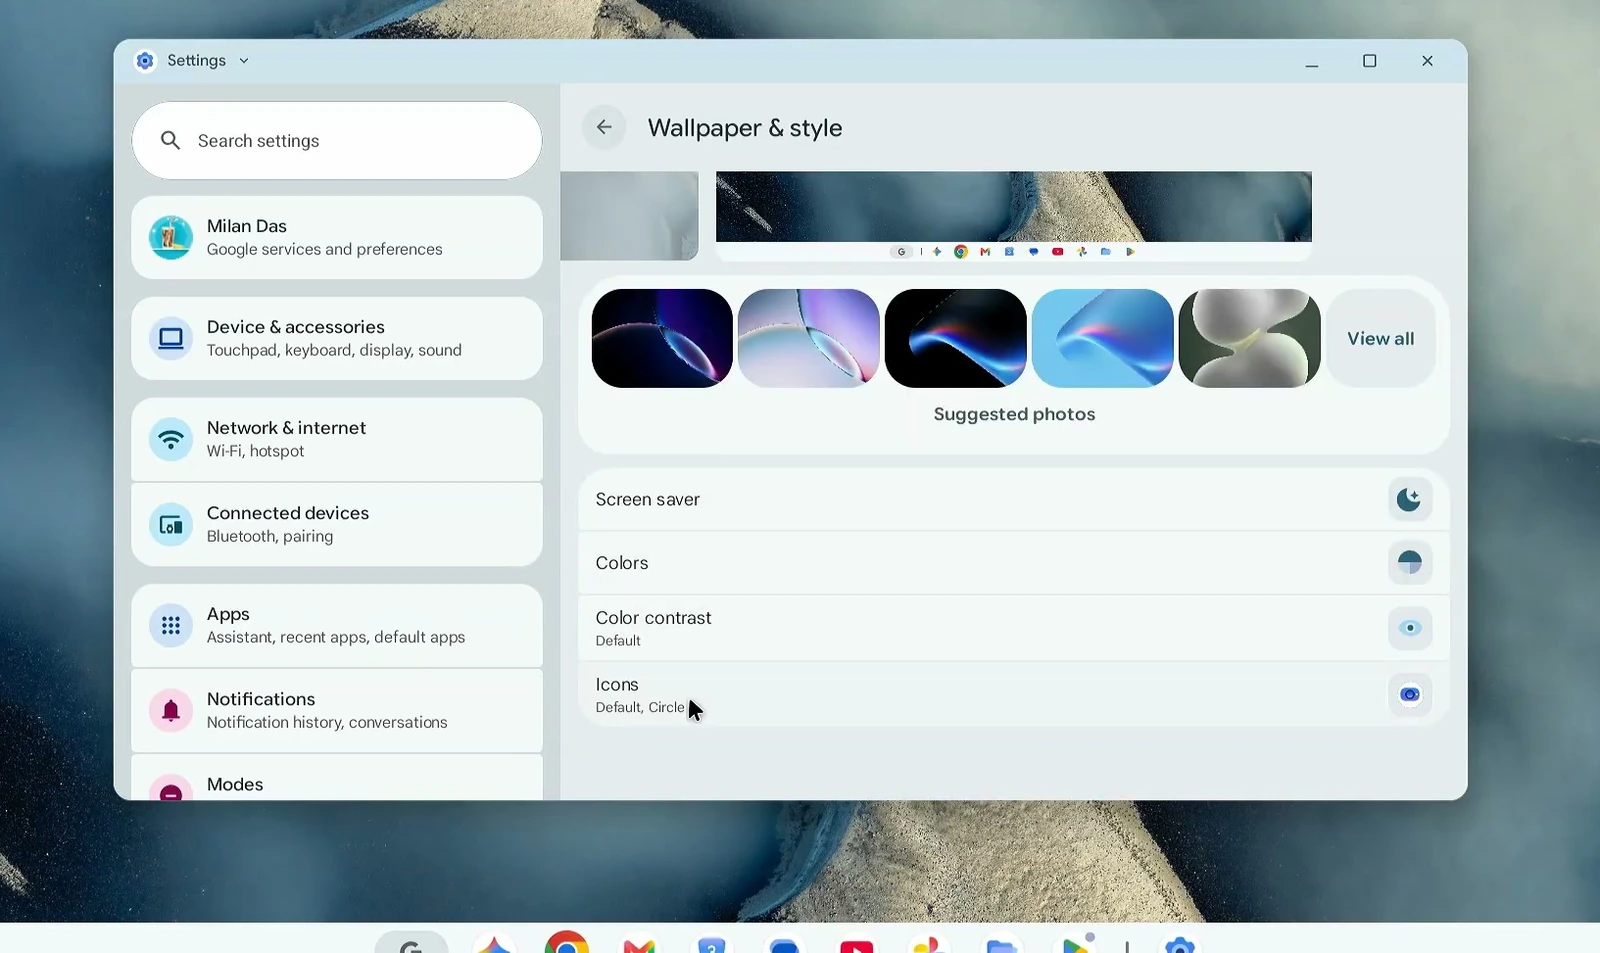
Display settings offer controls for screen brightness, text size and interface scaling. You can also switch between light and dark appearance. These are useful adjustments if you’re running the system on a monitor with a different resolution or viewing distance.
To organize apps, open the launcher and use an app’s context menu to Add to home screen. Shortcuts can be moved around the desktop. Dragging one app icon onto another creates a folder; I grouped Chrome, Gmail and Google Photos into a folder named Productivity.
Right-click an empty area of the desktop and choose Browse widgets to open the widget picker. I added a digital clock, then moved and resized it to fit the desktop. There are also widgets from compatible installed apps.
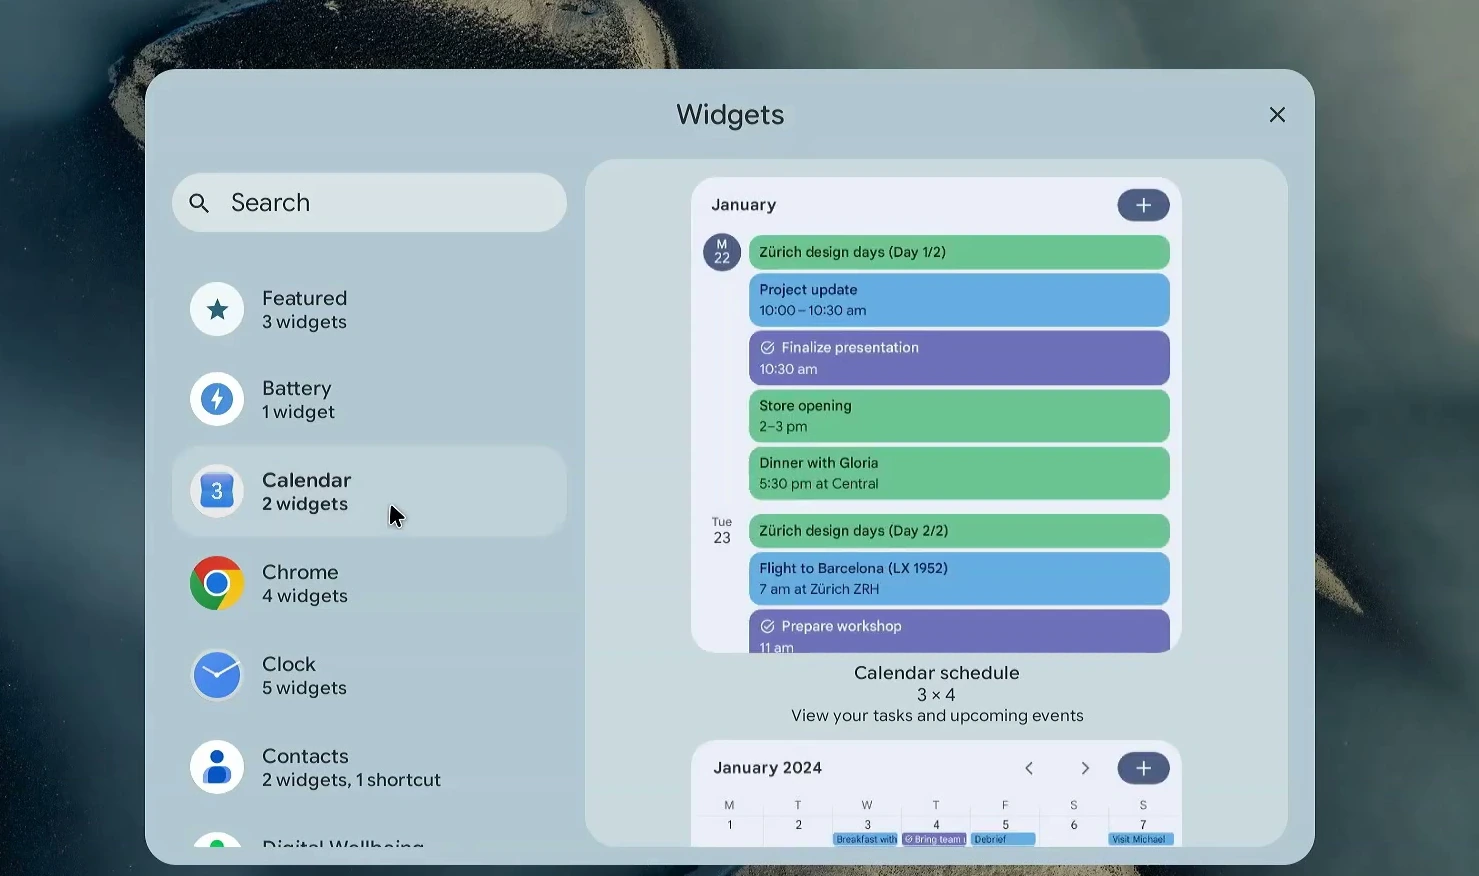
Frequently used applications can be pinned to the taskbar and rearranged. If you’d rather reclaim a little screen space, the taskbar can also be set to hide automatically.
Connect your Android phone
Googlebook OS includes cross-device services for pairing supported Android devices with the desktop. In Settings, open Connected devices, then Connection preferences and Cross-device services.
I added my Pixel 10a to the device group associated with my Google account. The available settings included notification syncing, Do Not Disturb synchronization, internet sharing and Instant Hotspot options.
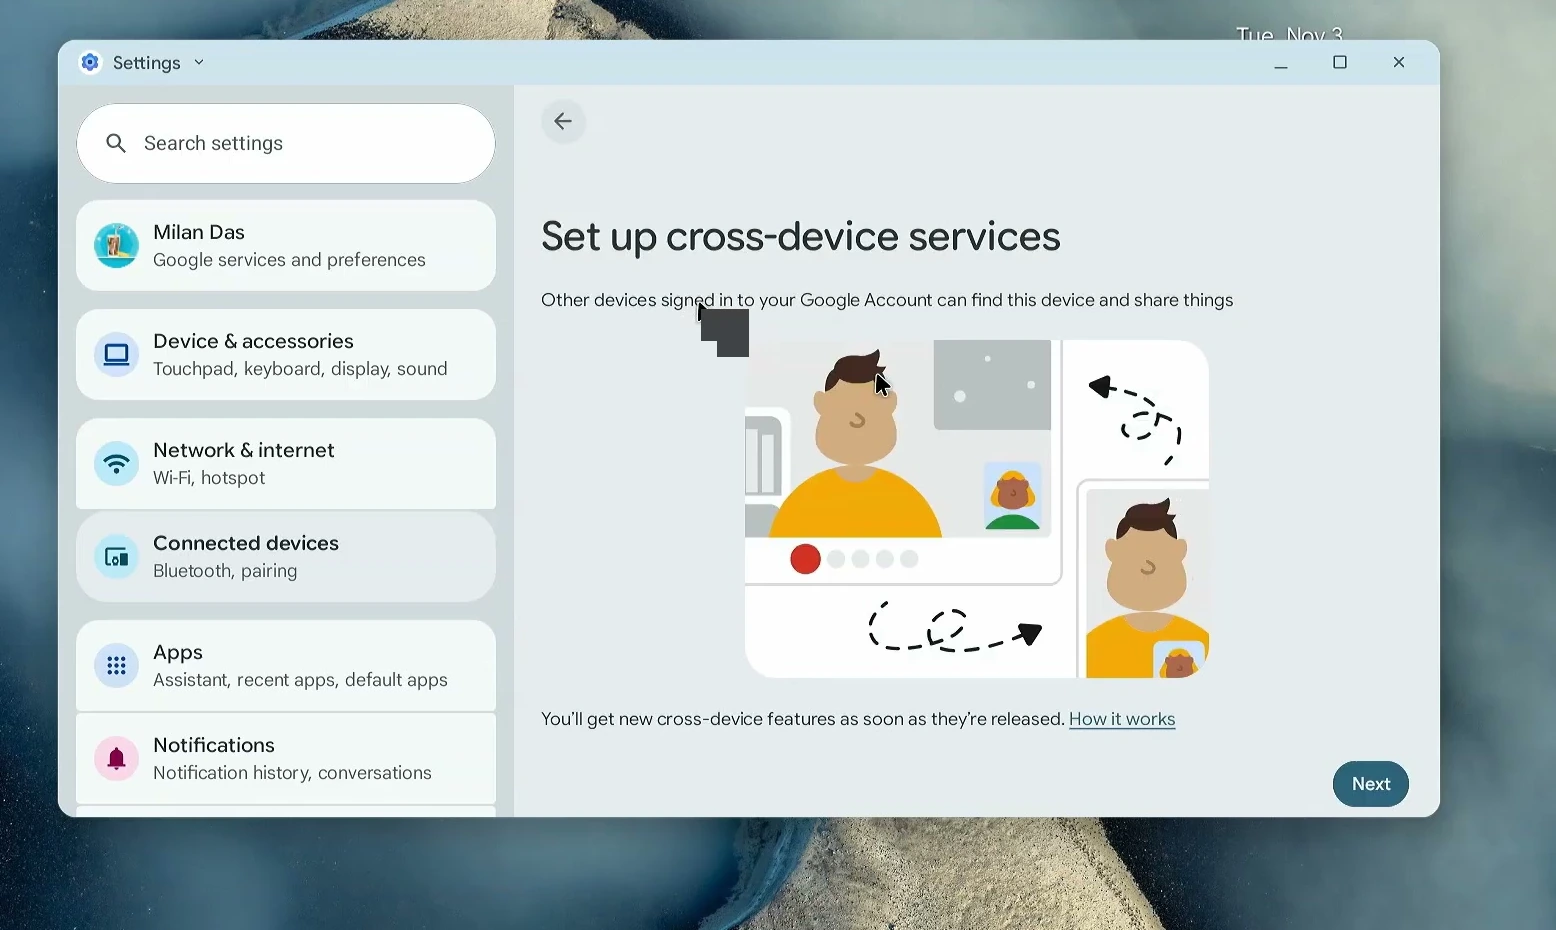
There is also a Cast my apps setup that asks the phone and PC to be on the same Wi-Fi network with Bluetooth enabled. A QR code starts the pairing process. I explored the setup screen, but I wouldn’t assume every cross-device feature is fully functional on an unofficial gbOS86 installation.
An iPhone linking utility is also present, with a QR-code setup for messaging-related connectivity. Treat these options as features to test on your own hardware rather than guaranteed compatibility.
Install Linux applications inside Googlebook OS
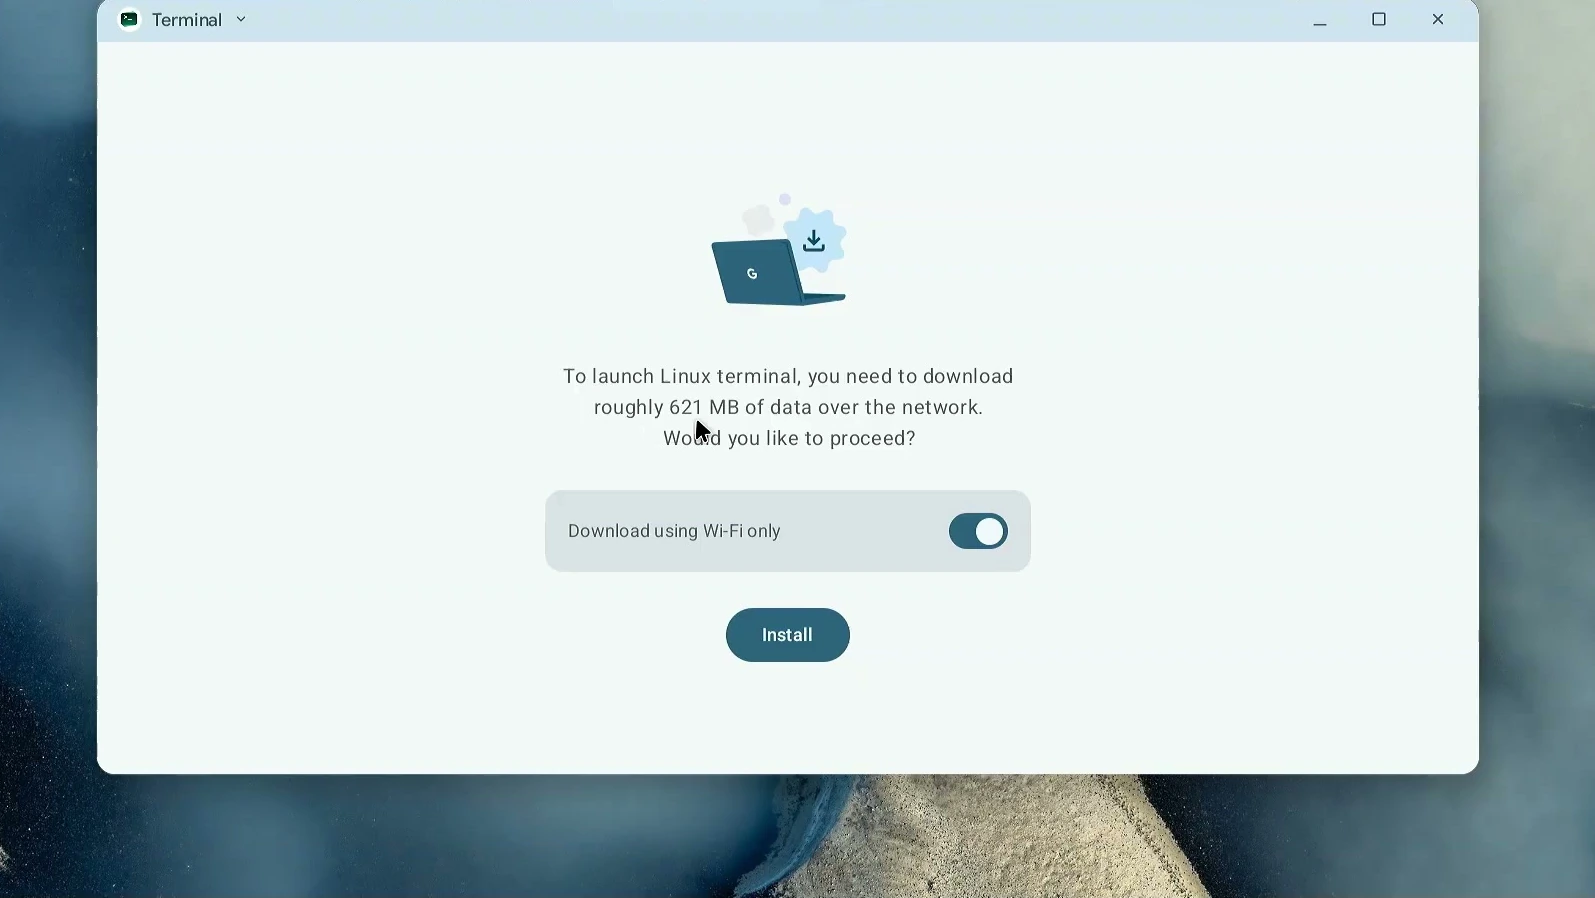
One of my favorite things to try was the separate Linux environment. Open the app launcher and select Terminal. On the first launch, the system offers to download and set up the Linux container. My installation needed about 621 MB of additional data.
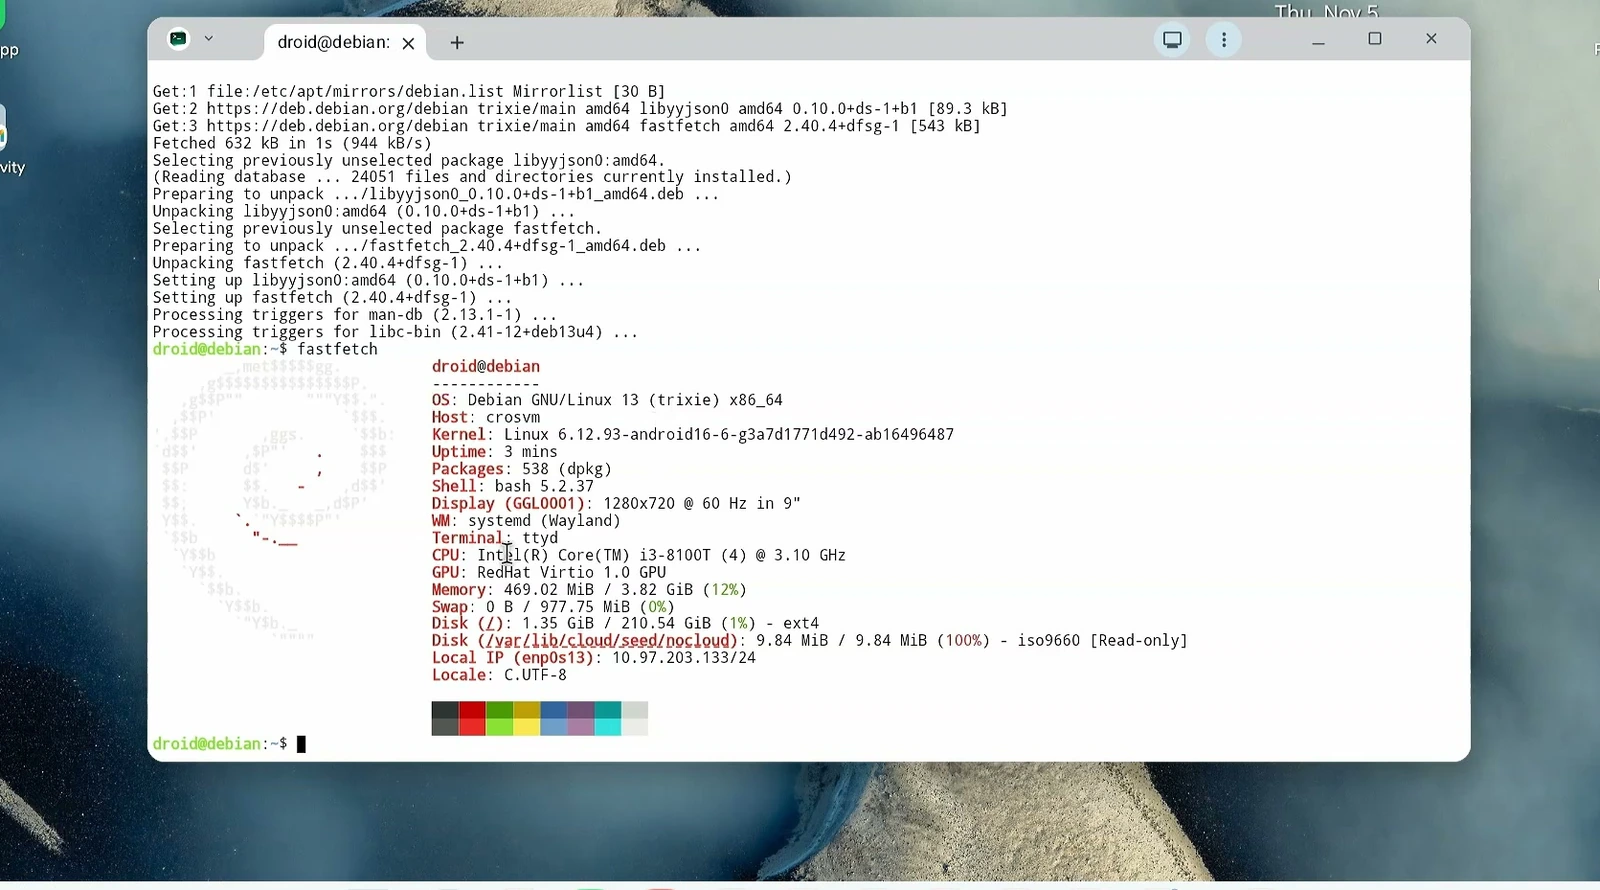
After setup, a Linux terminal window opens. I updated the package information and installed Fastfetch, a utility that displays operating-system and hardware details in a compact terminal summary. The environment identified itself as Debian Linux 13.
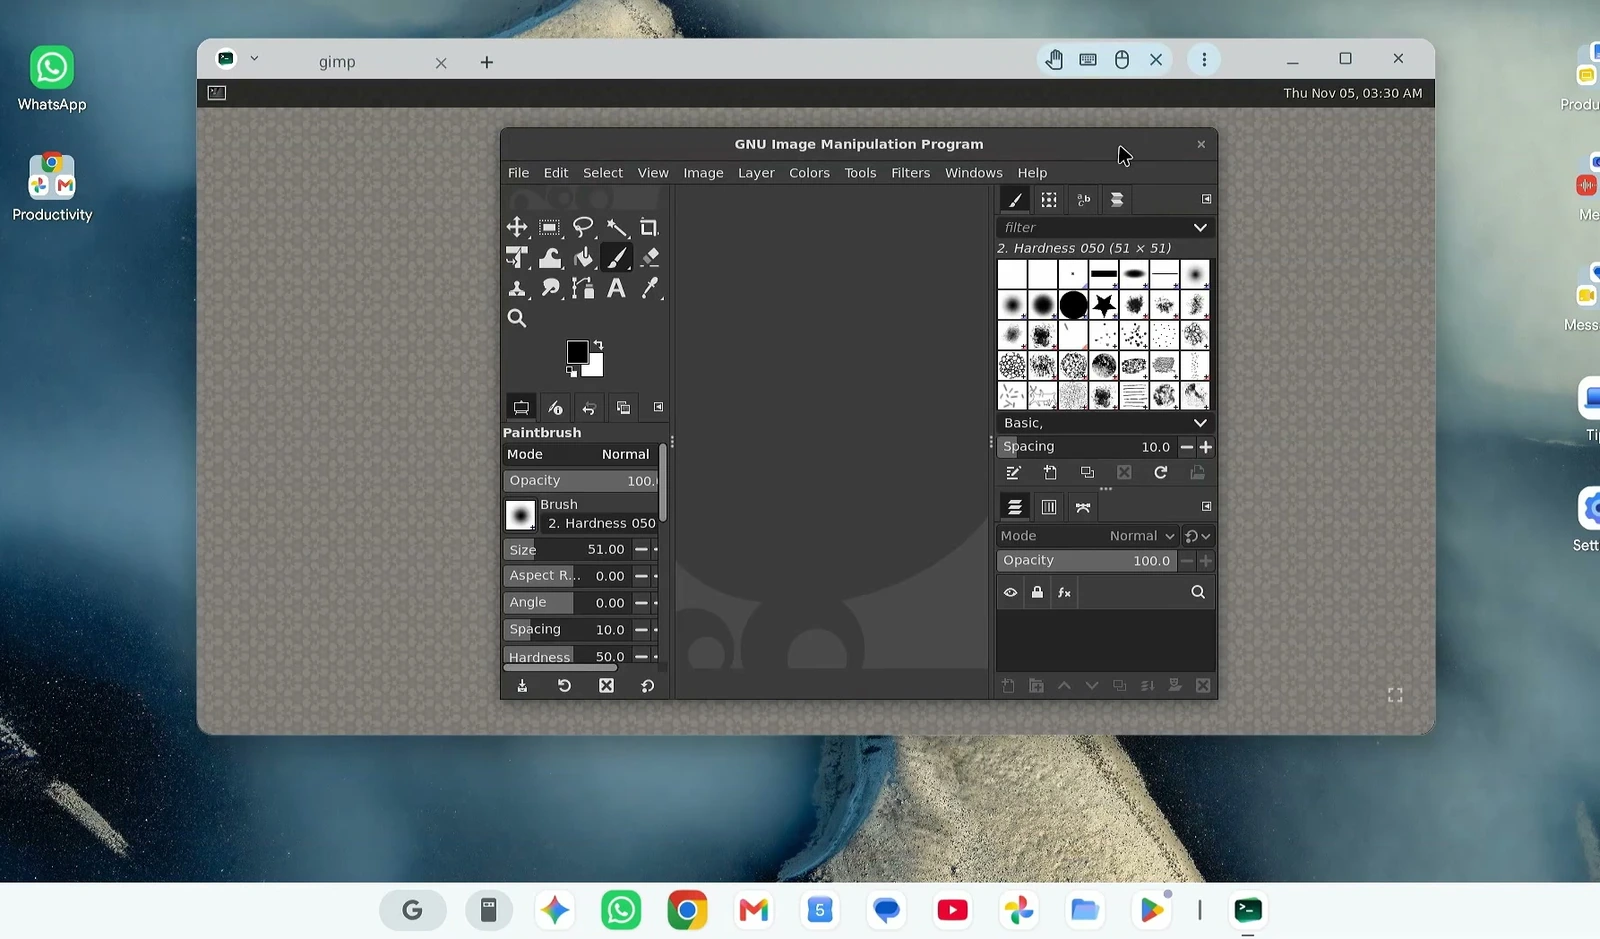
Linux here isn’t just a text-only terminal. I also installed GIMP, the desktop image editor, and Mousepad, a lightweight text editor. Both opened in their own windows alongside Android apps, which makes the Linux environment considerably more useful than a command prompt alone.
Because packages and repositories change over time, use the Debian package manager inside your own Linux container for the applications you want rather than assuming every package is preinstalled.
Try Android games with keyboard controls
To test gaming, I installed Hill Climb Racing through Google Play. It opened in a desktop window, with a built-in control overlay for actions such as acceleration, braking and pausing.
Open the game’s menu and select Game controls to inspect or edit the keyboard mappings. I assigned the up arrow to accelerate and the down arrow to brake, then returned to the game to try them.
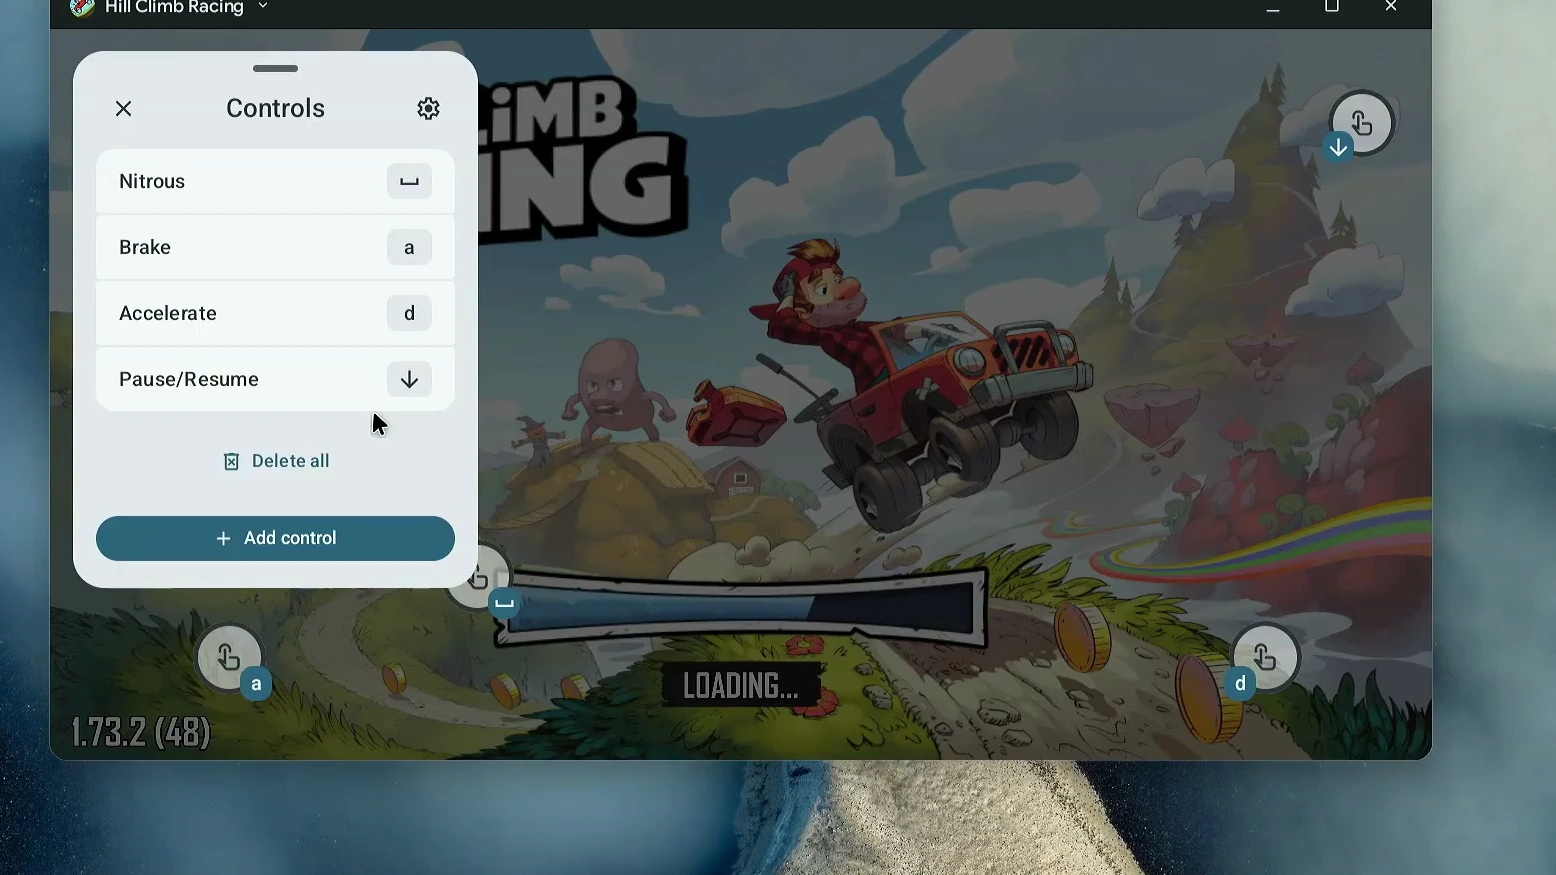
After saving the new mappings, I closed the controls panel and returned to the game to test the arrow keys.
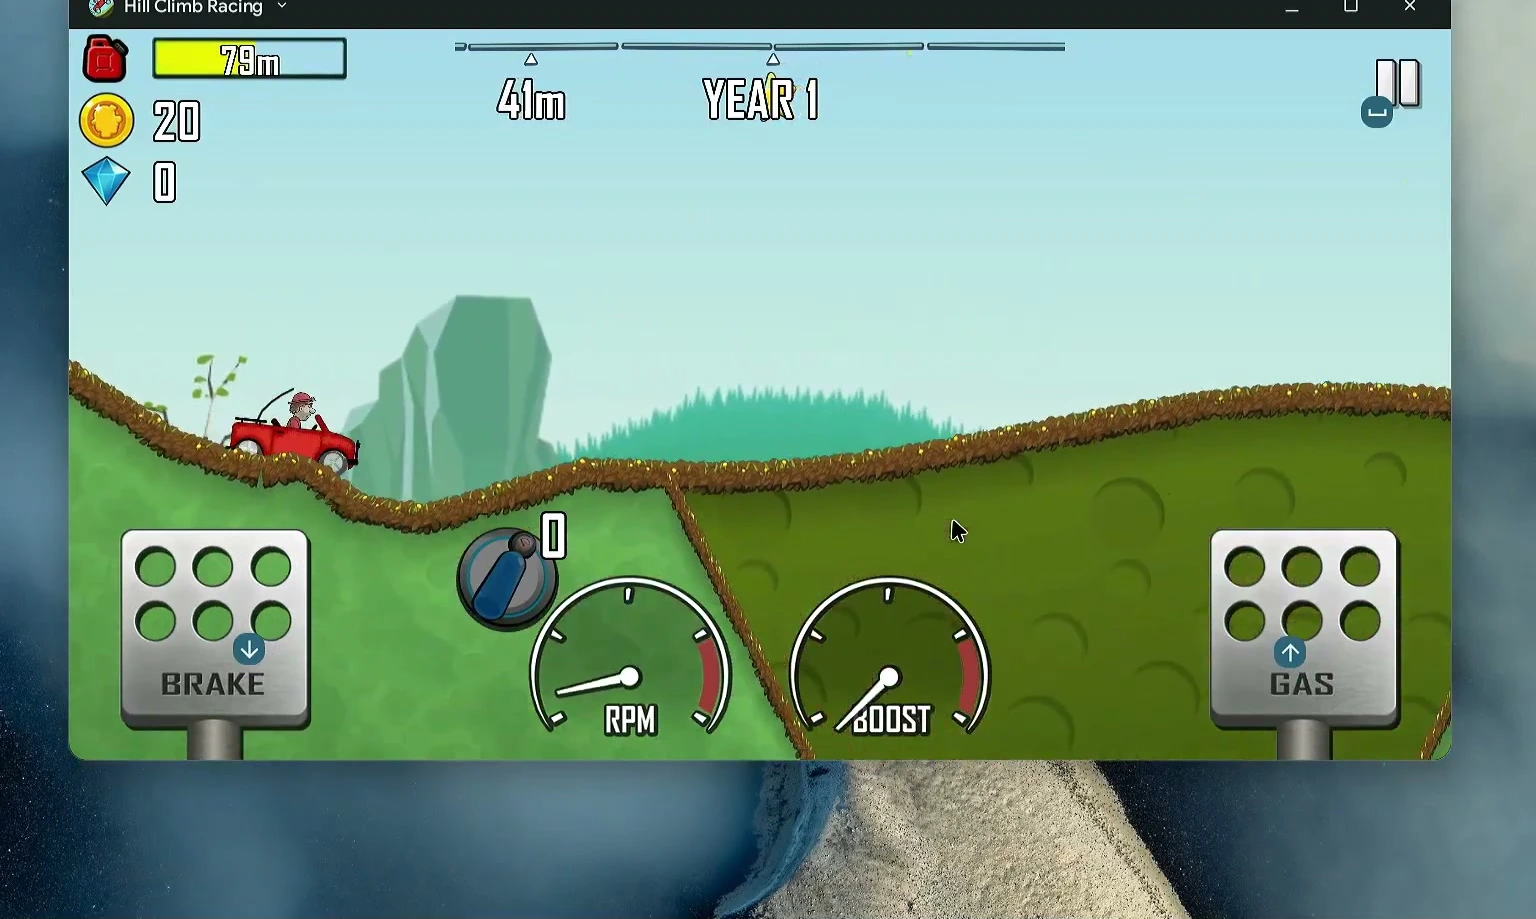
The car responded to the controls on my Dell. It’s a handy feature for touch-oriented games, though support and performance vary by title and hardware.
Check video playback and day-to-day performance
Finally, I opened YouTube to see how the system handled high-resolution playback on the Core i3’s integrated graphics. I selected a 4K, 60 fps HDR video and checked the available quality options.
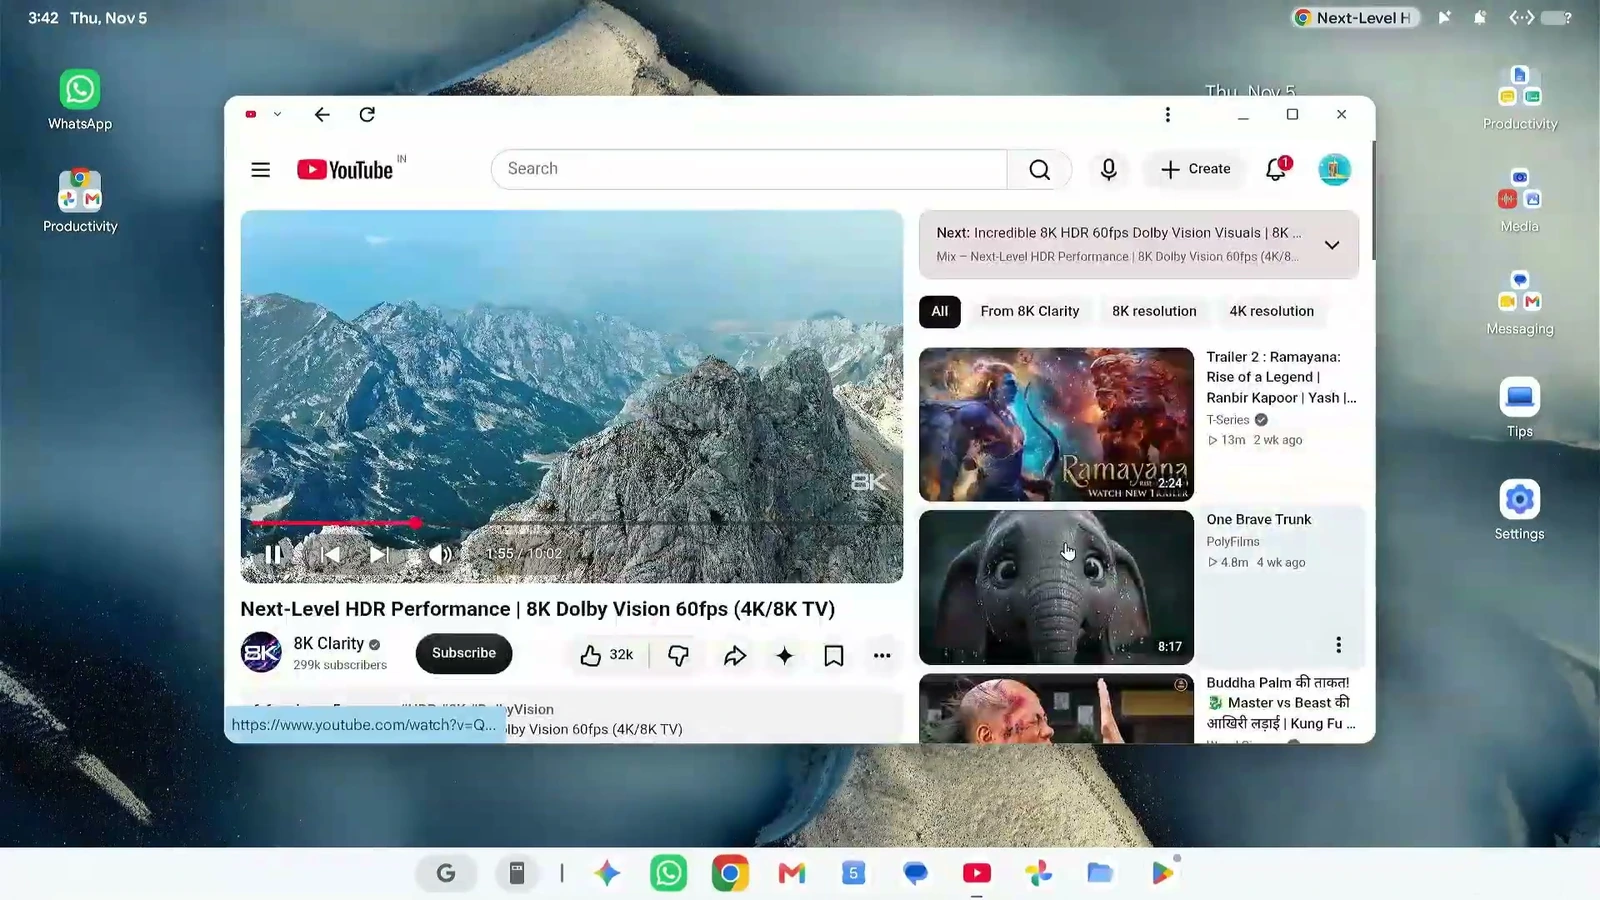
The video opened and playback started, but that isn’t a guarantee of consistently smooth 4K performance on every machine. Decoding support, graphics drivers, network speed and the particular video all affect the result. For everyday use, I’d check the applications and features I actually depend on before committing this operating system to a main computer.
On my Dell, the combination of Android apps, a familiar desktop layout, a usable Linux environment and keyboard-controlled gaming made Googlebook OS an interesting experiment. The safest way to find out whether it works for you is to start from the live USB, check your hardware, and only then consider a permanent installation.