You can view another computer’s HDMI output on your laptop, but most laptops cannot do this with an HDMI cable alone. Their HDMI ports are outputs: they send video to an external display rather than receive video from another computer.
The workaround is an HDMI video capture card. It receives the other computer’s HDMI signal and passes it to your laptop over USB as a camera-style video feed. This guide explains how to connect the hardware, view the feed in VLC on Windows, and optionally record it.
What You Need and How to Connect It
You need a source computer with an HDMI output, an HDMI cable, an HDMI video capture card with a USB connection, and a Windows 10 or Windows 11 laptop with a compatible USB port. The capture card must support the resolution and frame rate you plan to use; Full HD at 30 frames per second is a practical starting point.
Connect the HDMI cable from the source computer’s HDMI output to the capture card’s HDMI input. Then connect the capture card’s USB side to your laptop. The laptop receives the picture through USB, so its own HDMI port is not part of this connection.
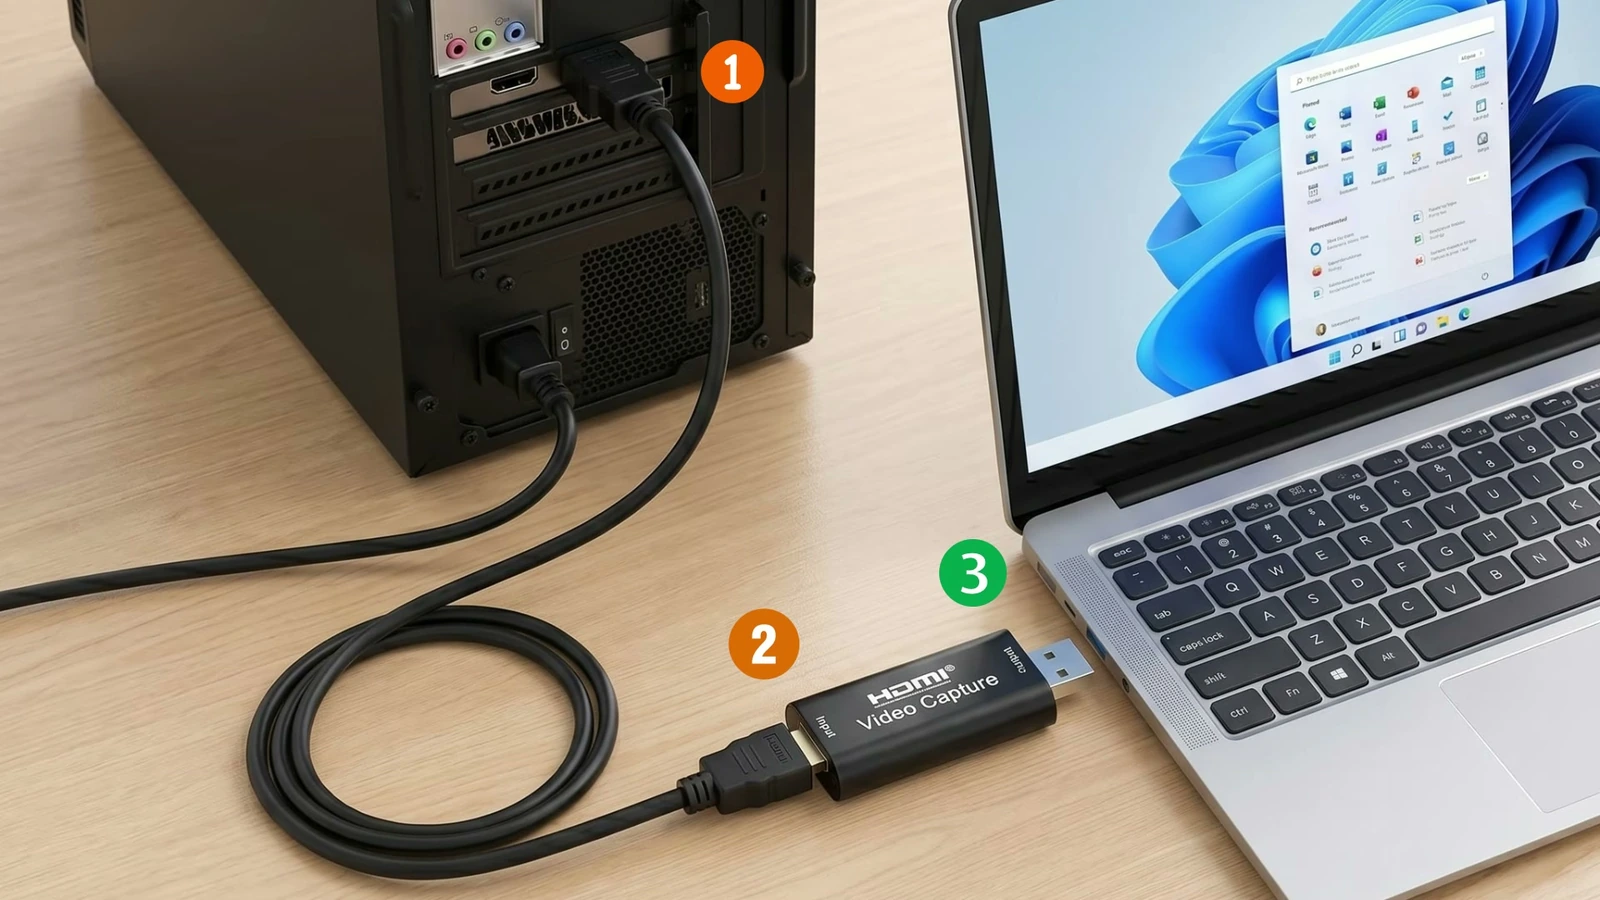
Note: This setup provides a video preview, not remote control. You still need to control the source computer using its own keyboard and mouse; viewing it in VLC does not transfer your laptop’s controls to that computer.
Check That Windows Detects the Capture Card
Windows 10 and Windows 11 usually detect basic USB HDMI capture cards automatically, without a separate driver installation. The device commonly appears as USB Video, although its name can vary by manufacturer.
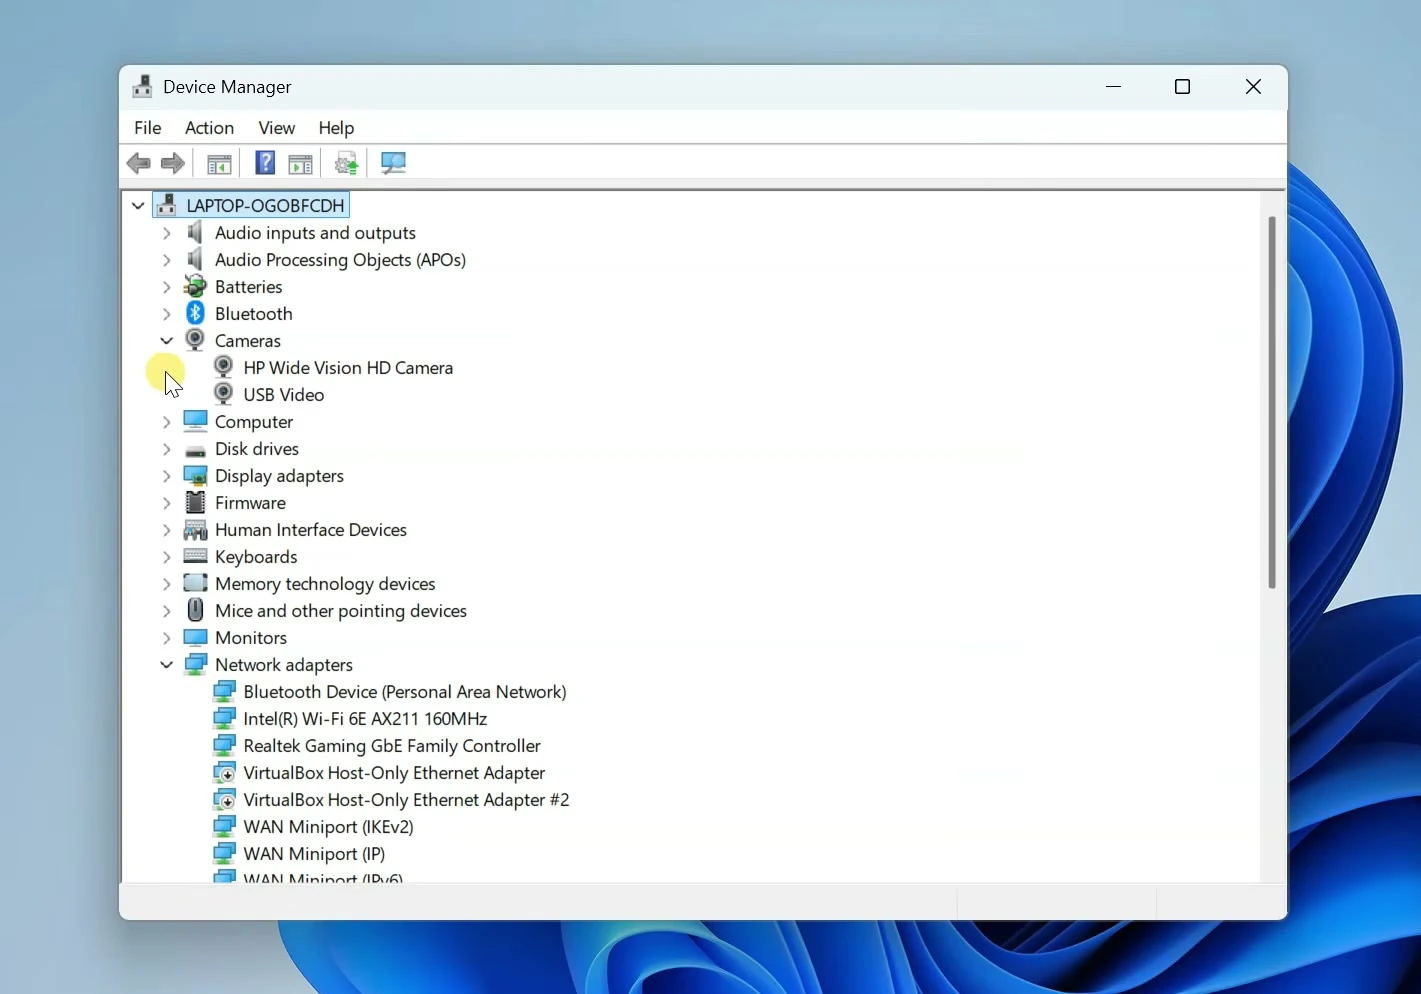
To check detection, open Device Manager and look under Cameras for USB Video or the capture card’s name. A listing confirms that Windows recognizes the USB video device, but you should still test whether it is receiving a picture.
For a quick test, search for Camera in the Start menu and open the Camera app. If it is using the capture card, you should see the source computer’s display. Once you finish testing, close Camera before continuing in VLC.
Configure the HDMI Video Feed in VLC
VLC provides control over the capture device, resolution, frame rate, and buffering. If it is not installed on your laptop, download and install it from the official VideoLAN website.
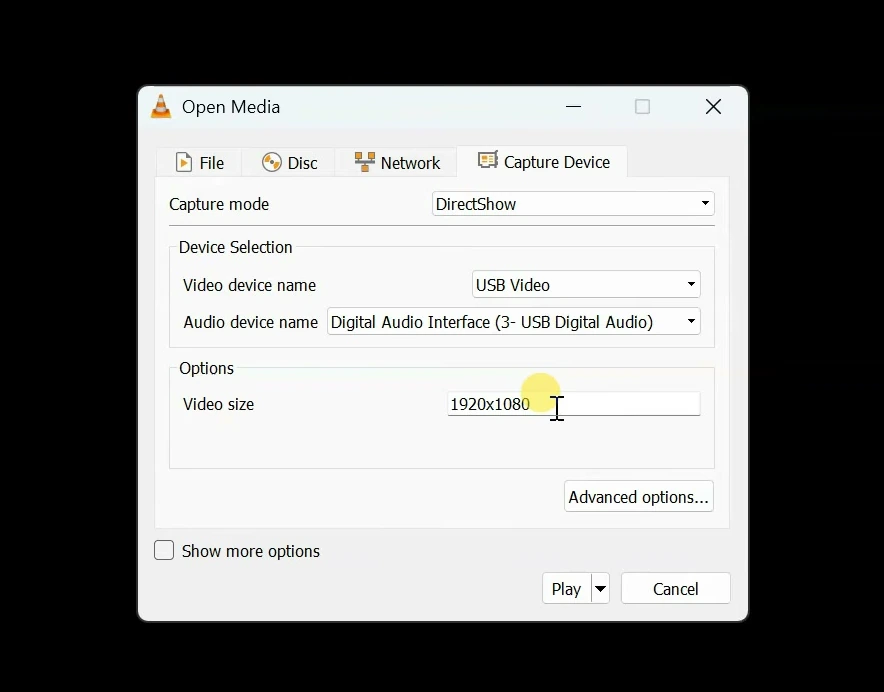
Open VLC, then choose Media and Open Capture Device. Set Capture mode to DirectShow. In Video device name, select USB Video or the name of your HDMI capture card.
If you also want sound from the source computer, select the capture card’s audio device in Audio device name. It may appear as USB Audio or USB Digital Audio. Choose the capture card’s audio source rather than your laptop’s microphone.
Enter 1920×1080 in Video size to request Full HD capture. This depends on the capture card supporting that mode. Higher resolutions such as 2K or 4K are only worth trying if your card supports capturing them; many inexpensive cards work more smoothly at Full HD.
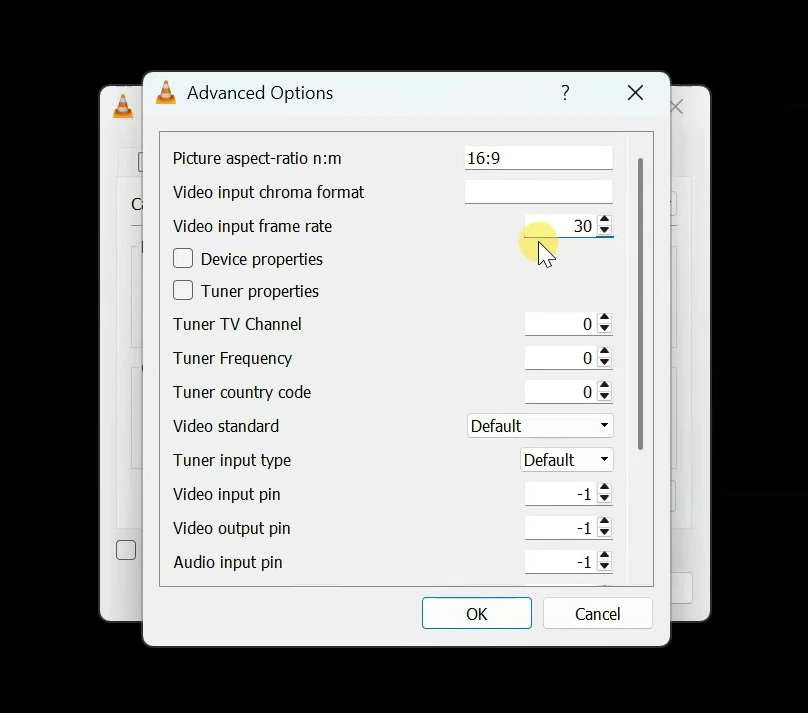
Open Advanced options and set Frame rate to 30. This is suitable for ordinary desktop viewing. Set Picture aspect ratio to 16:9 for the 1920×1080 image. Use 16:10 only when it matches the captured picture; choosing an aspect ratio solely to fill your laptop’s screen can stretch the image.
Return to the capture settings and enable Show more options. Set Caching to 0 to reduce the buffering delay, then select Play. The source computer’s display should appear in VLC, and you can switch to full-screen viewing.
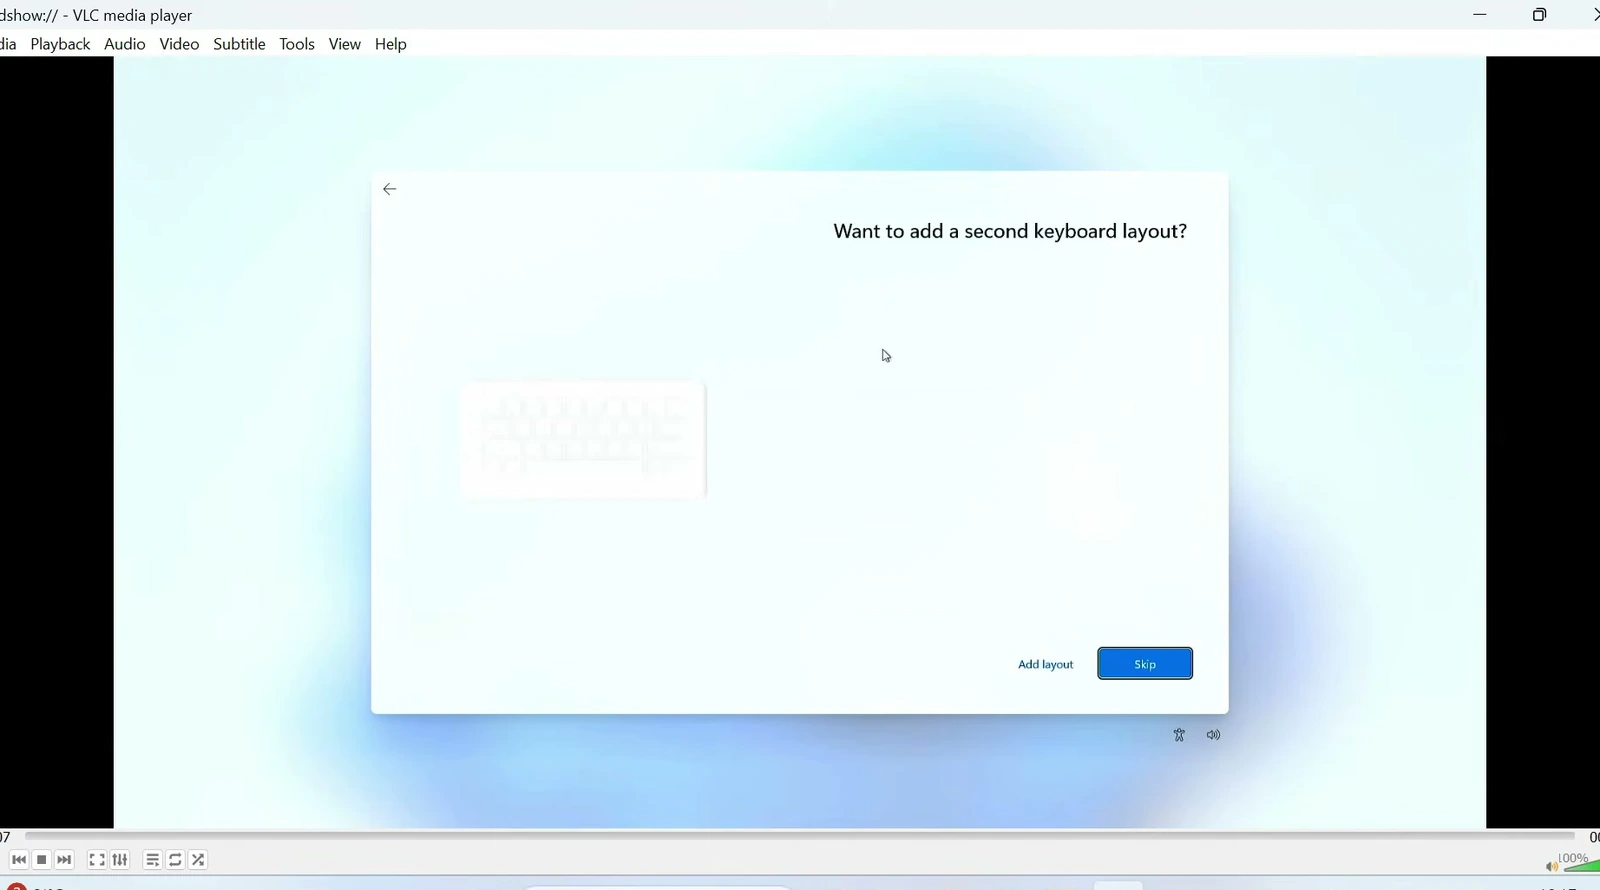
Warning: Zero caching does not mean zero latency. The capture card and video processing still introduce delay. This method is useful for desktop work and setup tasks, but it is not an ideal replacement for a direct monitor connection when playing fast, reaction-sensitive games.
Optional: Record the Display in VLC
While the captured display is playing, open VLC’s View menu and enable Advanced Controls. A red Record button appears above the normal playback controls. Select it to start recording, then select it again to stop.
VLC normally saves these recordings in your Windows Videos folder. This can be useful for recording Windows installation, troubleshooting sessions, or BIOS screens, provided the source computer is sending those screens through its HDMI output.
Troubleshooting Common Problems
▸ The capture card does not appear
Check the capture card’s USB connection to the laptop, then look again under Cameras in Device Manager. Most basic cards are detected automatically, but that is not a guarantee for every model. If yours remains missing, check its manufacturer’s Windows compatibility and driver requirements.
▸ The device is detected, but there is no picture
Check that the source computer is on and that the HDMI cable runs from its output to the capture card’s input, not to the laptop’s HDMI port. In VLC, confirm that DirectShow and the capture card’s video device are selected. Test the feed in Camera to help separate a connection problem from a VLC configuration problem.
▸ The picture works, but sound is missing
Check Audio device name in VLC and select the capture card’s USB audio device if one is available. Selecting USB Video alone does not also select the correct audio source.
▸ Playback is slow or delayed
If you tried a higher resolution, return to 1920×1080 at 30 fps, provided your card supports it. Check that Caching is set to 0 to minimize VLC’s buffering. Some capture delay will remain even with these settings, so a direct monitor is the better choice when immediate response is essential.
Final Words
An HDMI capture card lets your Windows laptop display another computer’s video without needing an HDMI input port. With VLC configured for a supported resolution and frame rate, you can use that feed for everyday viewing, setup work, and recording—just remember that it remains a delayed video preview rather than a direct monitor connection.