If Windows stops at a **Your PC/Device needs to be repaired** screen, Hiren’s BootCD PE can help you attempt a repair without immediately reinstalling Windows. It starts a separate Windows-based recovery environment from a USB drive, giving you access to repair tools even when your installed system cannot boot.
Start with Lazesoft’s automatic repair. BootIce and EasyBCD provide a manual alternative, but the boot-record procedure covered here is only appropriate for a legacy BIOS/MBR installation—not a universal fix for modern UEFI/GPT systems.
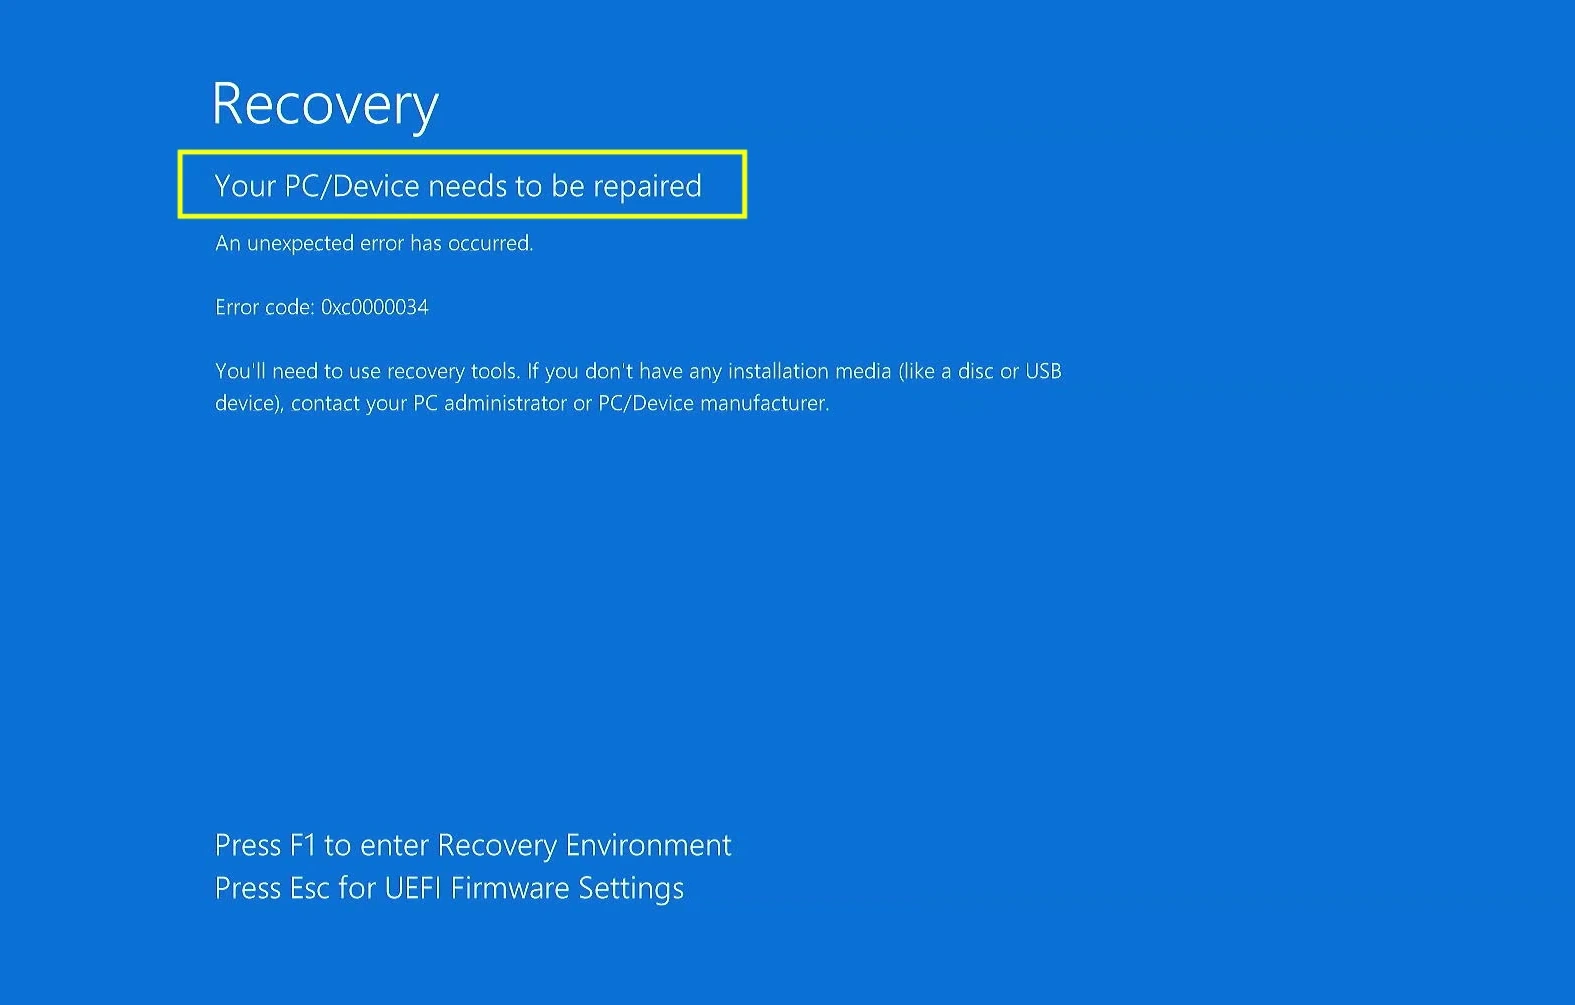
Note: Boot repair can address damaged boot records or boot configuration. It cannot guarantee a fix for every restart loop, a failing storage drive, or other hardware problems.
Prepare the recovery tools and protect your files
You need a working Windows computer to create the recovery USB, an internet connection for the downloads, and a USB drive large enough for the Hiren’s BootCD PE ISO. Rufus’s supplied download page lists Windows 8 or later as its requirement. Hiren’s BootCD PE is an x64 recovery environment, so the affected PC must be compatible with it.
Warning: Creating the recovery USB erases its existing contents. Back up that USB first. Boot repair also changes startup information on the affected system, so copy important files to separate storage before making repairs whenever possible.
Download the Hiren’s BootCD PE ISO from the official page, then download the Rufus executable appropriate for the working computer. Rufus runs directly without an installation.
Note: If the Windows drive is protected by BitLocker, have its recovery key available. A locked volume must be unlocked before recovery tools can access the Windows installation or your files.
Create the Hiren’s BootCD PE USB in Rufus
Connect the USB to the working computer and open Rufus. Under **Device**, select the USB you intend to erase. Use **SELECT** to open the downloaded Hiren’s BootCD PE ISO, shown in the example as `HBCD_PE_x64.iso`.
The illustrated setup uses **GPT** as the partition scheme and **UEFI** as the target system. Use this configuration when the affected PC will boot the recovery USB in UEFI mode. A legacy-only computer needs compatible recovery media instead; do not change the internal Windows disk’s partition style simply to match this screenshot.
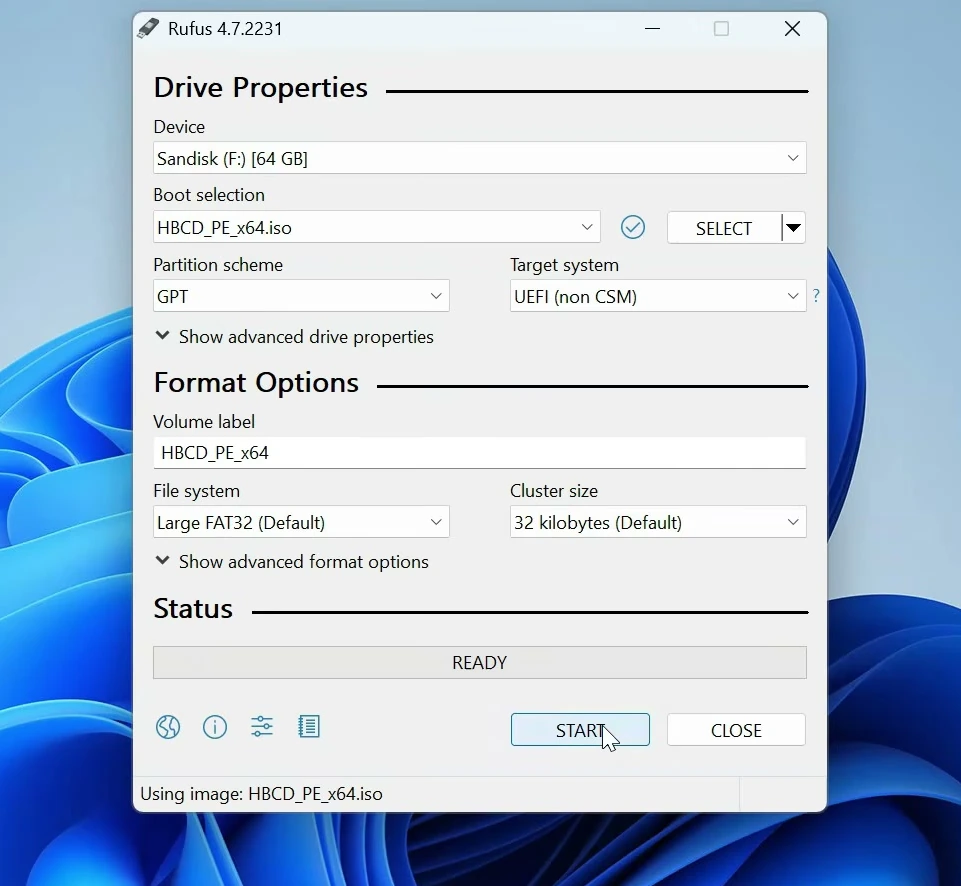
Double-check the selected USB, click **START**, and accept the erase warning only after confirming the correct device. Wait for Rufus to finish writing the recovery files before removing the USB.
Boot the affected PC into Hiren’s BootCD PE
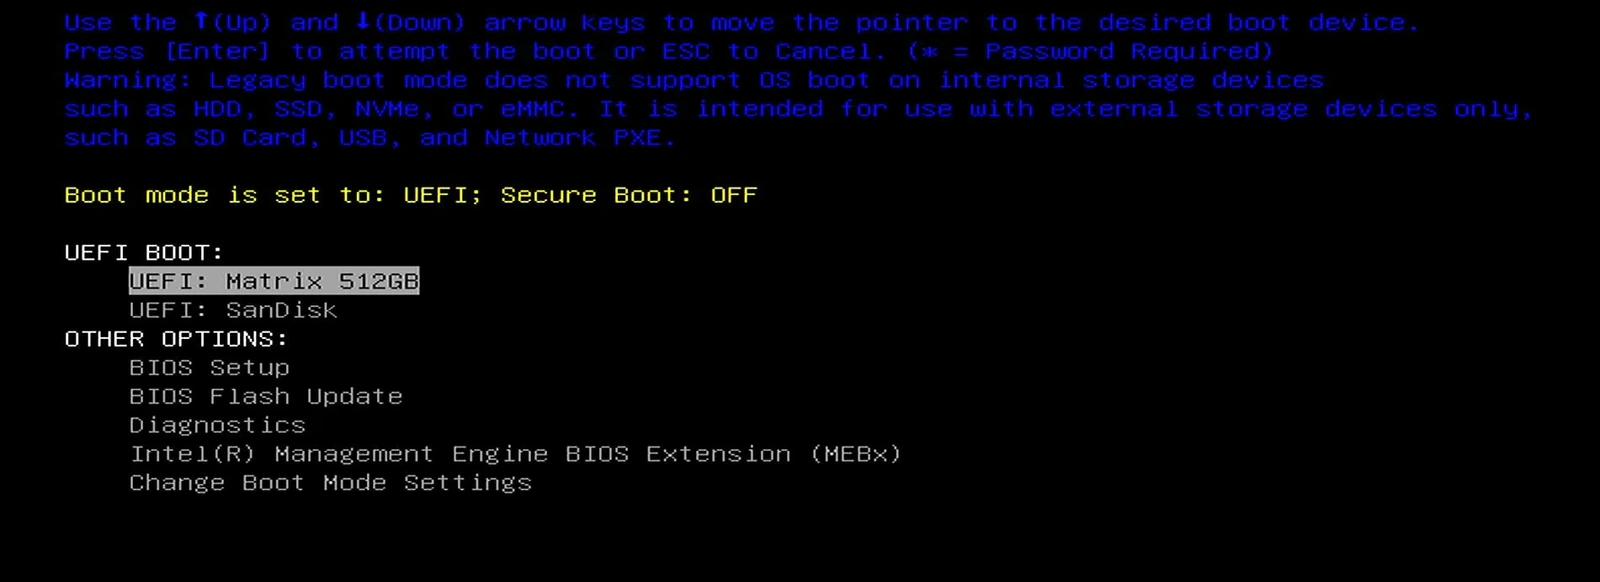
Connect the recovery USB to the affected PC. Turn it on and open its one-time boot menu using the key specified by the manufacturer or displayed during startup. The key and menu appearance vary between computers.
Choose the entry matching your recovery USB. For the UEFI media created above, select its **UEFI** entry rather than the internal SSD. The Dell example lists the SanDisk USB below the internal drive.
Wait for the Hiren’s BootCD PE desktop to load. This is the temporary recovery environment, not the Windows installation you are repairing.
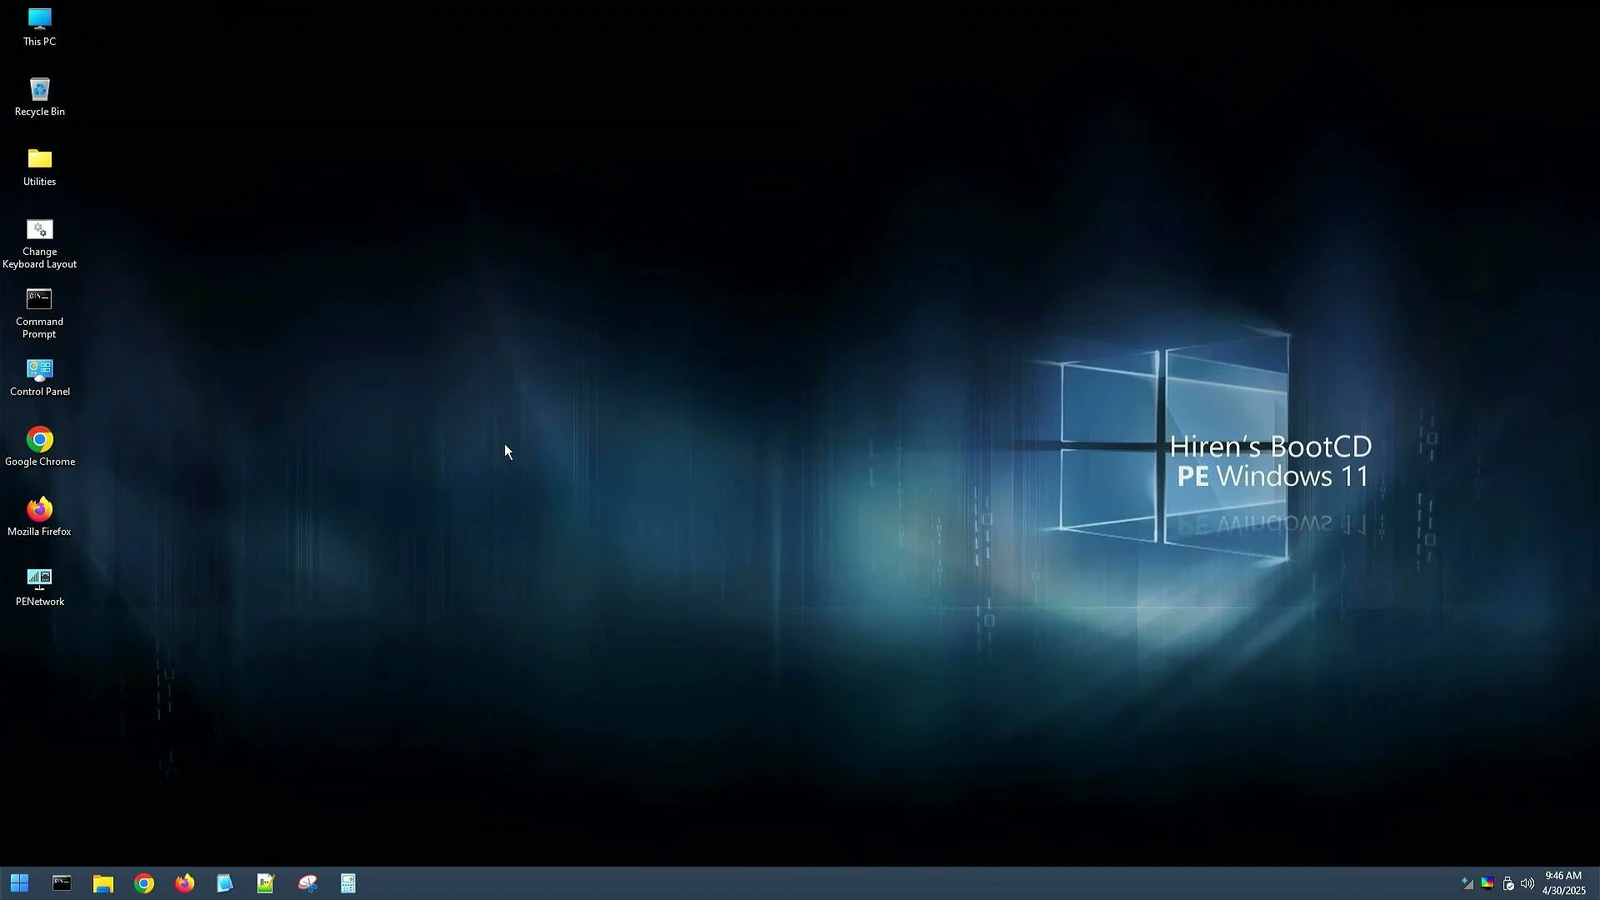
Important: Drive letters can change in the recovery environment. Before selecting a Windows volume in any repair tool, verify its contents rather than assuming it is C:. If your files are accessible, use this opportunity to copy important data to separate storage.
Try Lazesoft’s automatic boot repair first
Open **Lazesoft Recovery Suite**, enter **Windows Recovery**, and choose **One Click Fix**. This is the simpler starting point because it checks boot components without requiring you to rewrite individual records manually.
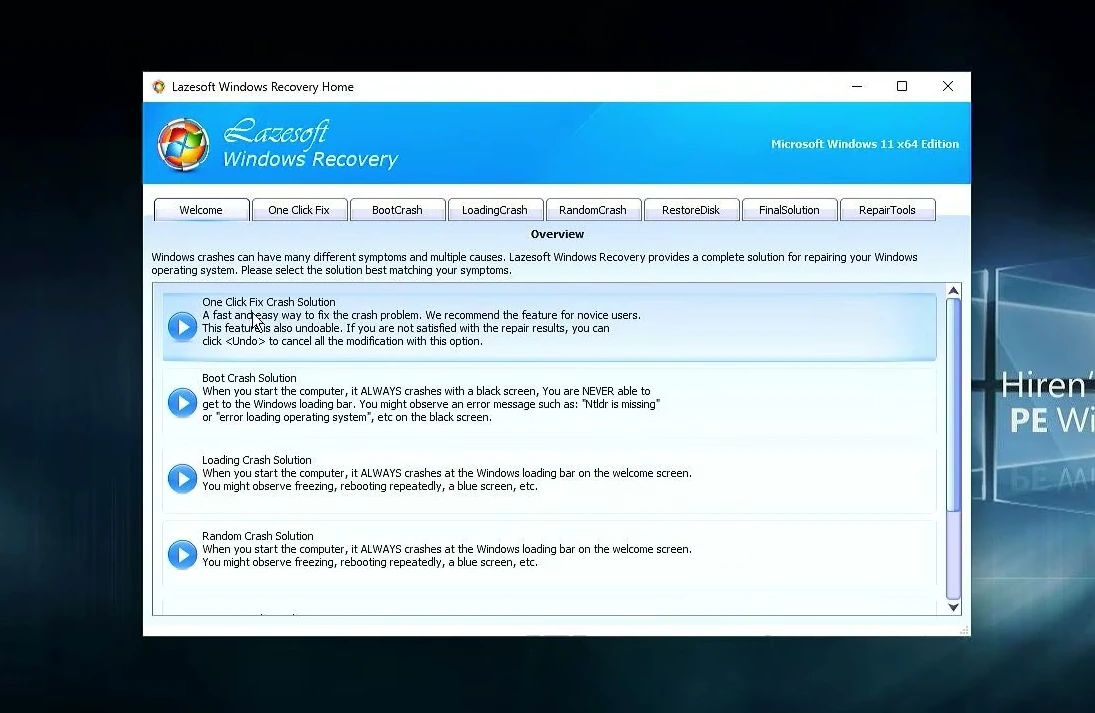
Select the detected Windows installation you want to repair. If several installations appear, check their locations carefully. Continue through the repair wizard and allow it to complete. The illustrated wizard detects Windows 11 and lists checks for boot components, including the MBR, boot sector, and BCD.
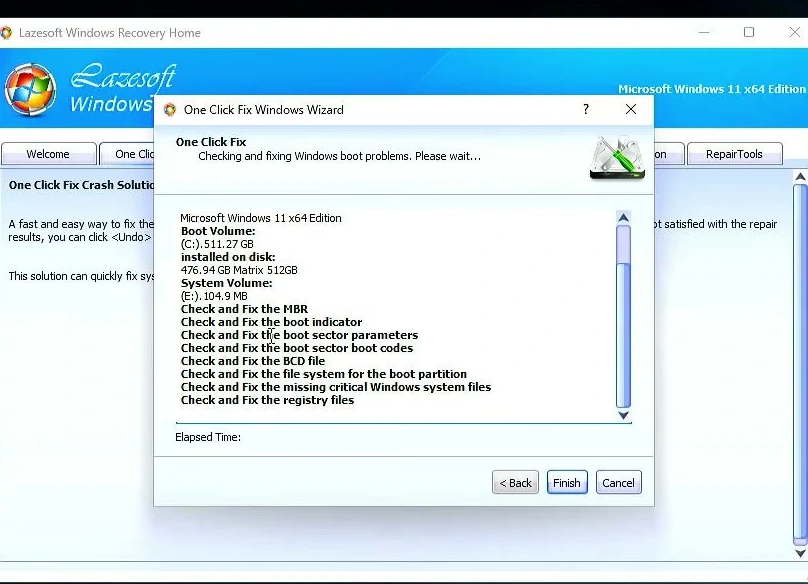
Warning: If Lazesoft cannot find the expected installation, stop before applying changes. Check whether the internal drive is visible, the Windows volume is accessible, and any encryption has been unlocked. Writing boot records is not a substitute for resolving a missing or unreadable drive.
When the repair finishes, shut down, remove the recovery USB, and start the PC from its normal internal drive. Reaching the Windows sign-in screen is the first useful confirmation that startup is working again. Sign in and check that the desktop loads.

Important: If Windows starts normally, you are finished. The manual methods below are alternatives for an unresolved problem, not additional steps to perform on a working system.
Use BootIce only for a legacy BIOS/MBR installation
If automatic repair fails, boot back into Hiren’s BootCD PE. Before using BootIce, establish how the installed Windows system boots and check the internal disk’s partition style with a disk-management tool. Continue with this procedure only for a **legacy BIOS/MBR** Windows installation.
Warning: Do not apply this MBR-writing procedure as a repair for UEFI/GPT Windows. UEFI uses an EFI System Partition and a different startup path. Also, the recovery USB’s GPT setting does not establish the partition style of the internal Windows disk. If you cannot confidently identify the system’s boot mode and target disk, stop here.
Open **BootIce** and select the internal disk belonging to the Windows installation—not the recovery USB or a backup drive. Open its **Master Boot Record** tool, select **Windows NT 6.x MBR**, and click **Install/Config**.
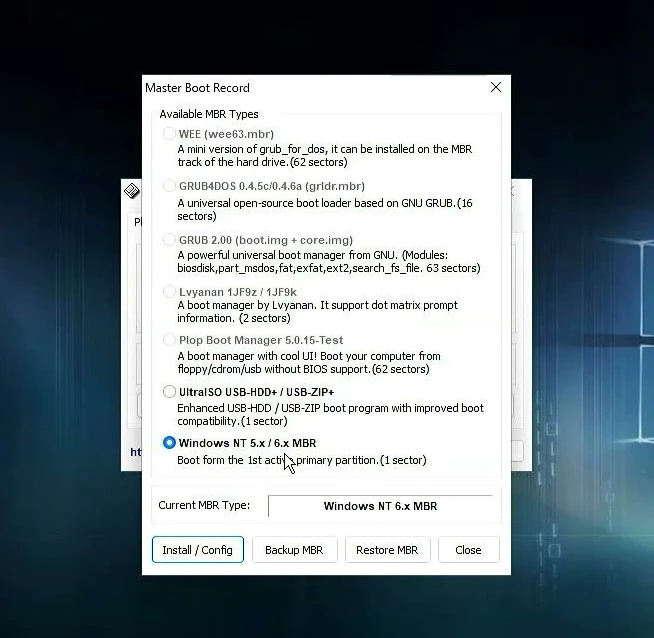
When BootIce asks you to choose between the Windows NT 5.x and Windows NT 6.x MBR, confirm **Windows NT 6.x MBR**. Allow the write operation to finish before closing the tool.
Note: An MBR repair changes one part of the legacy startup process. It does not automatically rebuild a missing Windows boot-menu entry or fix every other boot component.
Check the legacy Windows boot entry with EasyBCD
Within the legacy repair path, open **EasyBCD** and inspect **View Settings**. Review the Windows bootloader entry, boot device, and bootloader path. BCD stands for **Boot Configuration Data**: it holds the information used to locate and start installed operating systems.
Important: Before editing, confirm EasyBCD is working with the installed Windows system’s BCD store, not a configuration belonging to the recovery environment or USB. If you cannot establish which store is loaded, do not make changes. This walkthrough is not an EFI System Partition repair procedure.
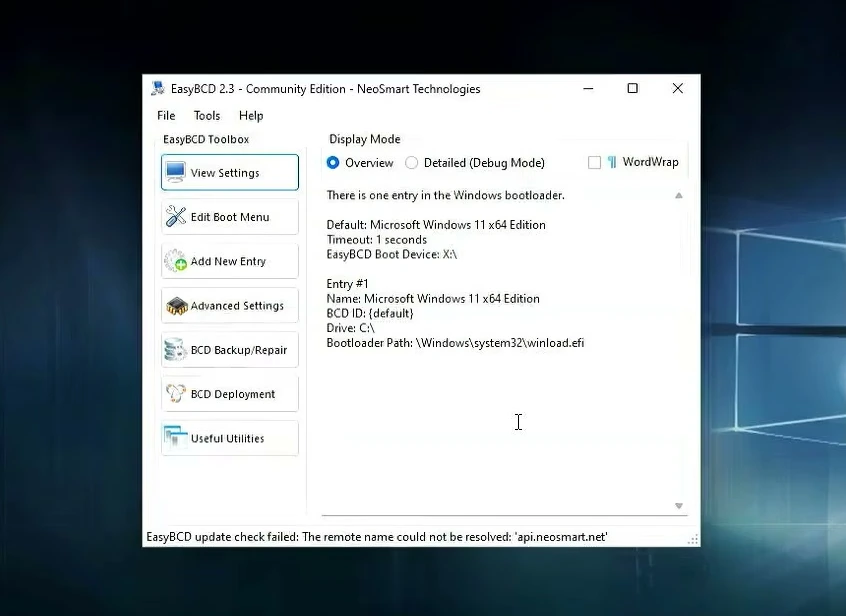
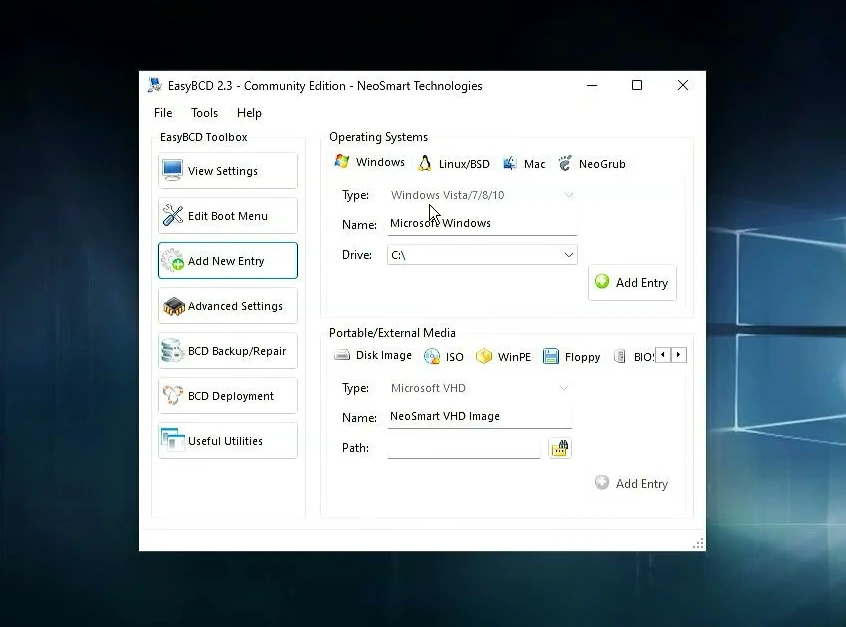
If a suitable Windows boot entry is missing, open **Add New Entry**, select **Windows**, and choose the verified volume containing the installed system. The example selects C:, but your recovery environment may assign a different letter. Click **Add Entry** after checking the target.
Open **Edit Boot Menu** to review the resulting entries. Set the intended Windows entry as the default if appropriate, then click **Save Settings**. The example contains an existing Windows 11 entry and a second Windows entry, so check carefully for duplicates. Avoid deleting the original entry before testing the replacement.
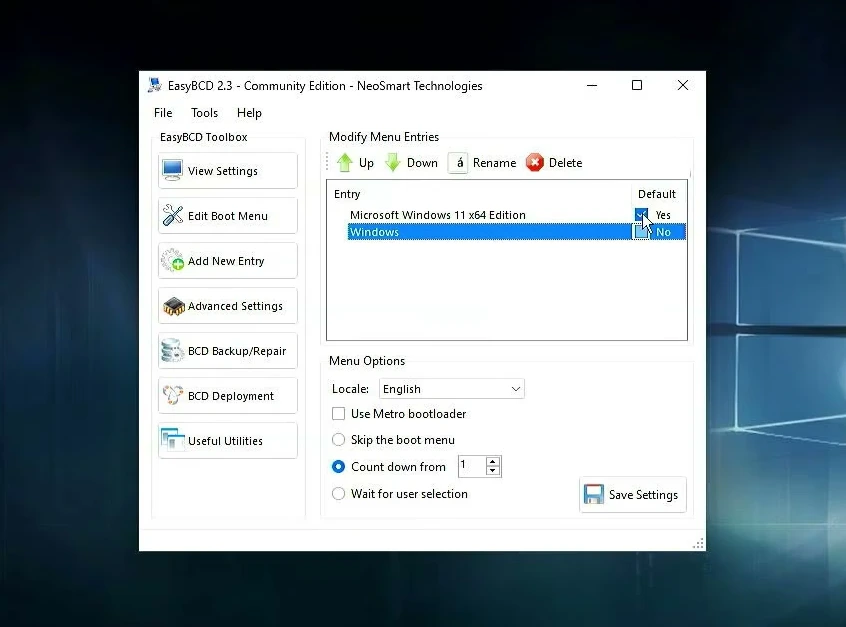
Note: Adding another entry is useful only when the boot configuration needs it. It does not repair damaged Windows files or make an inaccessible drive readable.
Restart and verify Windows loads
After the manual changes, shut down, remove the recovery USB, and start the PC from its internal drive. If a boot menu appears, choose the Windows entry you repaired. Sign in and confirm that Windows reaches the desktop.
If the same error remains, record its message and code rather than repeatedly rewriting boot records. Further repair needs to match the actual fault and the system’s BIOS/MBR or UEFI/GPT configuration. Protect any accessible files before attempting more invasive recovery.