SCRCPY Studio lets you mirror and control an Android phone from a Windows PC through a graphical interface. You can use your mouse and keyboard, forward supported phone audio, save screen recordings, stream a phone camera, and connect over Wi-Fi without typing commands for everyday use.
This tutorial starts with installation and a USB connection, then covers the recording, Camera Mode, Desktop Mode, and wireless controls shown in SCRCPY Studio. The phone runs the Android apps; the PC displays and controls them. Root access and a permanent Android app are not required.
Install SCRCPY Studio on Windows
Have a Windows 10 or Windows 11 64-bit PC, an Android phone, and a USB cable that supports data transfer ready. Basic screen mirroring supports Android 5.0 and newer, while audio forwarding requires Android 11 or newer and Camera Mode requires Android 12 or newer. Desktop features depend on the phone and its firmware.
Download and run the Windows installer
Open the latest release and expand Assets. Choose the Windows x64 Setup.exe file for a normal installation. The Portable.exe version runs without installing SCRCPY Studio itself. Choose the application download, rather than the source-code ZIP files.
Run the setup file and follow the installer. The video uses version 0.1.2; download the current release, whose version number and labels may differ slightly. The project currently distributes unsigned Windows builds, so SmartScreen may show an unknown-publisher warning. Check that the file came from the project’s release page and, if needed, compare it with the release’s SHA256SUMS-Windows-x64.txt. Only if you trust that download, select More info → Run anyway to continue.
Install the official scrcpy runtime
Open SCRCPY Studio and click Install official runtime near the lower-left corner. Keep the PC online while the download completes. Studio obtains the official Windows scrcpy package from Genymobile and checks its published checksum. ADB, the tool that communicates with Android, comes with that package, so you do not need a separate ADB installation.
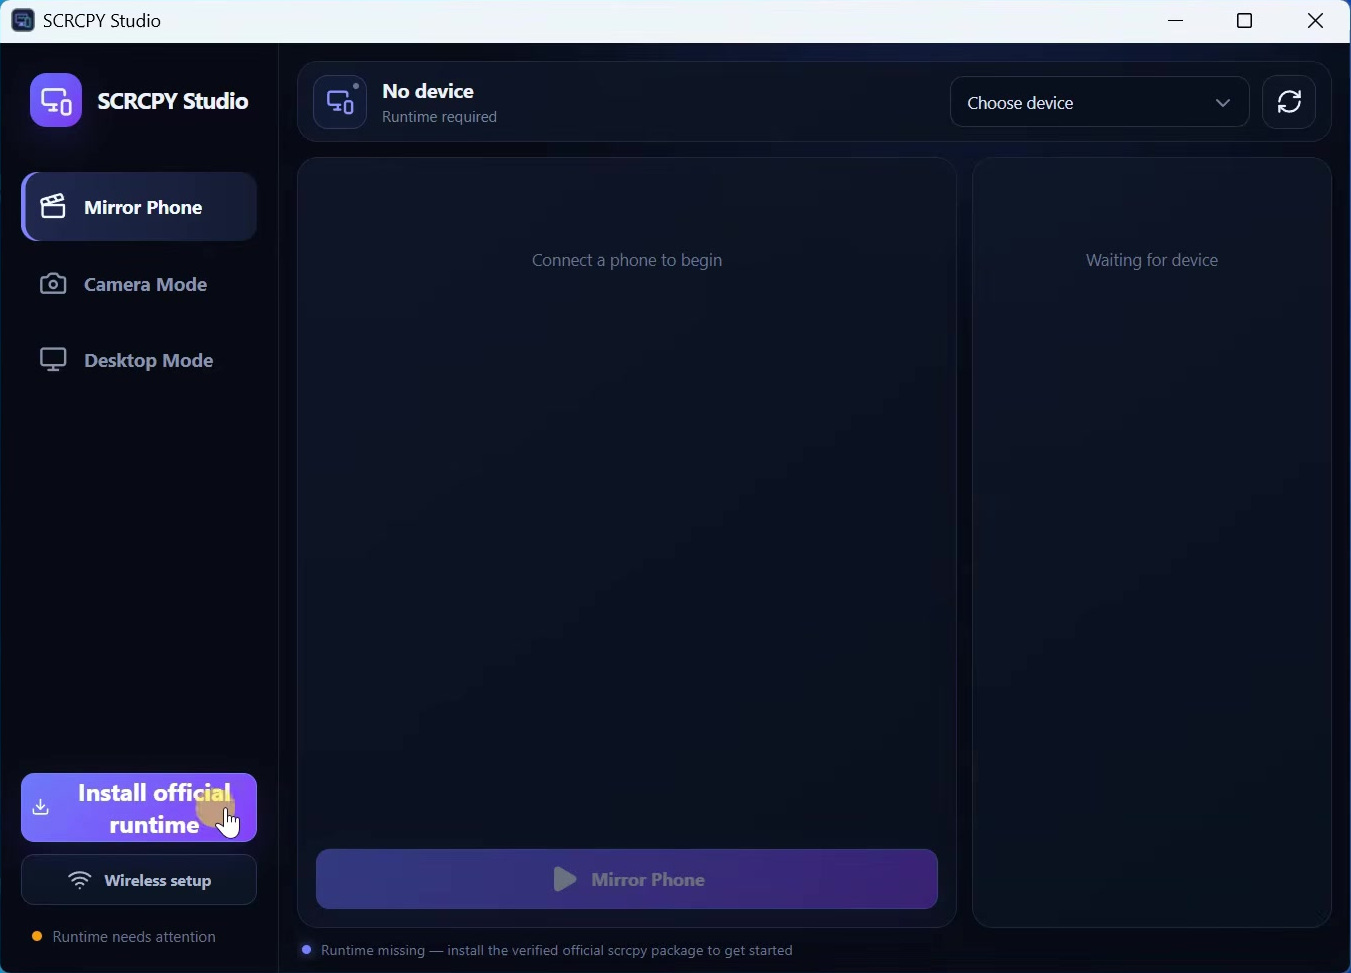
Wait for the status to change to Runtime ready. If Windows asks about network access for ADB, allow the connection on your trusted private network when needed for wireless use.
Prepare your Android phone and connect by USB
Enable Developer options and USB debugging
- Open Settings → About phone. On Samsung devices, open Software information next.
- Find Build number and tap it seven times. Enter your phone’s PIN or password if asked.
- Return to Settings and open Developer options. Its location varies by manufacturer; Settings search can help you find it.
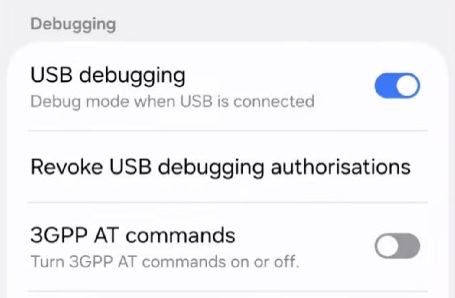
- Enable USB debugging and accept the confirmation.
Authorize the computer
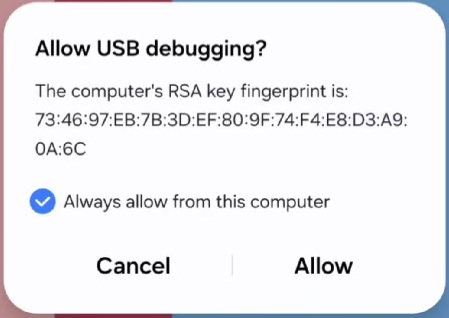
Connect the unlocked phone to your PC with the data-capable USB cable. On the phone, accept the Allow USB debugging? prompt. Select Always allow from this computer if this is your own trusted PC, then tap Allow.
SCRCPY Studio should detect the phone automatically. If it does not, click the Refresh icon in the upper-right corner. Select your phone in the device list if several devices are connected. The header should show its model, connection type, Android version, display resolution, and detected codec information.
Mirror and control Android from your PC
Start with the automatic profile
Select Mirror Phone in the left sidebar. Studio checks the device and builds an Auto Profile for resolution, frame rate, video codec, and audio. Leave those values alone for the first connection and click the purple Mirror Phone button at the bottom.
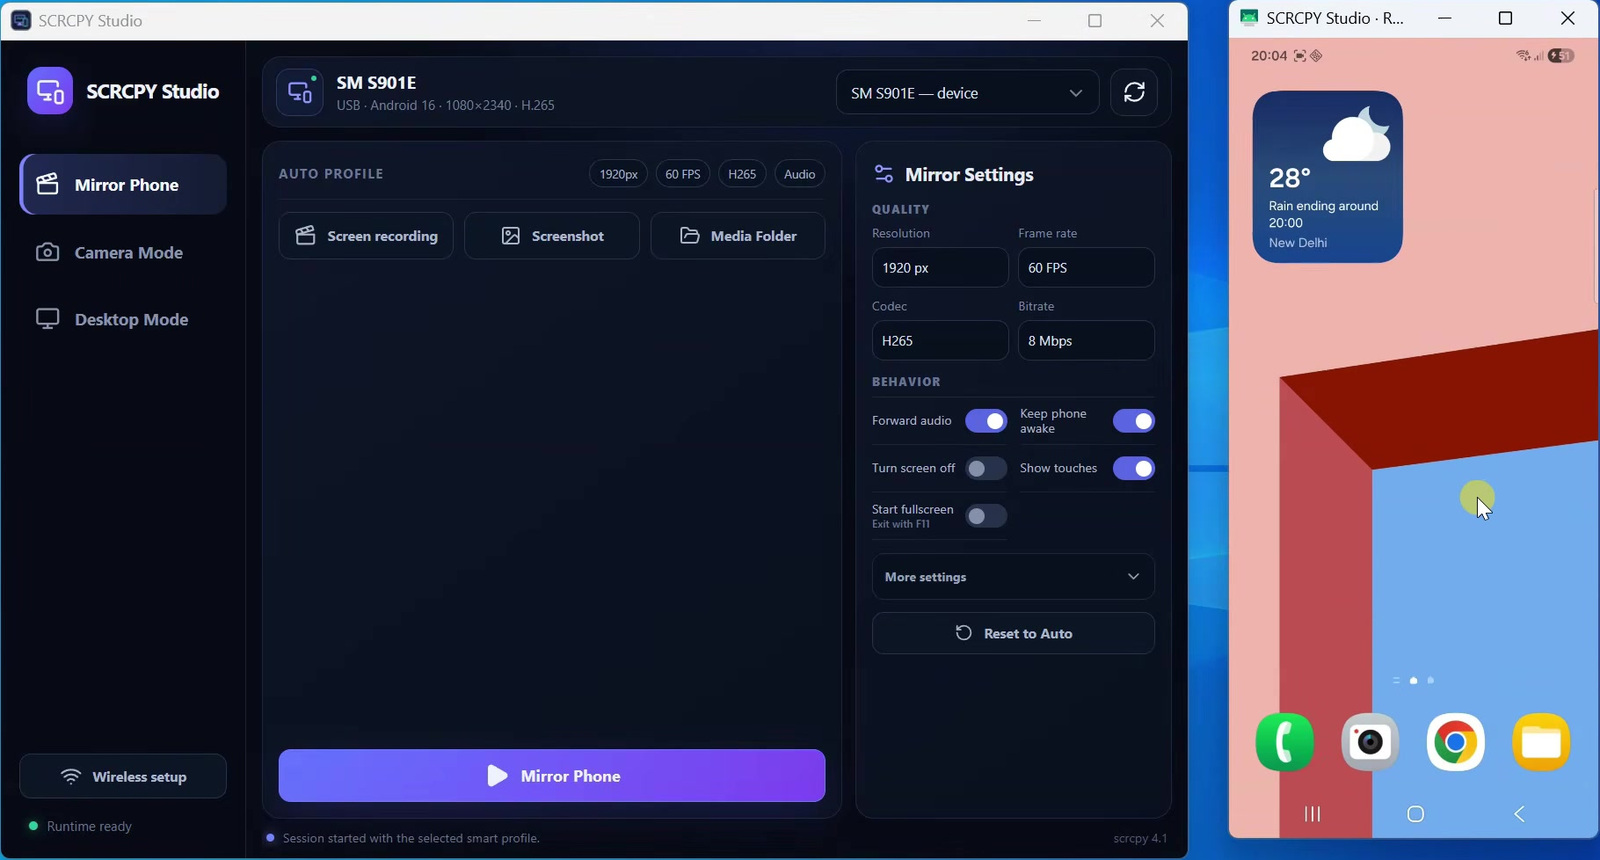
Your Android display opens in a separate window. Click an icon to open an app, drag to swipe, use the mouse wheel to scroll, and type into a focused text field with your PC keyboard. The physical phone stays usable while it is mirrored. Close the mirrored window when you want to end that session.
Adjust picture quality and phone behavior
The Mirror Settings panel contains resolution, frame rate, codec, and bitrate controls. Higher values can improve detail or smoothness, but also need more processing power and connection bandwidth. If the picture stutters, reduce resolution or frame rate first. Keep the automatic profile until you have a reason to change it.
- Forward audio: plays supported Android audio through the PC. According to the official scrcpy audio documentation, Android 11 needs the phone unlocked when the session starts; Android 10 and earlier cannot forward audio through this feature.
- Keep phone awake: helps prevent the device sleeping during use.
- Turn screen off: switches off the physical phone display while keeping its mirrored output on the PC.
- Show touches: adds touch indicators, useful when demonstrating actions.
- Start fullscreen: opens the display fullscreen. Press F11 to toggle fullscreen.
Expand More settings for orientation, video encoder, and display cropping. Leave the encoder on Automatic unless you are troubleshooting. If Studio shows Restart Mirror to Apply, click it to start a new session with the changed options. Use Reset to Auto to return to the recommended configuration.
Record the screen and take screenshots
Enable recording before starting the session
In Mirror Phone mode, click Screen recording so it changes to Recording enabled. Start the next mirror session using Start & Record, or use Restart Mirror to Apply if a session is already open. Enabling the option does not retroactively record activity that happened earlier.
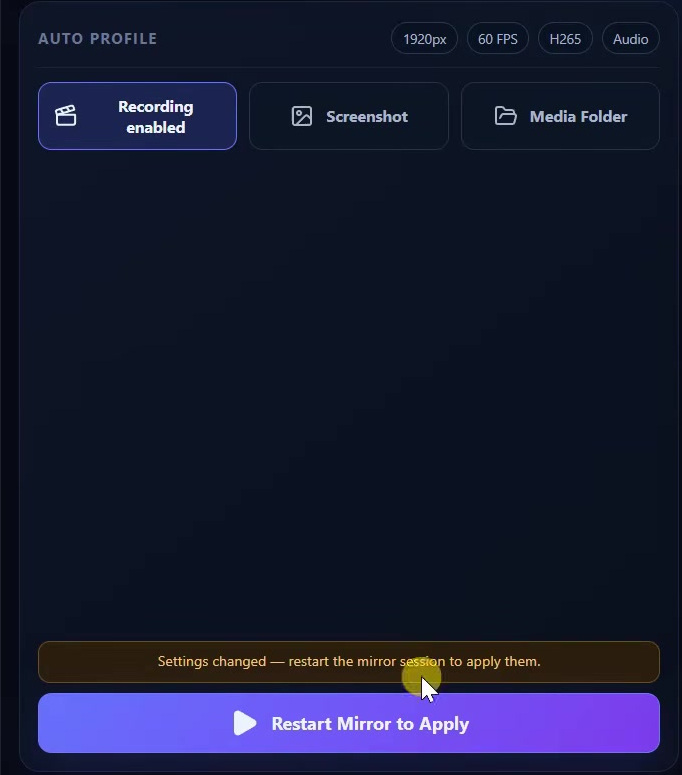
Perform the actions you want to capture, then close the mirrored window to finish the recording. Click Media Folder to find the saved file and open it to check that the expected picture and audio were captured.
Save a still image
While the Android screen is available, click Screenshot to capture the current display. The saved images are accessible through Media Folder too. Before sharing a capture, check it for notifications or other personal information.
Stream your phone camera to Windows
Choose a camera and its capture settings
Select Camera Mode in the sidebar. This feature requires Android 12 or newer. Studio lists the camera lenses exposed by the phone, including their IDs and reported maximum resolutions. Choose the front or rear camera you want from the Camera / lens list.
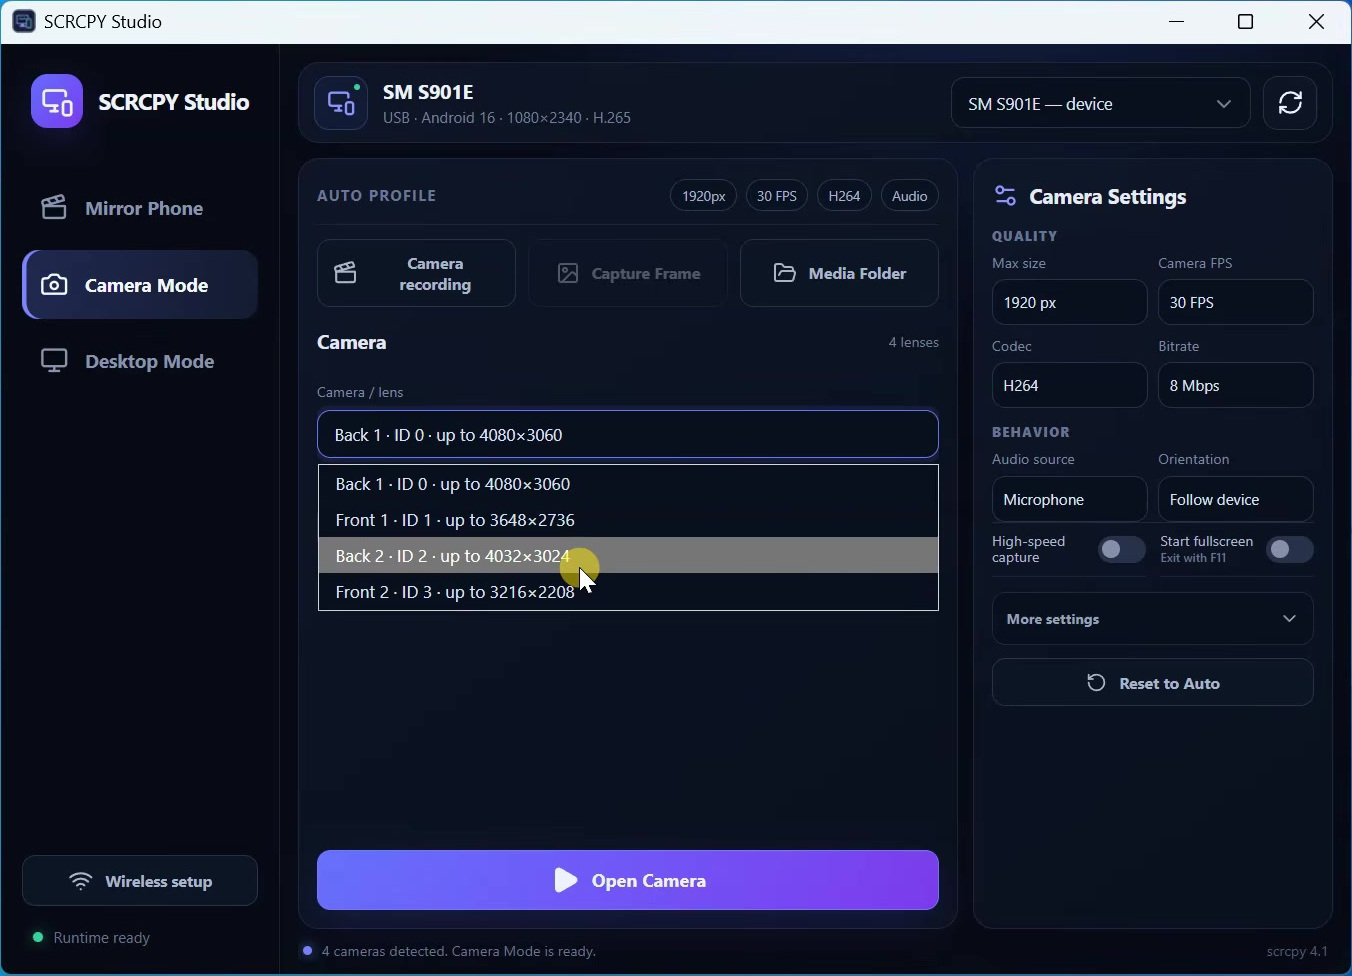
Set the initial zoom if needed. Torch at startup requests the flashlight when the session begins, if the selected camera supports it. In Camera Settings, adjust maximum size, camera FPS, codec, and bitrate. Choose Microphone, device audio, or no audio under Audio source, depending on what you want to capture.
You can also select orientation and fullscreen behavior. Leave High-speed capture off for ordinary recording; it depends on supported camera modes and frame rates. Capturing more frames can be useful for footage you later slow down in an editor, but it does not mean every camera supports every resolution/FPS combination.
Open or record the camera stream
Click Open Camera to show the live camera feed on the PC. To save it, enable Camera recording before starting the session. Close the camera window when finished and use Media Folder to open the recording. The video demonstrates a camera preview and local recording; opening this window alone does not register the phone as a webcam in every Windows meeting app.
Try Android Desktop Mode
Check support and enable freeform windows if offered
Select Desktop Mode. Studio inspects the phone’s display and windowing capabilities. You may see Virtual Display or Android Desktop Windowing, depending on what the device actually supports.
If the app offers Enable Freeform Windows & Restart, save your work on the phone before using it. The action changes the supported Android window settings and restarts the device. Leave the USB cable connected, wait for Android to start, unlock the phone, and allow Studio to reconnect and check support again.
After the change, Restore Original Android Settings & Restart lets you return the backed-up settings to their earlier values. This also restarts the phone. Enabling freeform settings cannot add firmware features that the manufacturer has not provided.
Launch the secondary display
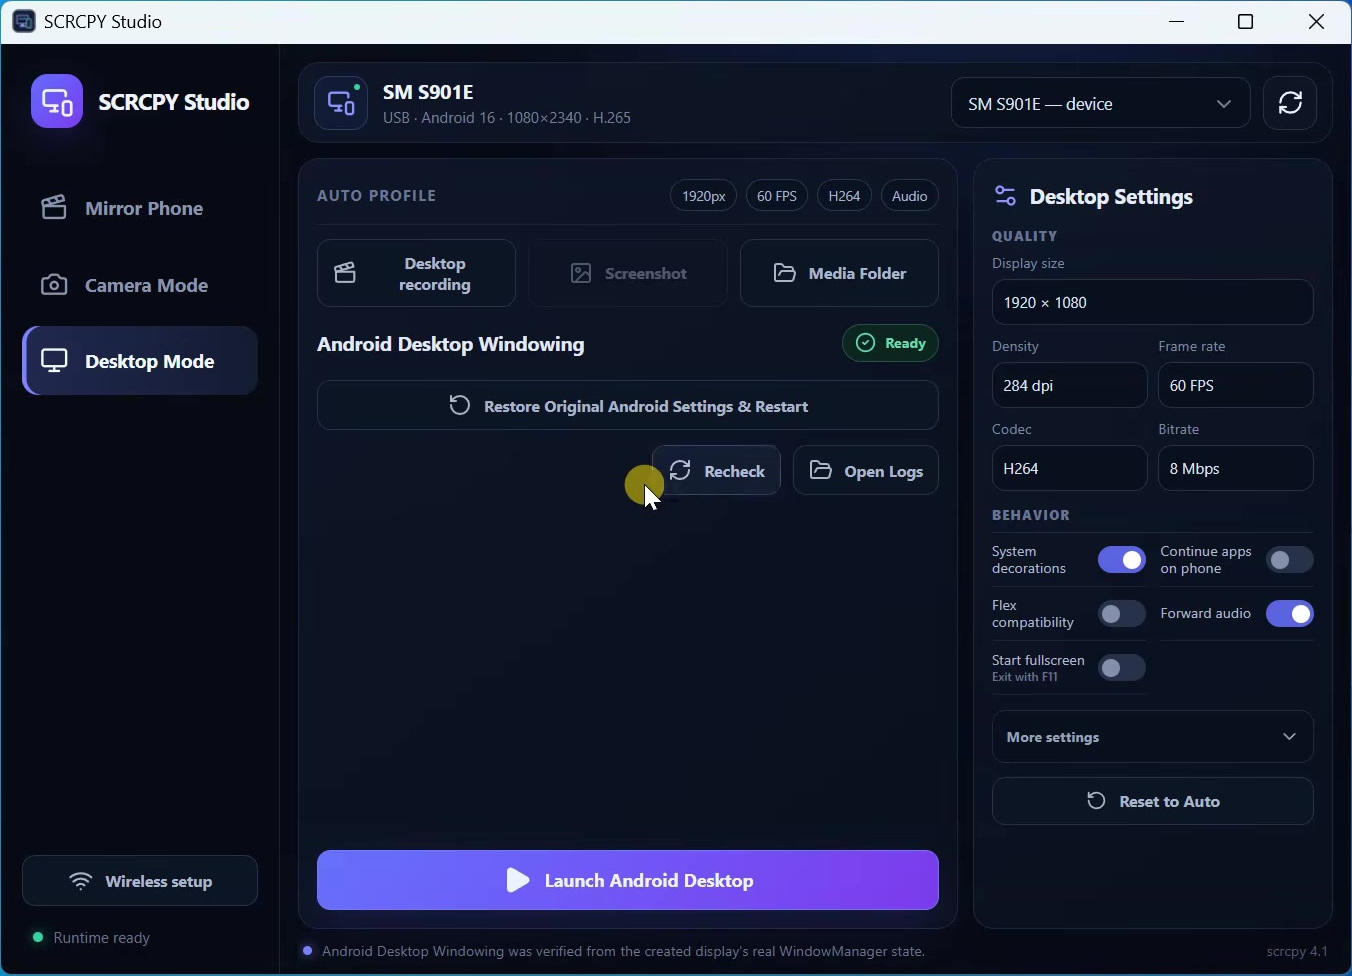
Use Desktop Settings to choose display size, density, frame rate, codec, and bitrate. Start with the automatic values. The demonstration uses a 1920 × 1080 display; your recommended values may differ. Density affects the apparent size of Android interface elements.
Review the available behavior options, including system decorations, continuing apps on the phone, Flex compatibility, audio forwarding, and fullscreen. Click Launch Android Desktop when desktop windowing is available, or Launch Virtual Display for the basic secondary-display mode.
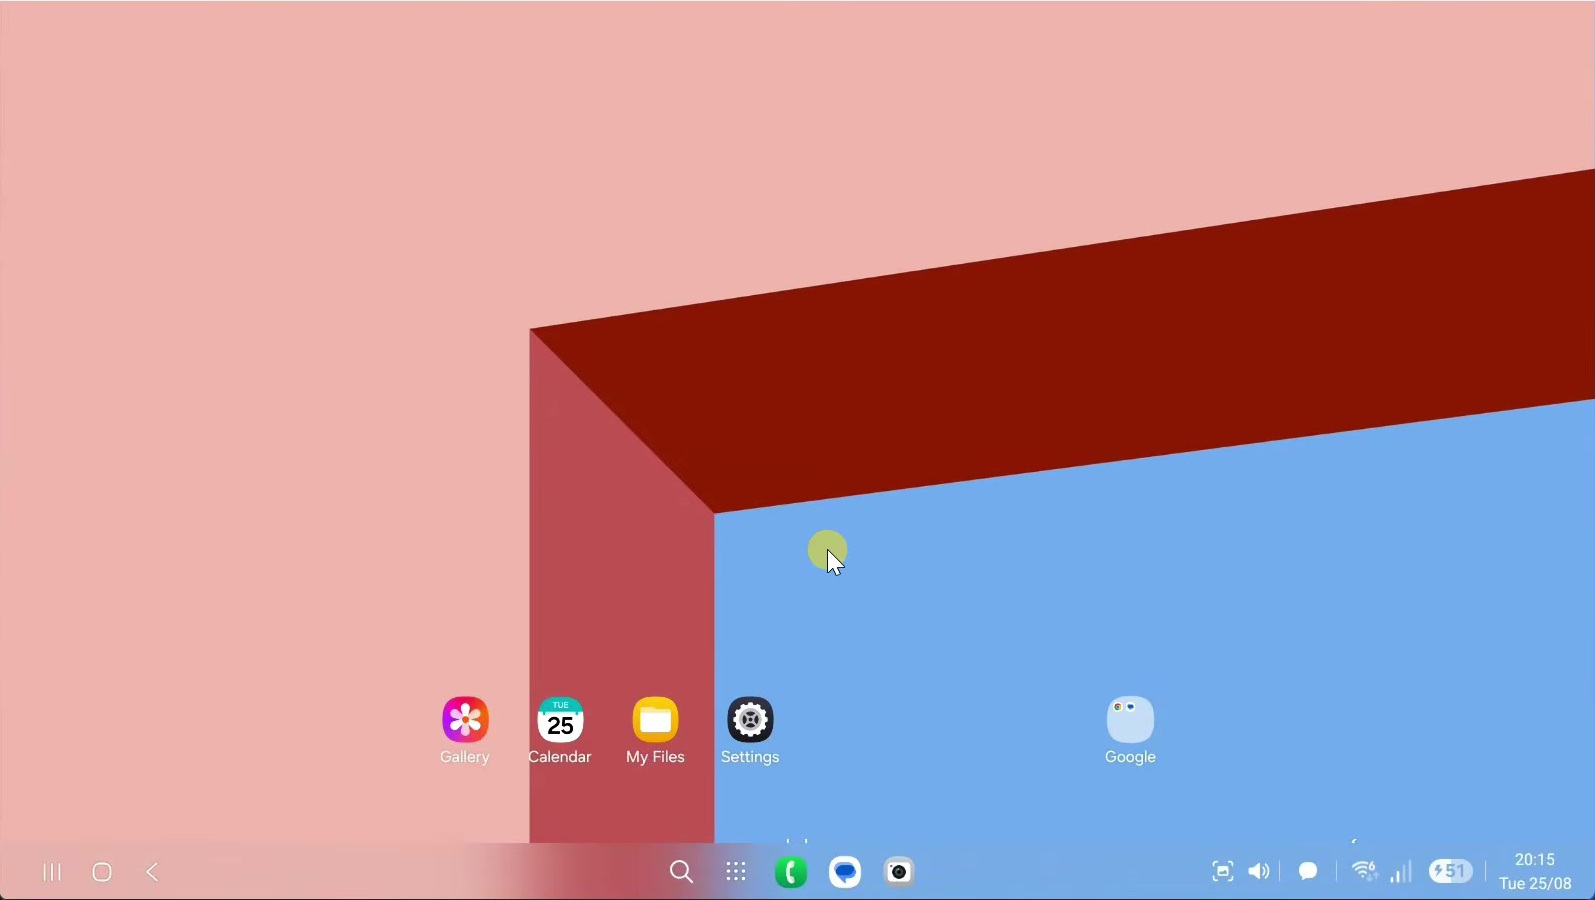
On compatible firmware, apps can open in movable, resizable windows. Other phones may provide only a basic secondary Android display. A scrcpy virtual display does not automatically start Samsung DeX. If the result is unexpected, use Recheck and Open Logs to inspect the detected display and windowing state.
Connect wirelessly over Wi-Fi
Switch the USB-authorized phone to wireless mode
- Keep the phone connected by USB and put the phone and PC on the same trusted local network.
- Click Wireless setup near the lower-left corner.
- Under Use this phone wirelessly, click Use Wireless.
- Wait for Connected wirelessly or the success message telling you that the USB cable can be unplugged.
- Disconnect the cable, return to Mirror Phone, and start mirroring with the wireless device selected.
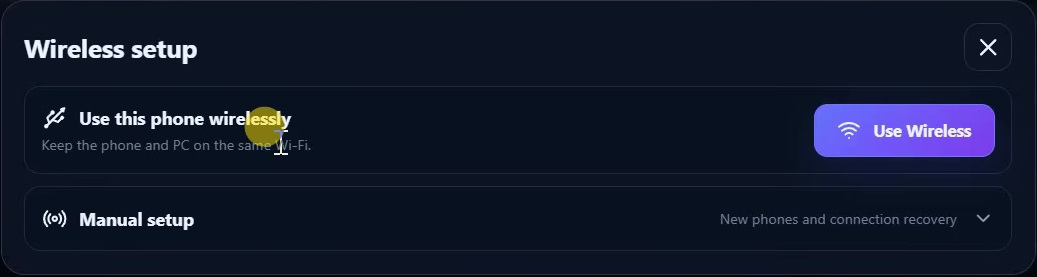
Studio switches ADB to a network connection and saves the phone for later use. Under Saved phones, use Reconnect to try a remembered connection, or Forget to remove it. Reconnect works only while the phone is reachable at the saved address and wireless ADB is available. A phone restart or changed IP address may require another USB-assisted setup or manual pairing.
Use manual pairing on Android 11 or newer
The video also shows the Manual setup panel. For a phone that supports Android’s wireless debugging, you can pair without an initial USB cable:
- On the phone, open Developer options → Wireless debugging and enable it on your trusted network.
- Choose Pair device with pairing code. Keep the displayed pairing IP address, port, and code visible.
- In Studio, expand Wireless setup → Manual setup. Enter that address in Pairing IP:port, enter the code, and click Pair.
- Return to the phone’s main Wireless debugging screen. Enter its connection IP address and port in Studio’s Connection IP:port field and click Connect.
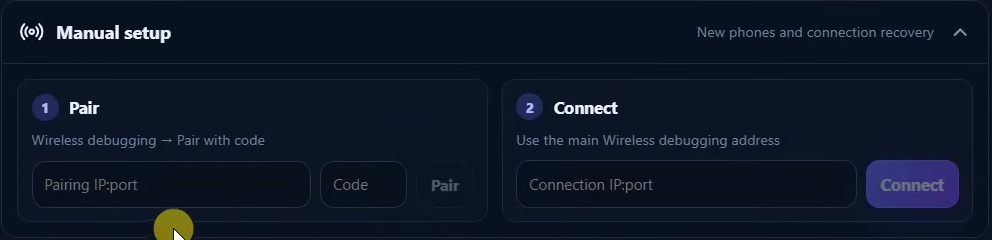
The pairing port and connection port are different values; copy each from the correct phone screen. Once the device appears connected, return to Mirror Phone. Use a trusted private network and keep the devices close to the router for a steadier connection. To switch back from the USB-assisted wireless connection, reconnect the cable and use Use USB Instead.
Fix common connection and playback problems
- No device appears: unlock the phone, recheck USB debugging, try another data cable or USB port, and click Refresh. Check for an authorization prompt on the phone. If Windows still cannot detect it, use the phone manufacturer’s official USB driver where required.
- The phone is unauthorized: reconnect it and accept the debugging prompt. If the prompt never returns, revoke USB debugging authorizations in Developer options, then connect again. This removes previously trusted computer authorizations.
- Mirroring closes or looks choppy: use Reset to Auto, lower resolution/FPS, and try USB to separate network problems from encoding problems.
- There is no audio: enable Forward audio, check the PC playback volume, and confirm the Android-version requirements above. On Android 11, unlock the phone before starting the session.
- Wi-Fi will not reconnect: check that both devices are on the same local network and the saved address is current. Guest-network isolation or firewall rules can block local device connections. Repeat USB-assisted setup or the pairing steps instead of assuming the remembered address still works.
- Desktop Mode lacks resizable windows: run Recheck and read Open Logs. A working virtual display does not guarantee desktop windowing support.
Start with a stable USB mirror session, then add recording, camera capture, desktop features, or Wi-Fi as needed. Once connected, SCRCPY Studio keeps these controls in the same interface, so most sessions can be started without opening a terminal.