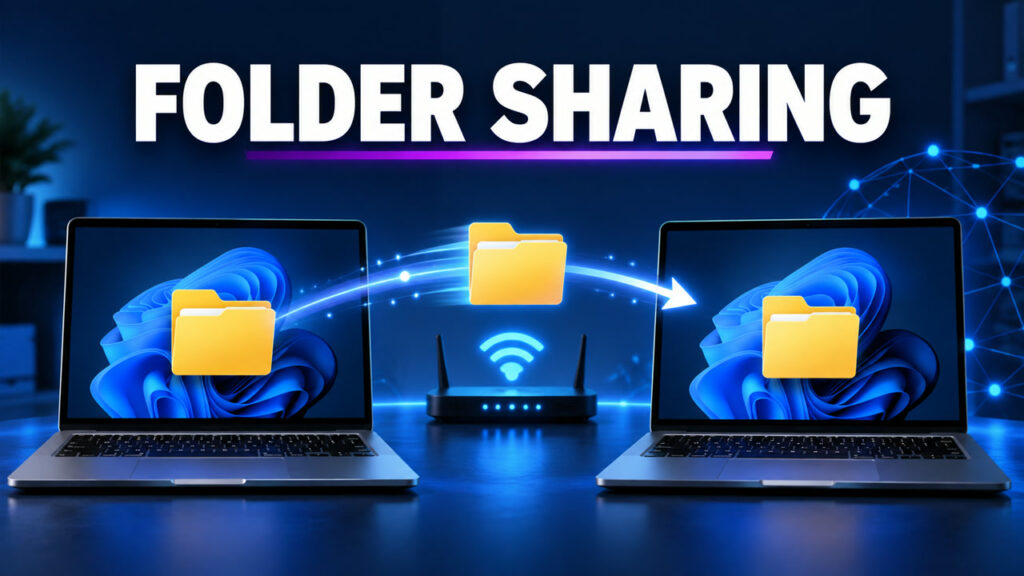
You can share a folder from one Windows 11 PC and open it from another computer on the same Wi-Fi or Ethernet network. This walkthrough uses a separate local account so the folder remains password protected without sharing the password for your main Windows account.
Configure the Folder Share
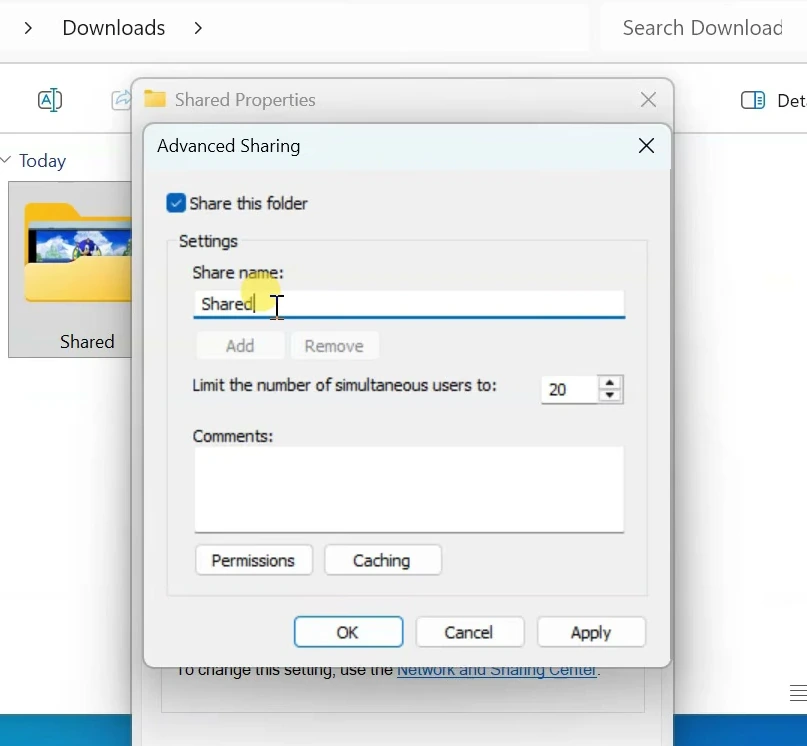
On the computer that contains the folder, right-click the folder you want to share and select Properties. Open the Sharing tab, then select Advanced Sharing.
Enable Share this folder. You can change the Share name if needed; this is the name other computers will see on the network. Then select Permissions.
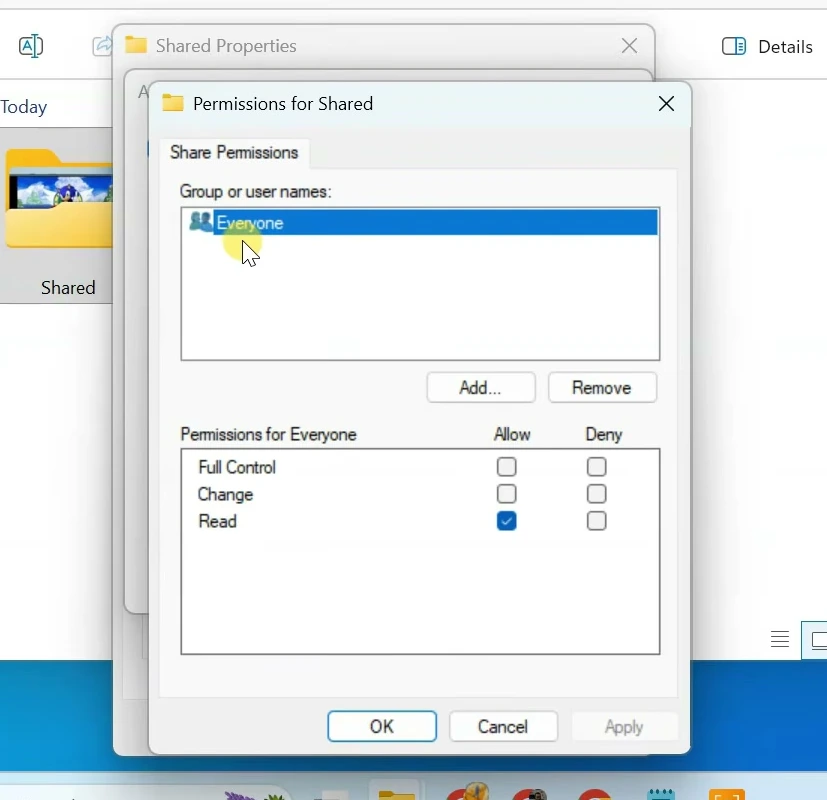
By default, the permissions list may contain Everyone. To limit access to a dedicated password-protected account, select Everyone and choose Remove.
Create a Dedicated Local Sharing Account
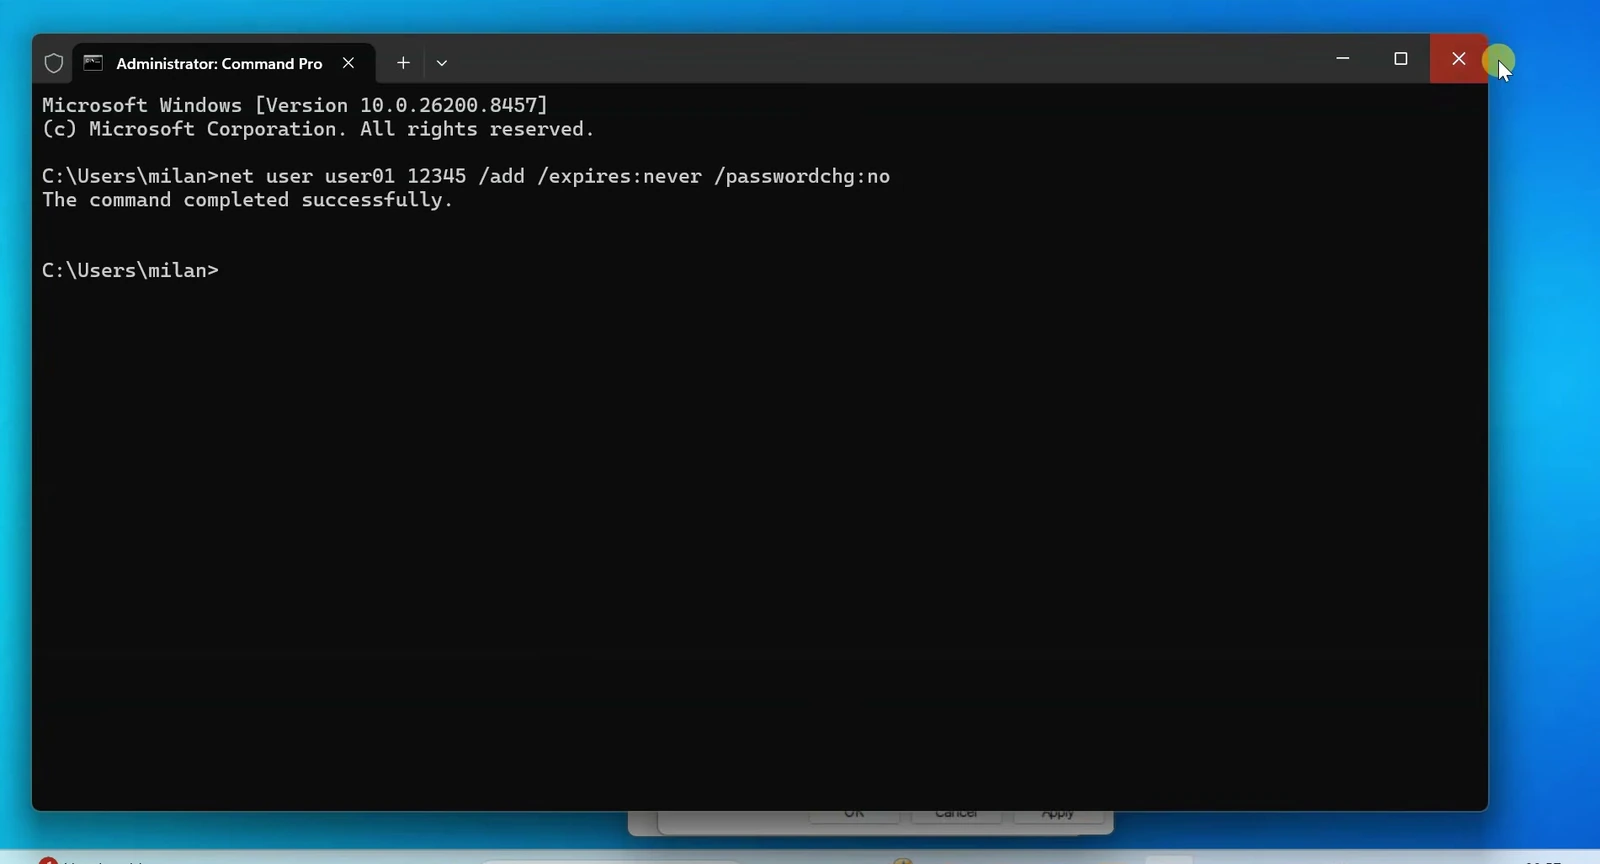
Create the account on the computer hosting the shared folder before adding it to the folder permissions. Open Command Prompt as an administrator and run the following command:
net user user01 12345 /add /expires:never /passwordchg:nouser01 and 12345 are example credentials from the video. Replace them with your own username and a strong, unique password. Do not use 12345 for a real account.
After the command completes successfully, Windows has created a separate local user account for network-folder access.
Add the Account to Share Permissions
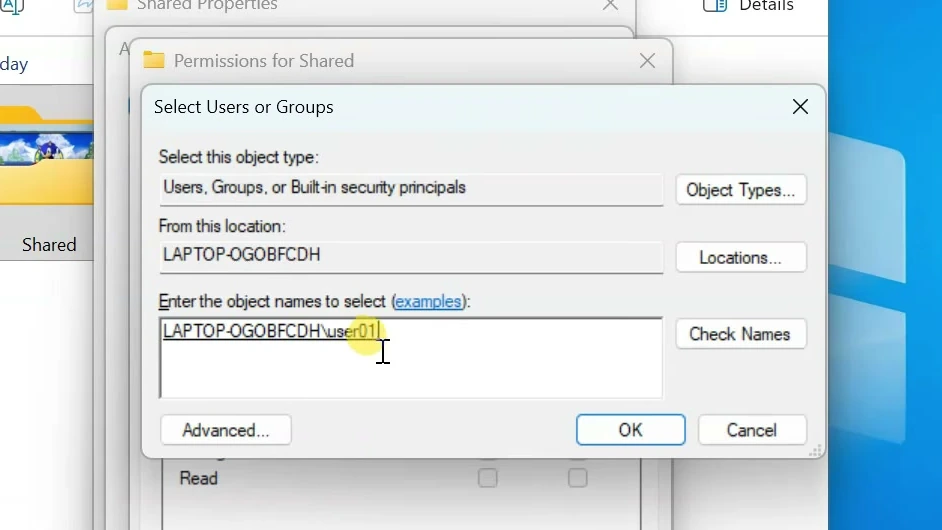
Return to the folder’s Advanced Sharing window and select Permissions. Choose Add, enter the username you created, and select Check Names. If Windows finds the account, it resolves the name. Select OK.
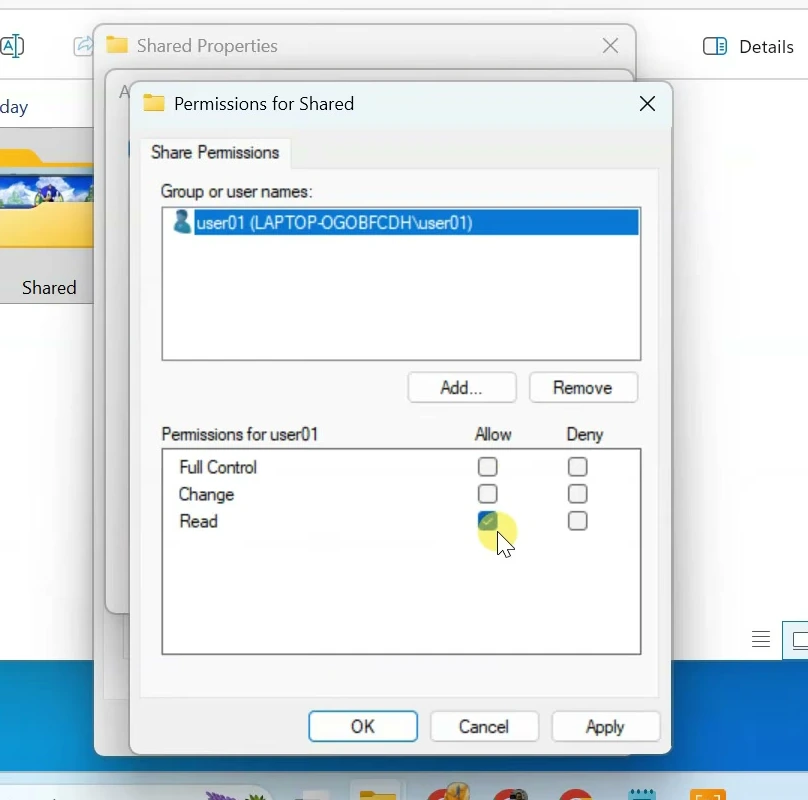
Select the new account in the permissions list and choose its share-level access. Allow Read if the other computer should only view and copy files from the folder. Allow Full Control if it should also copy files into the folder, delete, rename, or modify files. Click Apply, then OK.
Set Folder Security Permissions
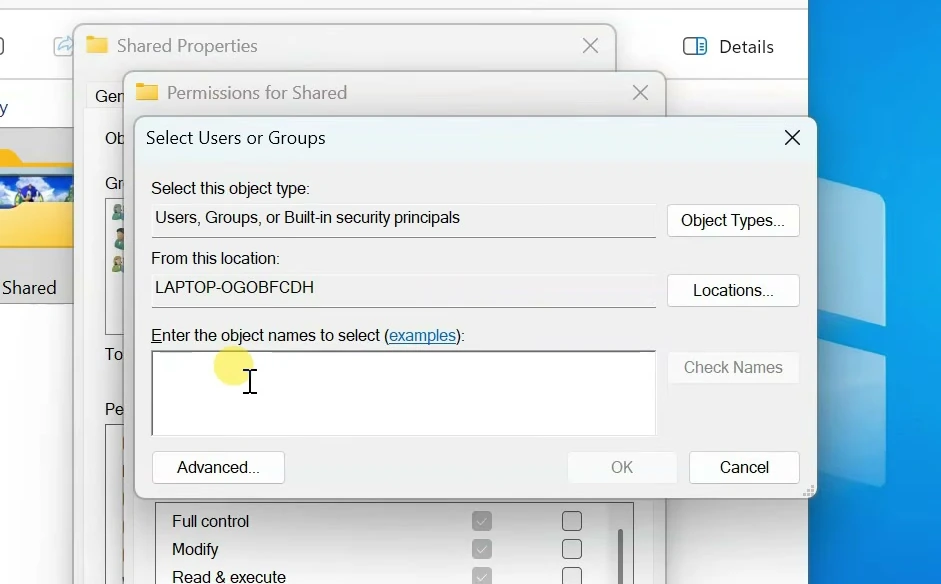
Share permissions are not the only permissions required. In the folder’s Properties, open the Security tab. Select Edit, then Add.
Enter the same local username, select Check Names, and click OK.
Select that user account and allow Full control. Click Apply, then OK. The folder is now shared with the dedicated local account.
Turn On Windows Network Sharing
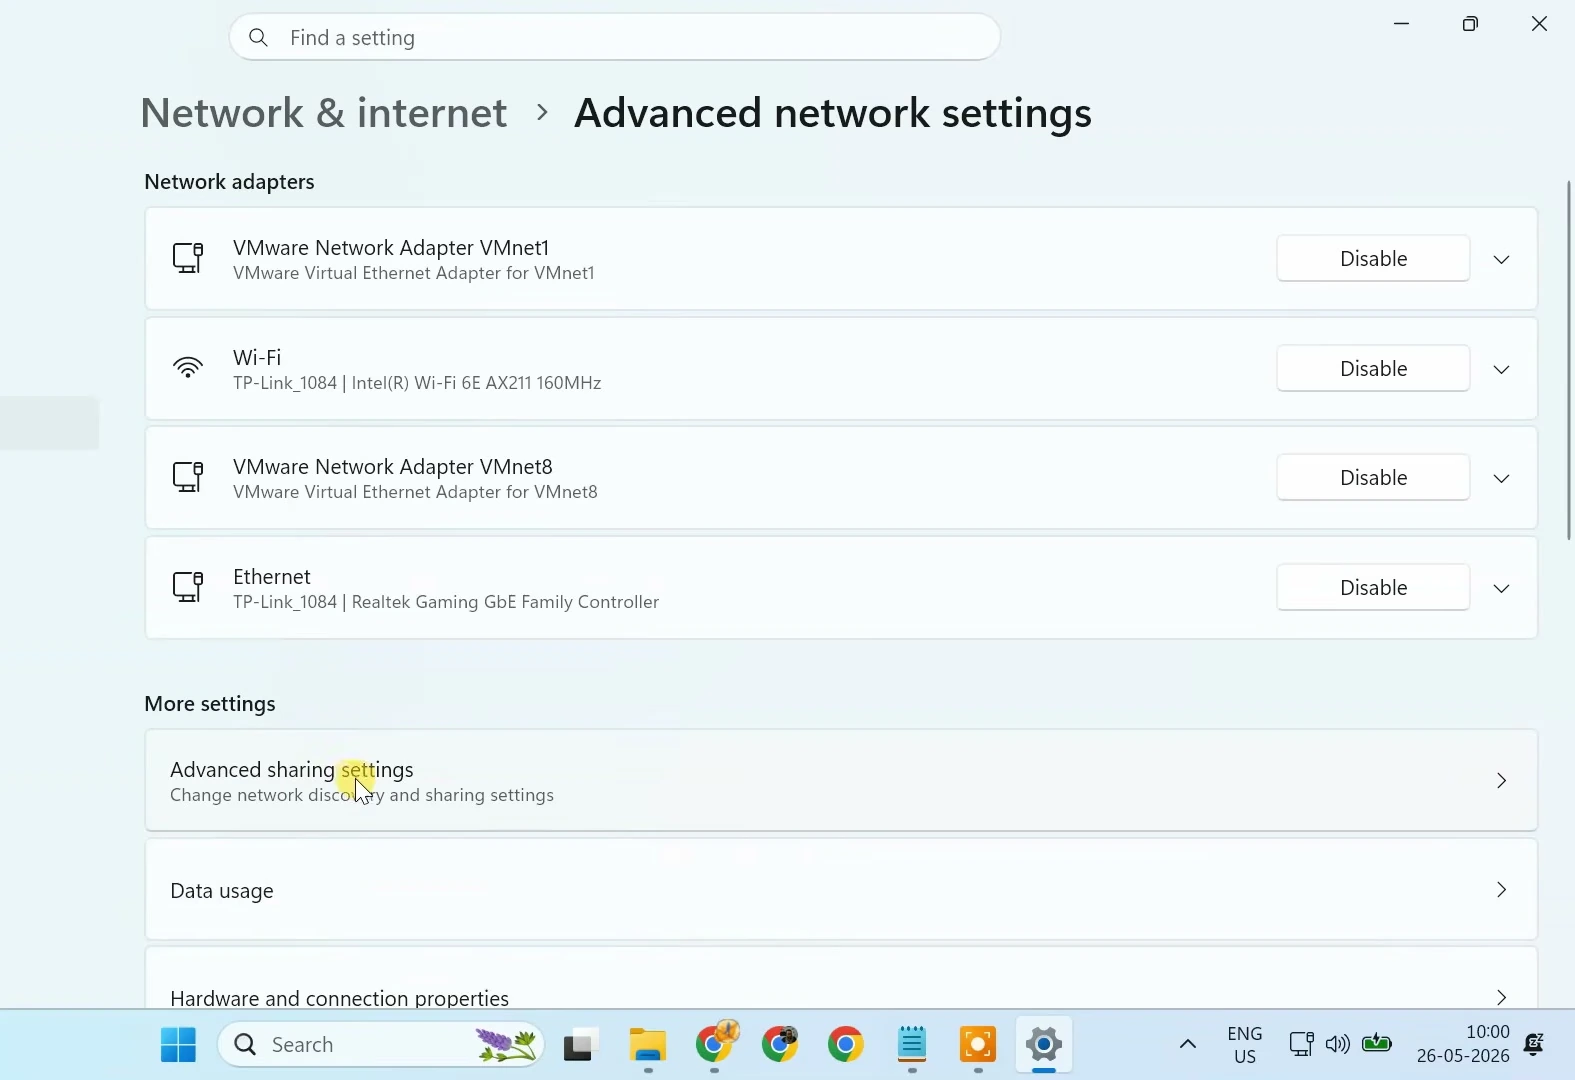
Open Settings and go to Network & internet > Advanced network settings. Under More settings, choose Advanced sharing settings.
Expand Private networks. Turn on Network discovery so devices can find each other, then turn on File and printer sharing to make the folder available across the network.
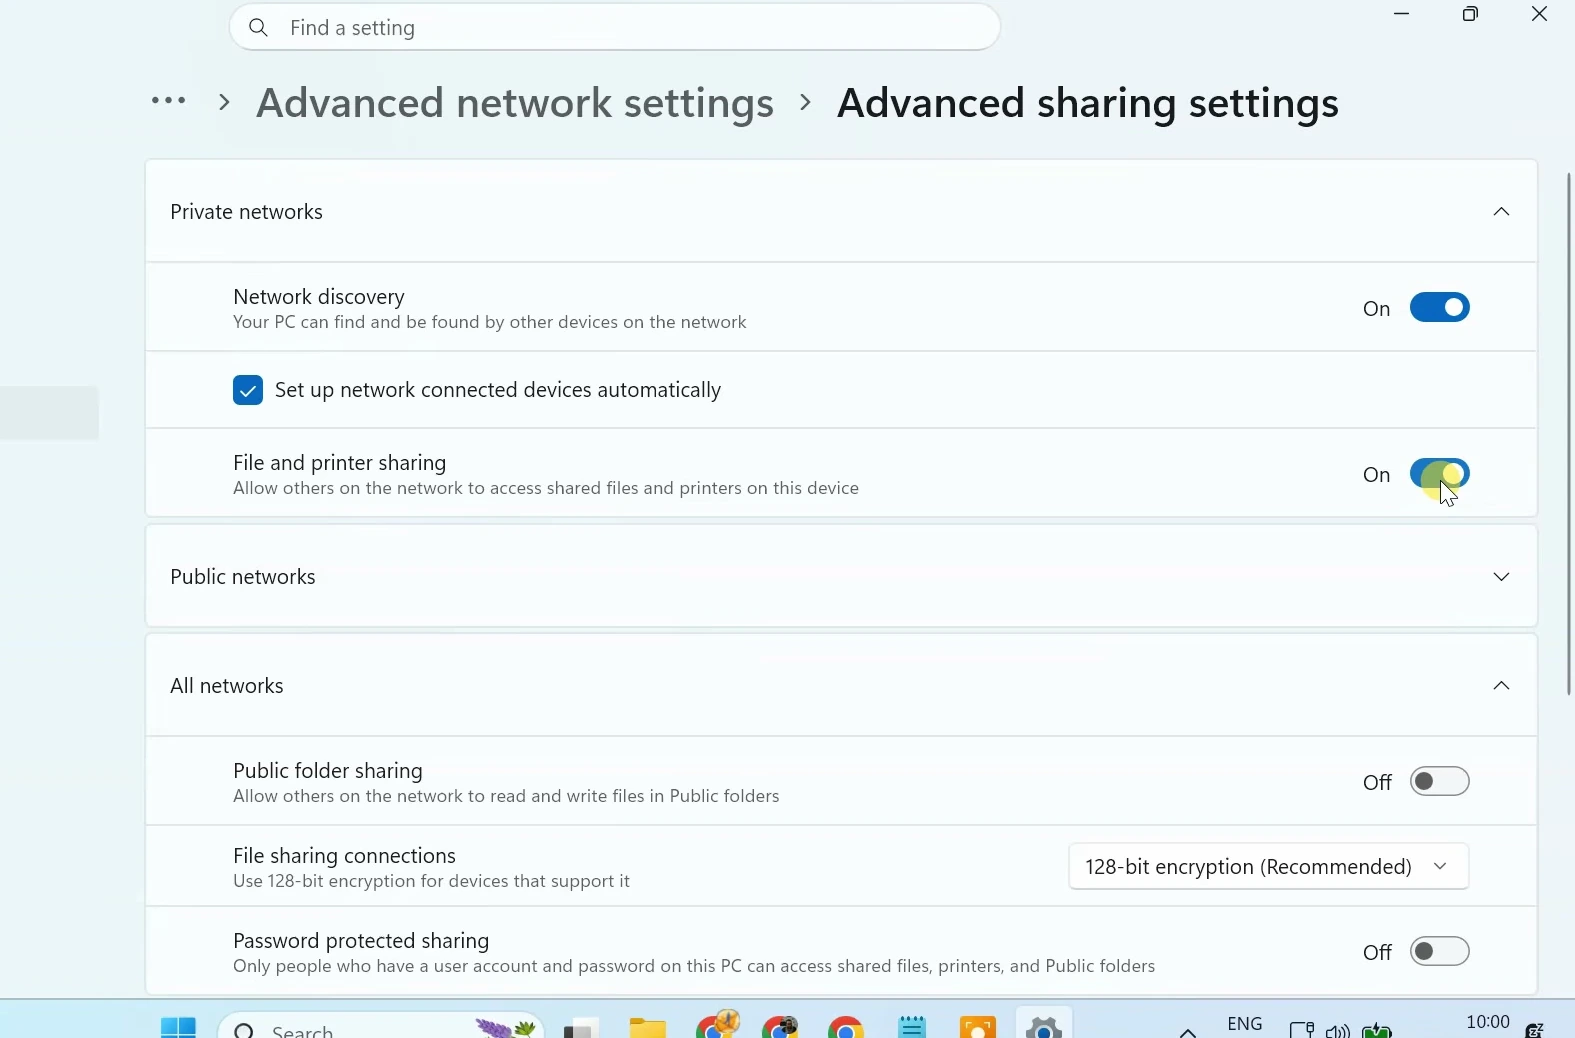
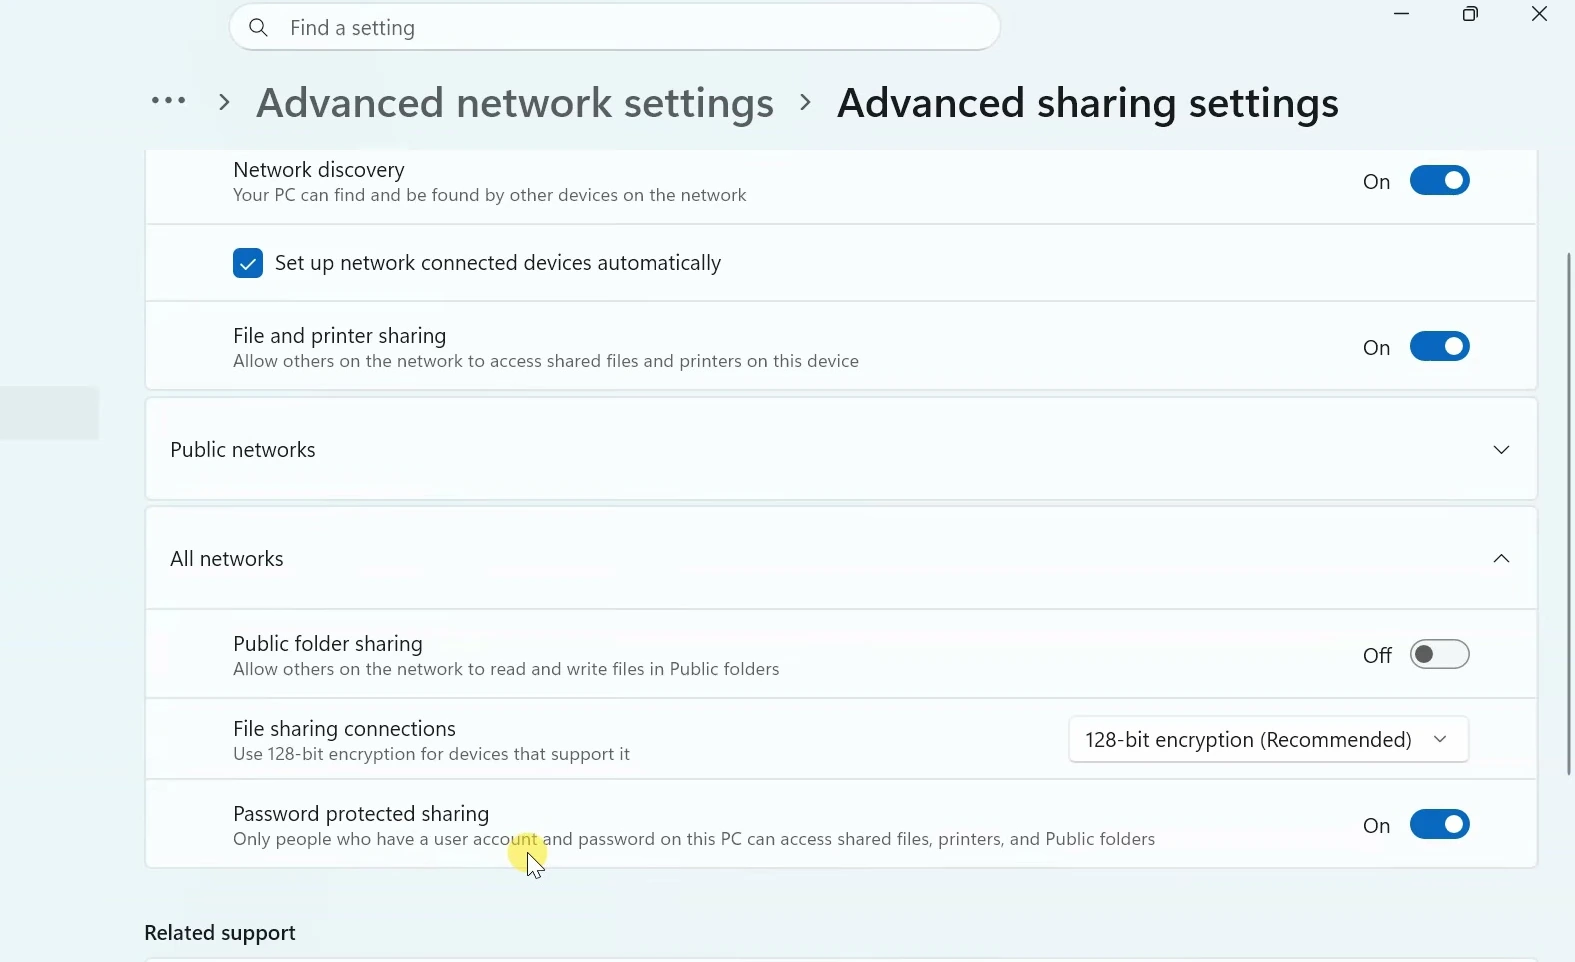
Next, expand All networks and make sure Password protected sharing is turned on. Another computer must then provide valid credentials for the local account you created.
Set the Current Network as Private
Return to Settings > Network & internet. For Wi-Fi, open Wi-Fi, select the connected network, and choose Private network under Network profile type.
For a wired connection, open Ethernet instead and select Private network.
Access the Shared Folder From Another PC
On the second computer, open File Explorer and select Network in the left sidebar. If File Explorer displays a message that network discovery and file sharing are off, click the message and select Turn on network discovery and file sharing.
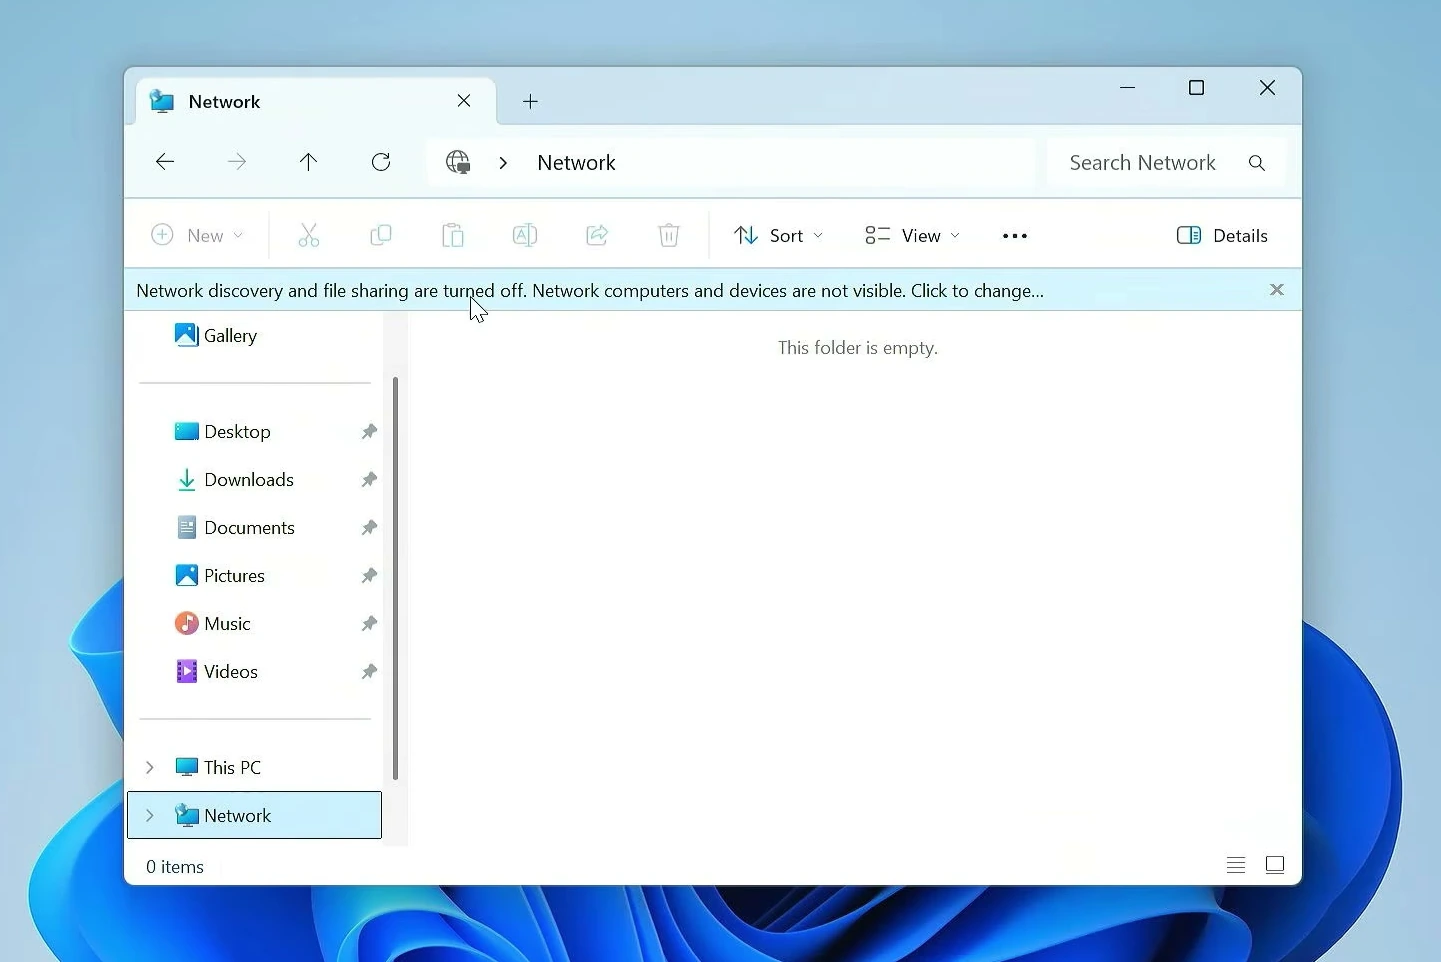
The available computers on the network will appear. Open the computer that hosts the shared folder.
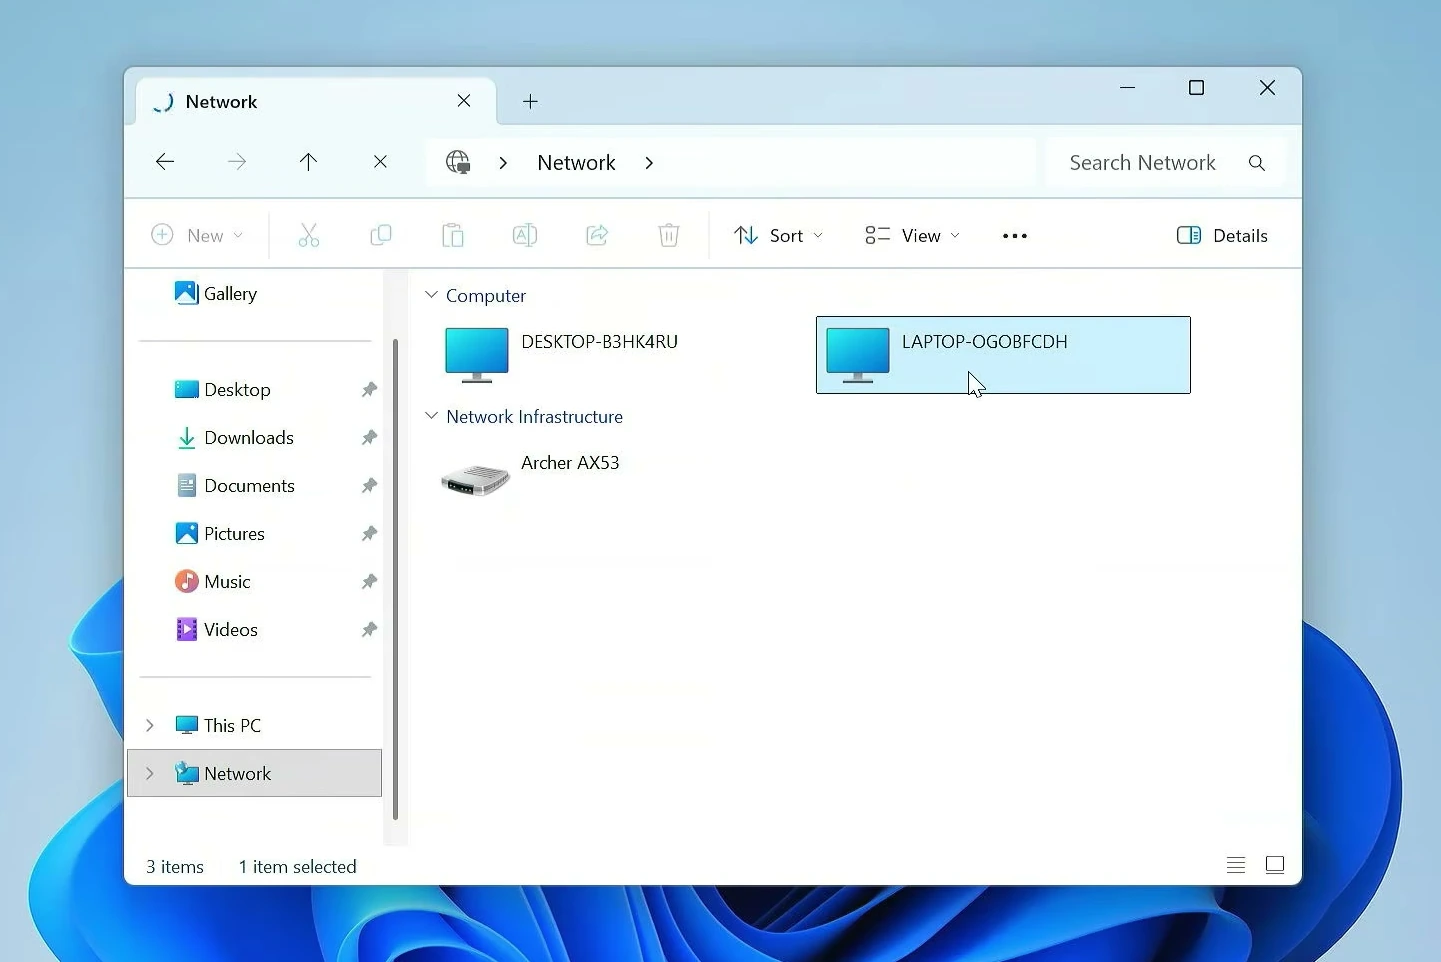
When Windows requests credentials, enter the username and password for the local account created on the host computer. Optionally select Remember my credentials, then click OK.
Open the shared folder. You can copy files from it, and you can paste, modify, rename, or delete files only if you granted the required permission earlier.
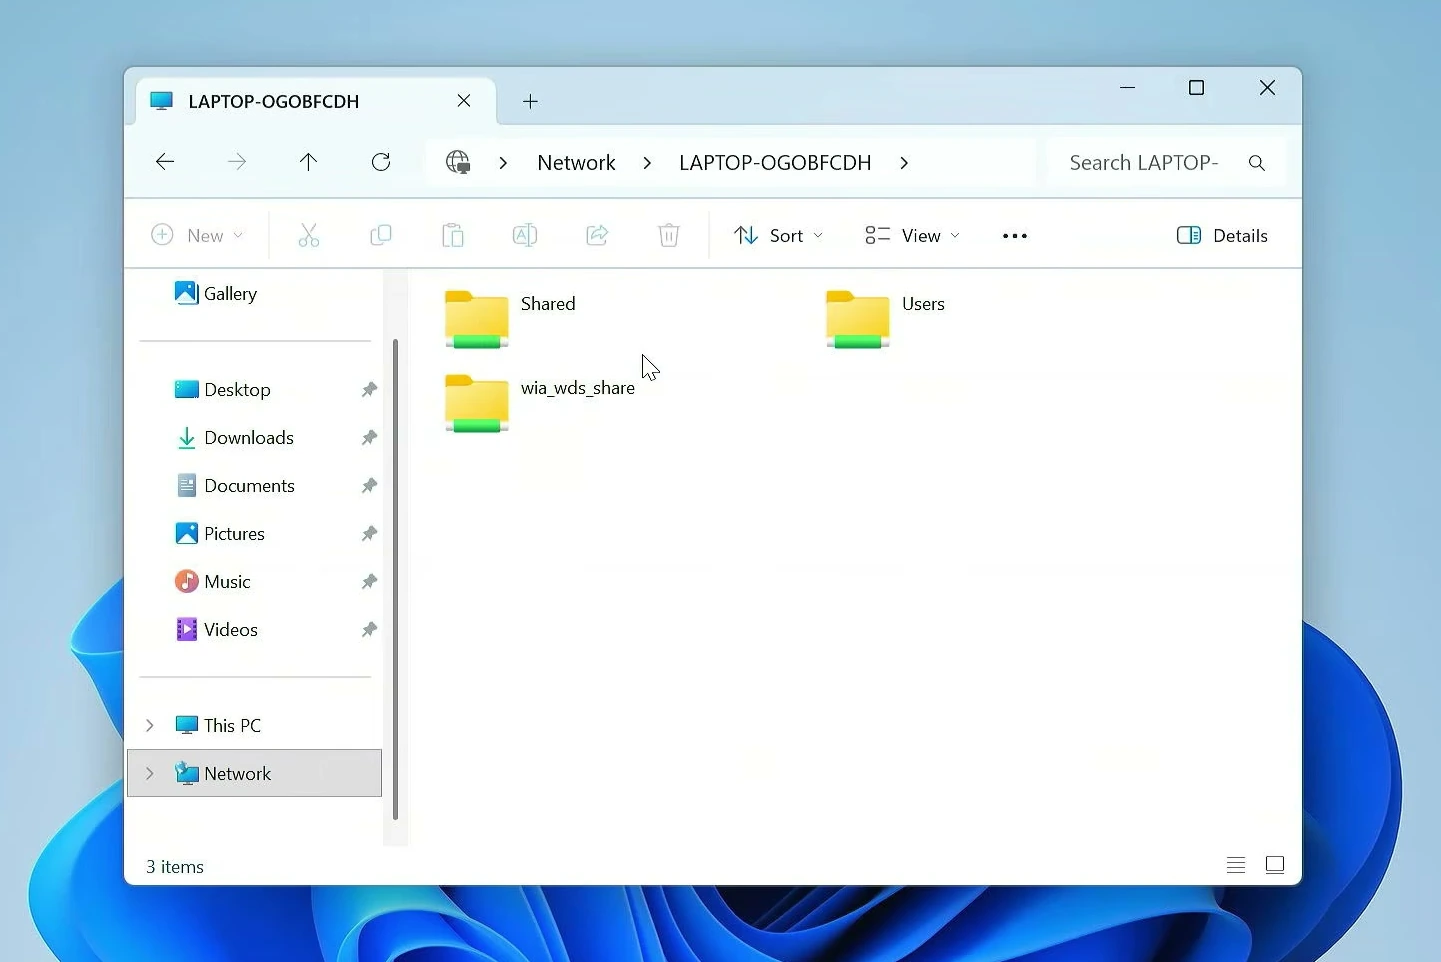
Try copying a file to confirm that the share is working as expected.
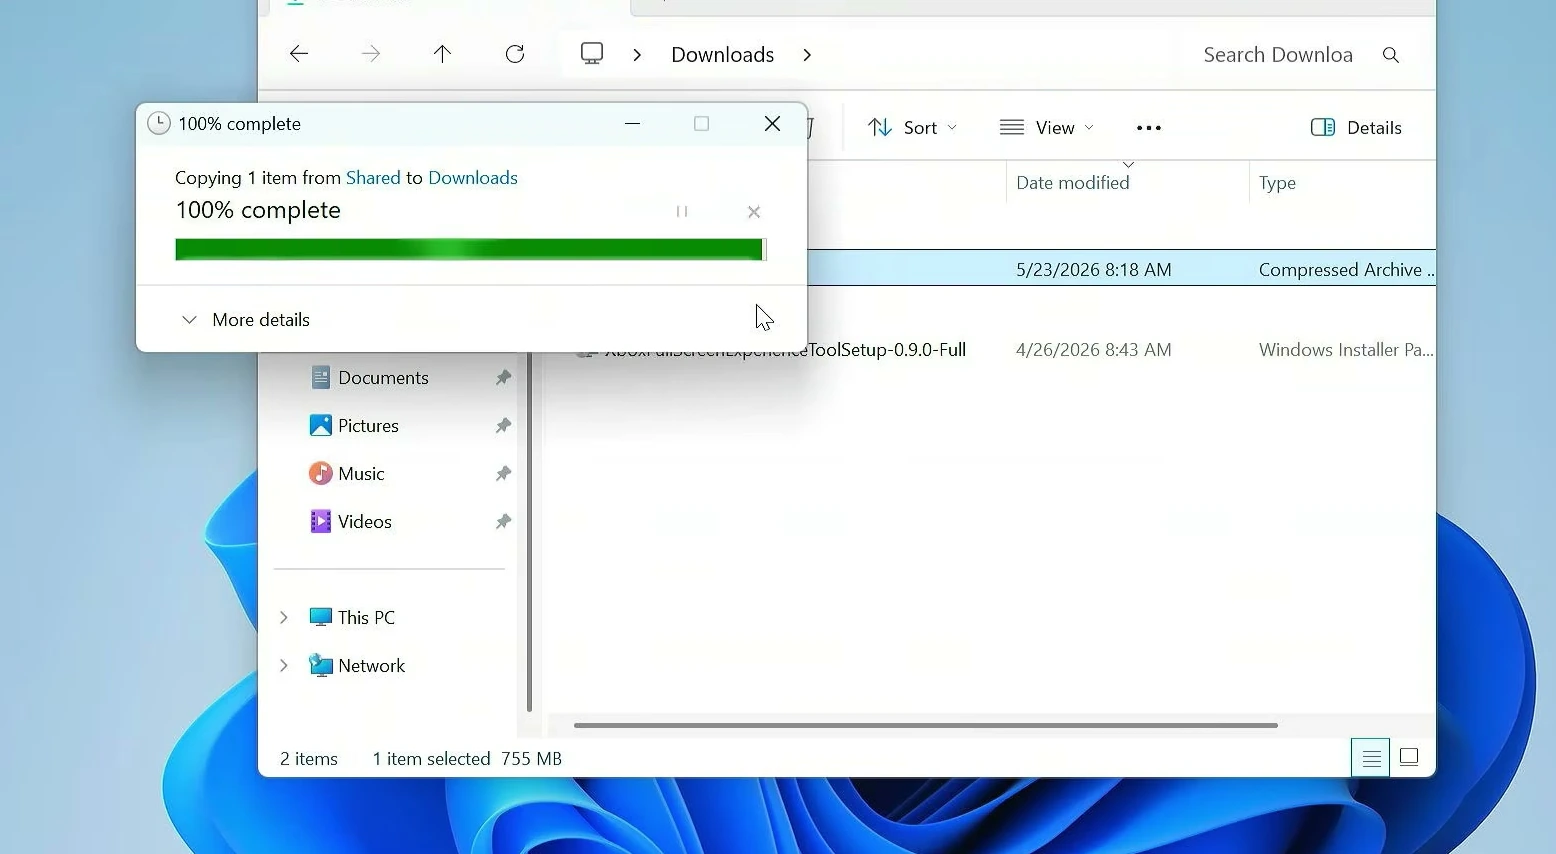
Optional: Map the Share as a Network Drive
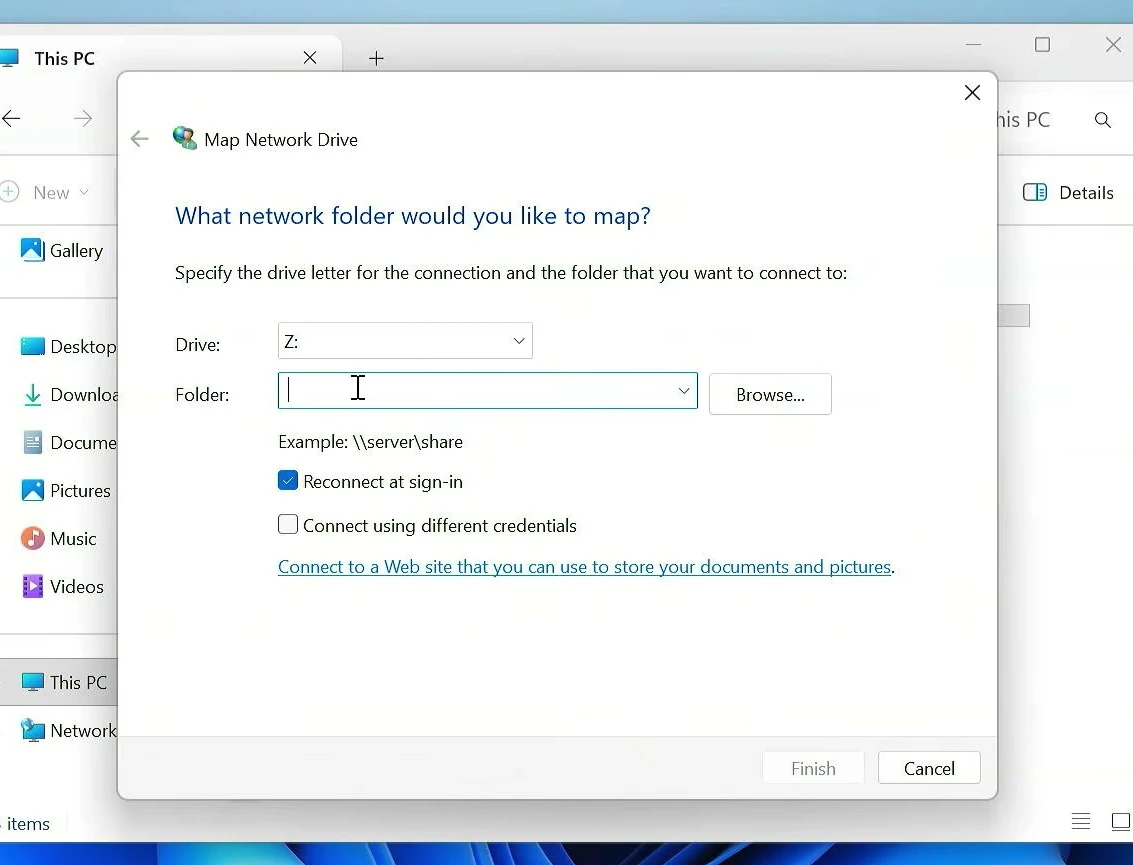
Mapping the folder gives it a drive letter in File Explorer for quicker access. On the second PC, right-click This PC and choose Map network drive.
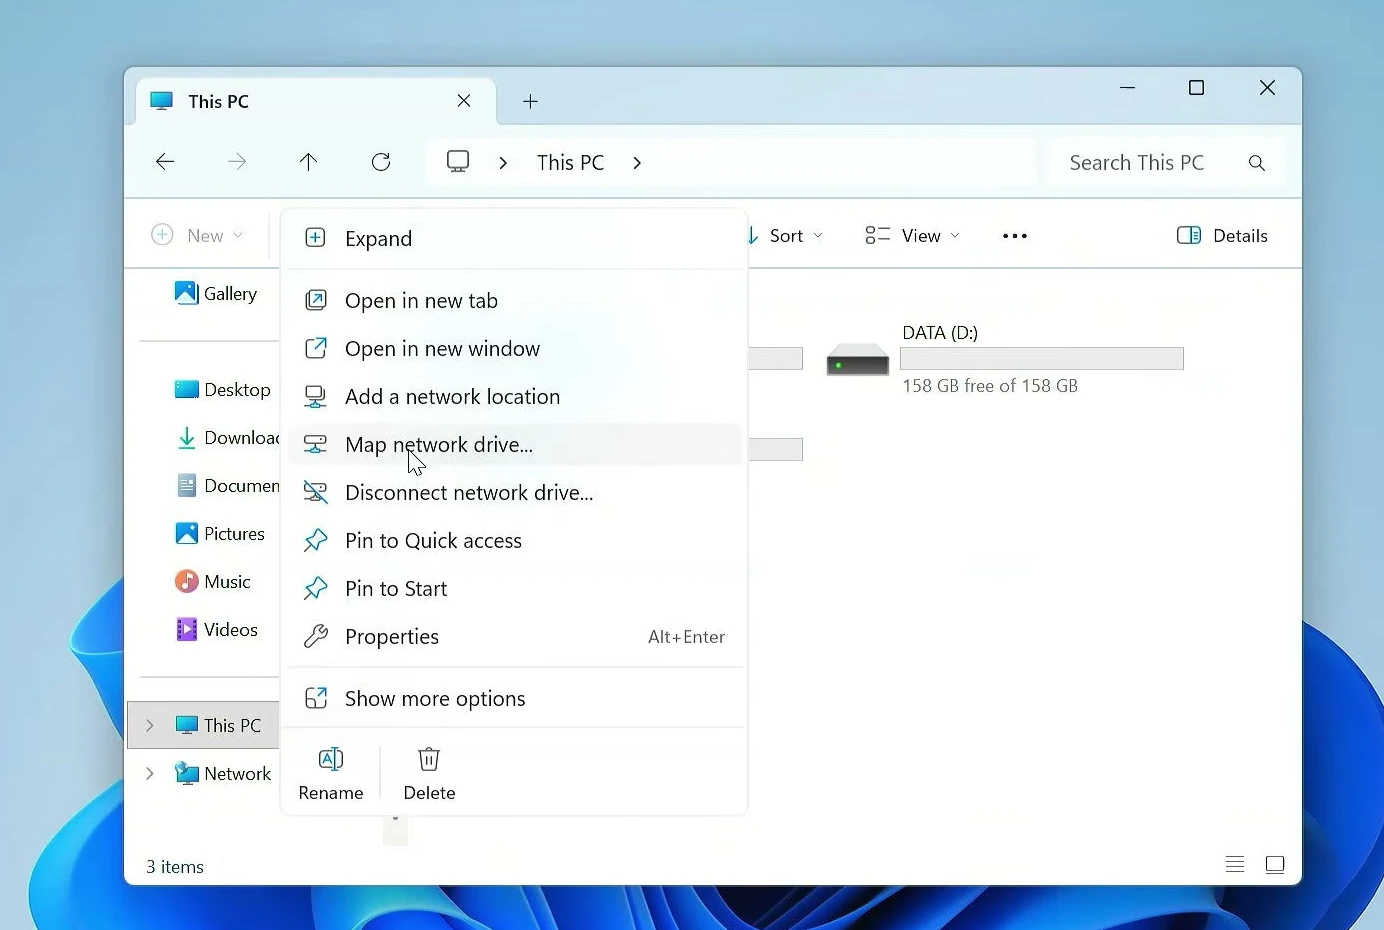
Choose a drive letter. In the Folder box, enter the network path for the shared folder. You can select Reconnect at sign-in to make the mapped drive appear automatically whenever you sign in, then select Finish.
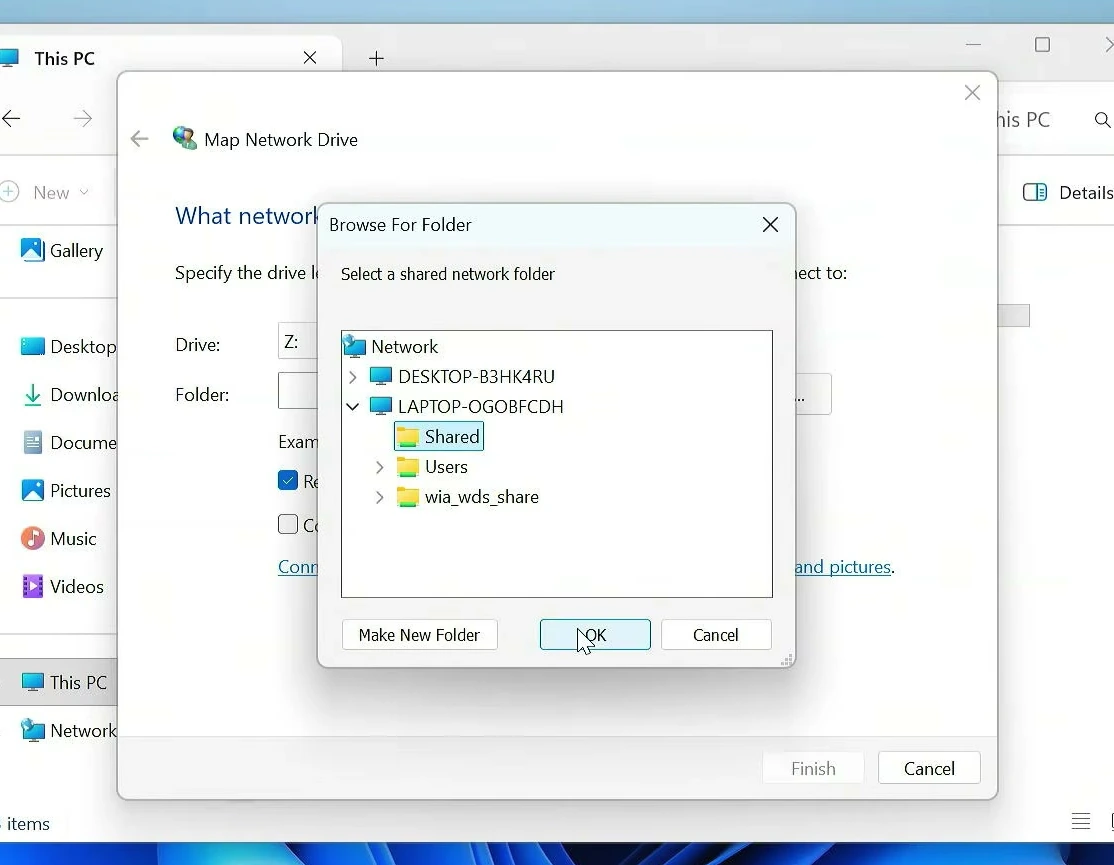
Alternatively, select Browse, expand the remote computer, and select the shared folder.
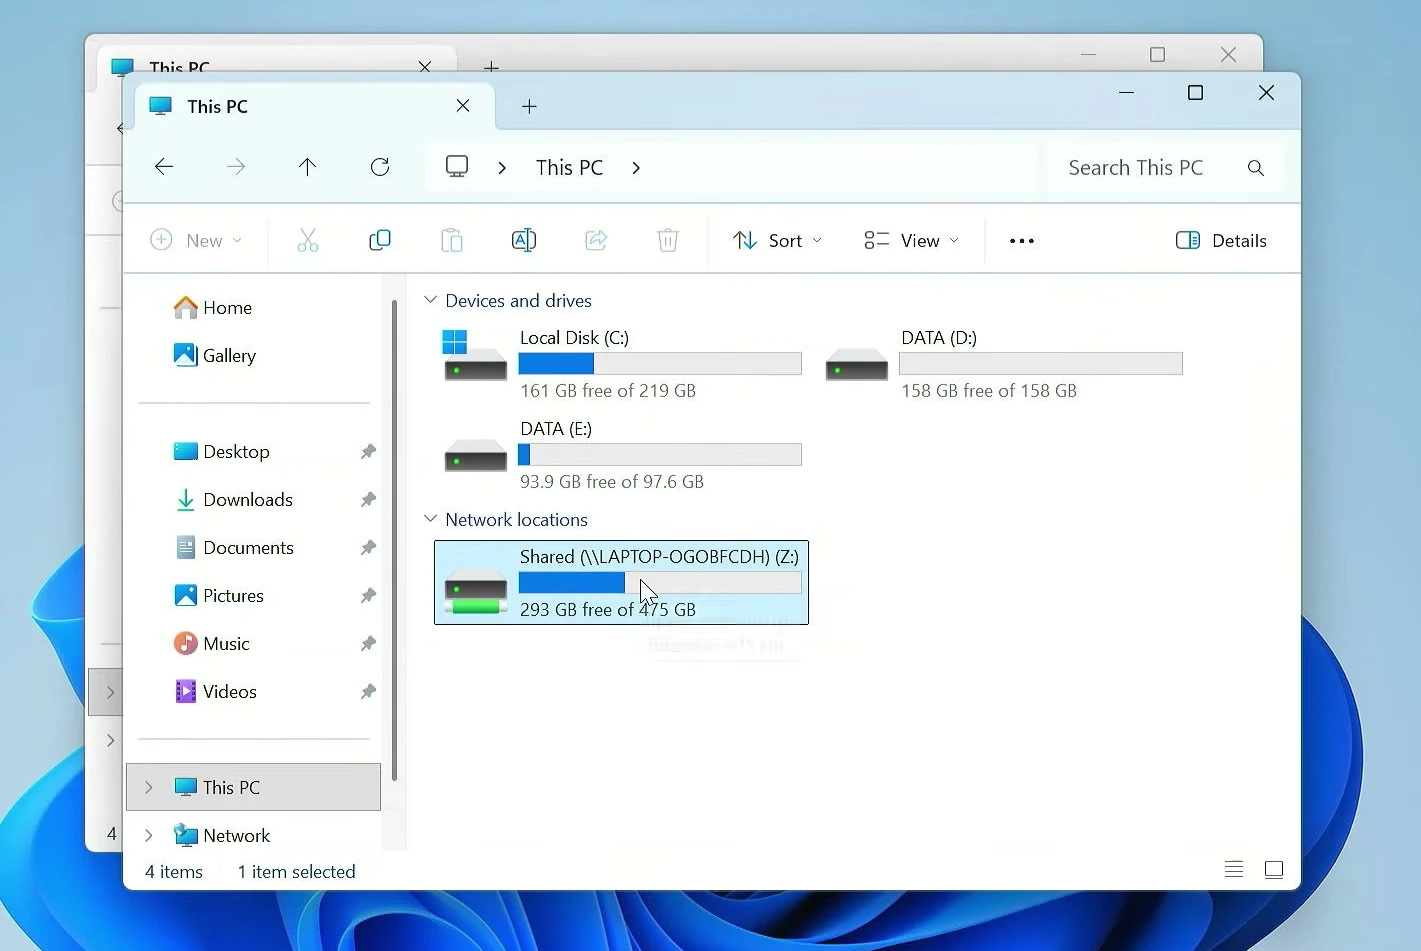
Once complete, the shared folder appears under Network locations in This PC like a normal drive.
Troubleshooting Network Sharing
▸ The host PC does not appear under Network
On the host computer, verify that Network discovery and File and printer sharing are enabled under Private networks. Also confirm that the active Wi-Fi or Ethernet connection uses the Private network profile.
▸ Windows asks for credentials
This is expected when Password protected sharing is enabled. Use the username and password for the local sharing account created on the host PC, not necessarily the credentials used to sign in on the second PC.
▸ You can open the folder but cannot make changes
Review the permissions assigned to the sharing account. Read is suitable for viewing and copying files, while changes such as adding, deleting, renaming, and modifying files require Full Control in the share permissions and folder security permissions.
Frequently Asked Questions
▸ Do both computers need to be on the same network?
Yes. This method is for computers connected to the same Wi-Fi or LAN network.
▸ Do I need to give out my main Windows password?
No. The process creates a separate local account specifically for accessing the shared folder.
▸ Can I make the shared folder show up as a drive?
Yes. Use Map network drive on the second computer, choose a drive letter, and select the shared folder.
Final Words
You have configured a password-protected Windows folder share, enabled the required network settings, and accessed the folder from another computer on the same local network. Mapping the share as a network drive can make regular file transfers even more convenient.