Installing Microsoft Office on a Windows PC can feel more complicated than it should, especially when you only want Word, Excel, and PowerPoint. Microsoft’s own deployment tools let you choose the apps you need and install them together, without hunting for separate installers.
I’ll use the Office Customization Tool to create the installation settings, then the Office Deployment Tool to download and install Office on Windows 10 or Windows 11. The edition shown here is Office LTSC Professional Plus 2024, so it’s worth understanding the licensing requirement before you begin.
Choose your Office applications
Start with Microsoft’s Office Customization Tool. It’s a web page that creates a small XML configuration file. That file tells the installer which Office edition, language, and applications to use.
Open Office Customization Tool
Open the tool and look for Architecture. Choose 64-bit if that matches your Windows installation, or 32-bit when appropriate. If Office is already installed, be mindful that its installed architecture can affect which edition you can add.
Under Office suites, open the product drop-down list and select Office LTSC Professional Plus 2024 – Volume License. Set the version to Latest, as shown in the walkthrough.
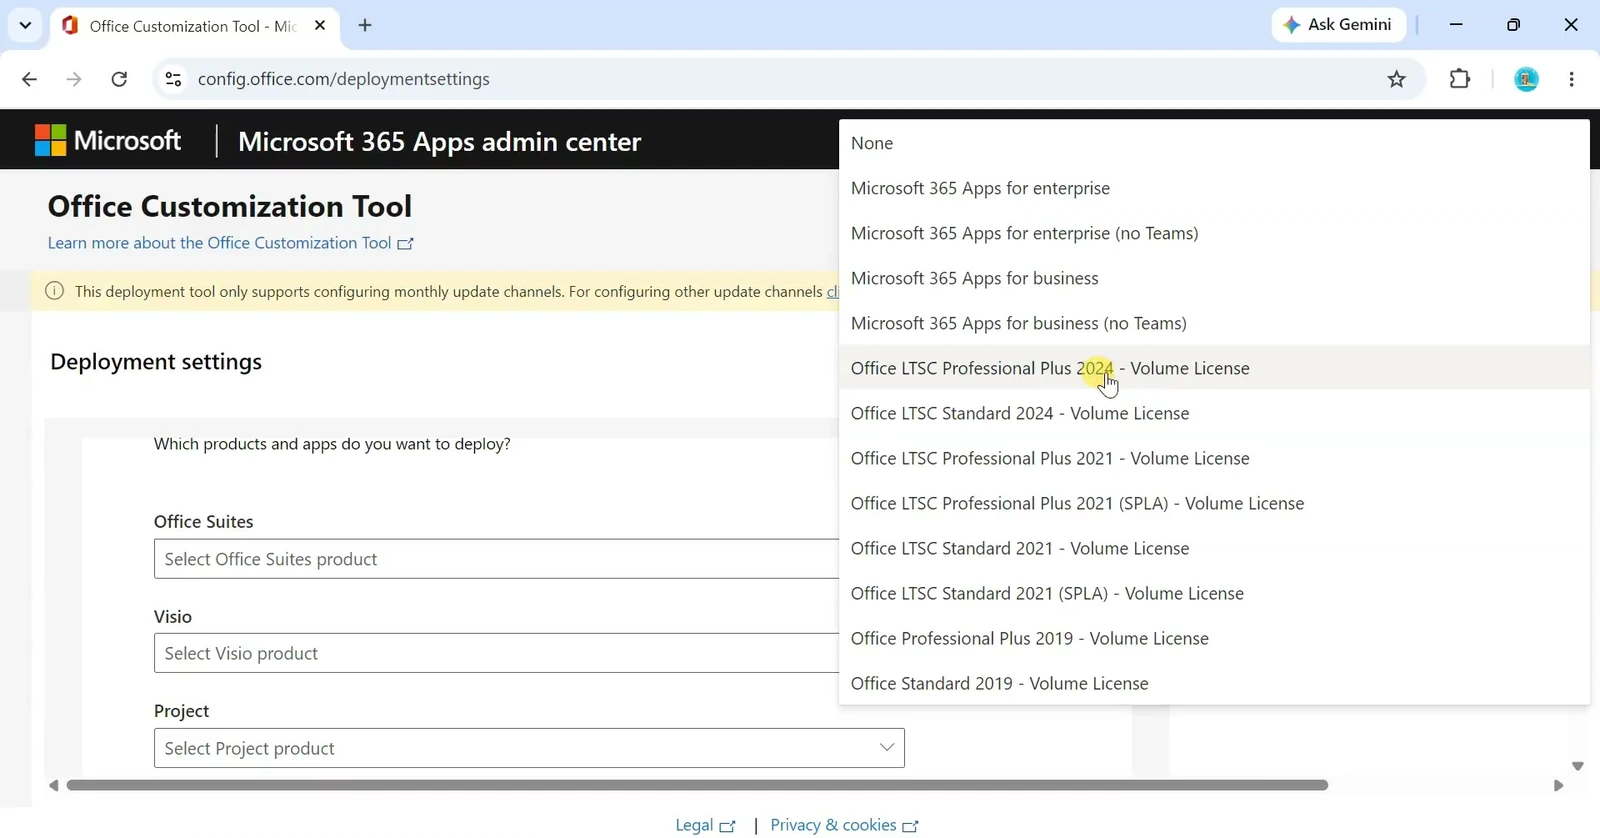
This is the volume-licensed 2024 edition, not the subscription-based Microsoft 365 plan. The setup tools are free to download, but Office LTSC 2024 requires a valid, eligible volume license to activate and use. Installing the software does not grant a free license. If you have a personal Microsoft 365 subscription instead, use the installation method provided with that subscription.
Now scroll to the Apps section. You can switch individual applications on or off. For my setup, I kept Word, Excel, and PowerPoint, then disabled the other apps I didn’t need. You can make a different selection if your license and workflow require it.
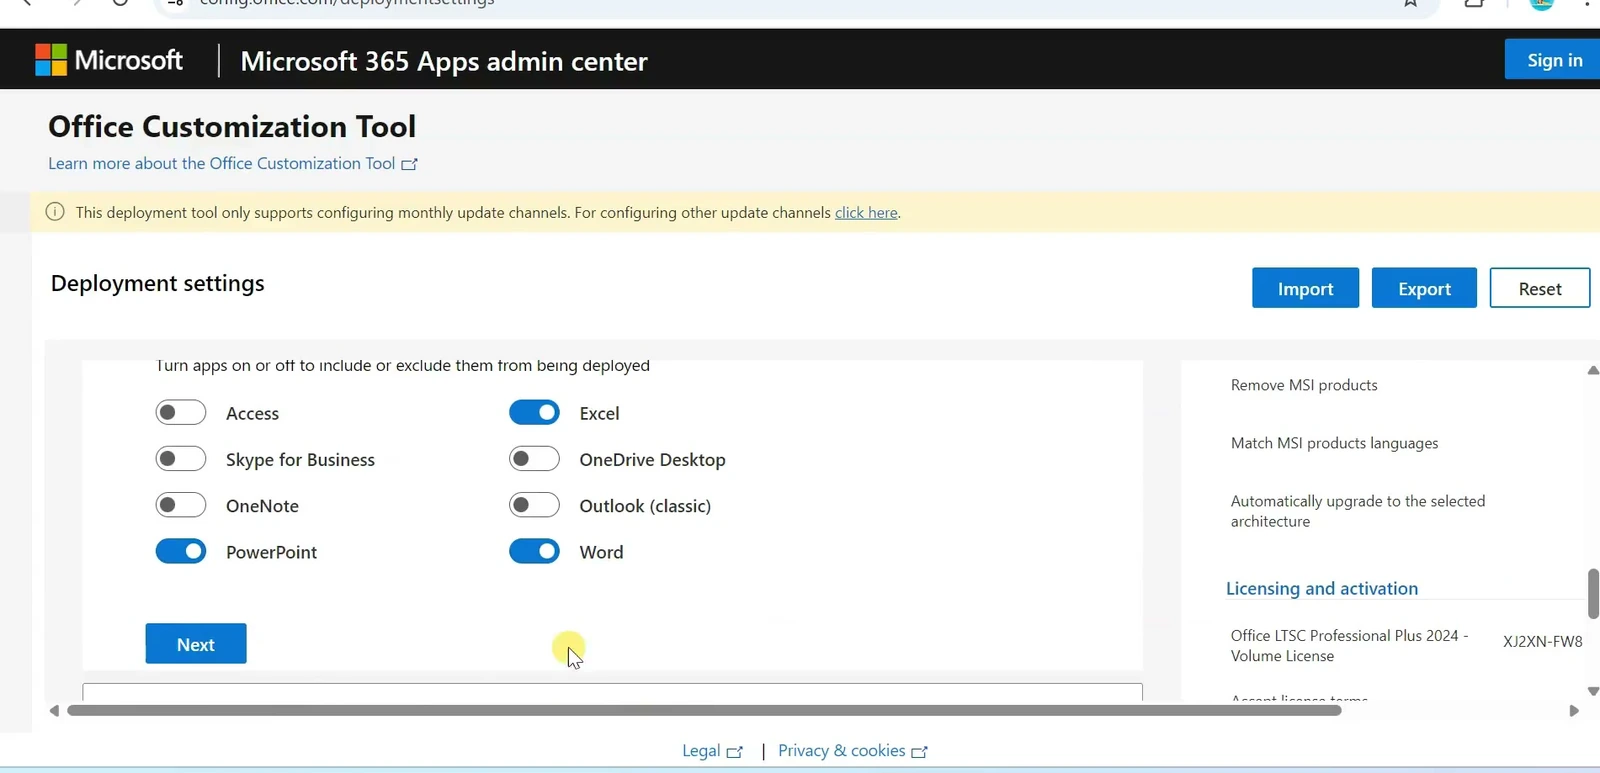
Once your app selection is ready, click Next. In the Language section, choose the language you want to use. I selected English (United States) and left the remaining settings at their defaults for this demonstration.
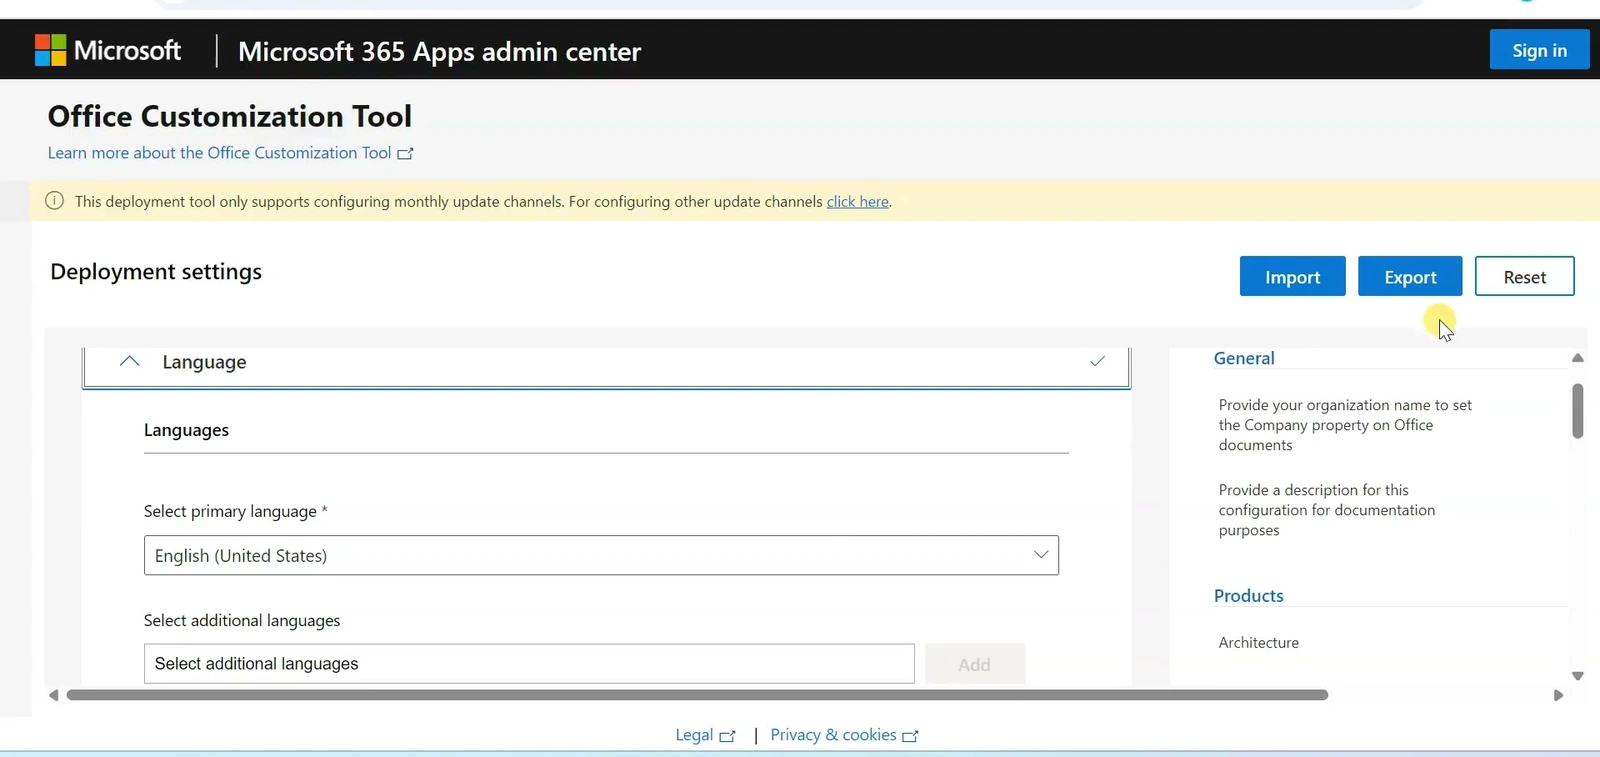
Click Export in the upper-right corner. In the dialog, choose Office Open XML formats, accept the license agreement, and export the configuration. Your browser downloads the XML file that will control the installation.
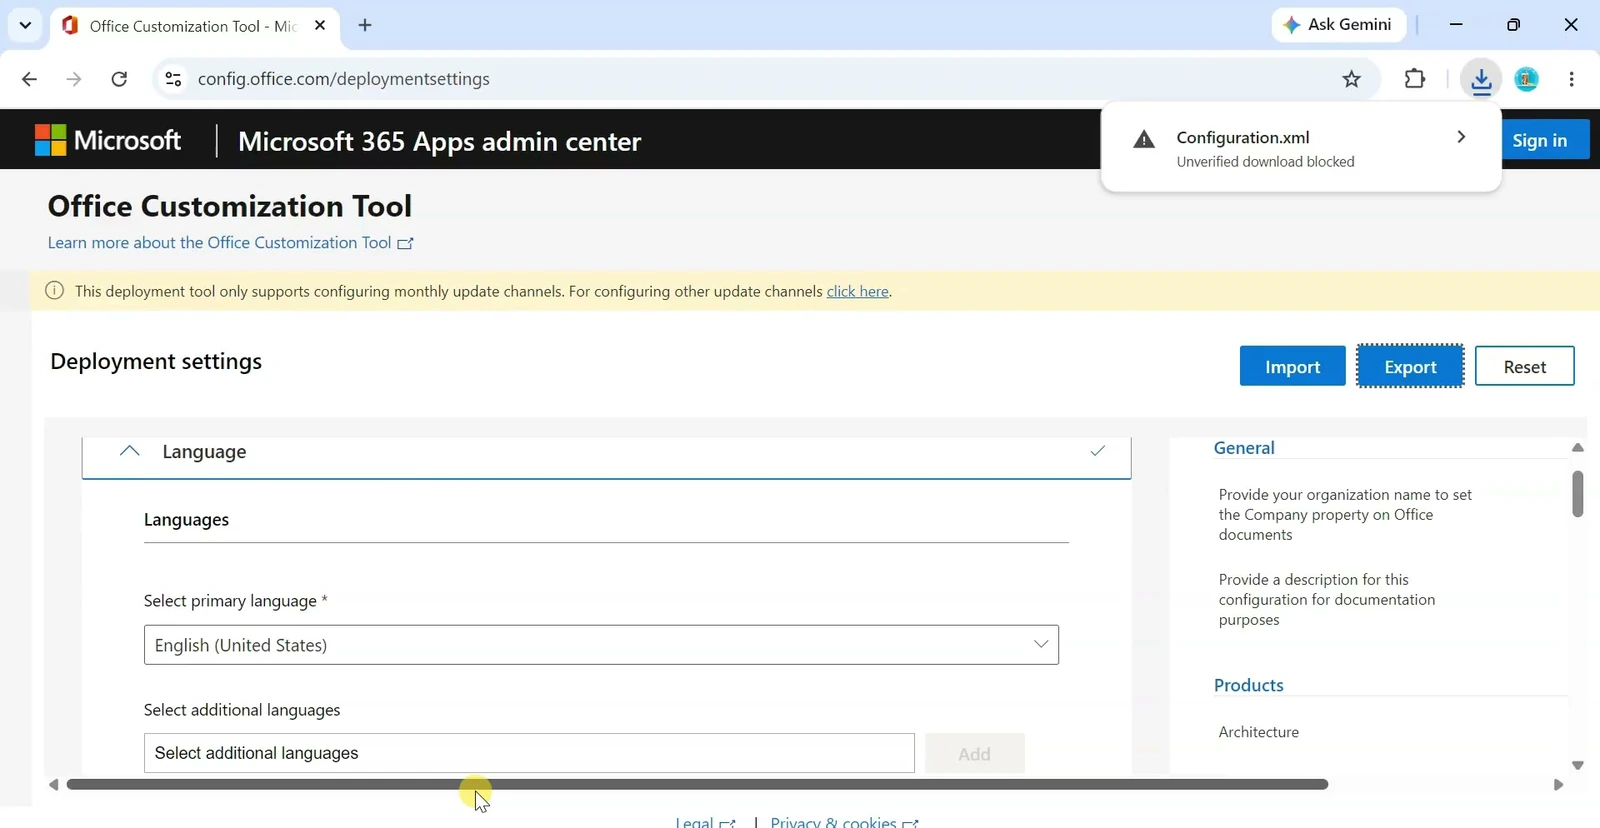
Keep that XML file handy. In the next step, we’ll put it alongside the deployment tool so the installer can read the settings you just selected.
Download the Office Deployment Tool
The XML file contains instructions, but it doesn’t install Office by itself. For that, Microsoft provides the Office Deployment Tool (ODT). It includes a small setup.exe program that reads your configuration and downloads the selected Office applications from Microsoft’s servers.
Download Office Deployment Tool
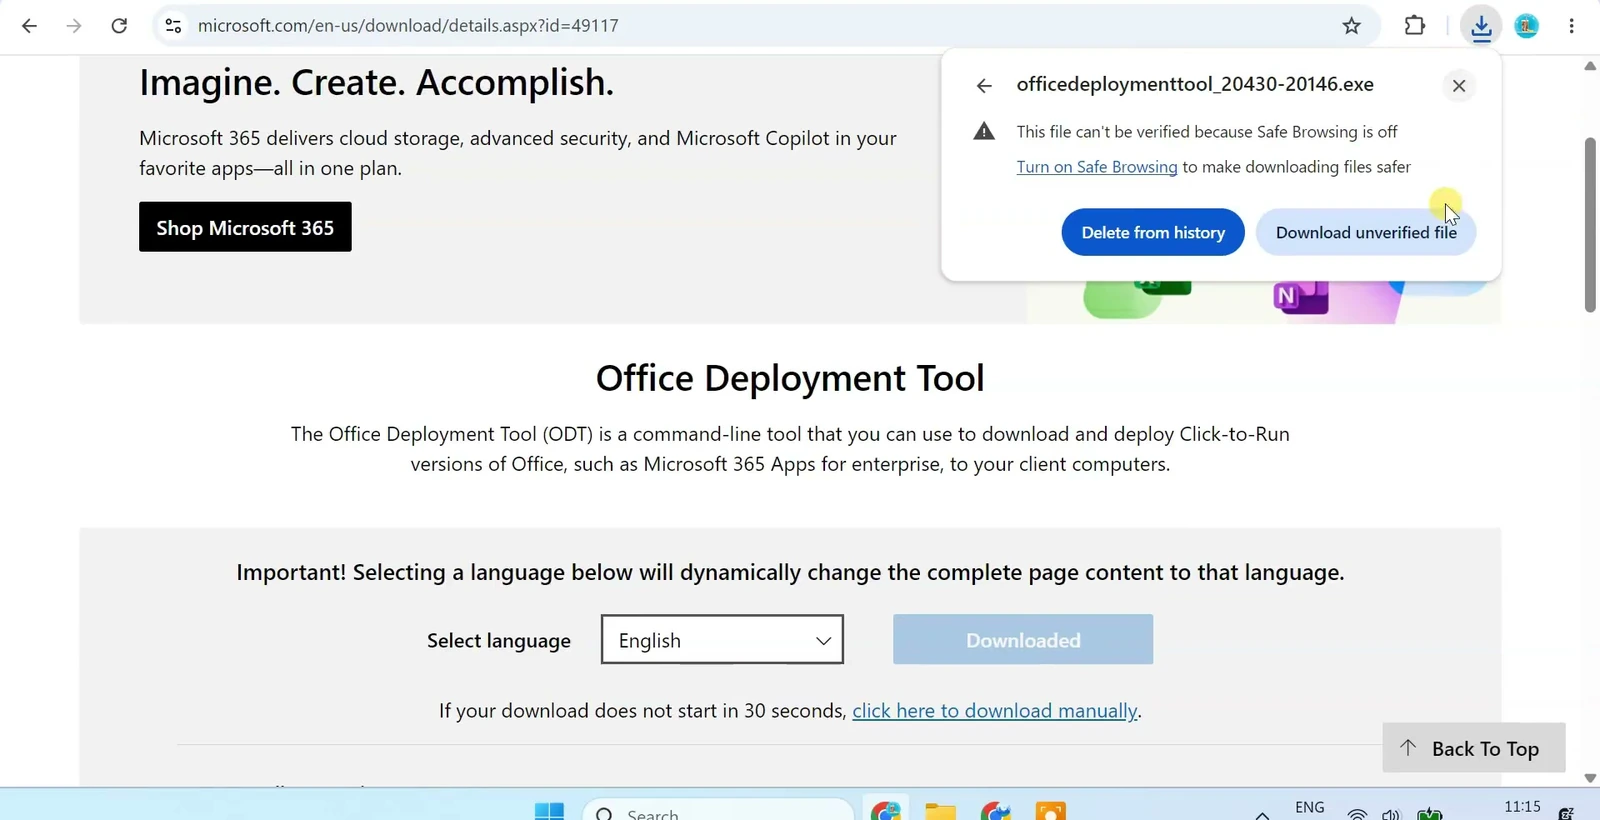
On Microsoft’s official download page, keep the appropriate language selected and click Download. You should now have two files in your Downloads folder: the Office Deployment Tool executable and the XML file from the previous section.
Open File Explorer and go to This PC, then open your C: drive. Create a folder named Office2024. I’m using a simple name without spaces to make the later command easier to run.
Copy both downloaded files into C:\Office2024.
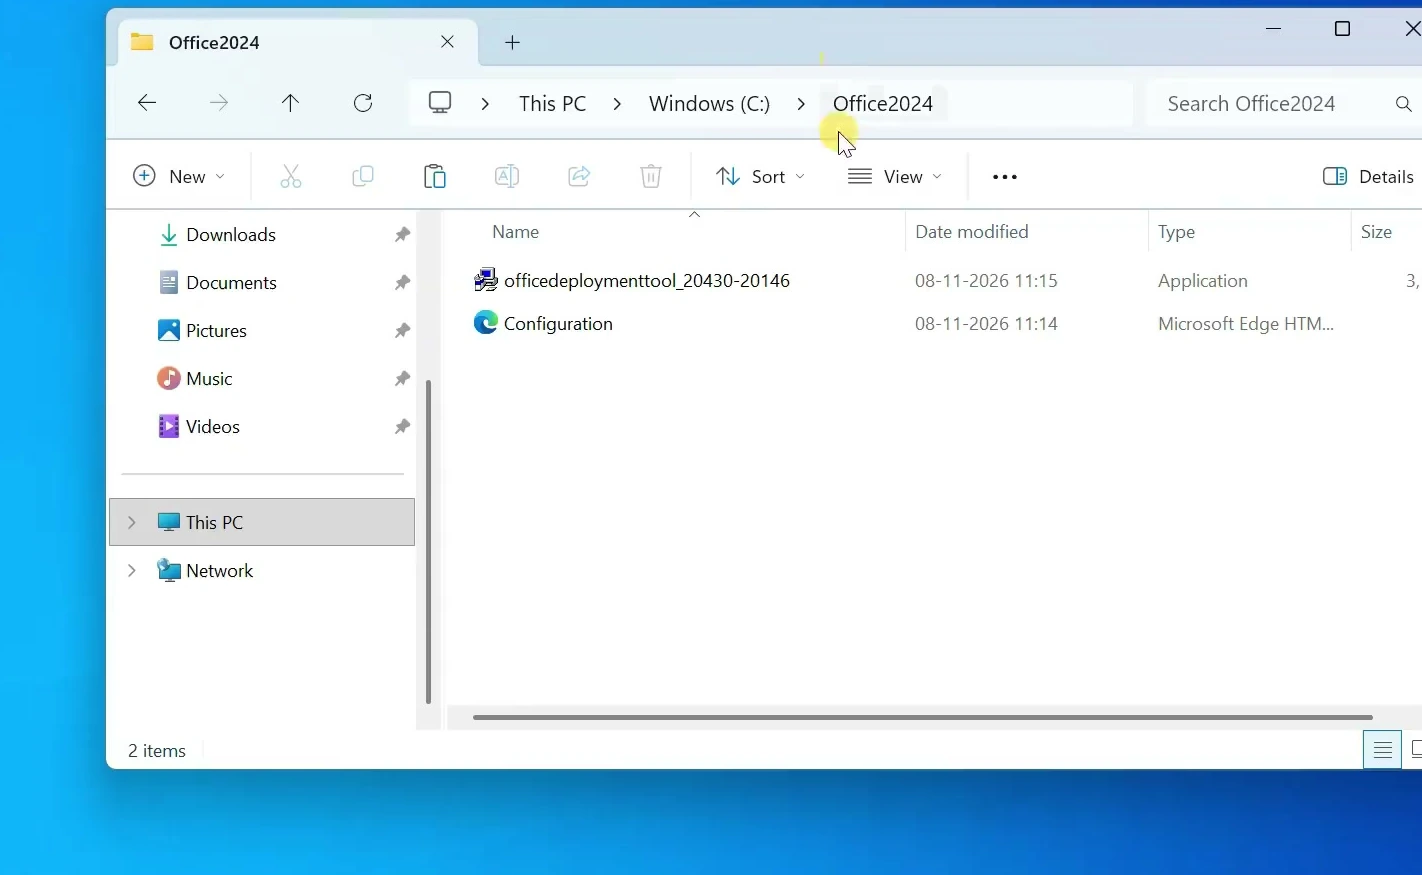
Next, right-click the downloaded Office Deployment Tool executable and choose Run as administrator. Accept its license terms and click Continue. When it asks where to extract the files, choose the Office2024 folder and click OK.
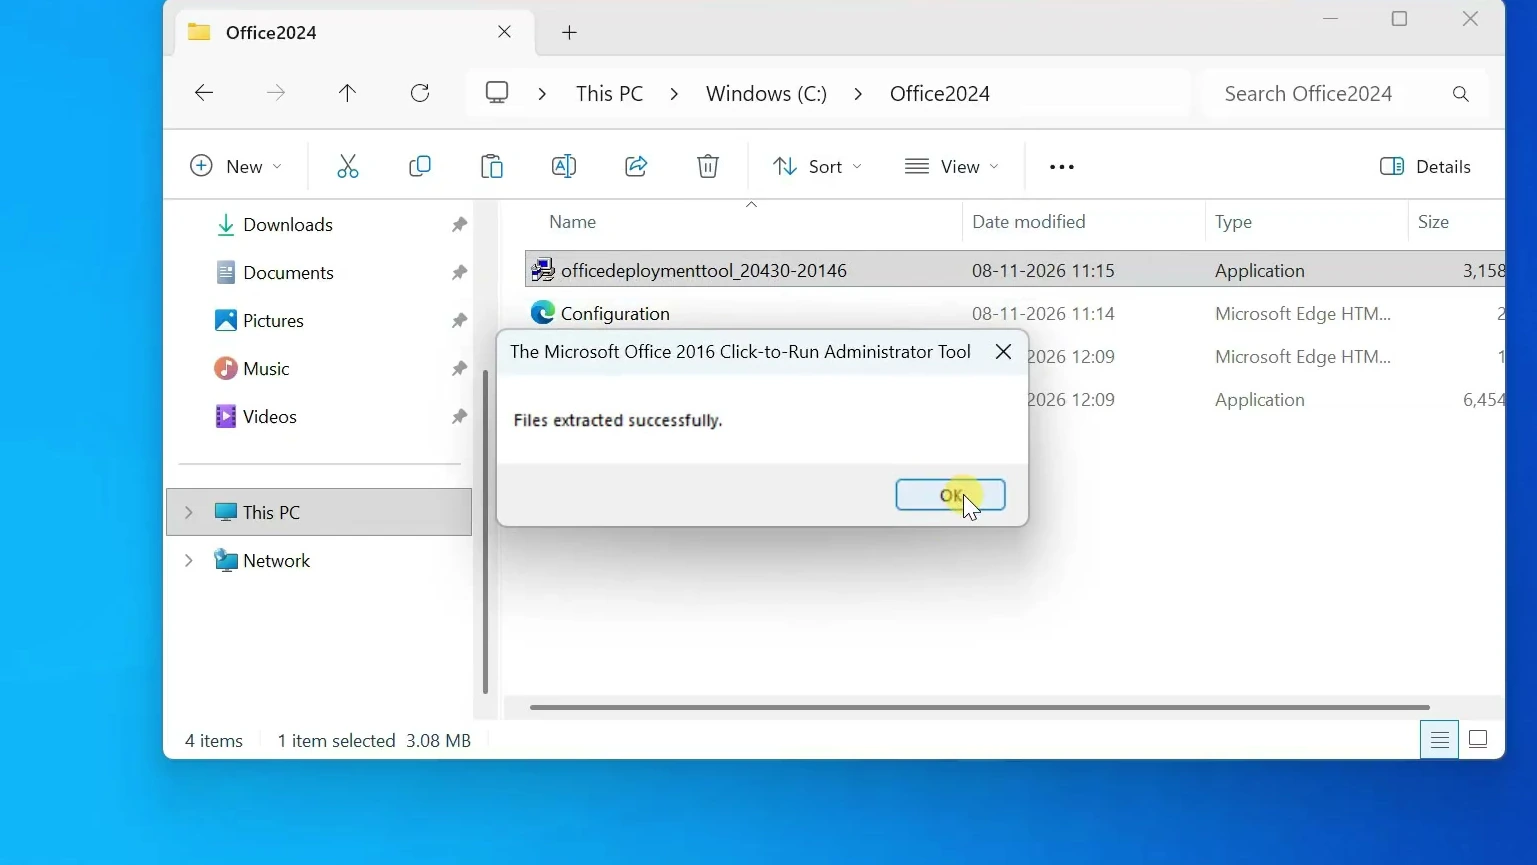
The folder should now contain the extracted setup.exe program as well as your exported XML file. Check the exact XML filename before moving on. In this walkthrough it’s Configuration.xml, but your browser might have given it a different name.
Install Office using the configuration file
Now that the files are together, we can start the actual installation. Open C:\Office2024 in File Explorer, click the address bar, type cmd, and press Enter. This opens Command Prompt in the same folder, so you don’t have to navigate there manually.
Enter the following command. It tells the deployment tool to install Office using the settings saved in your XML file.
setup.exe /configure Configuration.xmlIf your exported XML file has a different name, make sure the name in the command matches your actual file. Also, if Windows requires administrator permissions, use an elevated Command Prompt opened in that folder.
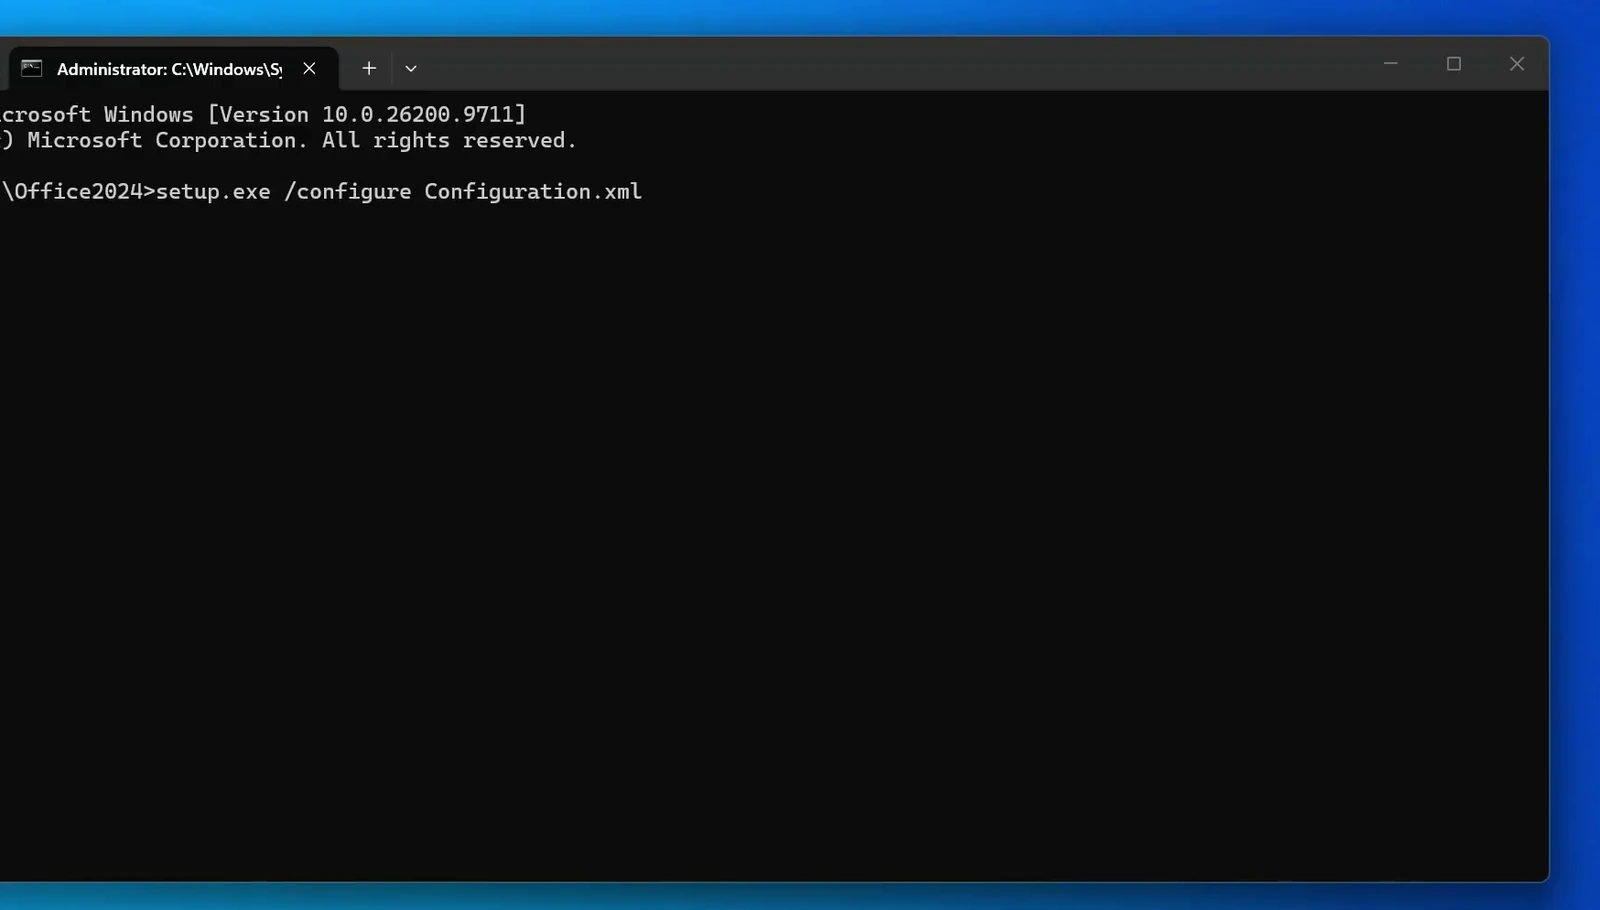
Press Enter to begin. The installer connects to Microsoft’s download service and installs the applications selected earlier. Leave the computer connected to the internet while the download and installation are in progress.
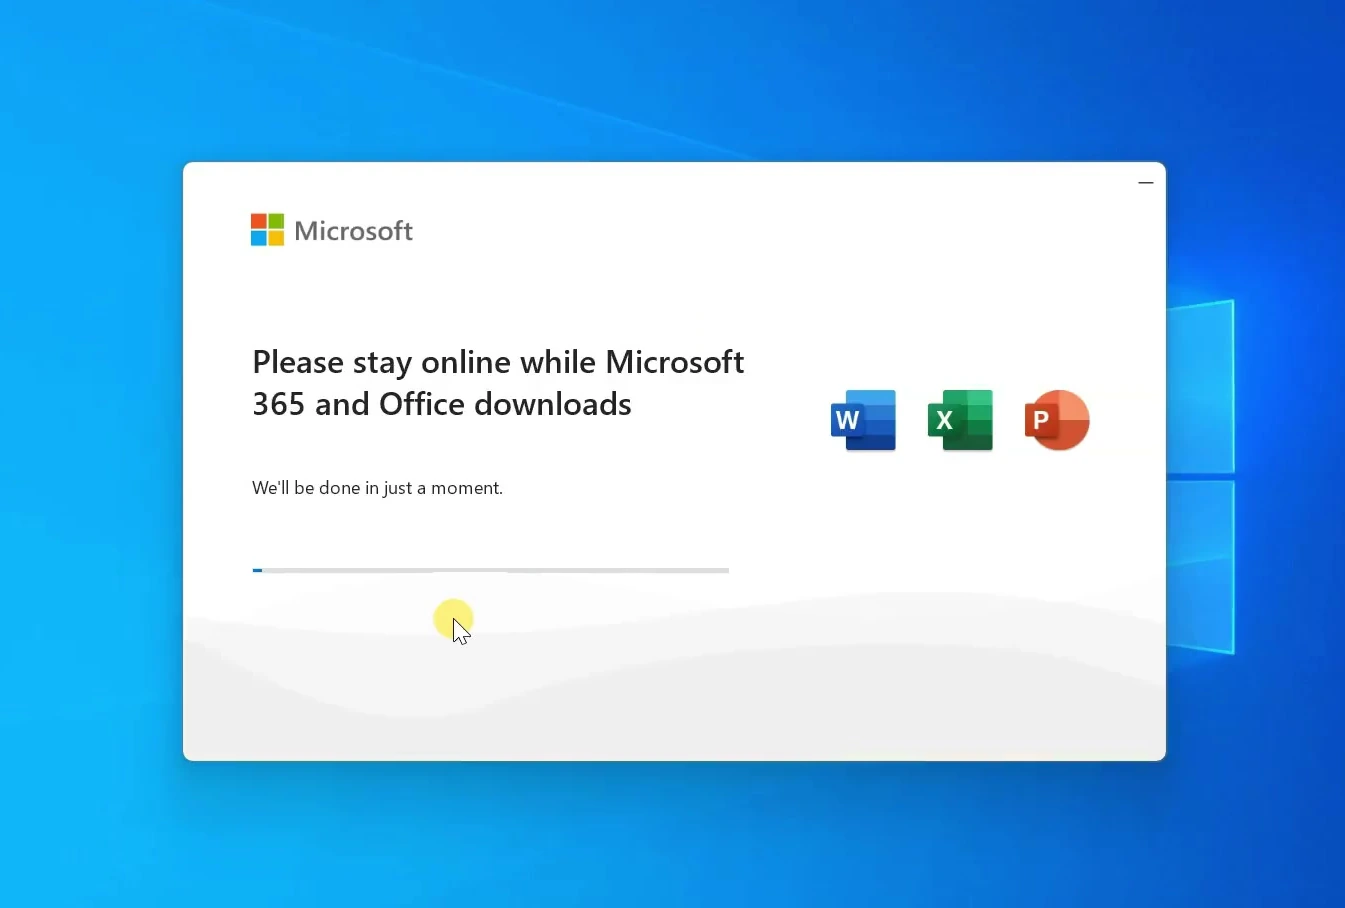
The process can take a little time depending on the internet connection and the amount of software you selected. When the installer finishes, click Close. You can then find Word, Excel, and PowerPoint through Windows Search or the Start menu.
Check the installed apps and license status
I opened Word first. On the first launch, Office may ask you to accept the license agreement. Click Accept if you agree to the terms. I then opened Excel and PowerPoint to check that the selected applications were present.
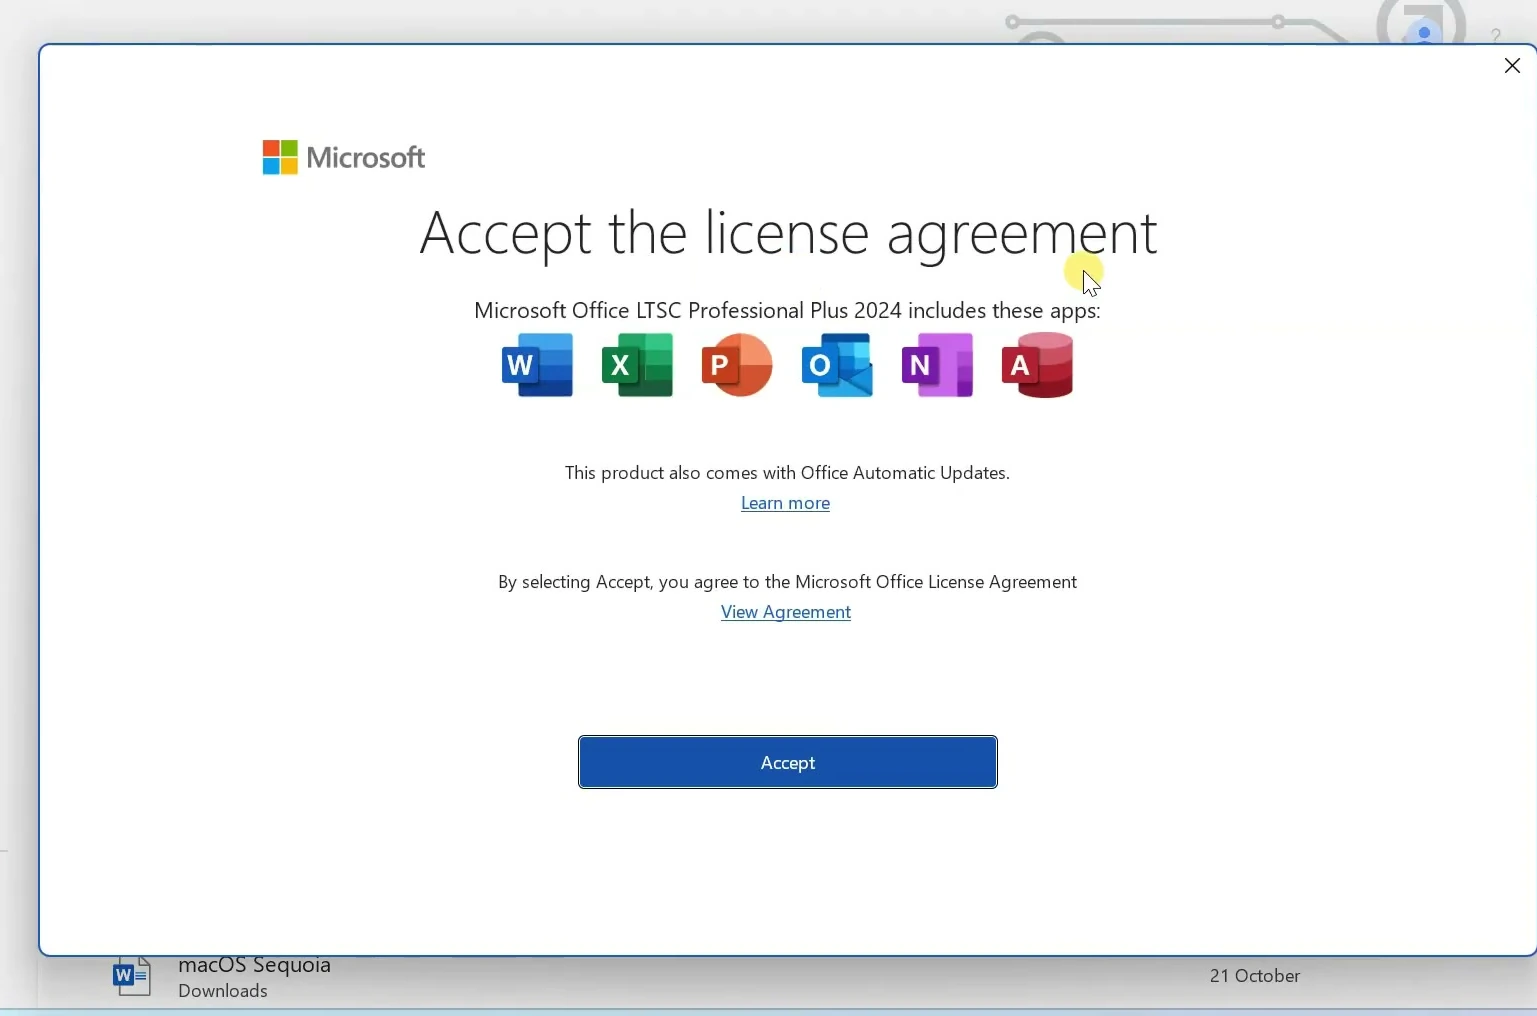
Seeing the apps open confirms the installation completed, but installation and activation are separate. To find the activation status, open any Office app, select File, and then choose Account. Look at the Product Information section.
In my recording, it shows Activation Required for Office LTSC Professional Plus 2024. That means the applications are installed, but the product still needs a valid license. It is not proof of a permanently activated or free copy of Office.
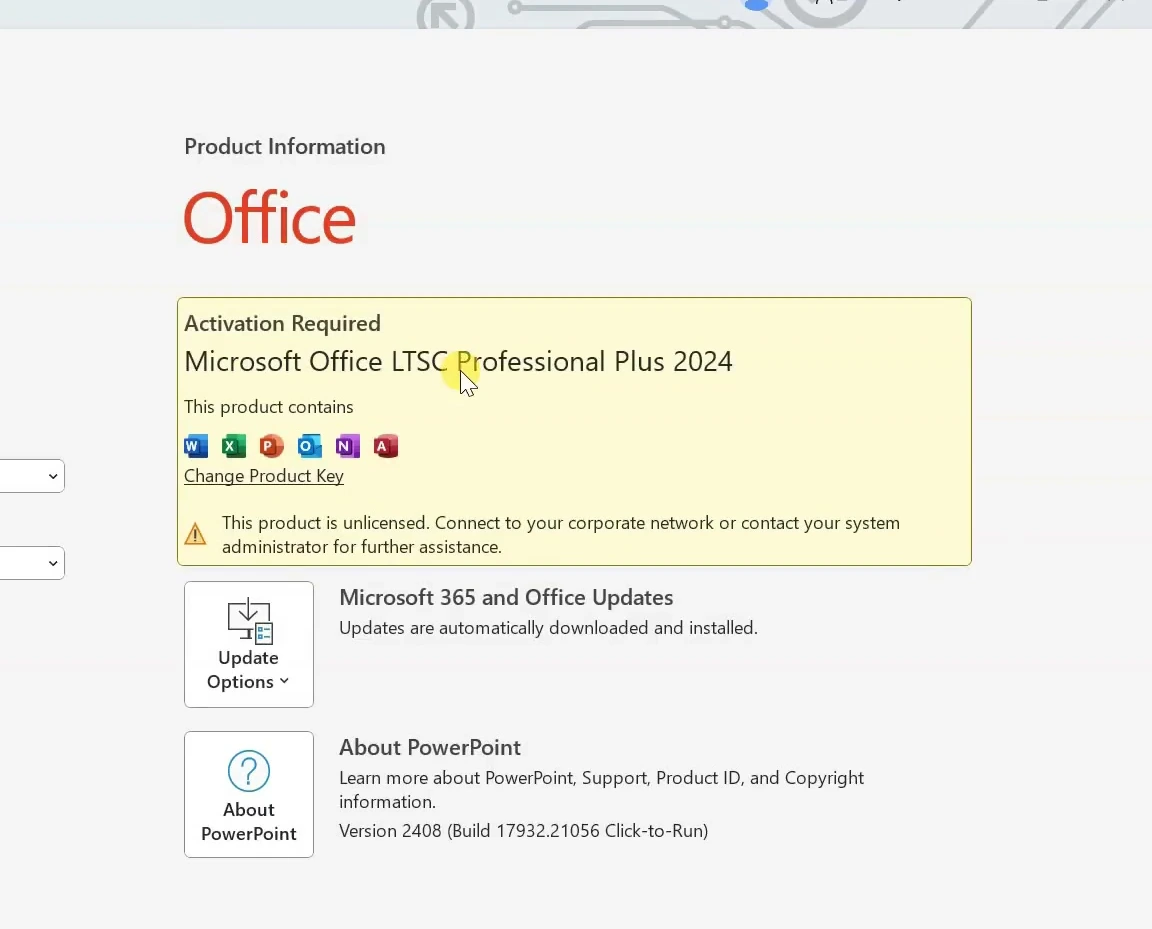
If you have the appropriate license, follow your organization’s or Microsoft’s supported activation process. If you don’t, choose an Office edition or subscription that you’re licensed to use.
Optional: Control Office network access with Windows Firewall
The installation is complete at this point. There’s also an optional network-control step in my setup: creating Windows Defender Firewall rules for individual Office applications. This lets Windows block network connections for a selected program.
To review these controls, search Windows for Windows Defender Firewall, open it, and select Advanced settings. This opens Windows Defender Firewall with Advanced Security, which has separate lists for Inbound Rules and Outbound Rules.
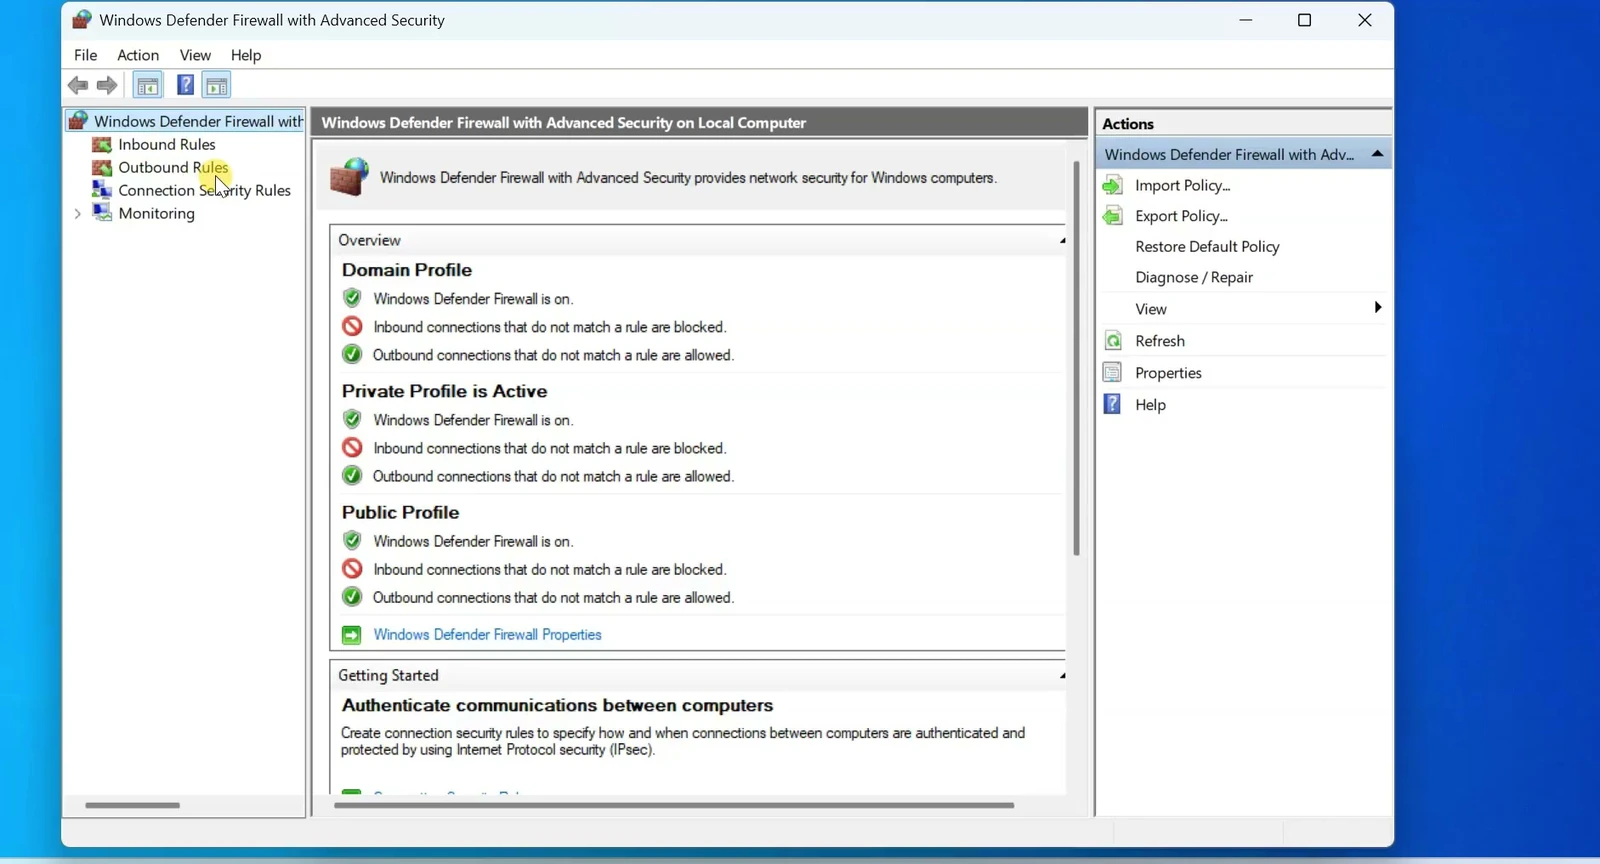
For an inbound rule, select Inbound Rules and click New Rule. Choose Program, then Next. Select This program path because the rule should apply to one Office executable, not every program on the computer.
To locate Word, search for it in Windows, right-click the shortcut, and choose Open file location. If Windows opens a shortcut folder, right-click the shortcut and use Open file location again. You’ll reach the Office program folder. Select the executable for the application you’re configuring, such as WINWORD.EXE for Word. Use the actual path on your computer rather than copying a path from someone else’s PC.
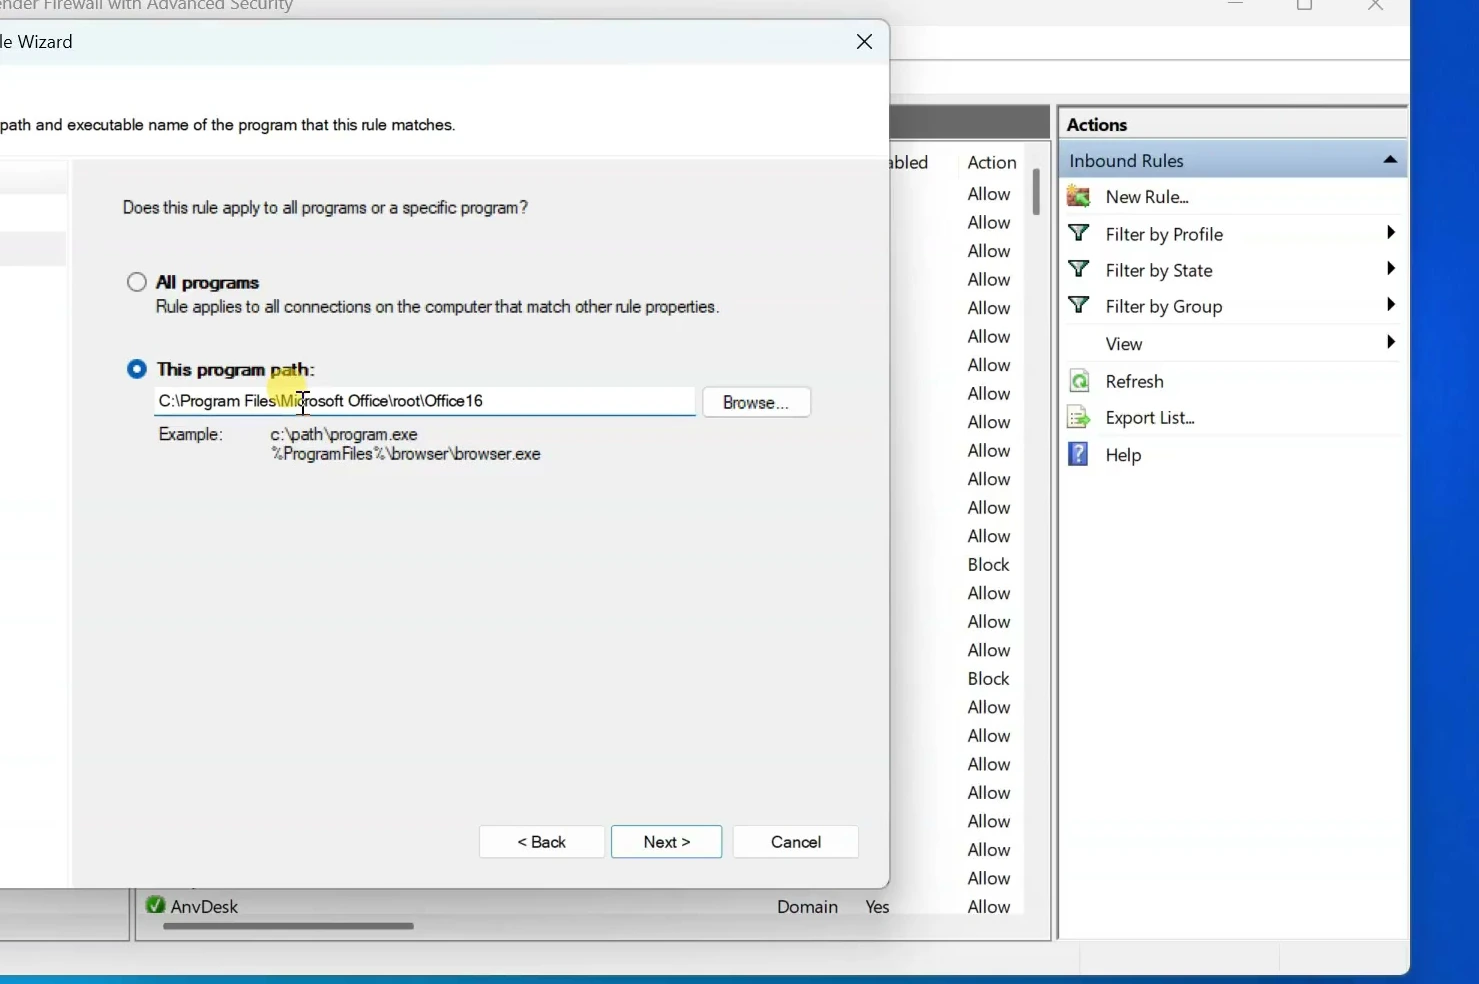
In the wizard, select Block the connection and click Next. The recording keeps the Domain, Private, and Public profiles selected. Give the rule a descriptive name, such as Word Internet Block, then click Finish.
You can repeat this for the other applications, using the executable that belongs to each app. For example, Excel uses EXCEL.EXE, while PowerPoint commonly uses POWERPNT.EXE. The resulting rules appear in the inbound list.
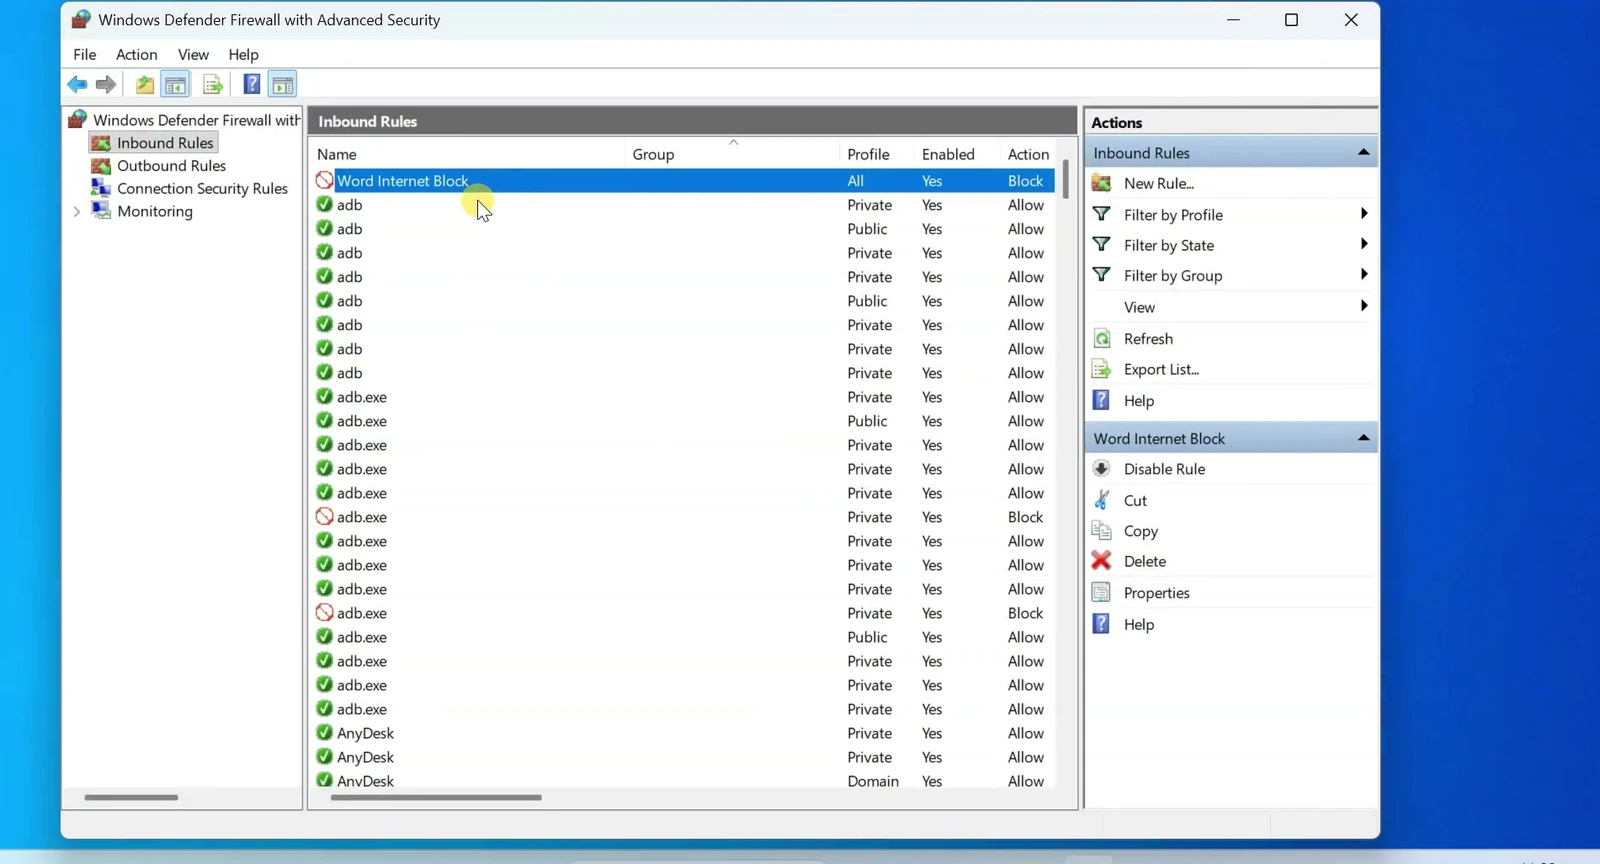
To restrict outgoing connections as well, open Outbound Rules and repeat the New Rule process for each selected Office program. Outbound rules matter in particular because they govern connections that an application initiates. After creating them, you can review the rules together in the firewall console.
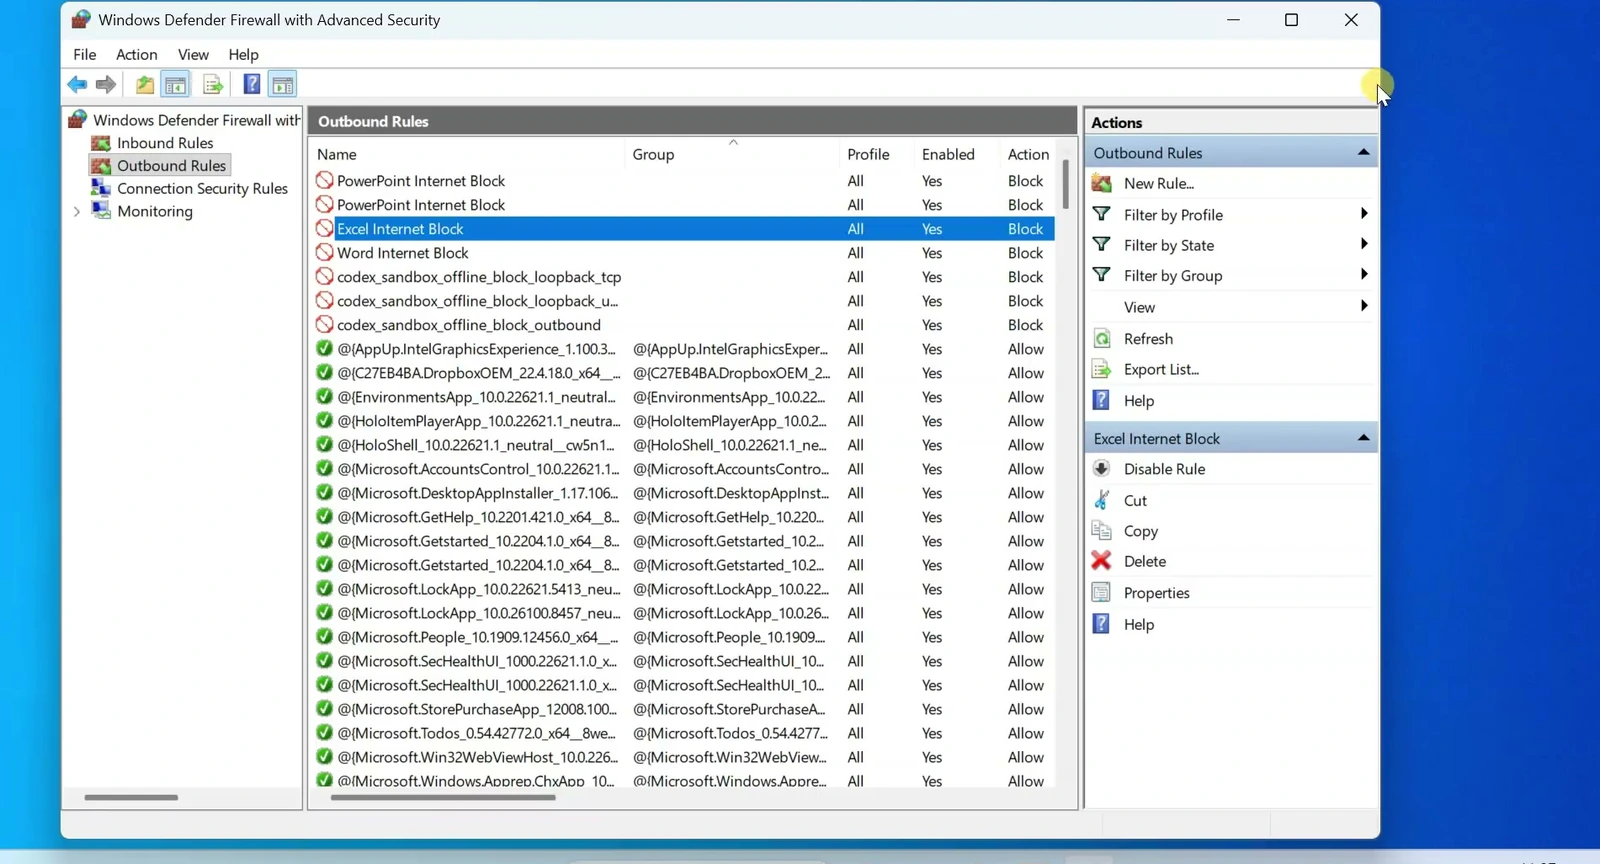
To reverse these restrictions, return to the appropriate Inbound Rules or Outbound Rules list, select each rule you created, and choose Disable Rule or Delete. If Office sign-in, activation, or connected features stop working, review the rules before troubleshooting the apps themselves.
If the installation doesn’t work
Most problems are easier to narrow down when you check the step where they occur.
▸ Command Prompt cannot find setup.exe
Check that you opened Command Prompt from the folder containing the extracted setup.exe, not just from Downloads. Also confirm that the XML file is in the same folder and that its filename matches the installation command exactly.
▸ Office download appears to stall
Make sure your internet connection is working and allow the Microsoft installer enough time to download the selected apps. The Office Deployment Tool retrieves installation files online when they aren’t already available locally.
▸ Word opens but says Activation Required
That is a licensing issue, not necessarily an installation failure. Check the product edition under File and Account, then activate it using a valid license for that specific edition. Firewall restrictions should not be used as an activation workaround.
With the configuration file and Microsoft’s deployment tool, it’s possible to install just the Office applications you need and verify exactly which edition ended up on your PC. The key is to treat deployment, activation, and optional network restrictions as separate steps.