Windows 11 includes useful features, but a new installation can also contain preinstalled apps, suggestions, telemetry settings, and interface elements you may never use. Win11Debloat is an open-source, community-maintained PowerShell script that puts many of those cleanup and customization options into one guided interface.
This tutorial shows how to use Win11Debloat in Custom Setup mode, remove only unwanted apps, review privacy and interface tweaks, create recovery safeguards, and check the result after restarting. The tool supports Windows 10 and Windows 11, although the screens below were recorded on Windows 11.
Important: Win11Debloat is not made or supported by Microsoft. It changes installed apps, policies, and registry settings, so read every option and select only changes you understand. Back up important files before continuing.
Before you debloat Windows 11
You will need an administrator account, an internet connection, and the built-in Windows PowerShell 5.1. The current Win11Debloat script does not support PowerShell 7 (pwsh) because the app-removal and System Restore components it uses are available through Windows PowerShell modules.
- Save your work and close open applications.
- Back up irreplaceable personal files.
- Make sure you know which apps and Windows features you actually use.
- If device encryption is enabled, confirm that you can access your BitLocker recovery key.
Record a baseline in Task Manager
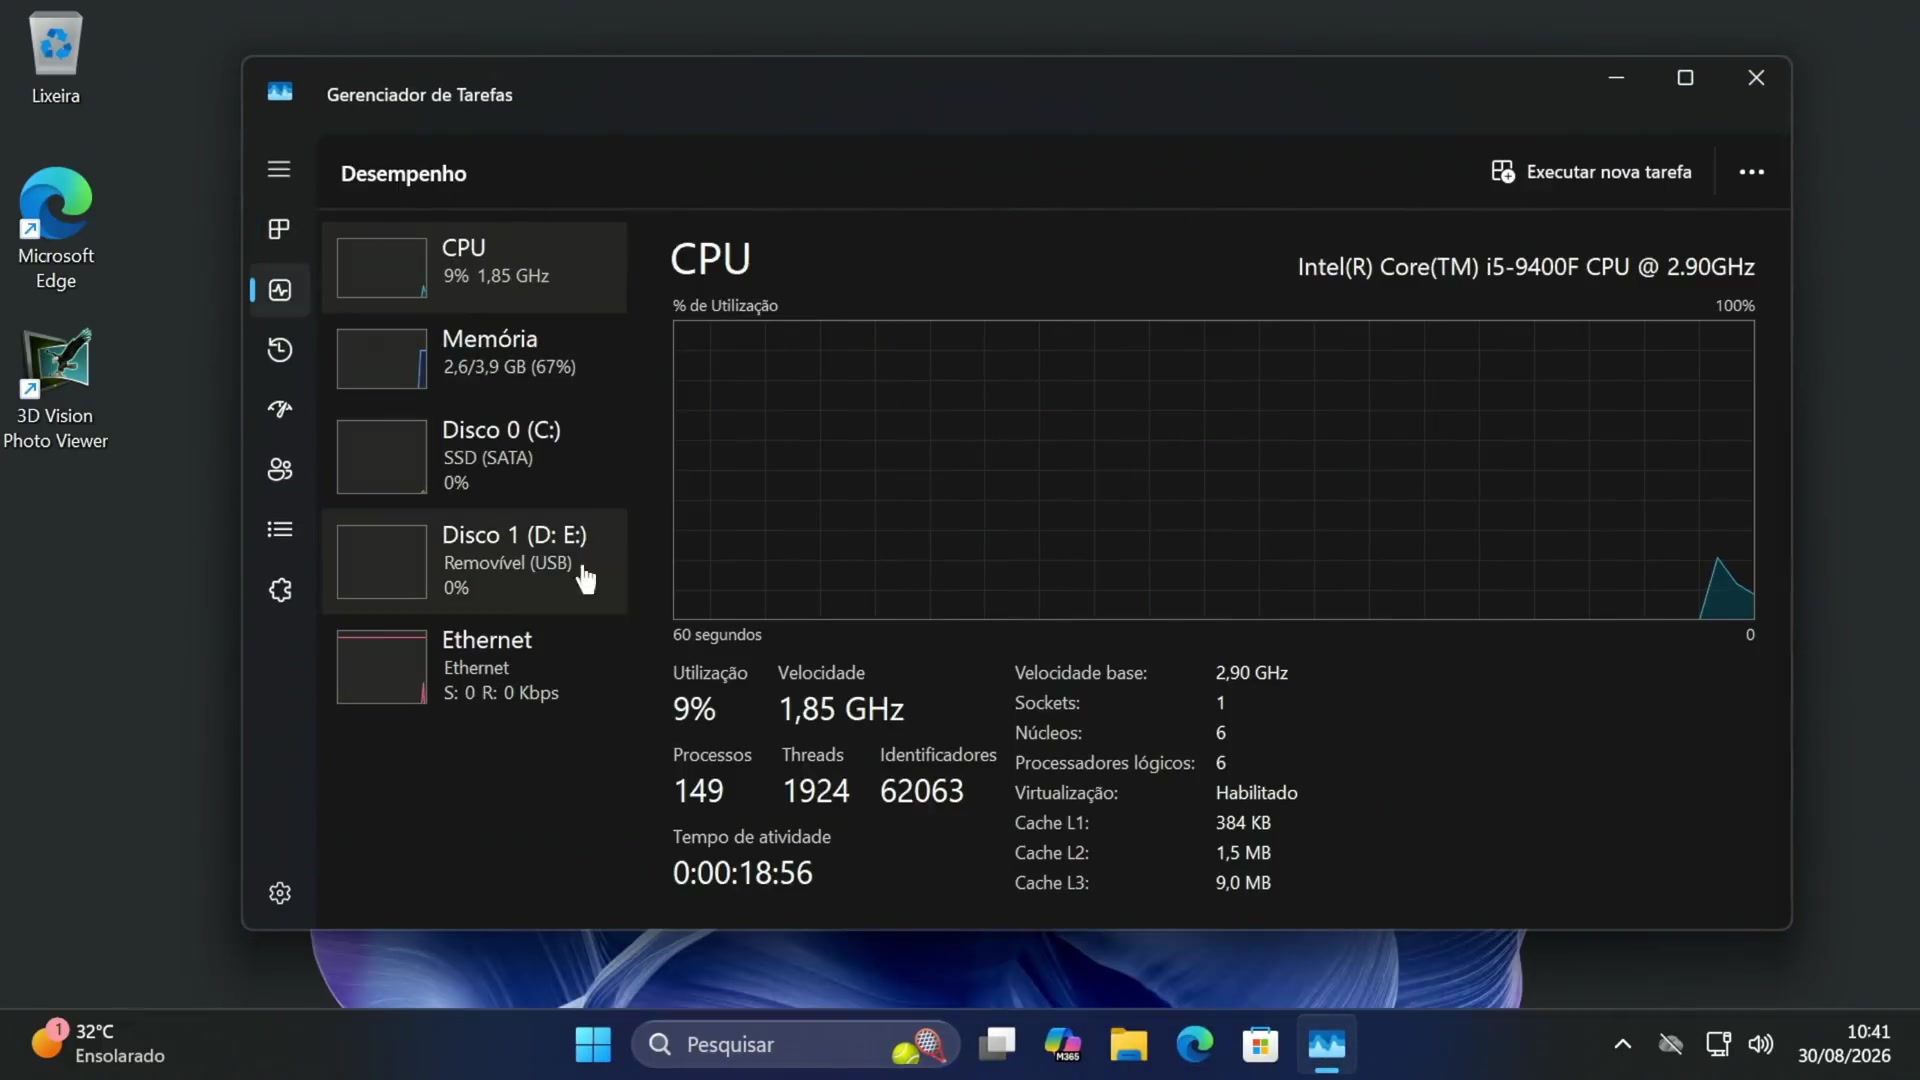
For a useful before-and-after comparison, restart the PC, wait a few minutes for startup activity to settle, and open Task Manager with Ctrl + Shift + Esc. Select Performance, then note the process count and memory usage. The demonstration PC started with 149 processes and approximately 2.6 GB of its 4 GB of usable memory in use.
Download and launch Win11Debloat
Step 1: Open the official project page
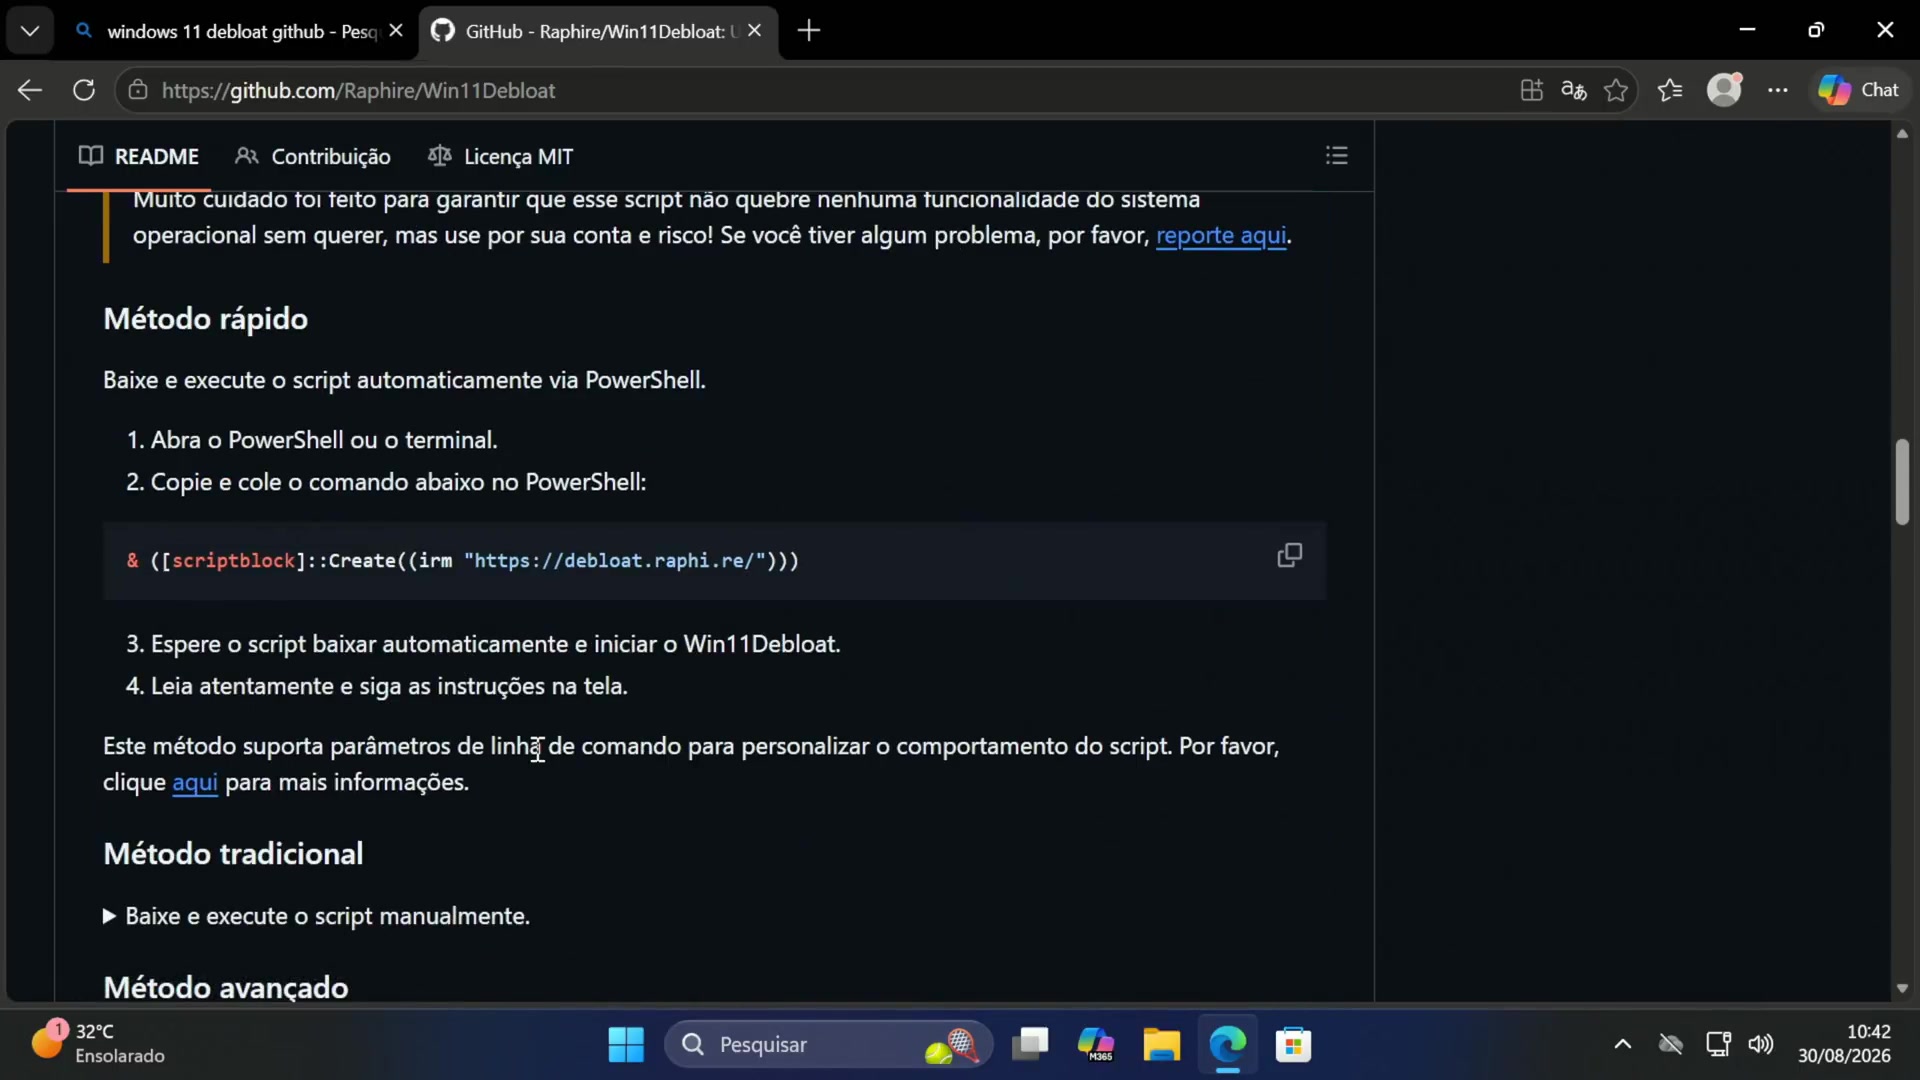
Open the official Raphire/Win11Debloat repository linked above. Avoid copied scripts, shortened download links, and commands posted by unknown third parties. The project’s How to Use documentation lists both a quick method and a manual ZIP-download method.
Step 2: Run Windows PowerShell as administrator
- Open the Start menu and search for Windows PowerShell.
- Right-click it and choose Run as administrator.
- Select Yes in the User Account Control prompt.
- Paste the official quick-start command below and press Enter.
& ([scriptblock]::Create((irm "https://debloat.raphi.re/")))This command downloads the current launcher from the project’s official domain and executes it. A remote-script command is convenient, but it also means you are trusting the code delivered at that URL. If you prefer to inspect the files first, use the repository’s manual ZIP method instead. Win11Debloat downloads its temporary files, opens the setup interface, and removes those temporary files when it finishes.
Choose the user and Custom Setup mode
Step 3: Select the account to modify
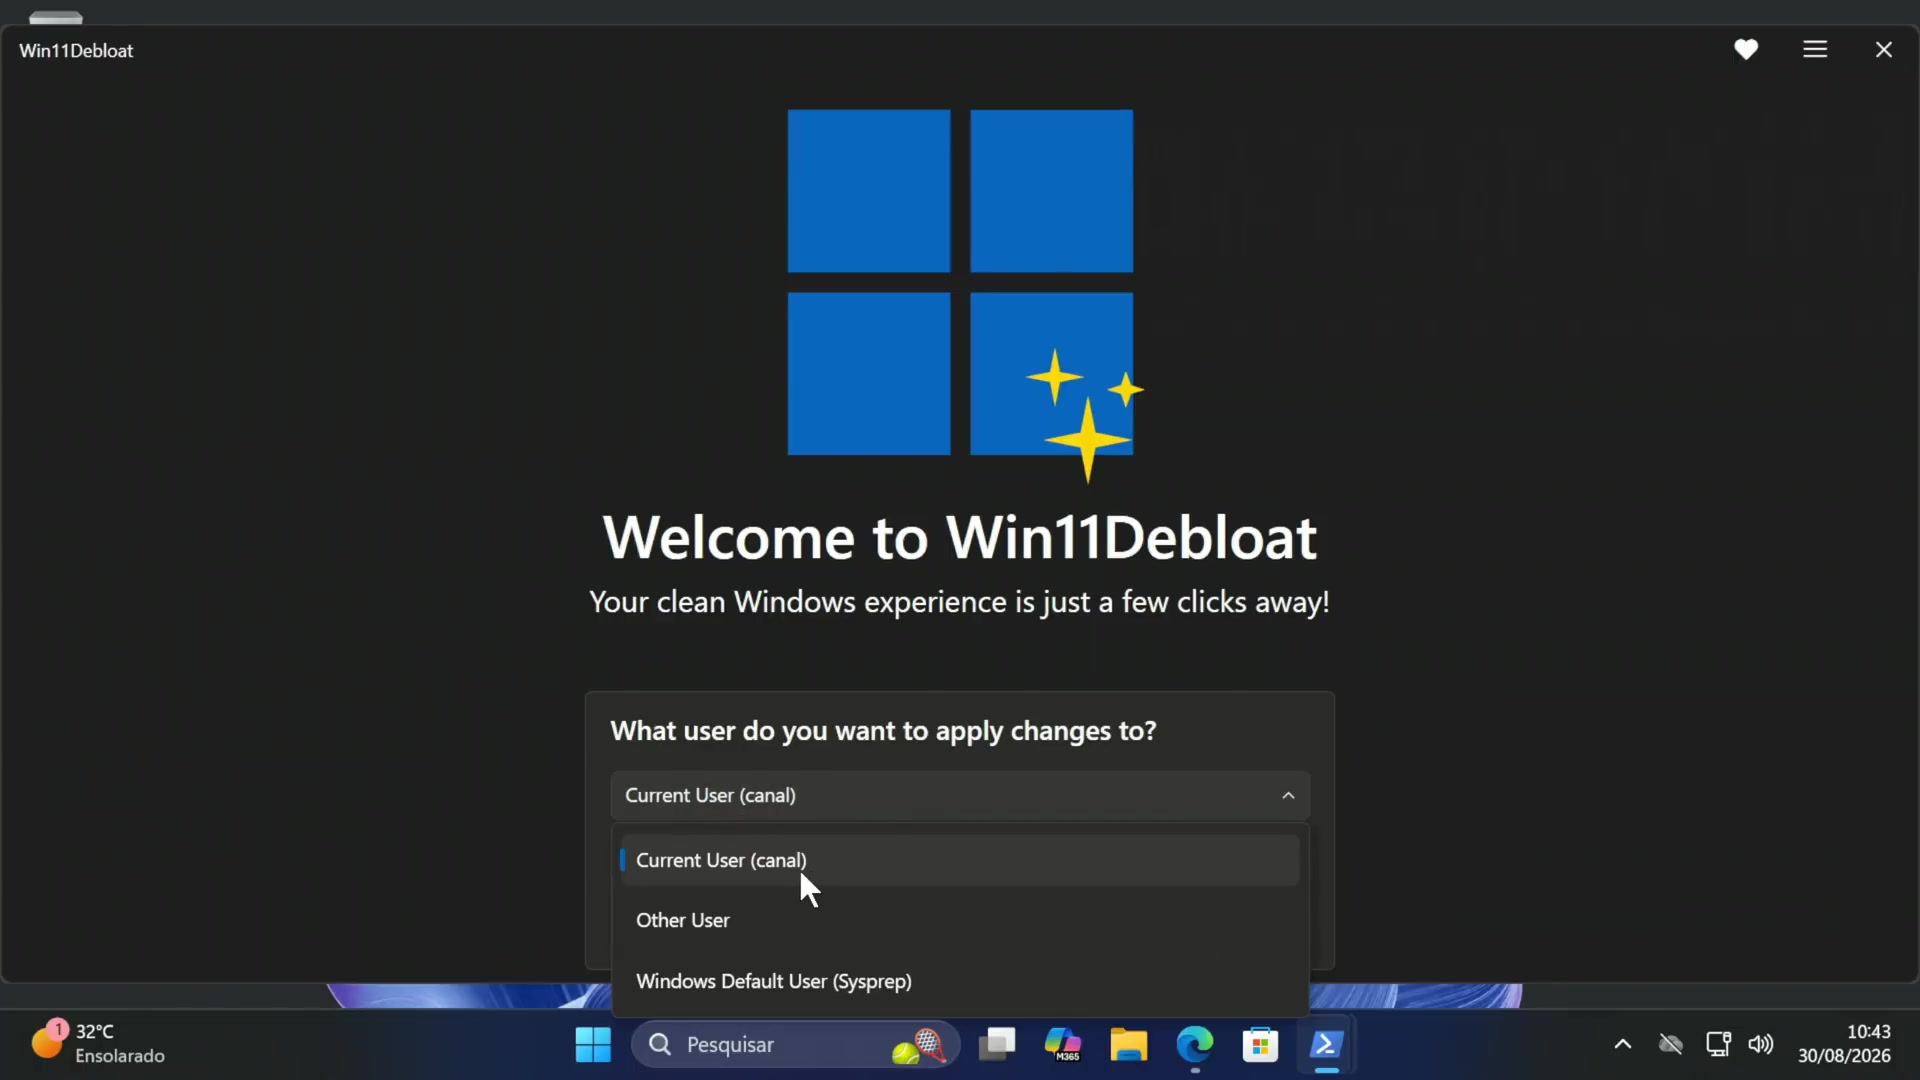
When the welcome screen appears, select Current User unless you specifically need to configure another profile. The Windows Default User (Sysprep) option is intended for deployment workflows and is not the right choice for a normal home PC.
Step 4: Choose Custom Setup
Select Custom Setup. Default Mode applies the project’s preset collection, while Custom Setup lets you review every app and tweak before anything changes. That extra review is worth the time because a useful feature for one person may be unwanted bloat for someone else.
Select only the apps you want to remove
Step 5: Review the App Removal list
On the App Removal screen, a checked item is scheduled for removal. Use the search box or enable Only show installed apps to shorten the list. The Quick Select menu can select default apps, Xbox gaming apps, or OEM software from manufacturers such as Dell, HP, Lenovo, and LG.
The colored dots are an important guide:
- Green — Recommended: generally safe to remove if you do not use the app.
- Yellow — Optional: review the app’s purpose before selecting it.
- Red — Not Recommended: removing it can affect Windows features or normal workflows.
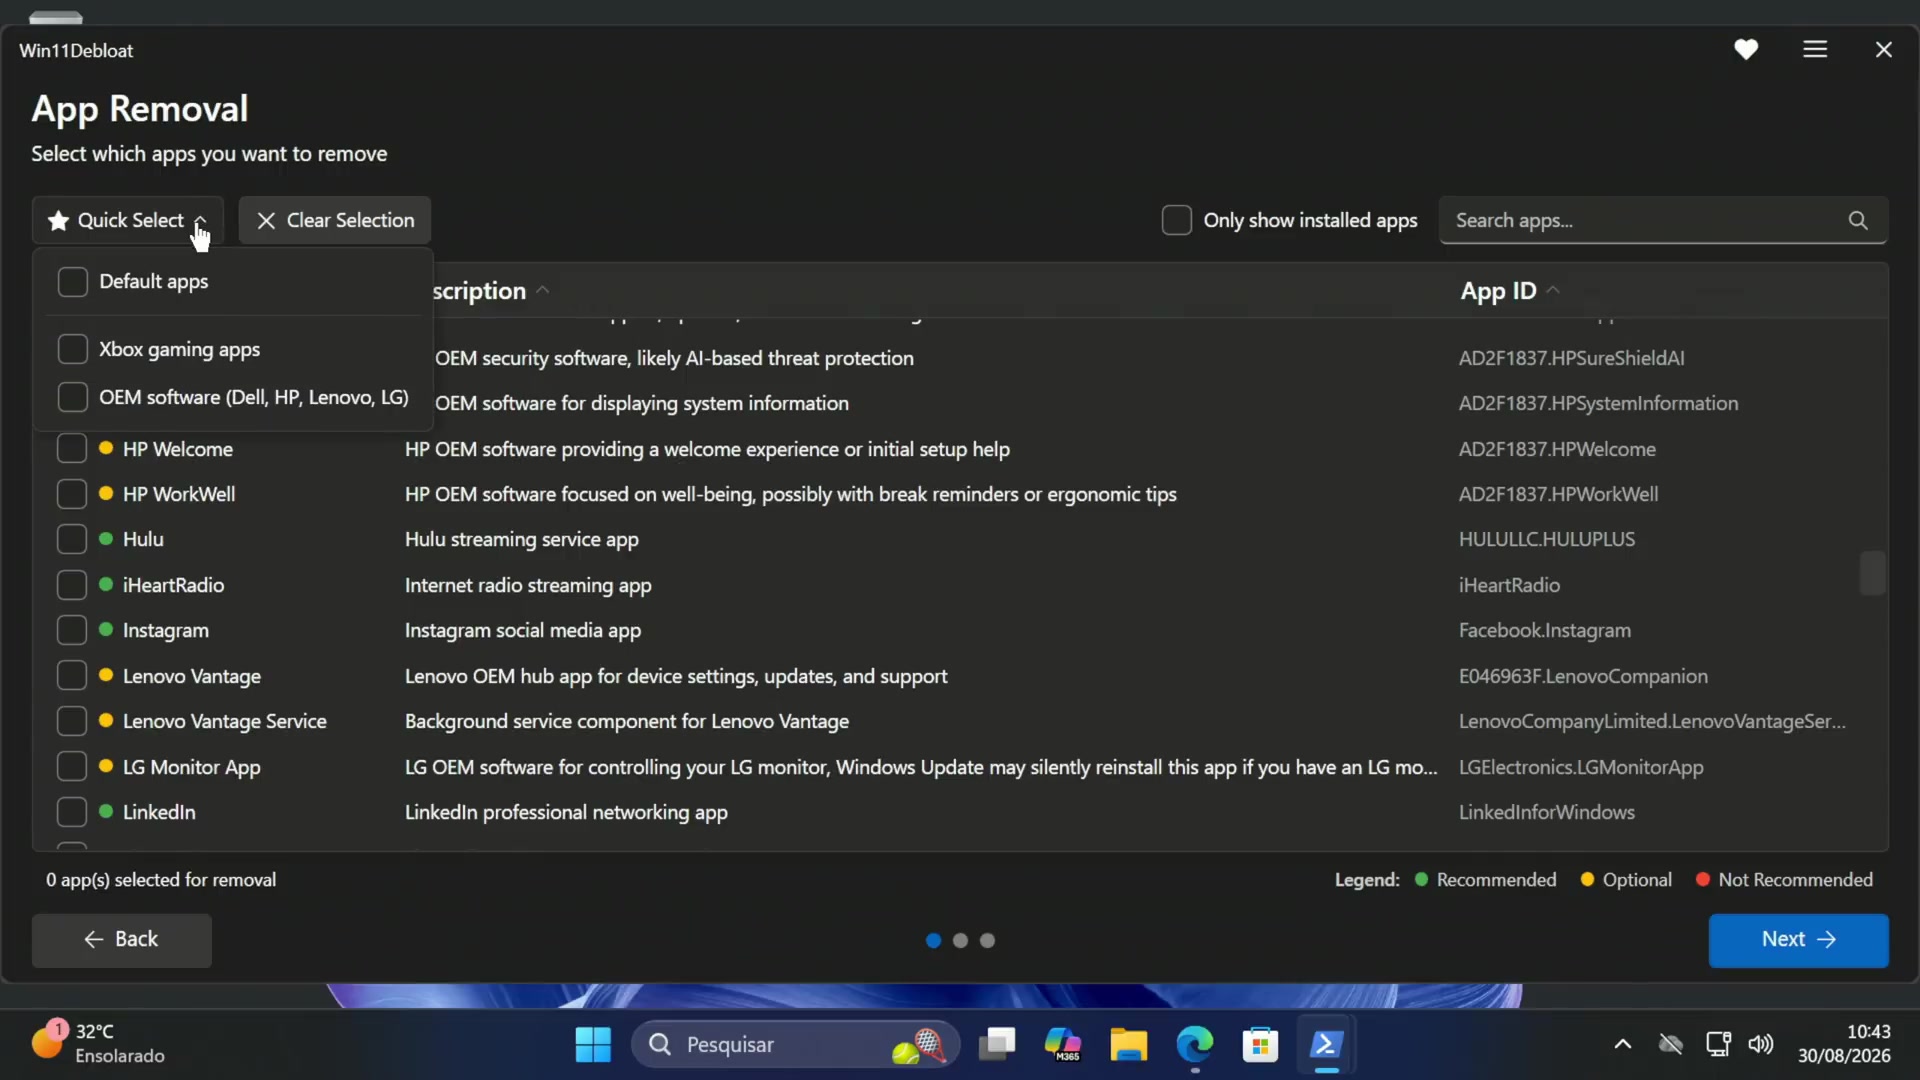
Keep Microsoft Store unless you have a specific reason to remove it, because the Store is the easiest way to reinstall many packaged apps later. Also keep OEM control software required for firmware updates, battery limits, special keys, audio processing, or display controls. Do not assume every manufacturer-branded app is disposable.
After checking the final selection count at the bottom of the window, select Next.
Configure privacy, system, and interface tweaks
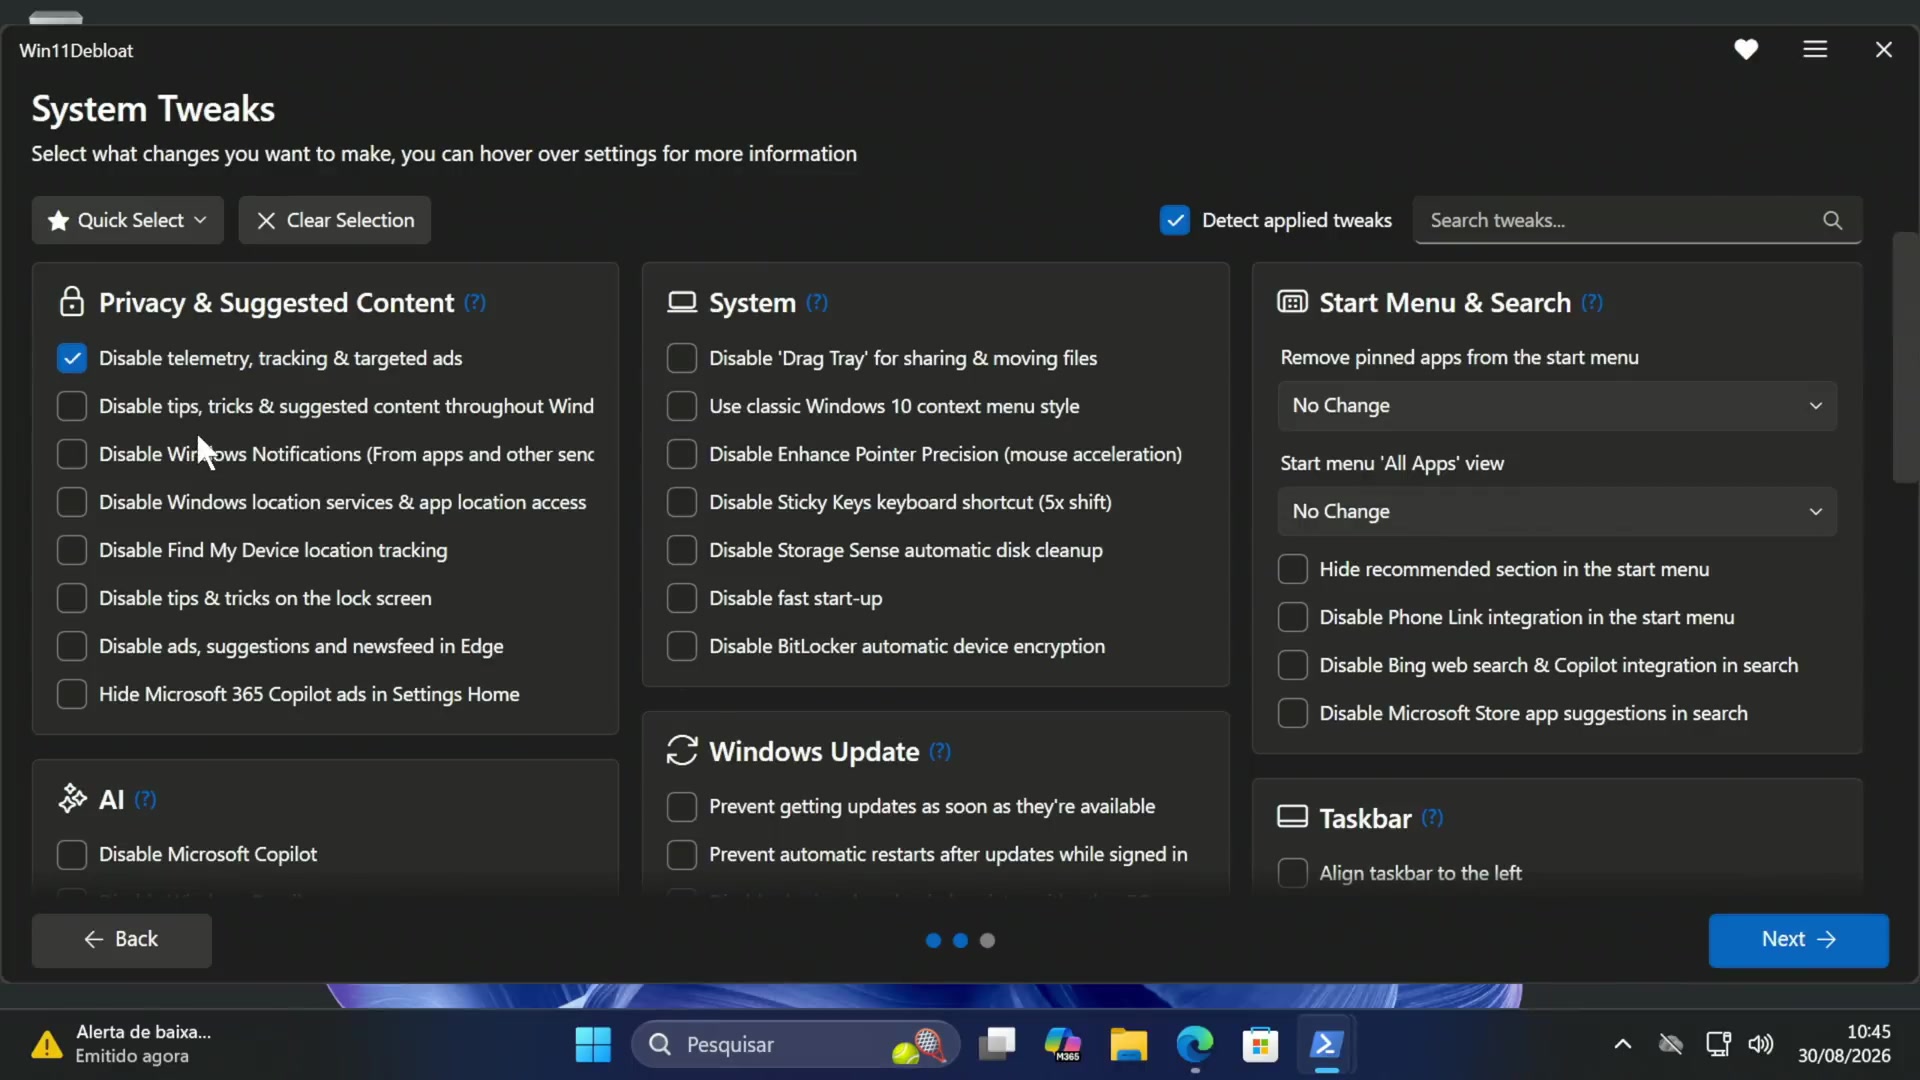
The System Tweaks page contains several groups. You do not need to enable everything. Hover over an option for its description, and treat the choices below as a practical review checklist rather than a mandatory preset.
Step 6: Review Privacy & Suggested Content
- Disable telemetry, tracking & targeted ads reduces diagnostic data, activity tracking, and ad personalization covered by the script.
- Disable tips, tricks & suggested content reduces promotional suggestions around Windows.
- Disable Windows location services affects apps that need your location. Leave it unchecked if you use maps, weather by location, or other location-aware software.
- Disable Find My Device location tracking also disables a recovery feature. Leave it unchecked if finding a lost laptop matters to you.
- Lock-screen tips, Edge suggestions, and Microsoft 365 ads are preference changes and can be selected independently.
Step 7: Be selective with System options
- Use classic Windows 10 context menu style restores the older right-click menu.
- Disable Enhance Pointer Precision turns off Windows mouse acceleration, which some players prefer for consistent aiming. It is not a universal gaming-performance boost.
- Disable Storage Sense stops automatic disk cleanup. Leave Storage Sense enabled if you rely on Windows to remove temporary files.
- Disable fast start-up forces a more complete shutdown. This can help with some dual-boot or troubleshooting scenarios, but it may make startup slower.
BitLocker warning: The option is named Disable BitLocker automatic device encryption. It prevents eligible devices from enabling encryption automatically; it does not decrypt a drive that is already protected. Microsoft recommends keeping device encryption enabled on supported systems, so most users should leave this option unchecked.
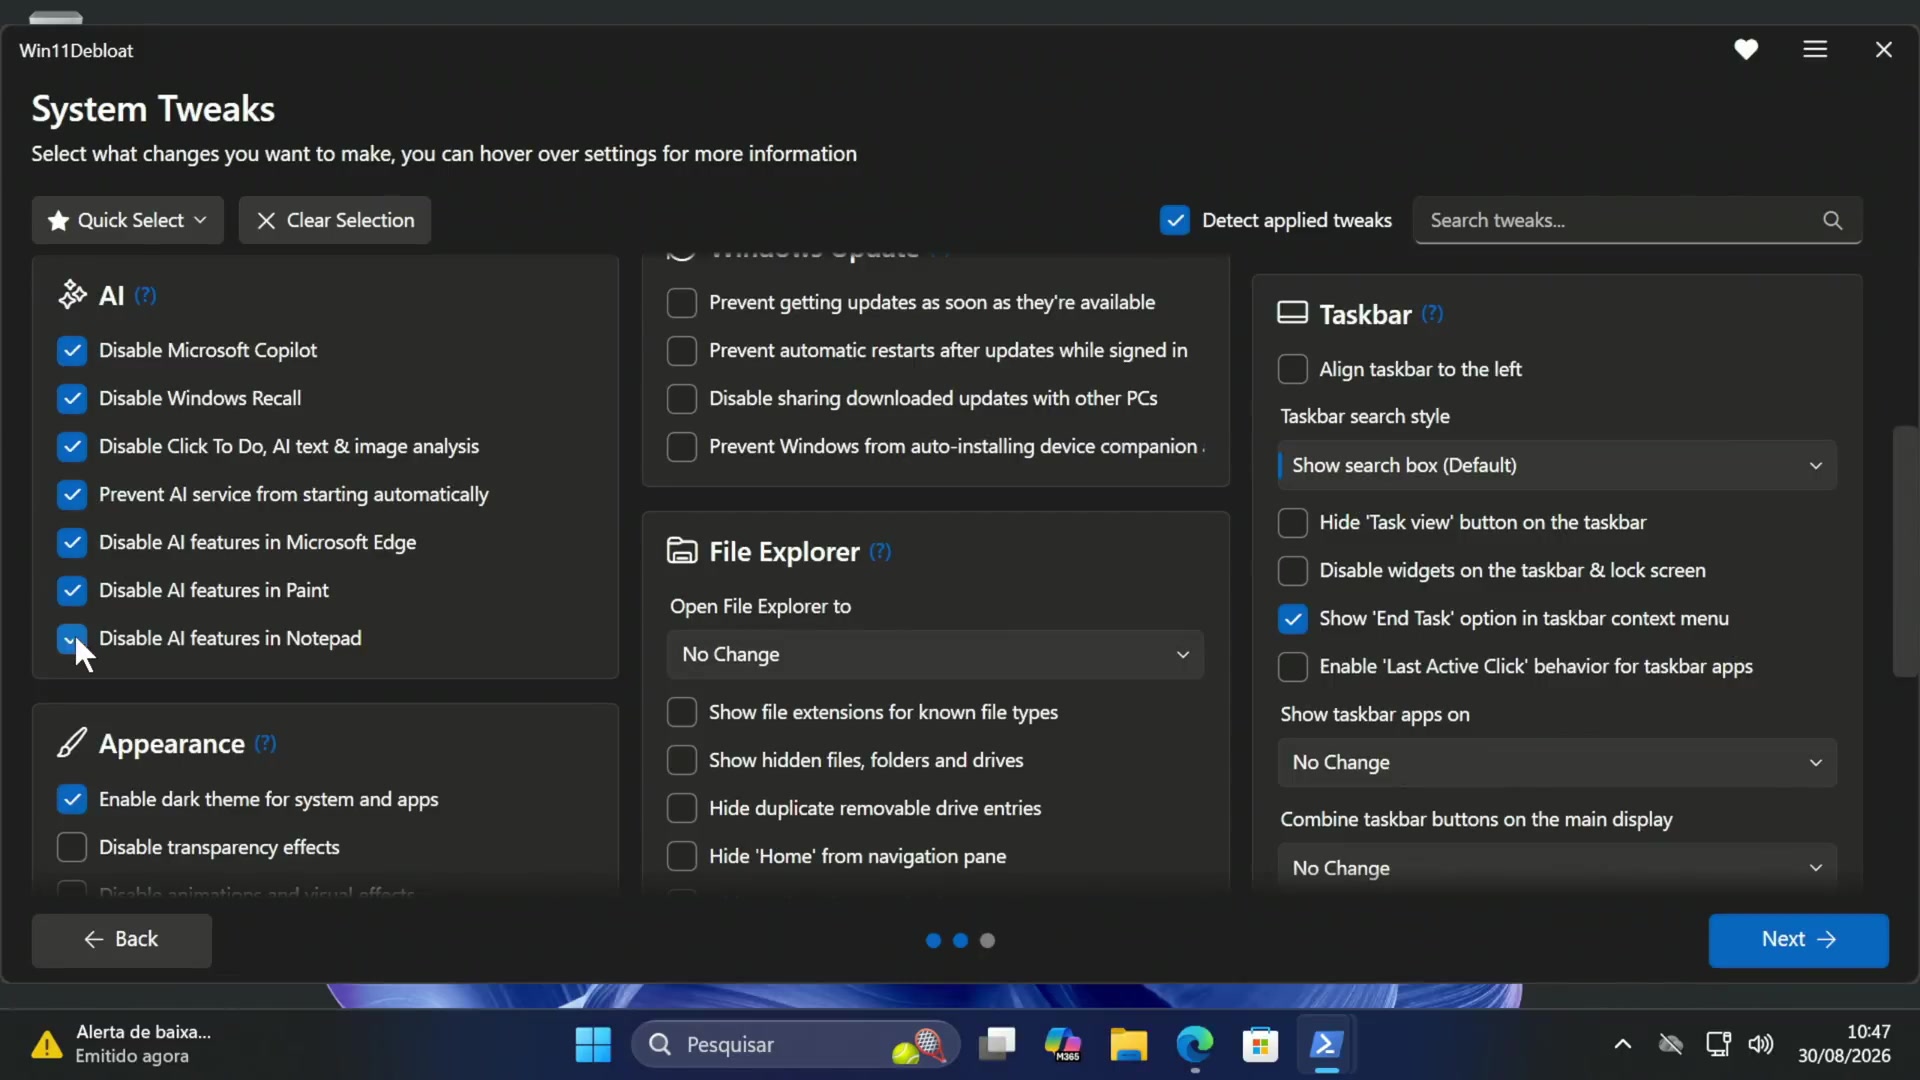
Step 8: Customize Start, Search, AI, and the taskbar
In Start Menu & Search, you can clear pinned promotional apps, hide recommendations, disable Phone Link integration, and remove Bing web results or Store suggestions from Windows Search. Leave any setting at No Change when you like the current behavior.
The AI group can disable Copilot, Recall, Click to Do, the AI service, and AI features in Edge, Paint, and Notepad. Select only the features you do not want. These policy and feature changes reduce integration and background components, but they do not guarantee a specific FPS or memory improvement.
Taskbar settings are mostly personal preference. One practical option is Show “End Task” option in taskbar context menu, which adds a quick way to force-close an app from its taskbar button.
Step 9: Check File Explorer, multitasking, and gaming
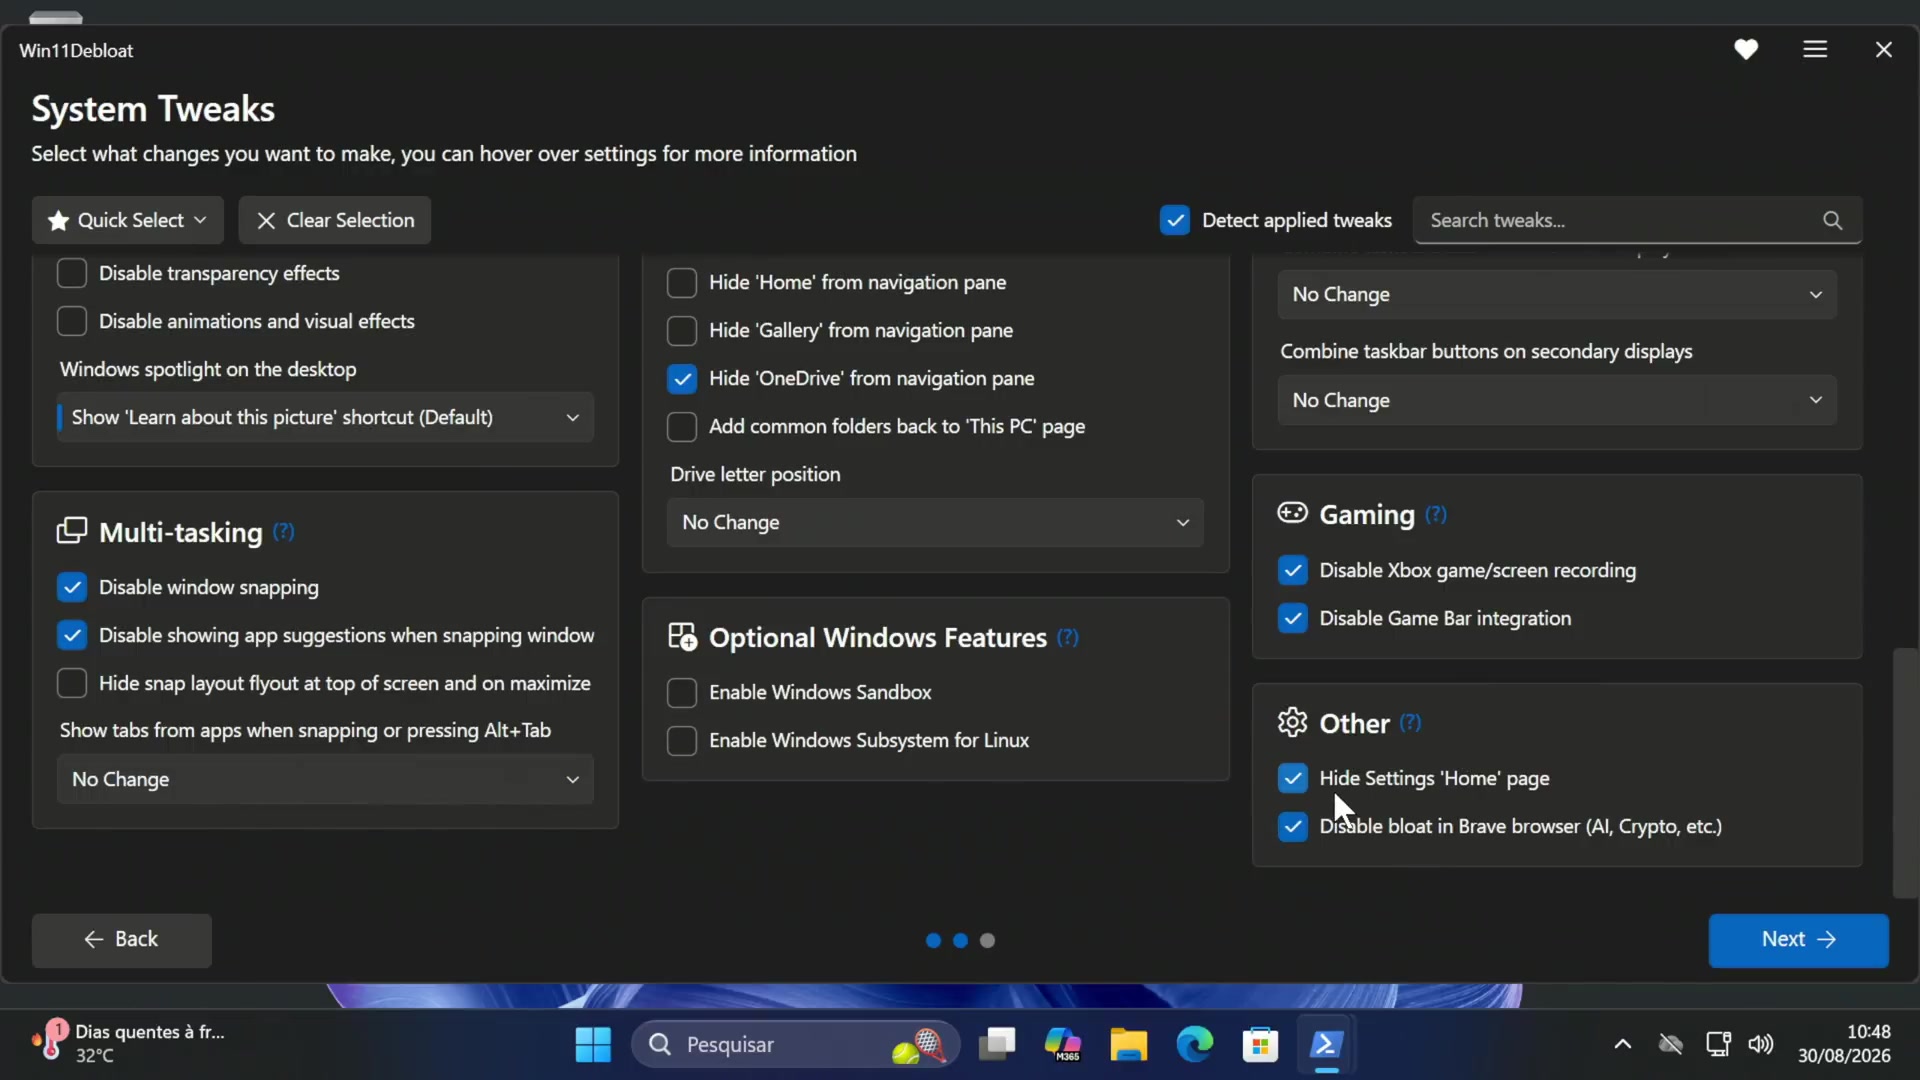
File Explorer options can show file extensions, show hidden files, hide Home, Gallery, or OneDrive from the navigation pane, and change the default opening location. These are organization and visibility choices, not meaningful performance optimizations.
Under Multi-tasking, disabling window snapping or Snap Assist suggestions changes how windows arrange on screen. Leave snapping enabled if you use Windows 11 layouts. The Optional Windows Features section can enable Sandbox or Windows Subsystem for Linux; it is safe to leave both unchanged when they are unrelated to your goal.
Under Gaming, disable Xbox game/screen recording and Game Bar integration only if you do not record clips, use Game Bar widgets, or rely on its overlay. The Brave option applies only to that browser and removes selected built-in content such as AI, Crypto, and News.
Create recovery safeguards and apply the changes
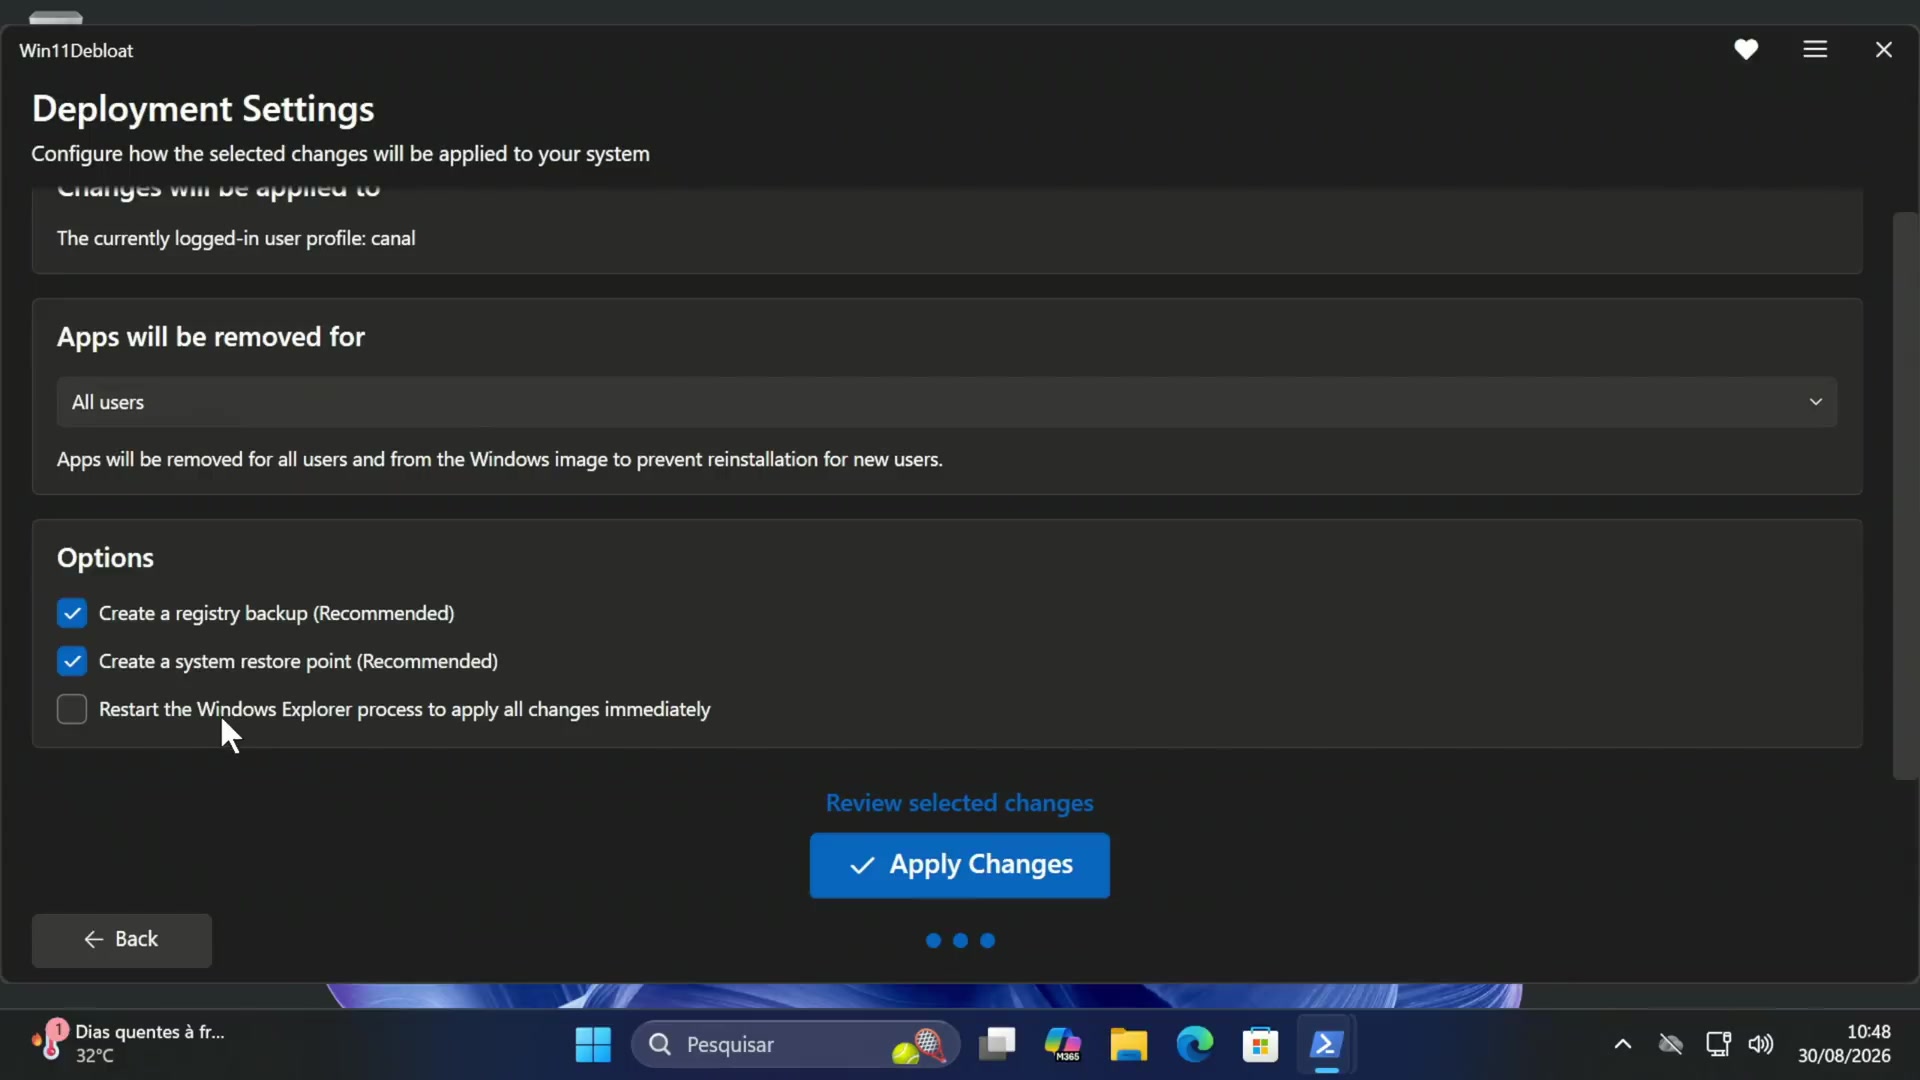
Step 10: Review Deployment Settings
Select Next to open Deployment Settings. Confirm the user profile that will receive the tweaks and the scope for app removal. Choosing All users removes selected apps for every profile and from the provisioned Windows image, which also prevents those apps from appearing automatically for new users. Choose a narrower scope when that broader change is unnecessary.
Keep both Create a registry backup and Create a system restore point enabled. A restore point can roll back system files, registry settings, and installed programs if a change causes trouble; Microsoft explains the recovery process in its System Restore guide. A restore point is not a backup of your personal files, which is why a separate file backup is still important.
Step 11: Apply, wait, and restart
- Select Review selected changes and read the summary.
- Return and correct anything you did not intend to remove or disable.
- Select Apply Changes.
- Leave the PowerShell and Win11Debloat windows open while the script works.
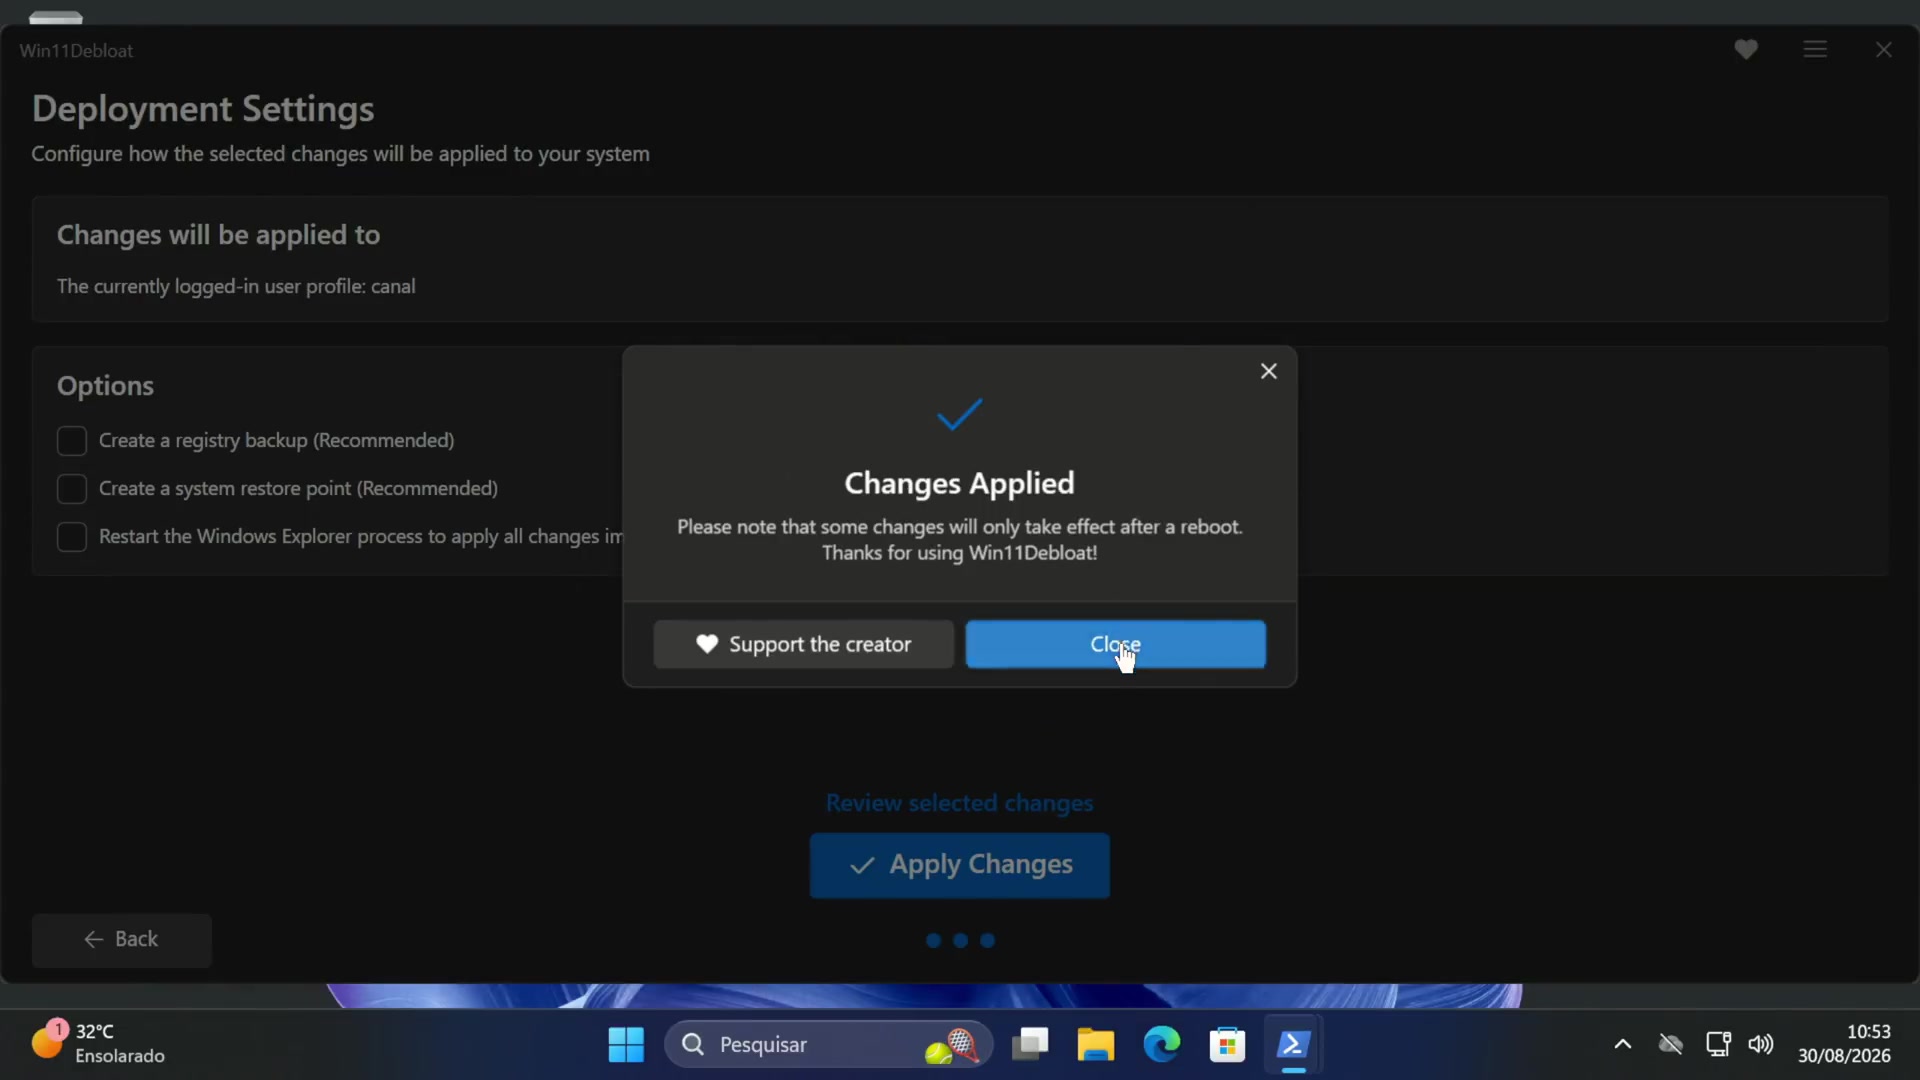
- Read the output for errors. When the Changes Applied dialog appears, select Close.
- Restart Windows so changes that require a reboot can take effect.
Check the result after restarting
After Windows starts, confirm that your essential apps, network connection, search, audio, and manufacturer-specific controls still work. Open Task Manager again under similar idle conditions and compare the process count and memory use with your baseline.
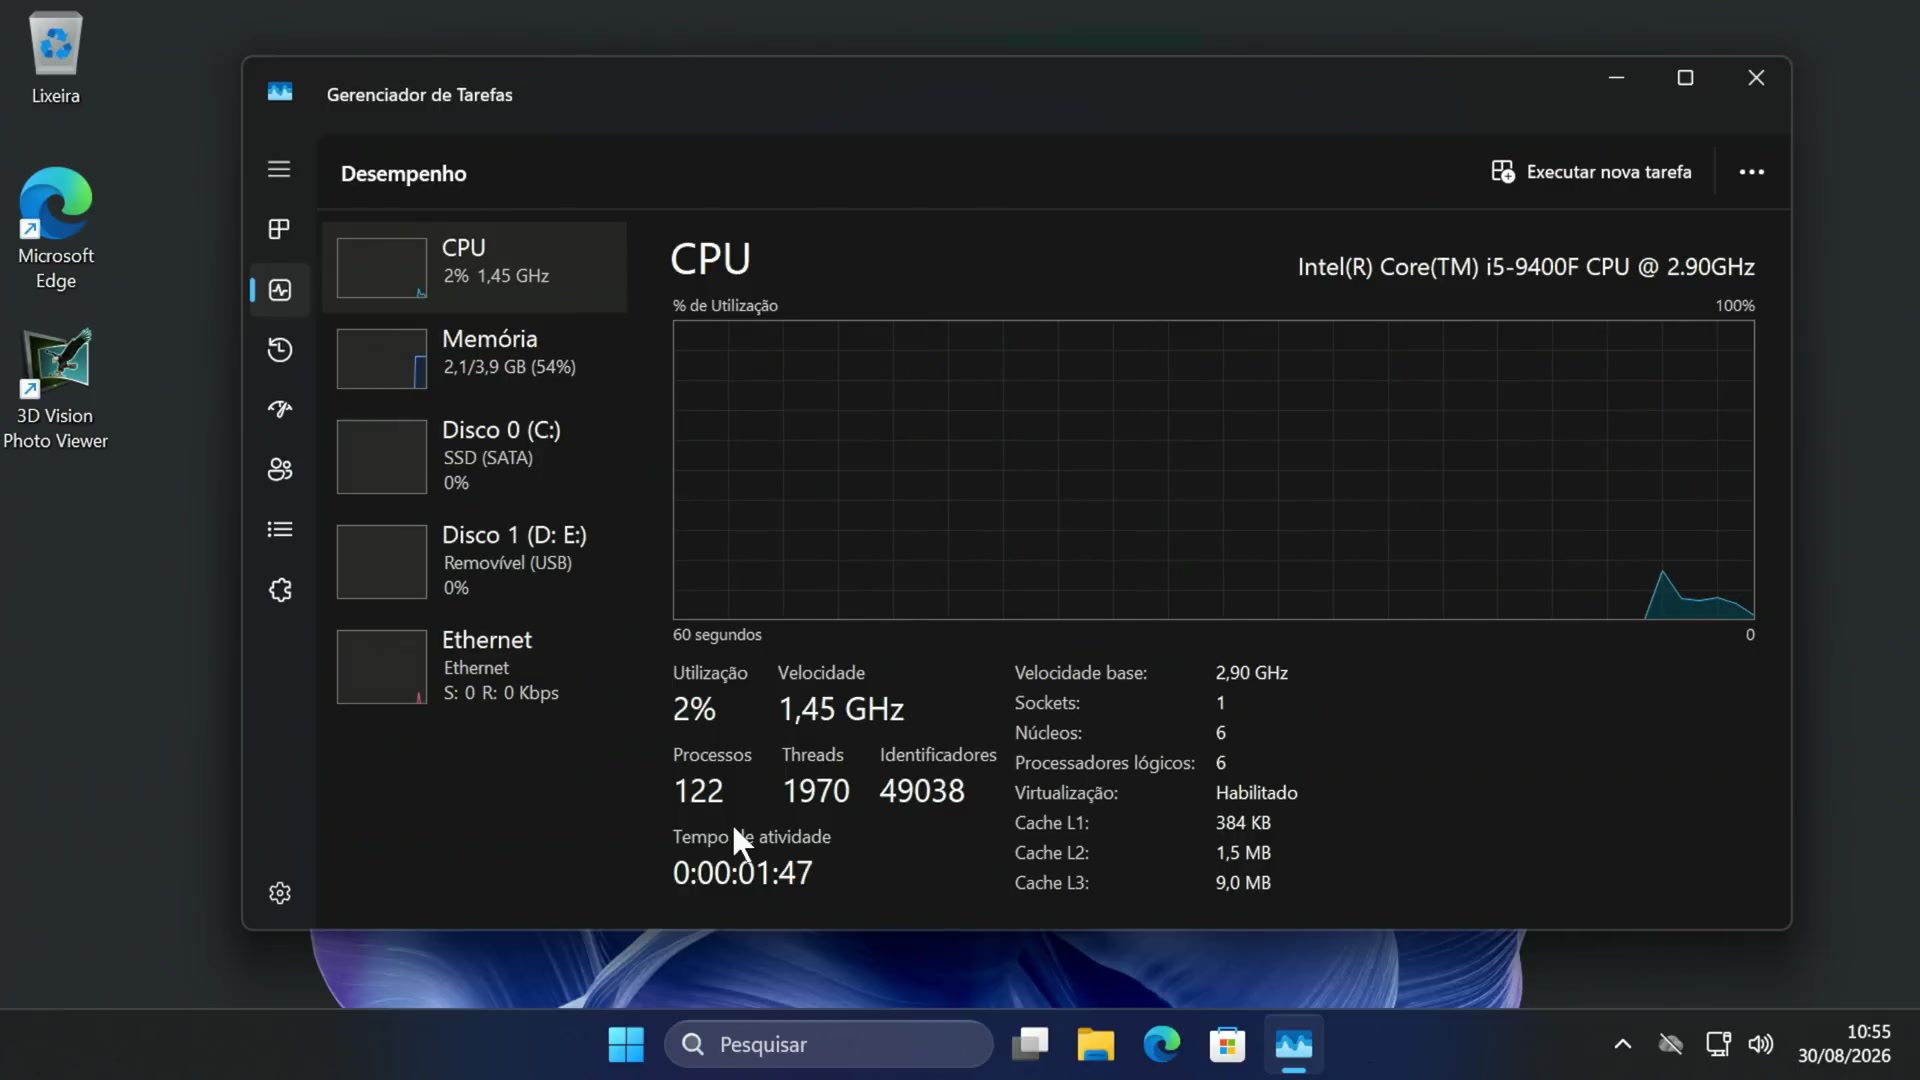
| Measurement | Before | After restart |
|---|---|---|
| Processes | 149 | 122 |
| Memory in use | 2.6 GB (67%) | 2.1 GB (54%) |
Do not treat this as a controlled benchmark. Background tasks fluctuate, and the before and after captures had different uptimes. The numbers demonstrate a possible reduction on one PC, not a guaranteed result. A successful cleanup is one that removes features you do not need without breaking the features you use.
How to undo a Win11Debloat change
Many tweaks can be reversed by running Win11Debloat again and choosing the opposite setting, while most removed packaged apps can be installed again from Microsoft Store. The project also maintains a Reverting Changes guide for individual settings.
If Windows becomes unstable, press Win + R, type rstrui.exe, and press Enter to open System Restore. Select the restore point created before the cleanup and review the affected programs before confirming. If the device is encrypted and you enter Windows Recovery Environment, you may also need the BitLocker recovery key.
Final advice
Win11Debloat is most useful as a selective cleanup tool. Custom Setup, a careful app review, and the built-in backup options make the process safer than enabling every switch. Start with unwanted apps and intrusive suggestions, leave security and productivity features alone unless you understand the tradeoff, and measure the result on your own hardware.