Windows can share a folder directly with another computer on the same Wi-Fi or Ethernet network. It is a practical way to move large files, keep a common project folder, or access documents from another PC without a USB drive or cloud upload.
This guide follows the process shown in the video but uses a stronger password method and least-privilege permissions. The result is a password-protected SMB share that can be opened in File Explorer or mapped as a drive.
Before You Share the Folder
Both computers must be connected to the same trusted local network. This can be the same Wi-Fi router, the same Ethernet switch, or one PC on Wi-Fi and the other on Ethernet through the same router. Do not forward TCP port 445 on the router or expose this Windows share directly to the internet.
The steps are written for Windows 11. They also work similarly in Windows 10, but regular Windows 10 support ended on October 14, 2025. Use Windows 11 or an eligible Windows 10 device enrolled in Extended Security Updates rather than treating an unpatched Windows 10 installation as safe.
Create a Dedicated Share Account
Password-protected sharing needs an account that exists on the computer hosting the folder. A separate standard local account keeps the share credentials independent from your main Windows sign-in.
Open Windows Terminal or Command Prompt as administrator and run the following command. The asterisk makes Windows ask for the password without displaying or storing it in the command line.
net user ShareUser * /add /passwordreq:yesEnter a strong, unique password when prompted. The recording types a simple password directly into the command and adds /passwordchg:no; do not copy that example. Microsoft’s net user documentation confirms that /passwordchg:no only prevents the user from changing the password, while /expires:never controls account expiry rather than password expiry.
If you prefer the graphical interface, open Settings → Accounts → Other users → Add account, choose to add a user without a Microsoft account, and create the same standard local account there.
Share the Folder on the Host PC
In File Explorer, right-click the folder and select Properties. On Windows 11 you may need to choose Show more options before Properties appears. Open the Sharing tab and select Advanced Sharing.
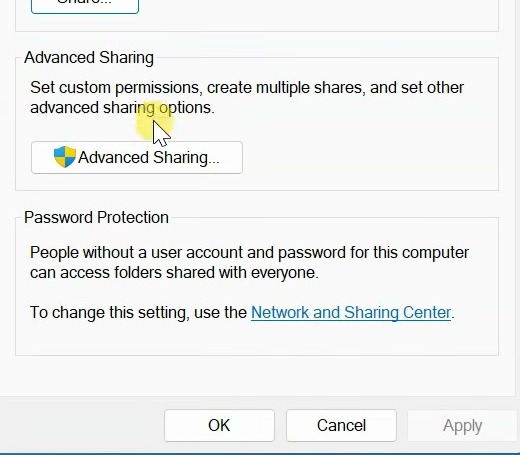
Enable Advanced Sharing
Enable Share this folder. The share name is what other computers will see, so keep it short and avoid characters that are difficult to type in a network path. Then select Permissions.
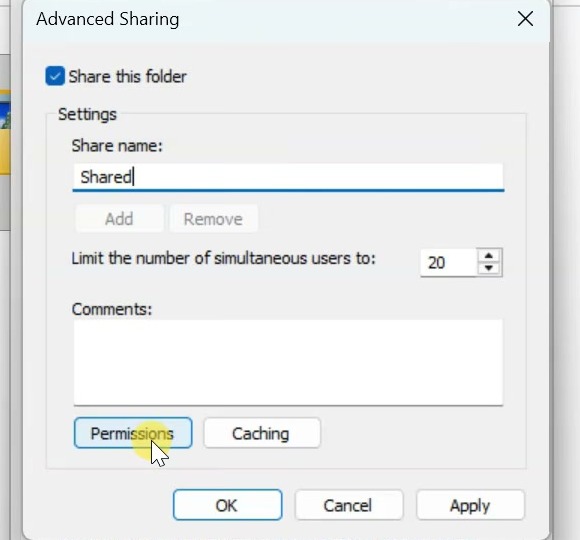
Add the Dedicated Account
Remove Everyone unless you deliberately want broad access. Select Add, enter ShareUser, choose Check Names, and confirm the resolved local account.
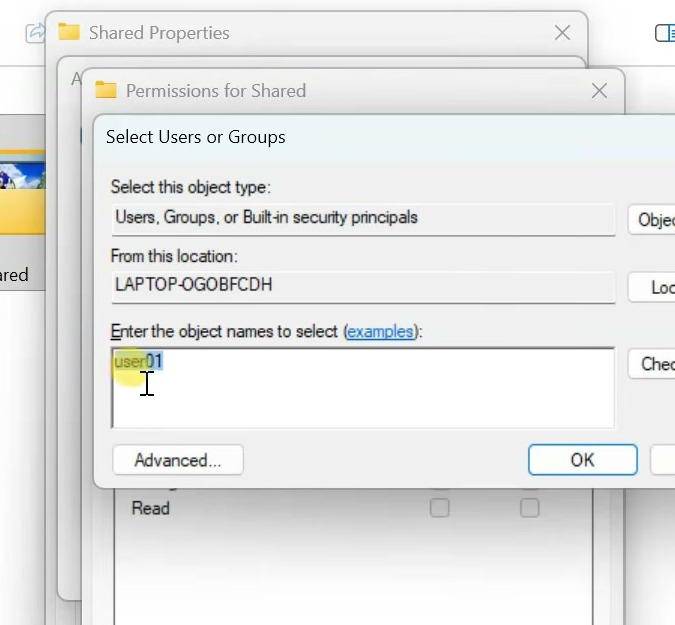
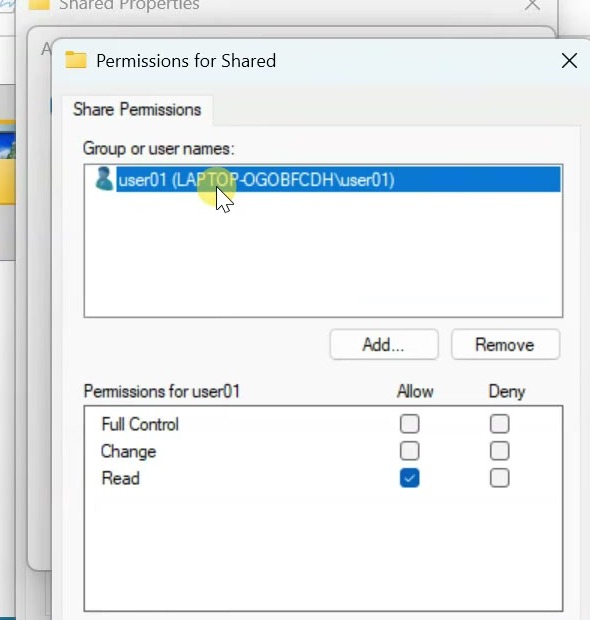
For a read-only share, allow Read. If the remote user must create, edit, rename, and delete files, allow Change as well. Avoid Full Control unless the user genuinely needs to change permissions and take ownership.
Match the Security Permissions
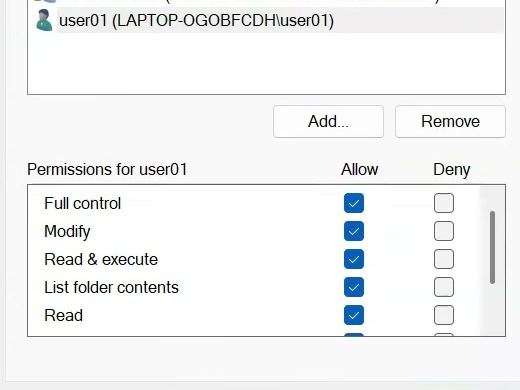
Windows applies both the share permissions and the folder’s NTFS Security permissions. The more restrictive result wins. Return to the folder properties, open Security, select Edit → Add, and add the same ShareUser account.
For read-only access, allow Read & execute, List folder contents, and Read. For normal read-and-write access, allow Modify. The video demonstrates Full Control, but Modify is the safer choice for ordinary file transfers because it does not grant permission-management rights.
Enable Sharing on a Private Network
Open Settings → Network & internet → Advanced network settings → Advanced sharing settings. Under Private networks, turn on Network discovery and File and printer sharing. Under All networks, keep Password protected sharing on.
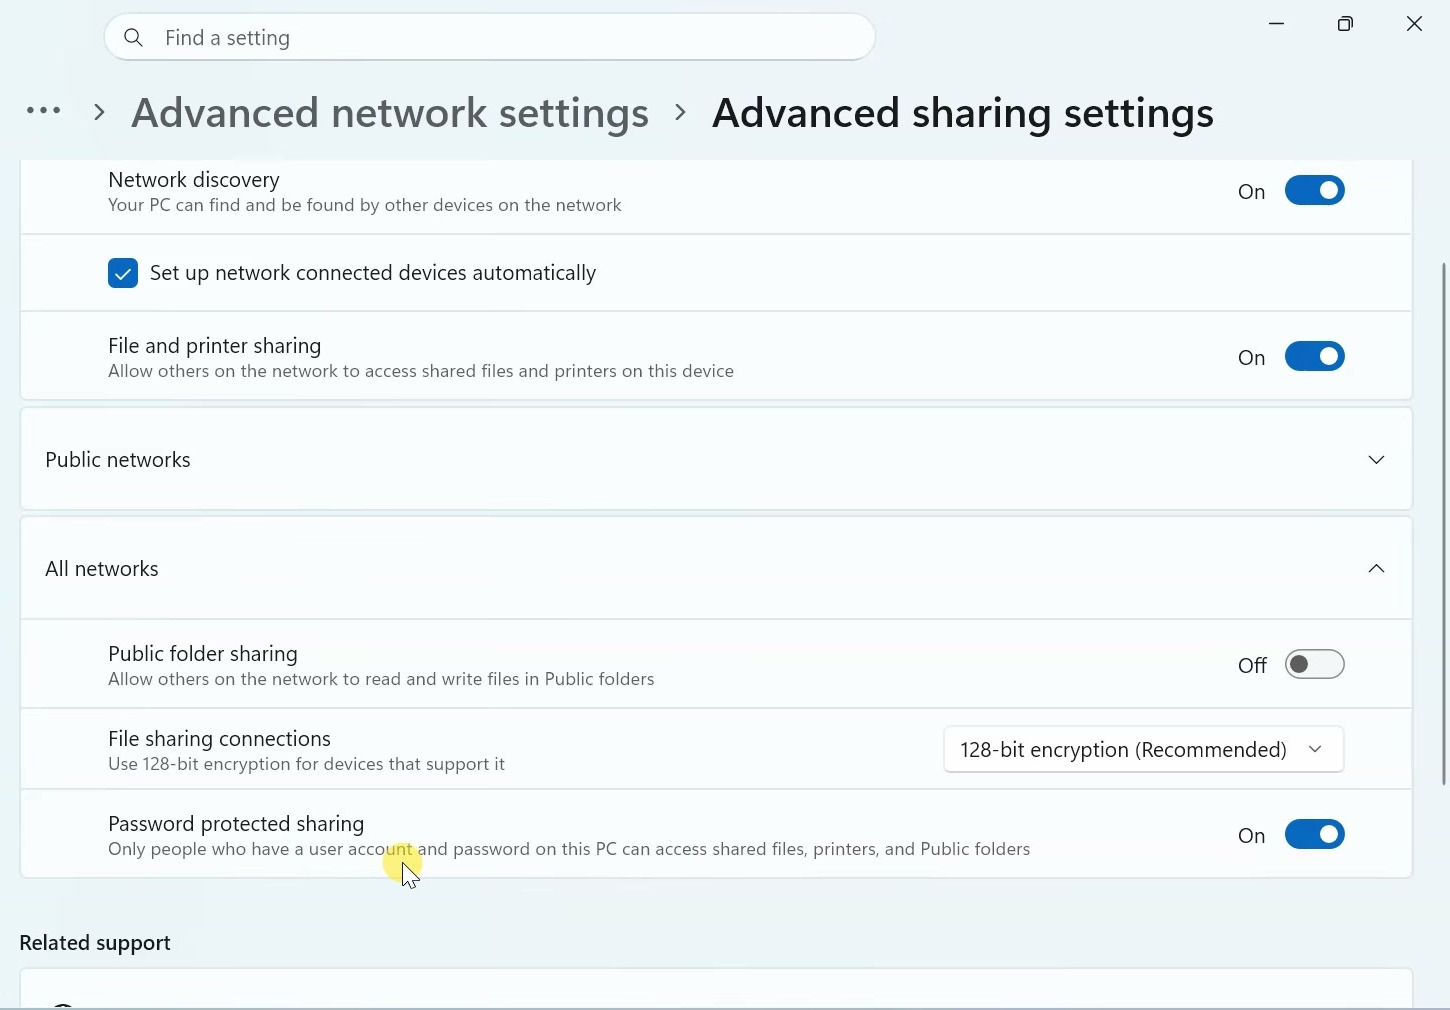
Password protection is important on current Windows versions. Do not enable insecure guest logons, disable SMB signing, turn on SMB 1.0, or switch off the firewall just to make the share appear. The authenticated method in this guide works with current Windows 11 SMB security and does not need those unsafe workarounds.
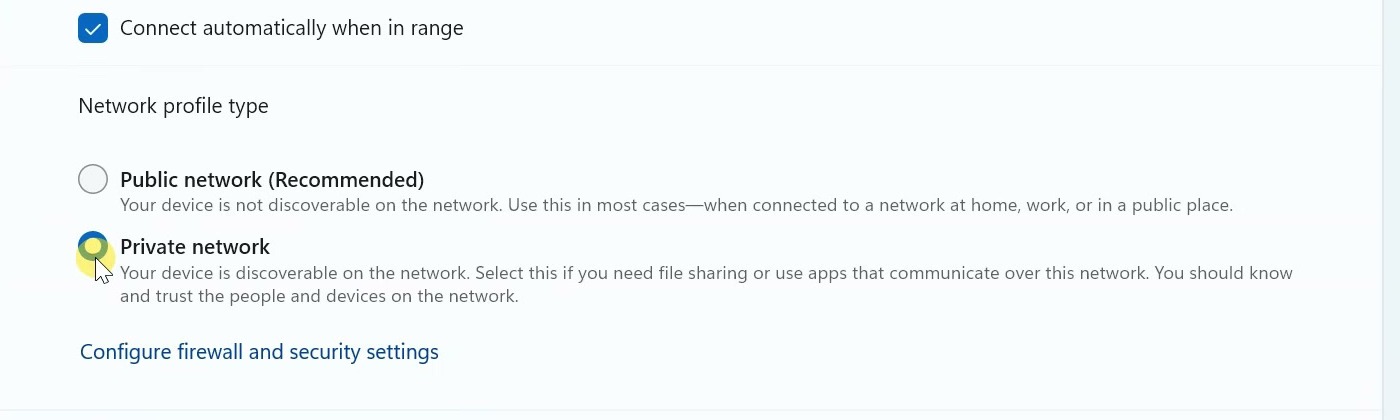
Set the Network Profile to Private
Open the properties for the connected Wi-Fi or Ethernet network and select Private network. Microsoft’s network-profile guidance explains that a private profile makes the PC discoverable and allows file and printer sharing. Use it only for a home, office, or other network you trust; leave airport, hotel, café, and other public networks set to Public.
Open the Shared Folder from Another PC
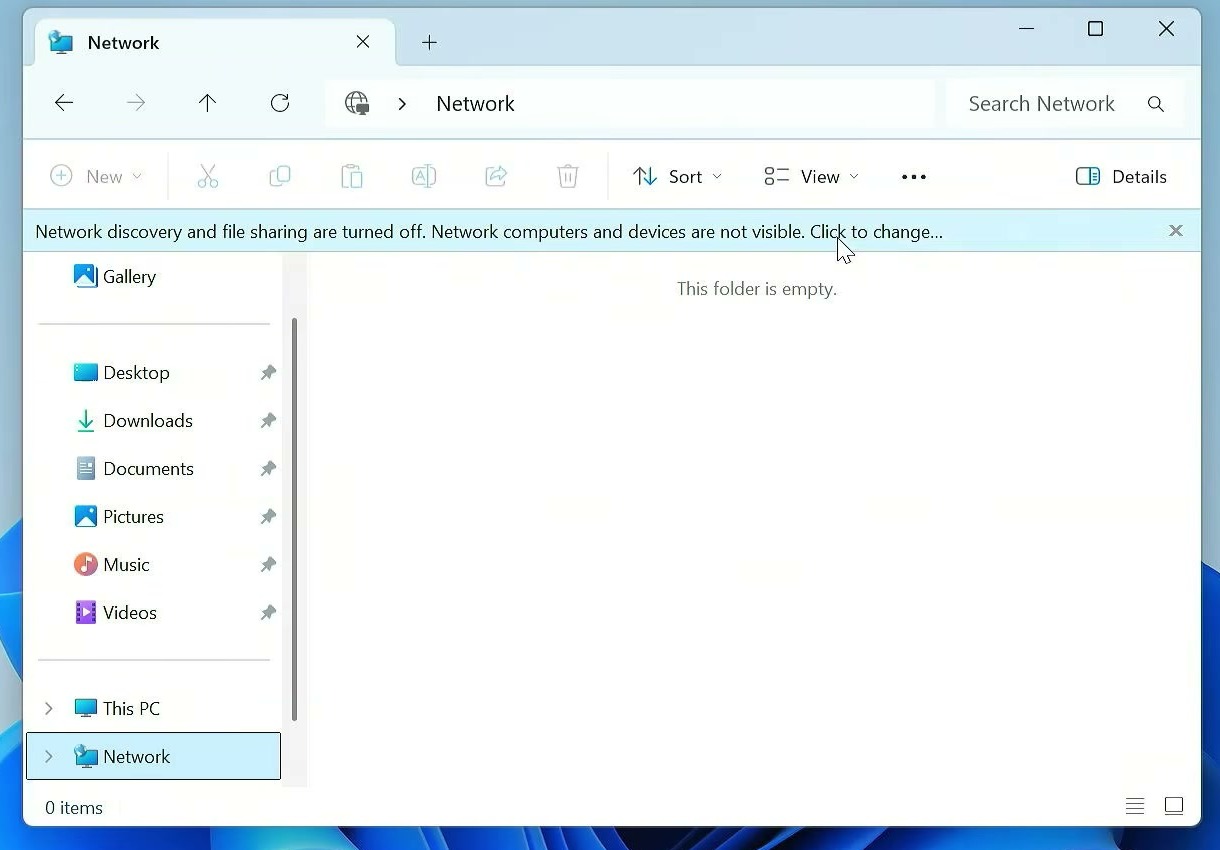
On the second PC, open File Explorer and select Network. If a yellow banner says network discovery is turned off, select the banner and enable discovery for private networks. You may need to confirm the current network is private first.
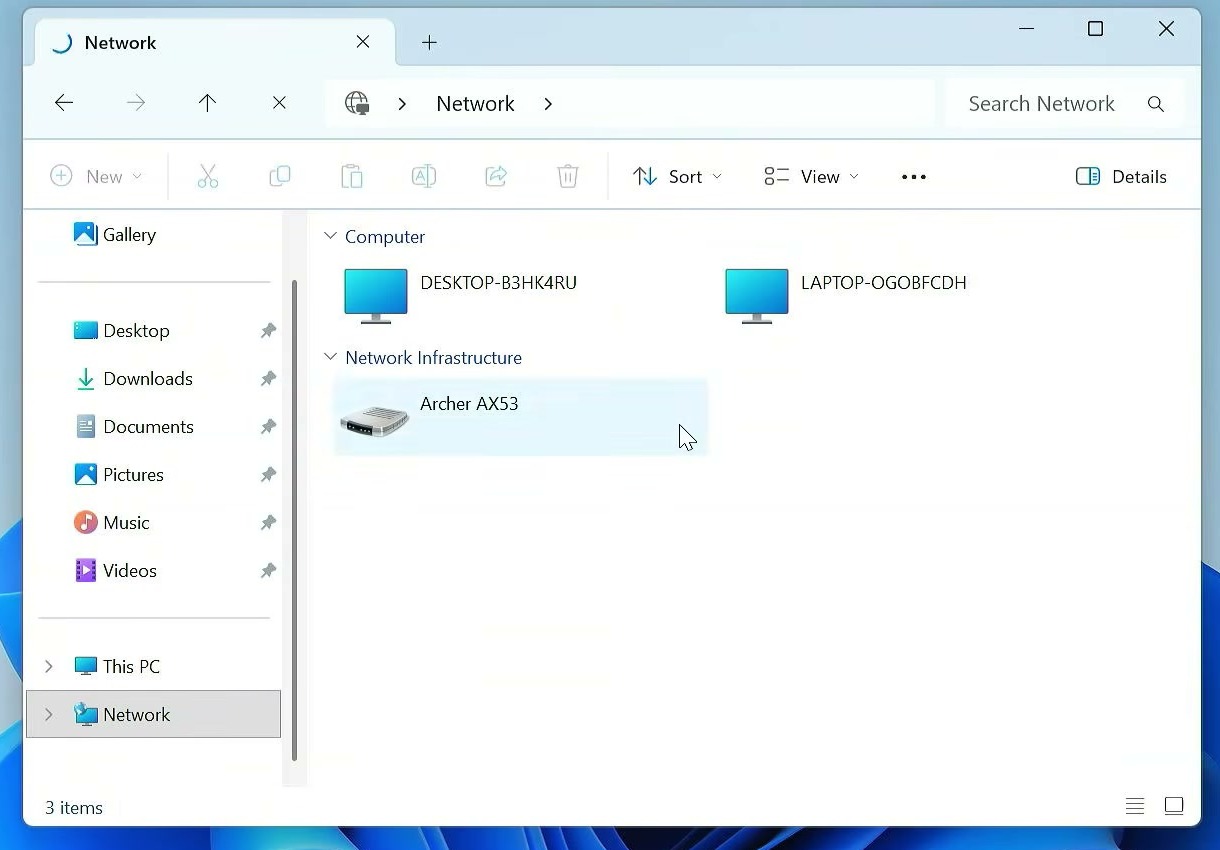
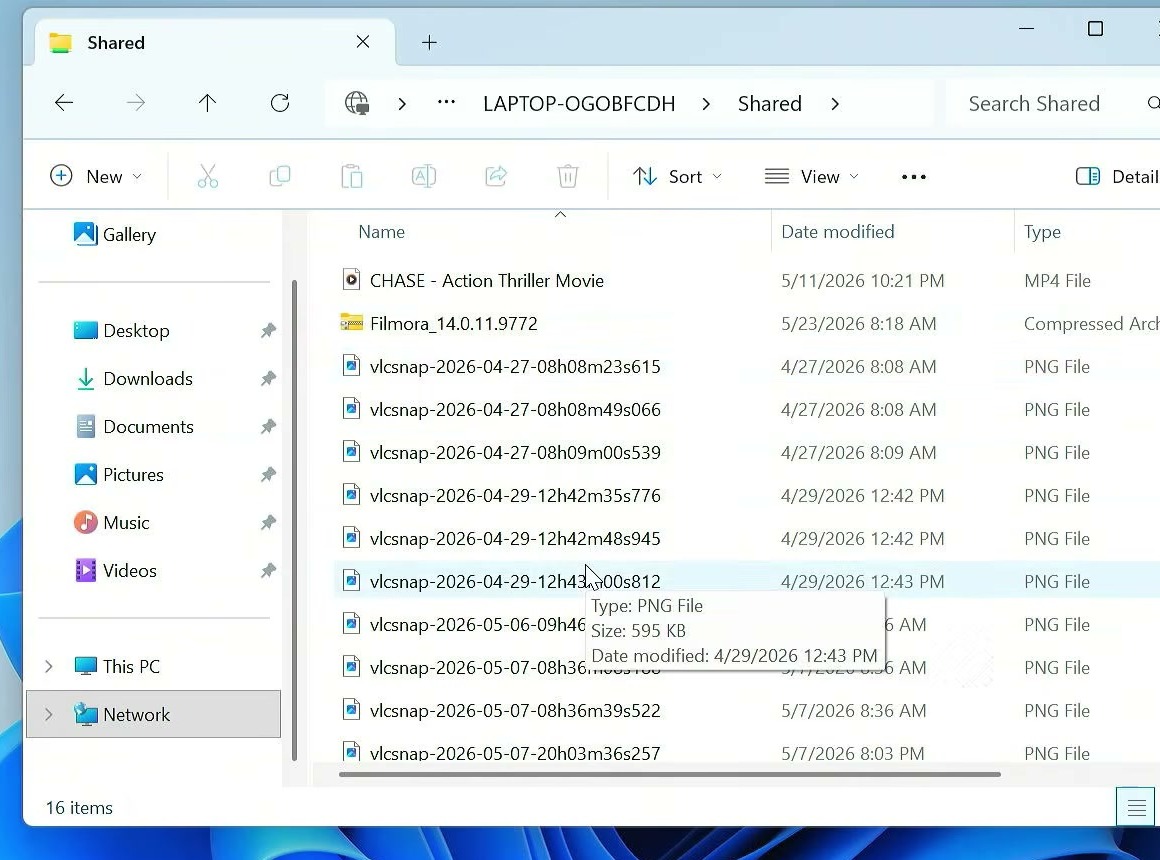
The host should appear under Computer. You can open it there, but a direct UNC path is usually quicker and still works when the Network view is slow to populate. Enter a path in this format in the File Explorer address bar:
\\HOST-PC\ShareNameReplace HOST-PC with the host’s device name and ShareName with the name chosen in Advanced Sharing. You can find the device name in Settings → System → About. Prefer the device name to an IP address because it provides more reliable Windows authentication with current SMB signing requirements.
Enter the Correct Credentials
When Windows asks for network credentials, enter the host name and dedicated account in this form:
HOST-PC\ShareUserUse the strong password created on the host. A Windows Hello PIN unlocks one device and is not the same as the reusable account password. Select Remember my credentials only on a PC you control.
Map the Share as a Drive
Mapping is optional, but it makes a frequently used share appear beside local drives. In File Explorer, open This PC, select the three-dot menu, and choose Map network drive. Pick an unused drive letter, enter \\HOST-PC\ShareName, and enable Reconnect at sign-in if the share should return automatically.
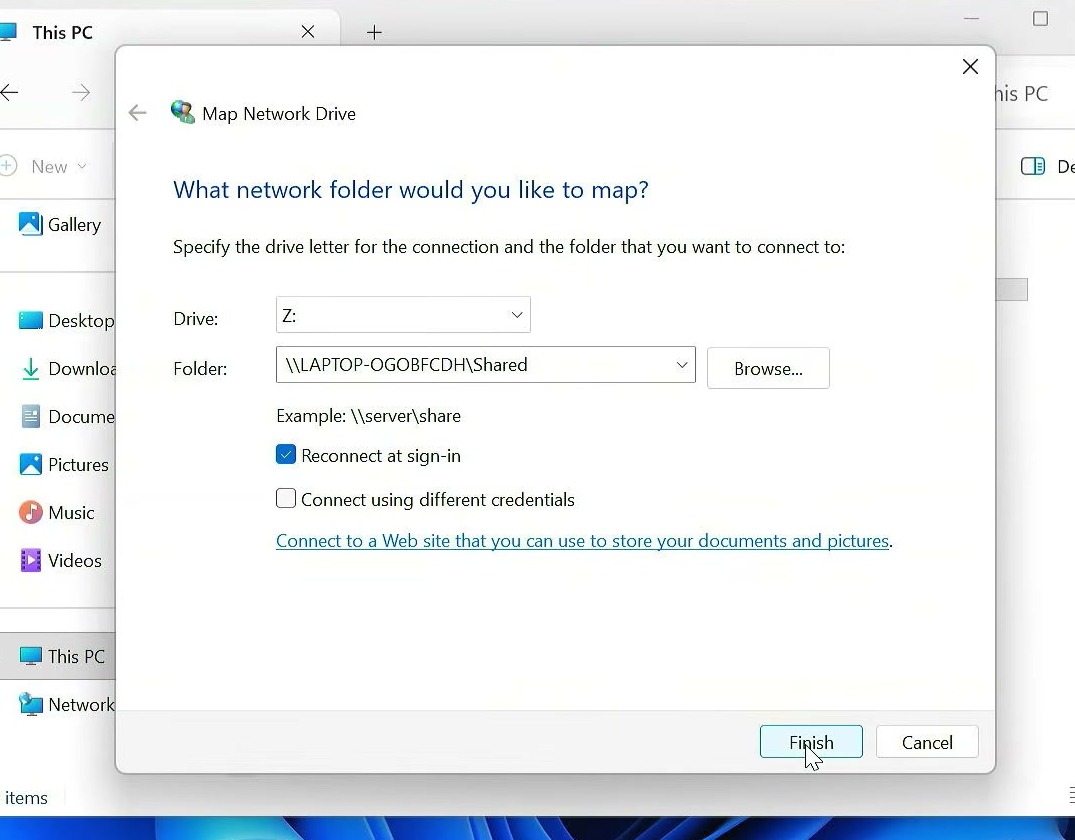
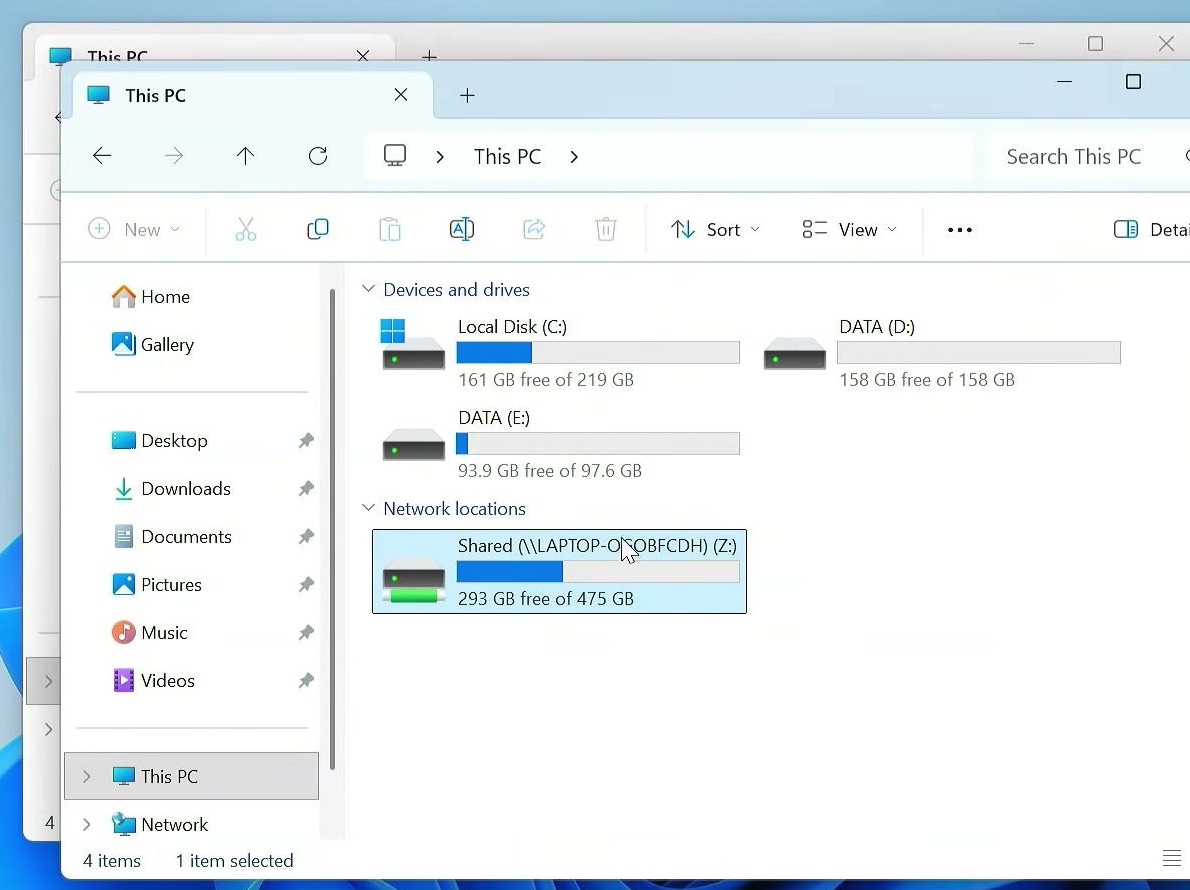
Select Finish. The folder should now appear under Network locations with its assigned letter.
Troubleshooting Folder Sharing
The Host PC Does Not Appear
Confirm both devices are on the same LAN, both trusted connections use the Private profile, and discovery plus file sharing are enabled. Then type the UNC path directly instead of waiting for Network view. Microsoft’s current Windows file-sharing guide also recommends checking the Function Discovery services when network devices still do not appear.
Windows Keeps Rejecting the Password
Use HOST-PC\ShareUser, not only the username, and enter the account password rather than a PIN. If Windows keeps reusing an old credential, open Credential Manager → Windows Credentials and remove only the entry for that host. You can also clear that one entry from Command Prompt:
cmdkey /delete:HOST-PCFiles Open but Cannot Be Changed
Check both permission layers. The account needs Change at the share level and Modify on the Security tab for normal write access. Do not solve a permission mismatch by granting Everyone full control.
Once those settings are correct, the shared folder behaves much like a local File Explorer location while both computers remain connected to the trusted LAN.