An older Windows PC can still be a surprisingly capable machine. With compatible hardware and the right bootloader, it is possible to experiment with macOS Sequoia 15 on a desktop that originally ran Windows. This type of unofficial setup is commonly called a Hackintosh.
OpenCore helps macOS start on certain PC configurations, but success depends on the processor, graphics, firmware and other hardware. A working setup takes preparation, especially when it comes to USB ports and boot files.
Check the hardware and prepare your files
For a useful reference, the PC used here is a Dell OptiPlex 7060 Micro with an Intel Core i3-8100T, Intel UHD Graphics 630, 16 GB of RAM and a 256 GB SSD. These specifications are an example, not a guarantee that another PC will work the same way.
You will need a Windows installation to prepare the files, a USB flash drive with enough space for the recovery installer, another USB device for testing ports, and access to a reliable internet connection. A wired Ethernet connection is particularly useful because this recovery-based installer downloads additional files during installation.
Map the USB ports in Windows
Some USB ports can stop working when macOS starts if the port mapping is unsuitable. It is easier to discover and map the ports before leaving Windows. USBToolBox is a Windows utility that detects the USB controllers and helps build a custom port map.
Download the Windows release of USBToolBox and launch Windows.exe from the extracted files.
In the menu, select D — Discover Ports. Plug a flash drive into each USB port you want to use, one at a time. Watch for the highlighted port entry each time. USBToolBox can also identify the USB 2.0 companion of many USB 3.0 ports.
When every required port has been tested, press B to return, then select S — Select Ports and Build Kext. Review the mapped ports and press K to build the configuration. Keep the generated UTBMap.kext folder safe; it will be added to OpenCore shortly.
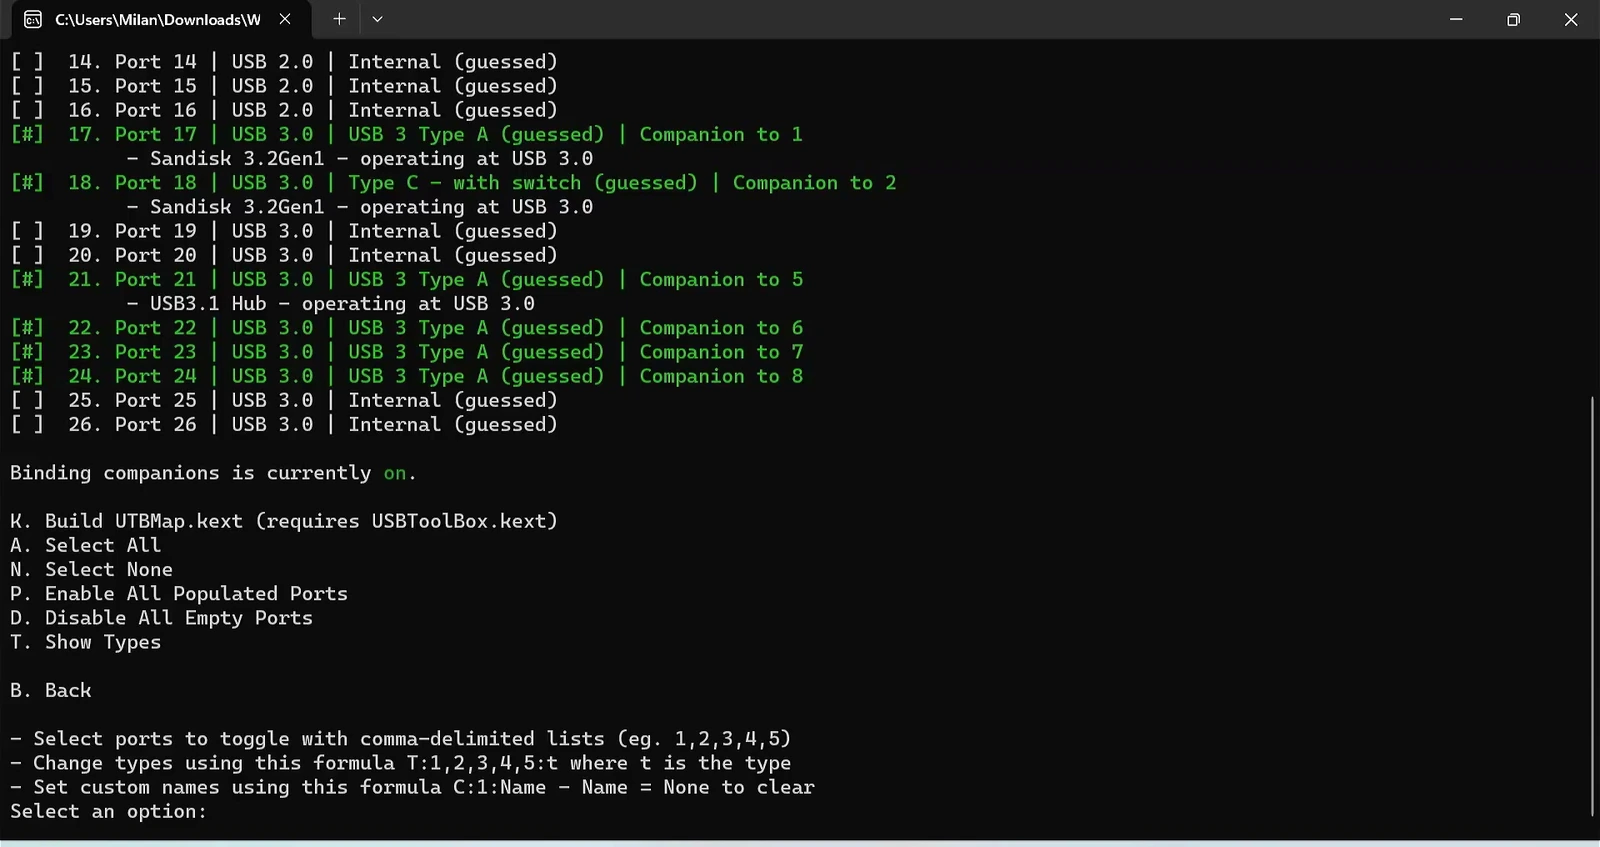
The generated map is specific to this computer. A map from another motherboard may not identify the right ports.
Generate the OpenCore EFI configuration
An EFI folder contains the OpenCore bootloader, its drivers and the configuration used to start macOS. OpCore-Simplify is a tool that can examine PC hardware and help generate this folder without building everything manually.
Make sure Python is installed first. Then download OpCore-Simplify from its official GitHub repository using Code and Download ZIP. Extract the archive and run the supplied OpCore-Simplify.bat file.
Download PythonDownload OpCore-Simplify
In OpCore-Simplify, select 1 — Select Hardware Report, then choose E — Export Hardware Report. The tool collects details about the CPU, GPU, motherboard, network hardware and ACPI tables.
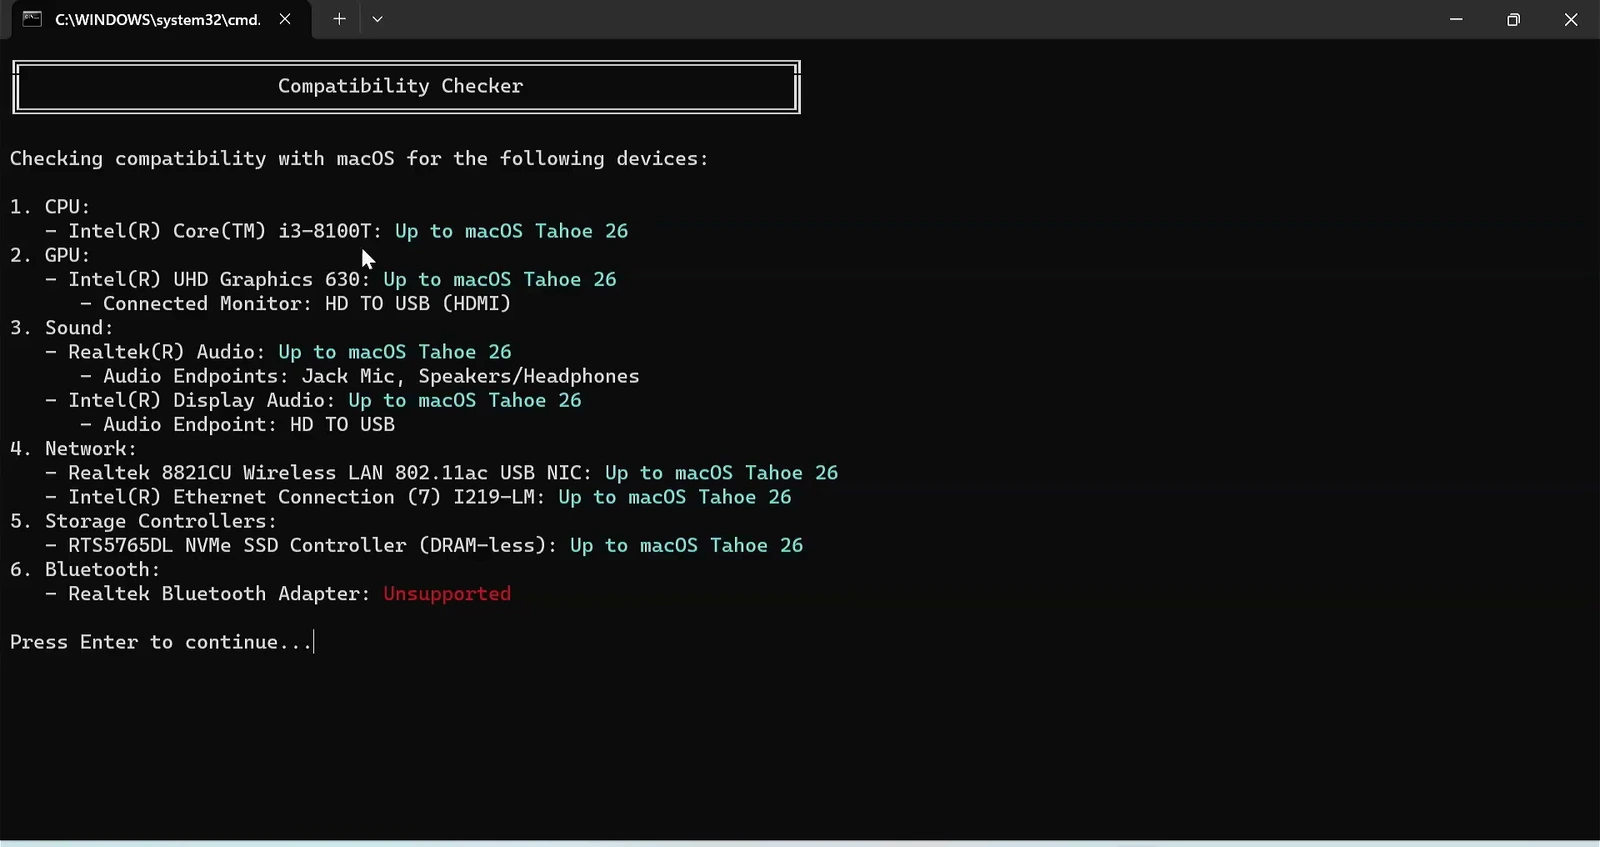
Review the compatibility results before continuing. On the Dell system, the Intel processor and UHD 630 graphics were recognized as compatible candidates, while the Realtek Bluetooth adapter was flagged as unsupported. A warning like this is worth paying attention to rather than assuming every feature will work.
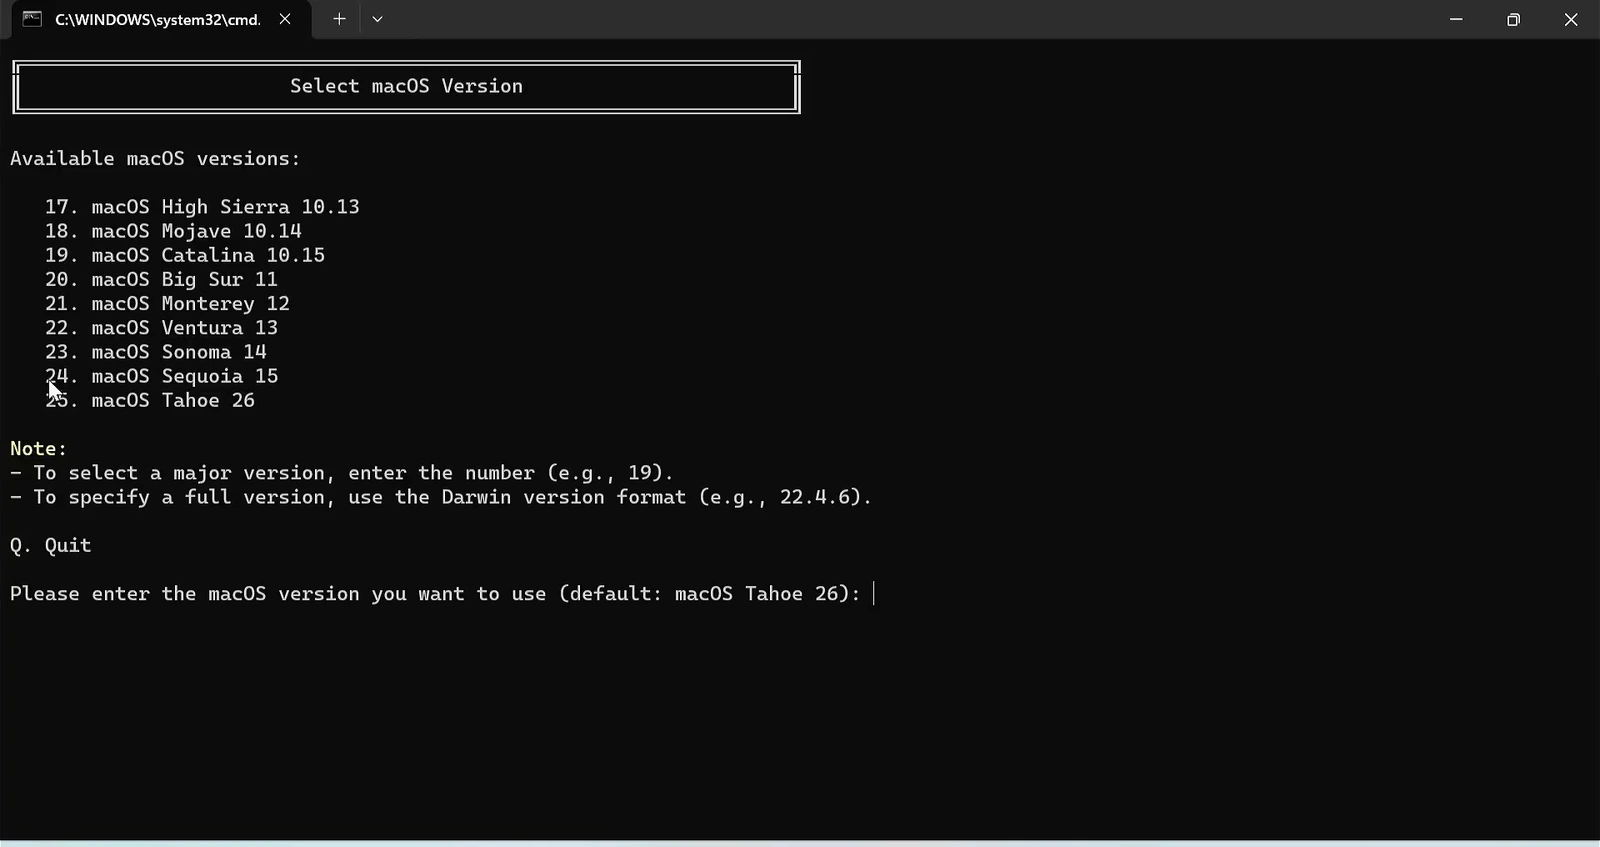
Continue to the macOS selection menu and choose macOS Sequoia 15. In the interface used for this setup, it appeared as option 24. Your version may show a different number, so select the label rather than relying on the number alone.
OpCore-Simplify can recommend a Mac model identifier, known as an SMBIOS. For this Dell configuration, the generated profile used iMac19,1. Do not assume the same model is appropriate for different hardware.
Use the custom USB mapping kext
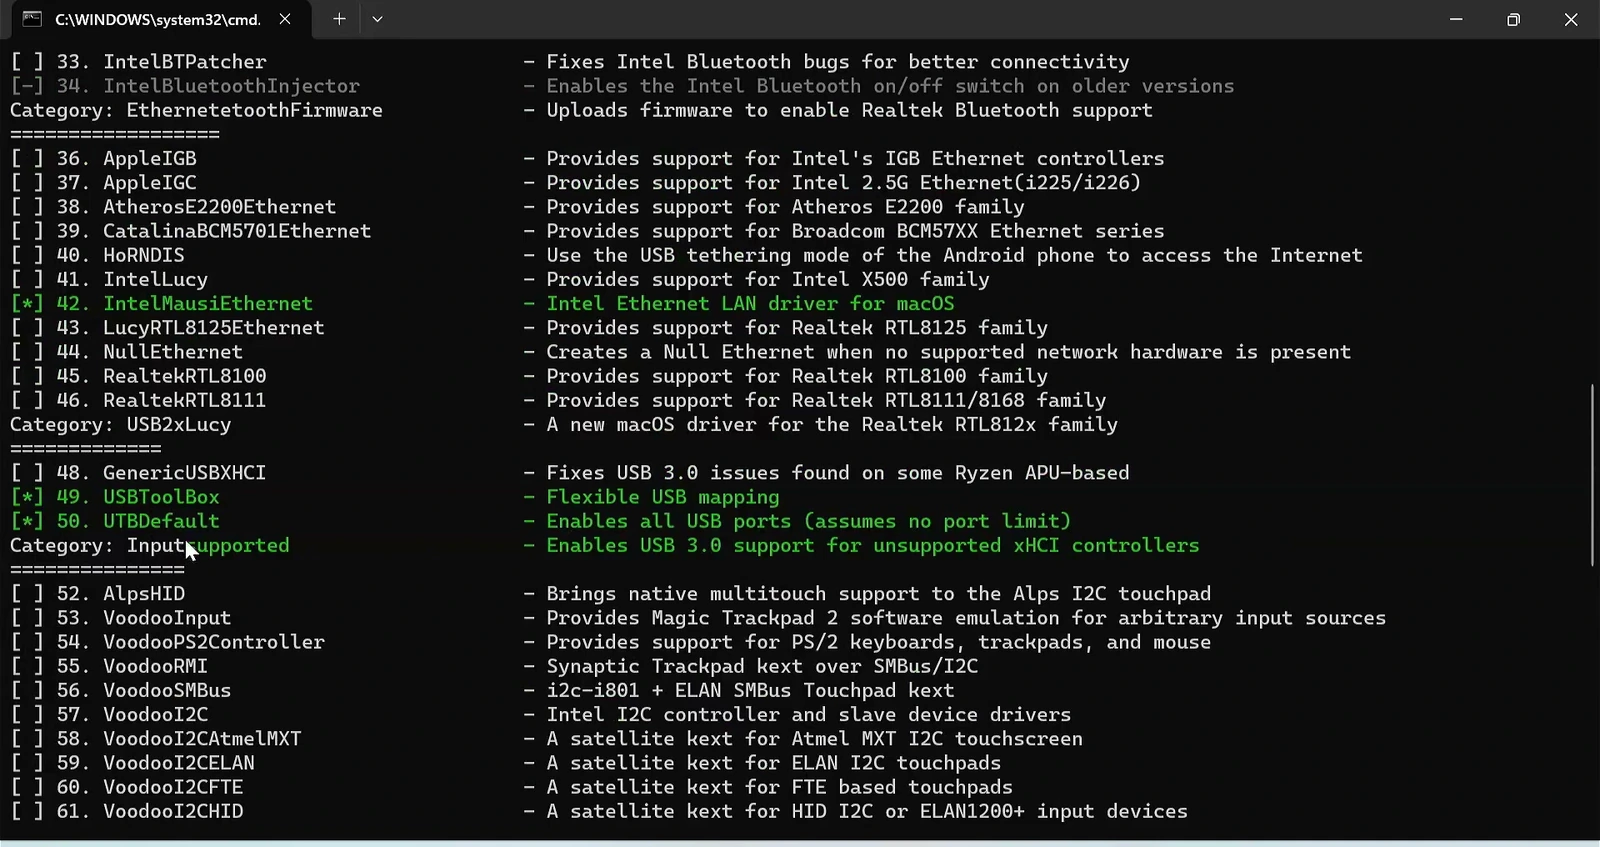
Return to the main menu and open Customize Kexts. In the USB section, check USBToolBox and UTBDefault. When using the custom map made earlier, keep USBToolBox enabled and disable UTBDefault. The selections in the menu can affect one another, so verify the final enabled and disabled states.
Back at the main menu, choose Build OpenCore EFI. The utility downloads the required files and may request an audio codec layout. For the Dell system with a Realtek ALC255 codec, the default layout was selected.
When the build finishes, locate the generated Results/EFI folder.
Add the USB map to OpenCore
Open the generated EFI/OC/Kexts folder. It contains the kernel extensions OpenCore will load, including USBToolBox.kext. Copy your custom UTBMap.kext folder into the same Kexts directory.
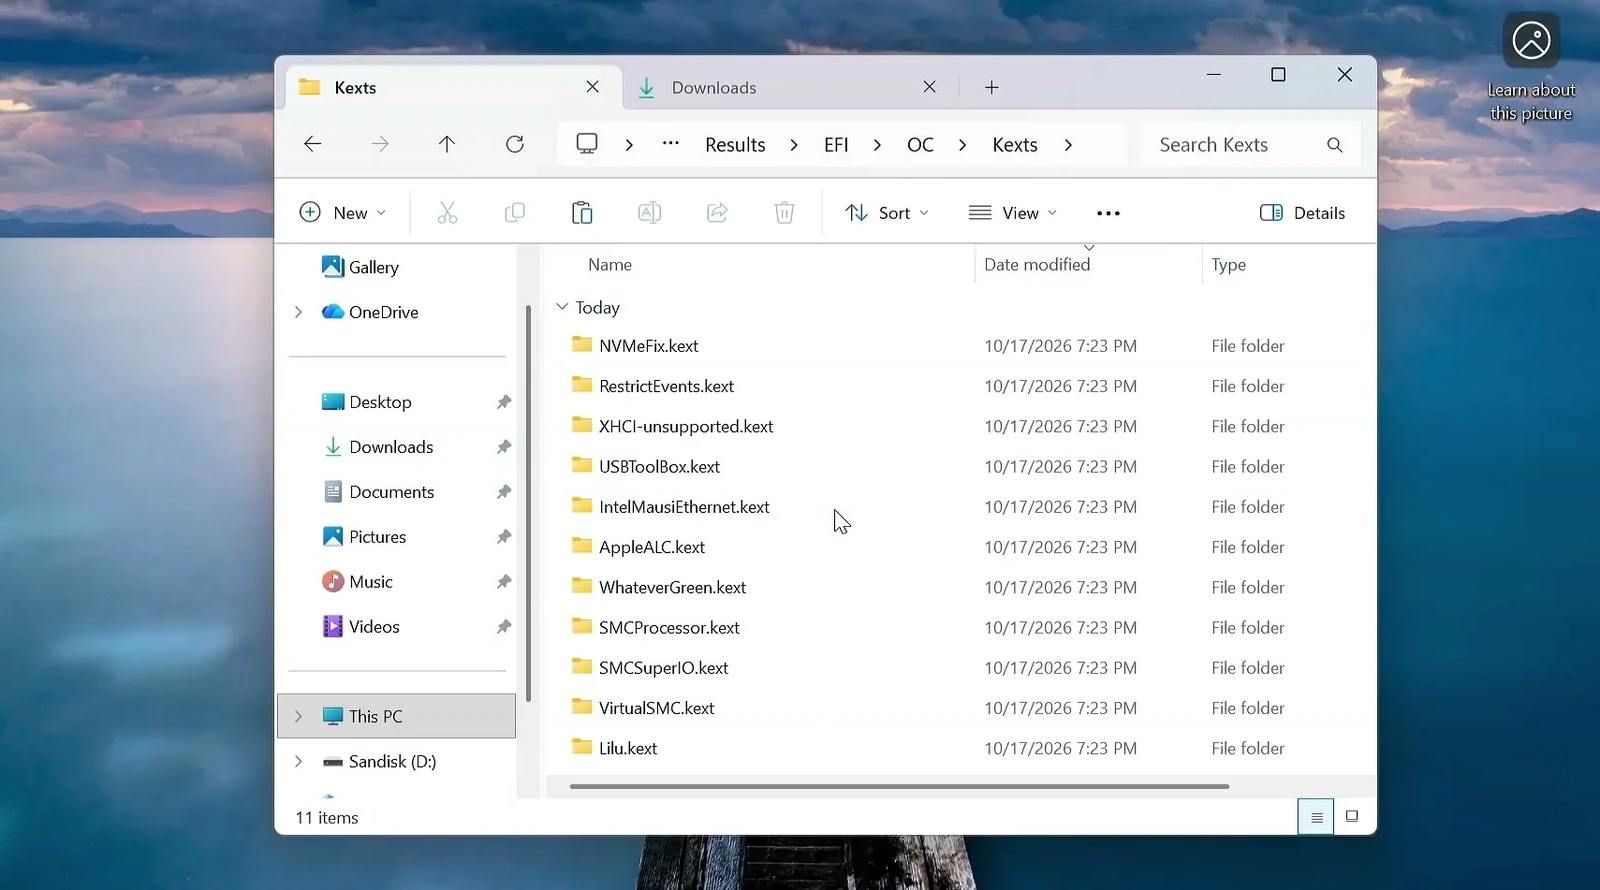
Copying the folder is only half the job. OpenCore also needs an entry for it in config.plist. The ProperTree utility can update that configuration using an OpenCore snapshot.
Download and extract ProperTree, then run ProperTree.bat. Press Ctrl + O to open EFI/OC/config.plist. Next press Ctrl + R to take an OC Snapshot, and select the EFI/OC folder when asked.
Look for UTBMap.kext in the resulting configuration and make sure it is enabled. Finally, press Ctrl + S to save.
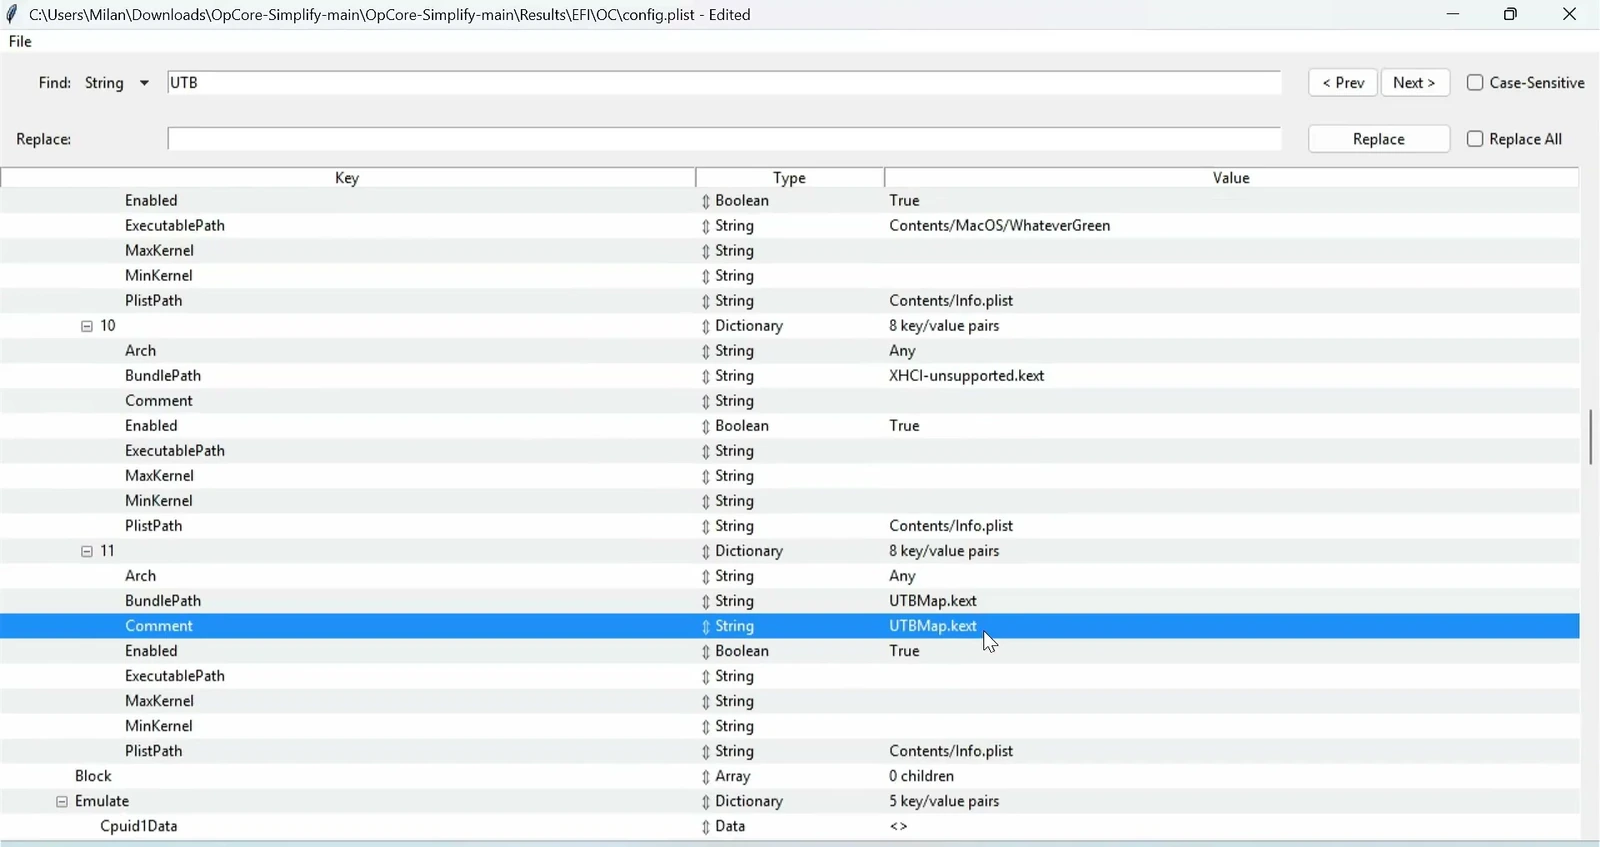
The EFI folder now includes the custom USB map and can be used to prepare the installer.
Download the macOS Sequoia recovery files
Now the macOS recovery environment needs to be downloaded. The official OpenCorePkg releases contain a utility called macrecovery, which can request recovery files from Apple’s servers.
Extract the OpenCorePkg release and navigate to Utilities/macrecovery. Open recovery_urls.txt to find the download entry for macOS Sequoia. Use the command provided for that version rather than guessing a model identifier or recovery URL.
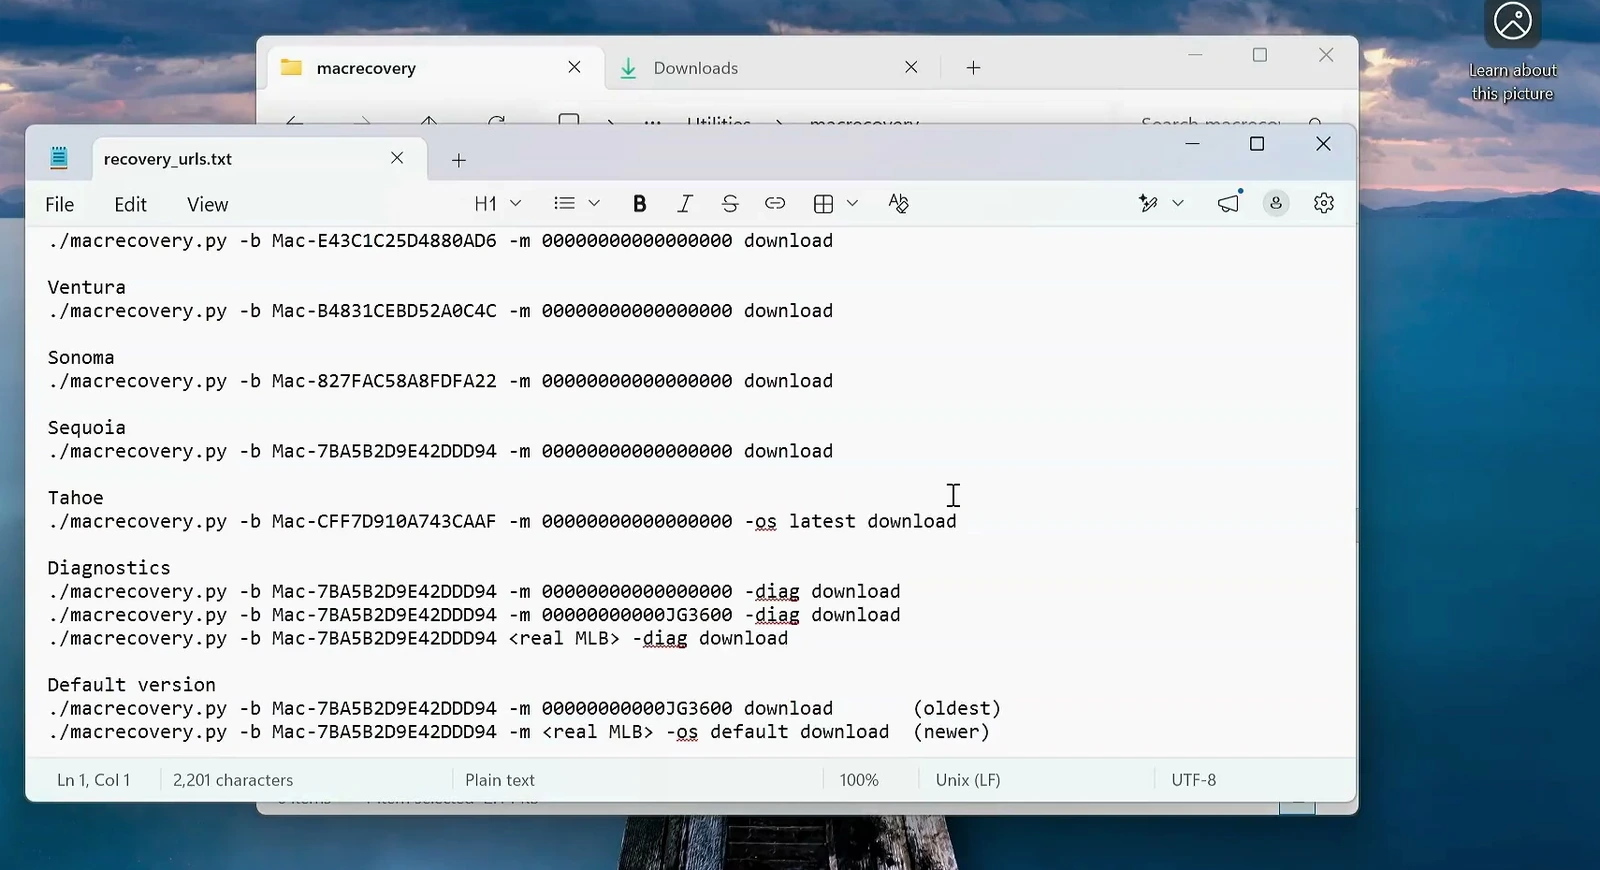
To run it on Windows, open the macrecovery folder in File Explorer, click the address bar, type cmd and press Enter. Paste the Sequoia download command from the text file. If the entry is written with a Unix-style ./ prefix, remove that prefix for Windows Command Prompt as appropriate.
The utility will download the necessary recovery components. When it finishes, look for the com.apple.recovery.boot folder, containing the downloaded BaseSystem.dmg and matching .chunklist file.
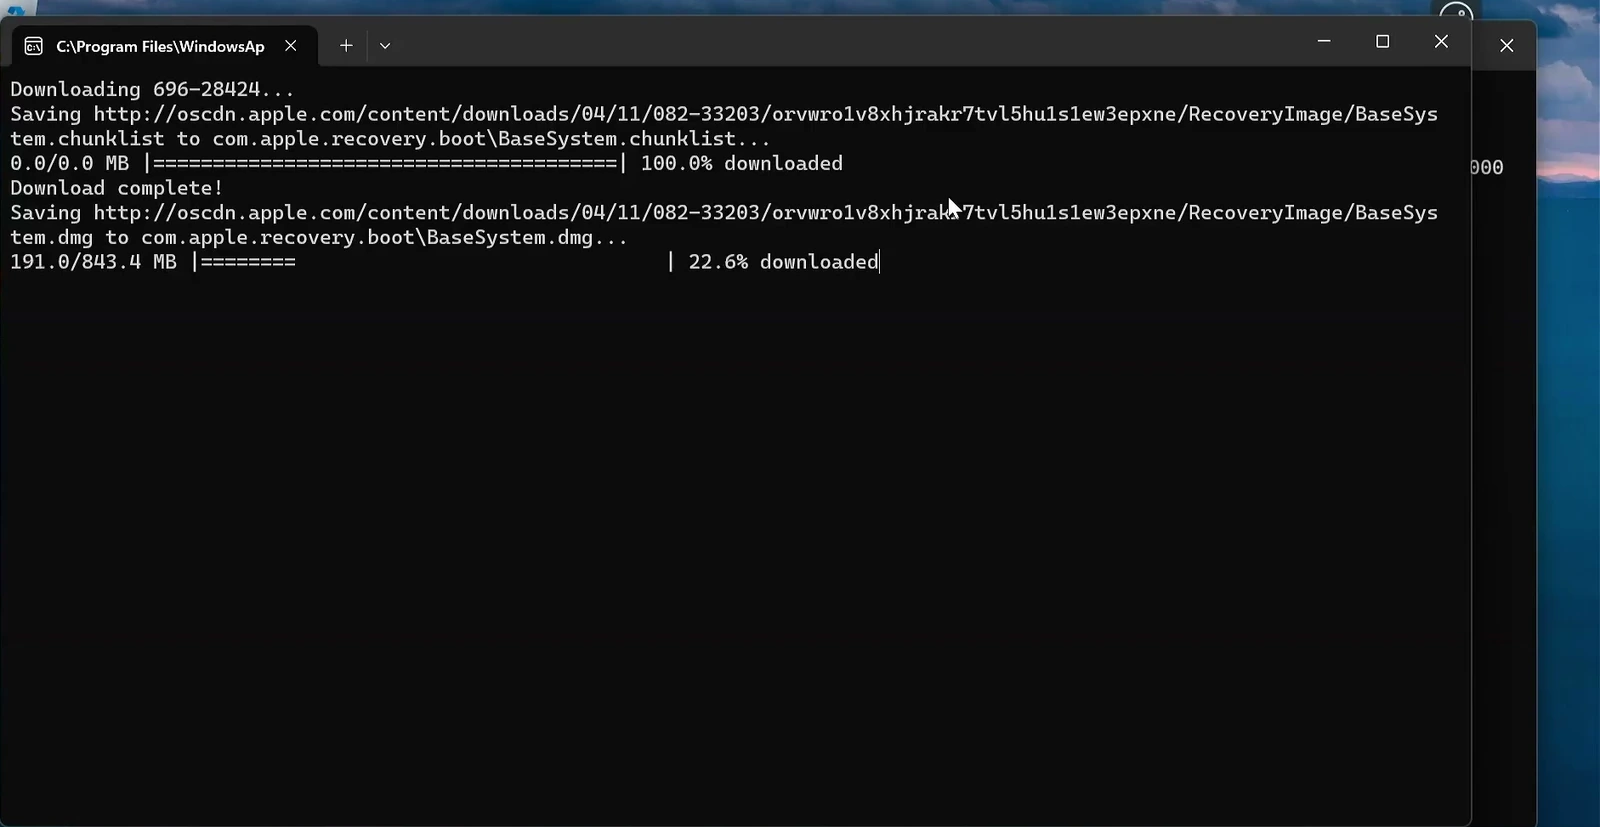
Keep this folder with your prepared EFI. Both will go onto the USB installer.
Prepare the installer USB with Rufus
Rufus can format the USB drive with a FAT32 file system that UEFI firmware can read. Connect the flash drive, download Rufus and launch it.
In Rufus, select the correct USB device. Set Boot selection to Non bootable and choose Large FAT32 as the file system. Use an appropriate partition scheme for your UEFI machine. On the Dell setup, a 64 GB SanDisk flash drive was used.
Double-check the settings below before formatting the USB.

Once everything looks correct, click Start and confirm the erase warning.
After formatting finishes, open the USB drive in File Explorer and place these two folders directly at its root:
- EFI — the working OpenCore folder generated and updated earlier.
- com.apple.recovery.boot — the folder containing the macOS recovery files.
Both must be at the top level of the USB drive, not inside another folder or inside a second extracted ZIP directory.
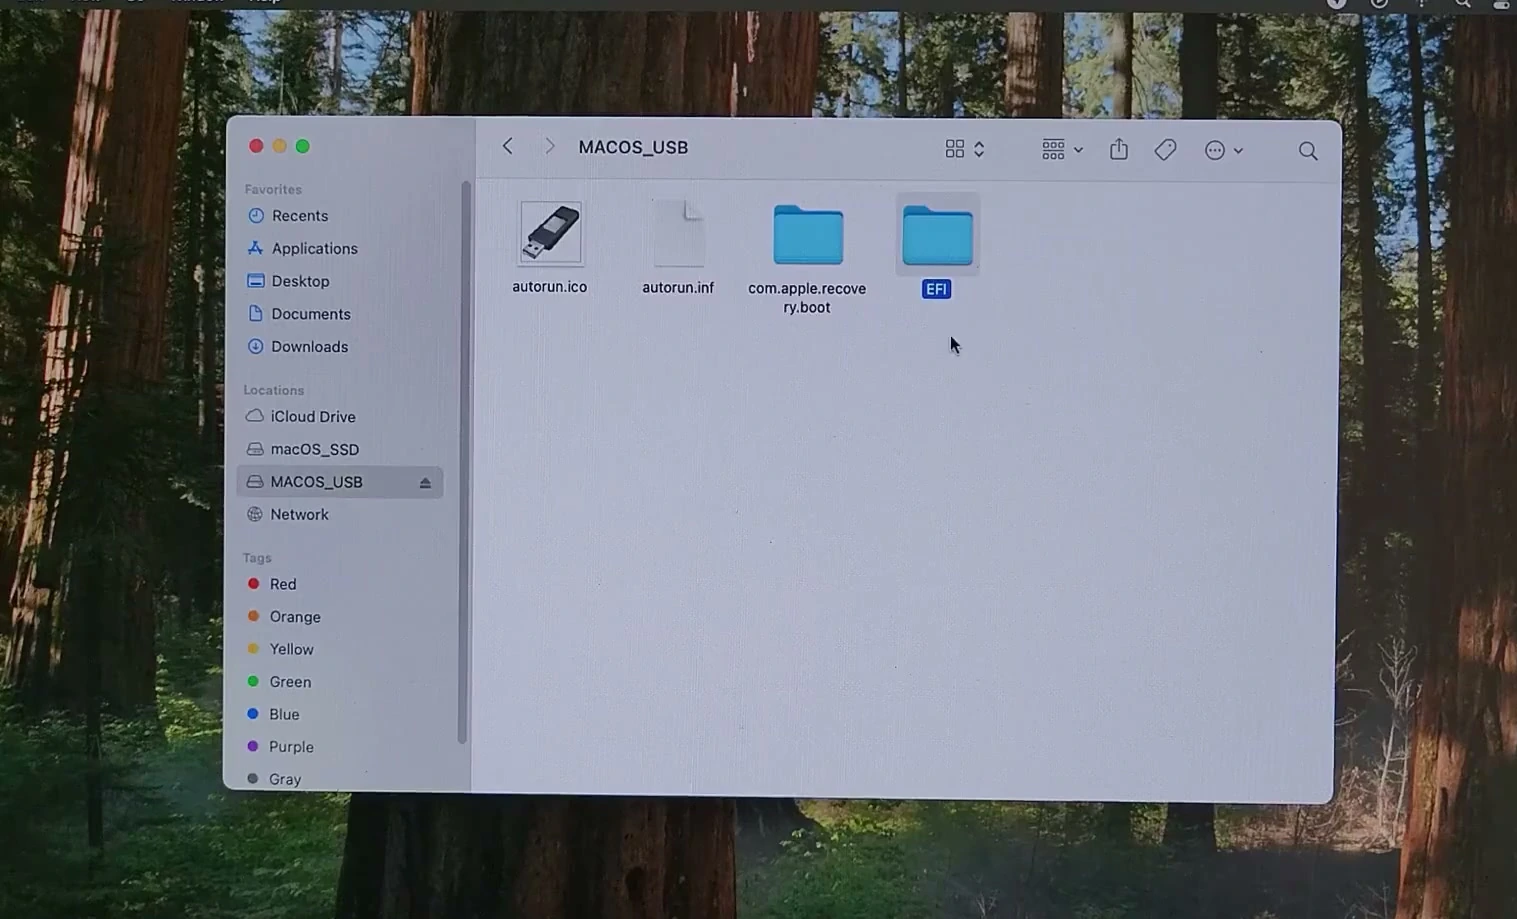
With both folders in place, the recovery USB is ready for the first boot.
Boot the PC into macOS Recovery
Leave the prepared USB inserted, restart the PC and enter its firmware setup. On the Dell OptiPlex, pressing F2 during startup opens the BIOS; other manufacturers use different keys.
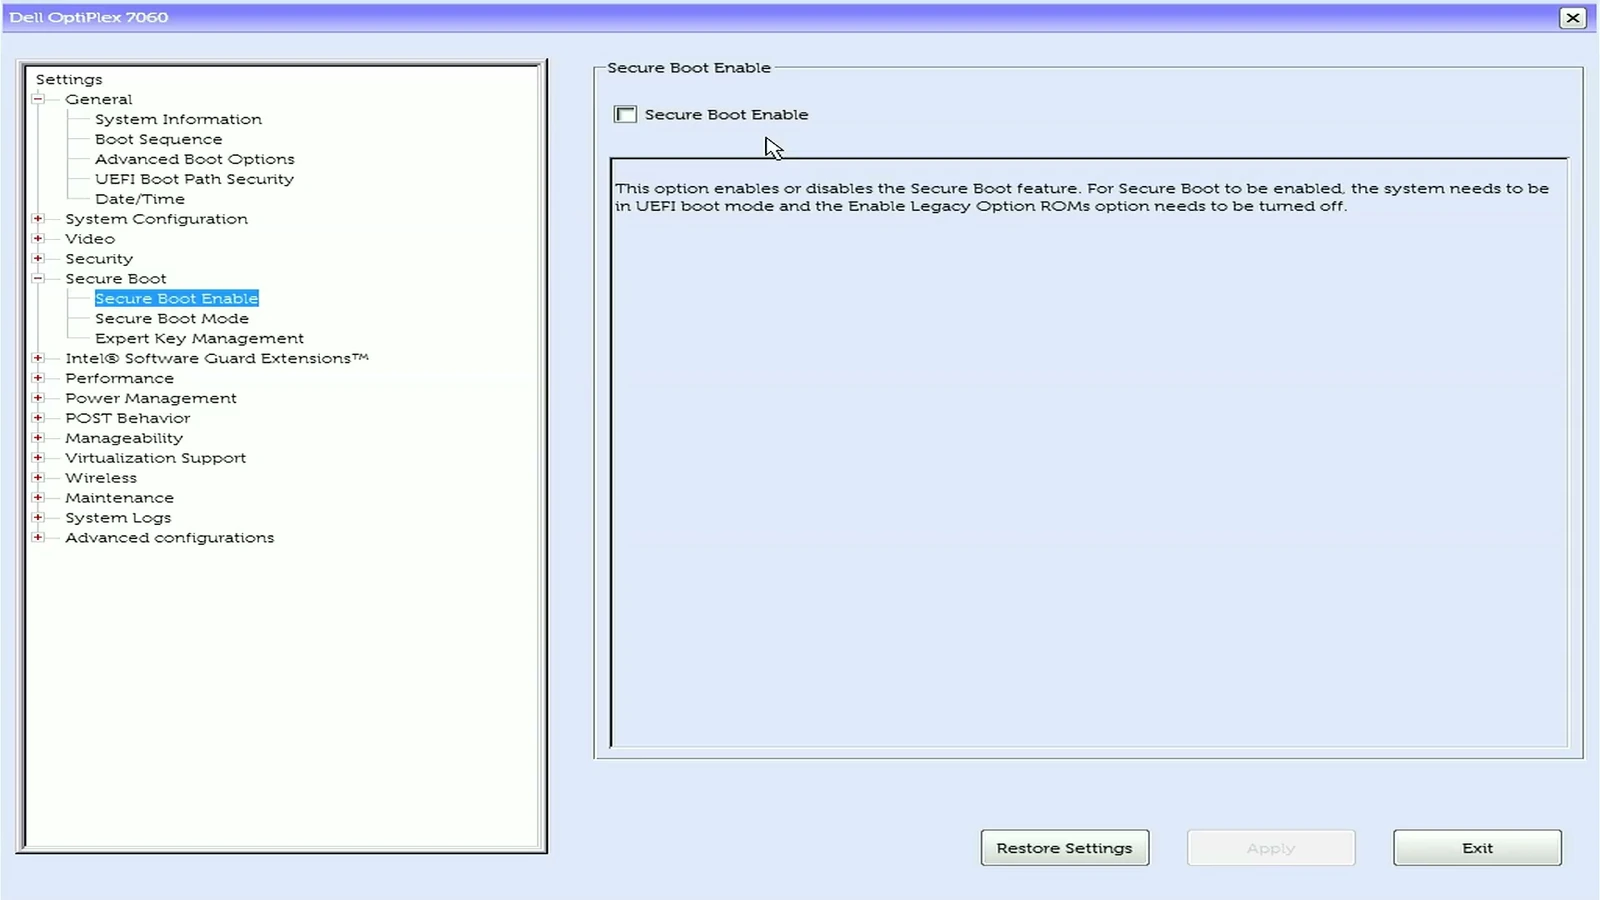
Check that the boot mode is UEFI. Disable Secure Boot if the OpenCore setup requires it, then select the installer USB as the boot device or move it earlier in the boot order. Save your changes and restart.
The OpenCore boot picker should appear. If it initially shows only Windows, press the Space bar to display additional boot entries. Choose the macOS recovery/USB entry.
Lines of startup text may appear while macOS loads in verbose mode. If startup completes, the macOS Recovery utilities menu will open.
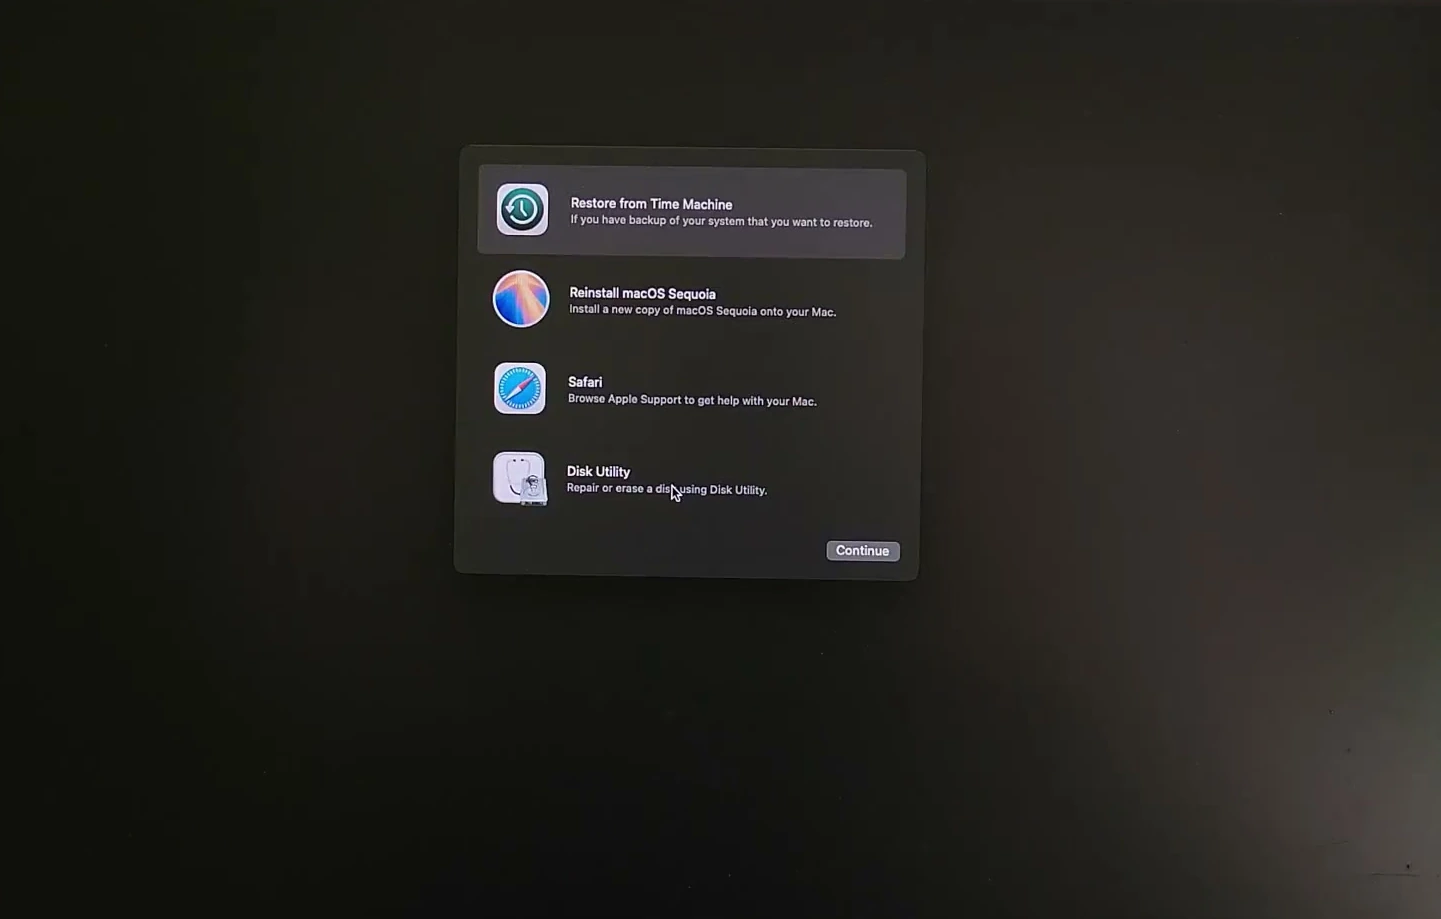
Use the recovery utilities to prepare the internal drive before starting the installation.
Erase the destination SSD and install macOS
From macOS Recovery, choose Disk Utility. Open View and select Show All Devices so that you can distinguish entire physical disks from the volumes beneath them.
Select the internal SSD intended for macOS and click Erase. Give it a name such as macOS_SSD, set Format to APFS, and set Scheme to GUID Partition Map. Confirm the erase only after checking the correct physical drive is selected.
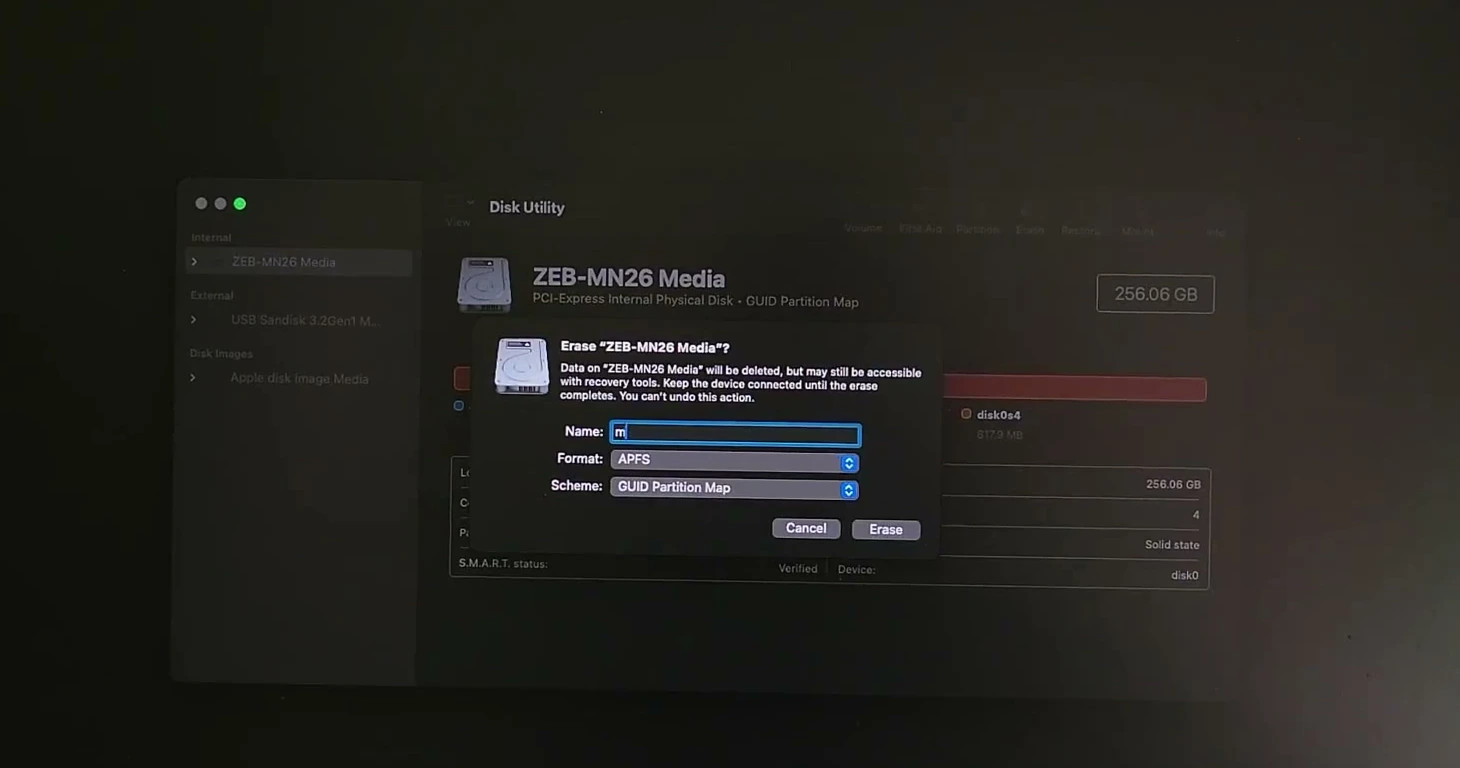
When formatting finishes, close Disk Utility and select Reinstall macOS Sequoia from Recovery. Accept the license prompts if you agree to the terms, choose the newly formatted SSD and begin installation.
Because this is a recovery-based installer, a working internet connection is required to download macOS components. Ethernet was used on the Dell system. The computer may restart several times during installation; do not remove the USB installer until the first setup is complete.
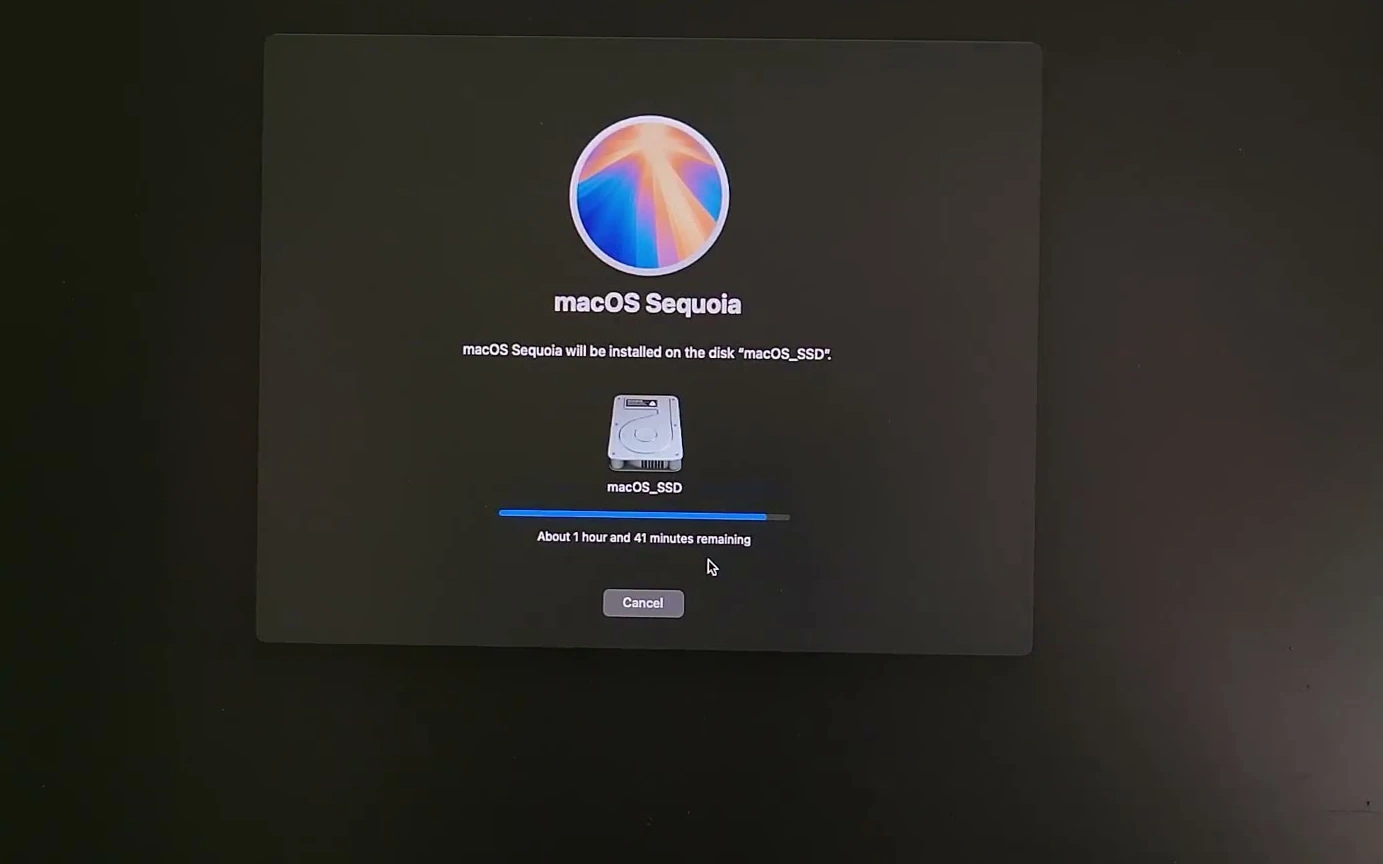
When installation finishes, the initial macOS setup assistant will guide you through the remaining choices.
Finish setup and check the hardware
On the first start, choose your country or region and complete the macOS setup assistant. For a clean installation, choose Set Up as New when offered the option to transfer data. Create your local account, then configure the Apple Account, privacy, location and appearance options as you prefer.
After reaching the desktop, open the Apple menu and select About This Mac. The Dell system reported macOS Sequoia 15.8.1 and identified itself as a 2019 iMac because of its configured OpenCore SMBIOS. That displayed Mac identity does not change the actual Dell hardware.
For a more detailed check, open System Report and choose Graphics/Displays. On this machine, the Intel UHD Graphics 630 appeared with 1536 MB of graphics memory and Metal 3 support. These are useful signs that graphics acceleration is functioning.
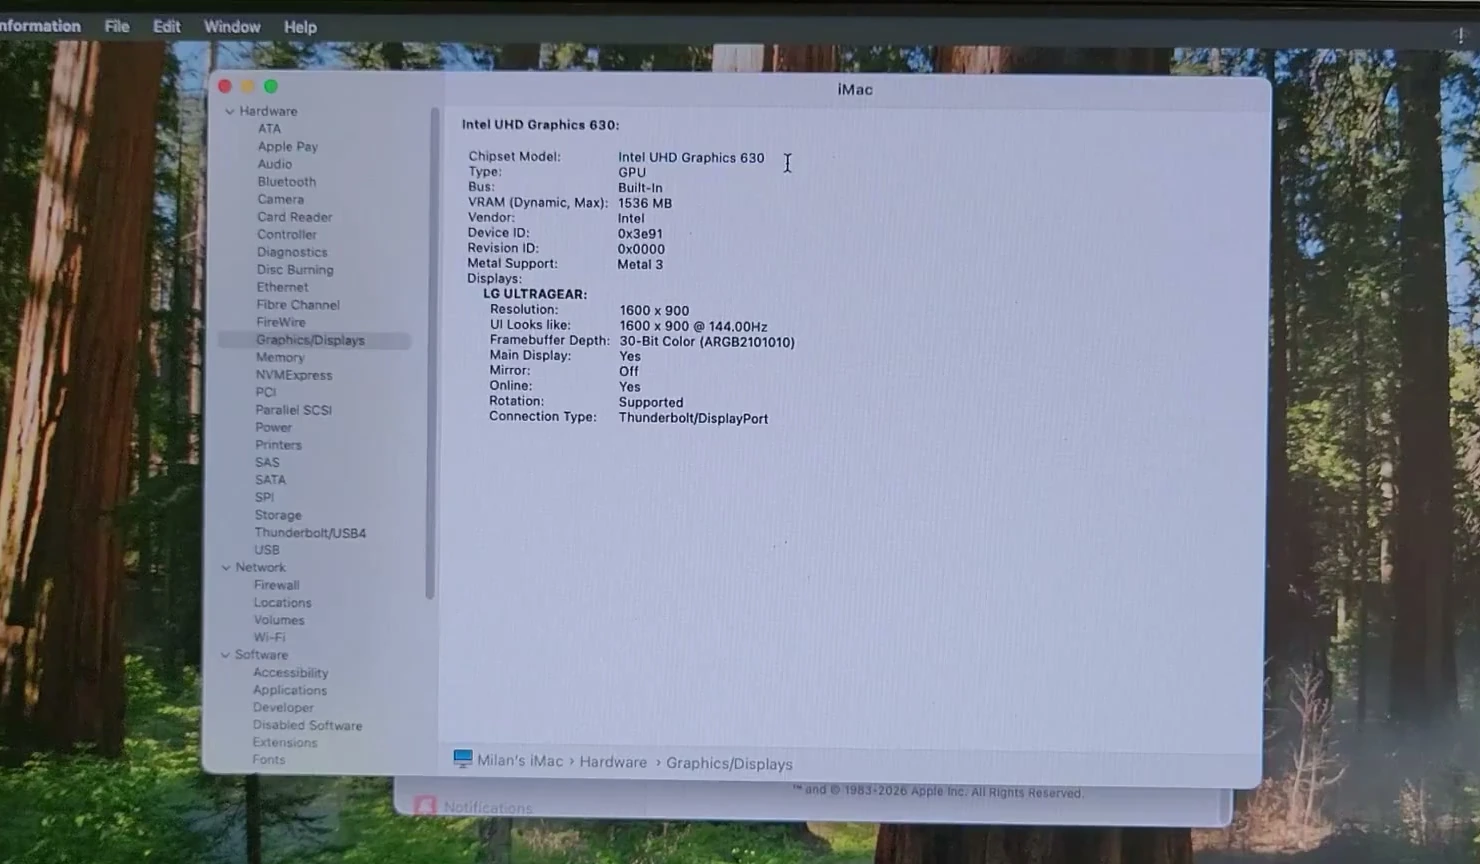
It is also worth checking regular applications, browsing and connectivity. Finder, Safari and the App Store worked on the Dell setup, and its built-in Ethernet adapter provided network access. Wi-Fi and Bluetooth support depends on the individual adapters; the compatibility scan had already warned about the Realtek Bluetooth device.
Boot macOS without keeping the USB inserted
At this stage, macOS is installed on the internal SSD, but OpenCore may still be starting from the USB drive. To make the internal SSD bootable through OpenCore, the working EFI folder needs to be copied into the SSD’s own EFI partition.
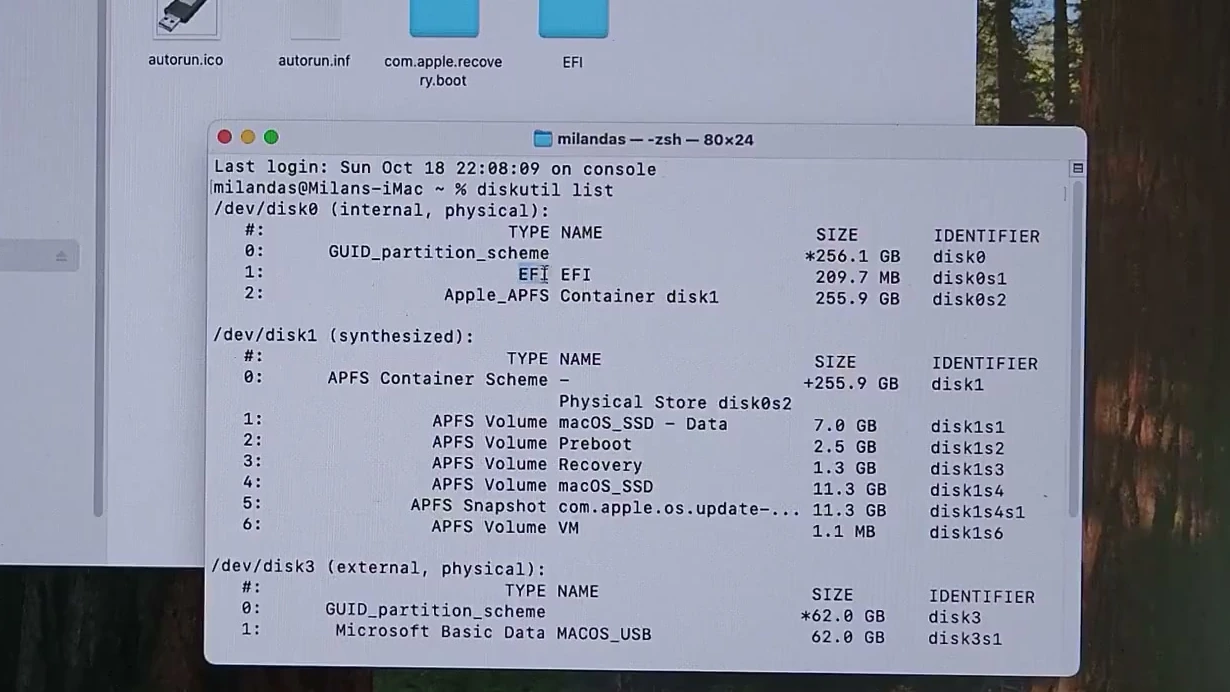
Open Terminal and run diskutil list to identify your internal drive and its small EFI partition. On the Dell system, the internal EFI partition was disk0s1. Check the identifier on your own computer; disk numbers can change.
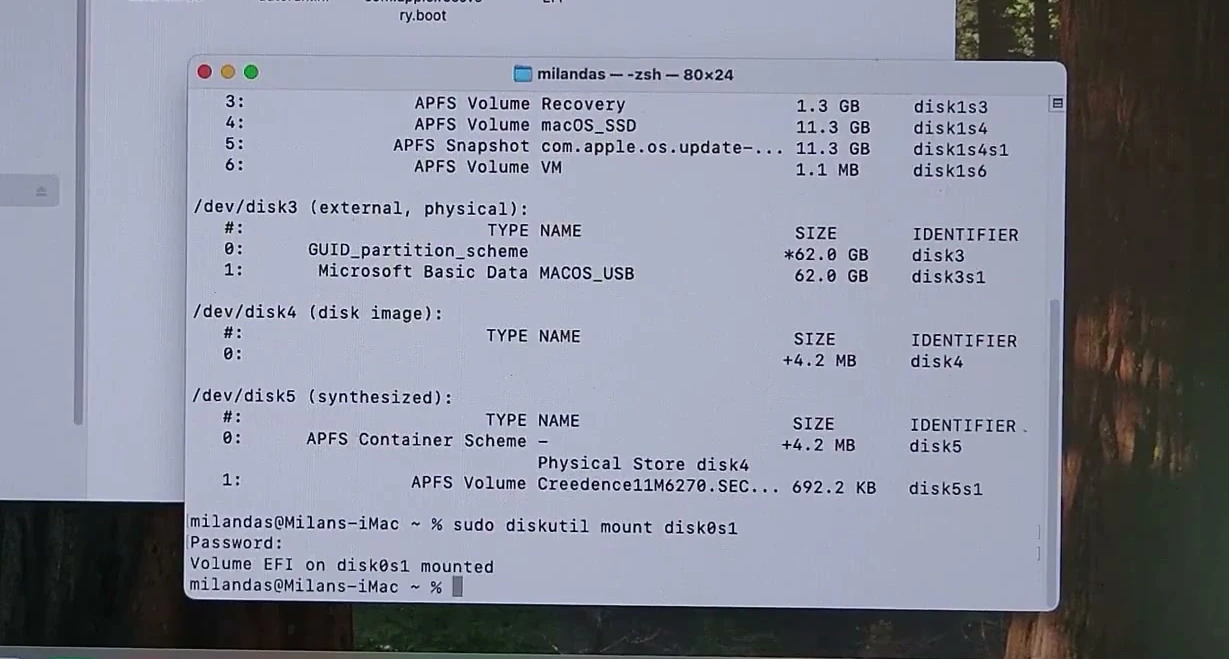
Next, mount that internal EFI partition. In this example, the Terminal command was sudo diskutil mount disk0s1. Replace disk0s1 with the actual EFI identifier if yours is different. Enter your administrator password when prompted.
Open the newly mounted EFI volume in Finder. Then open the installer USB and locate its working EFI folder. Copy that entire folder to the root of the internal EFI volume.
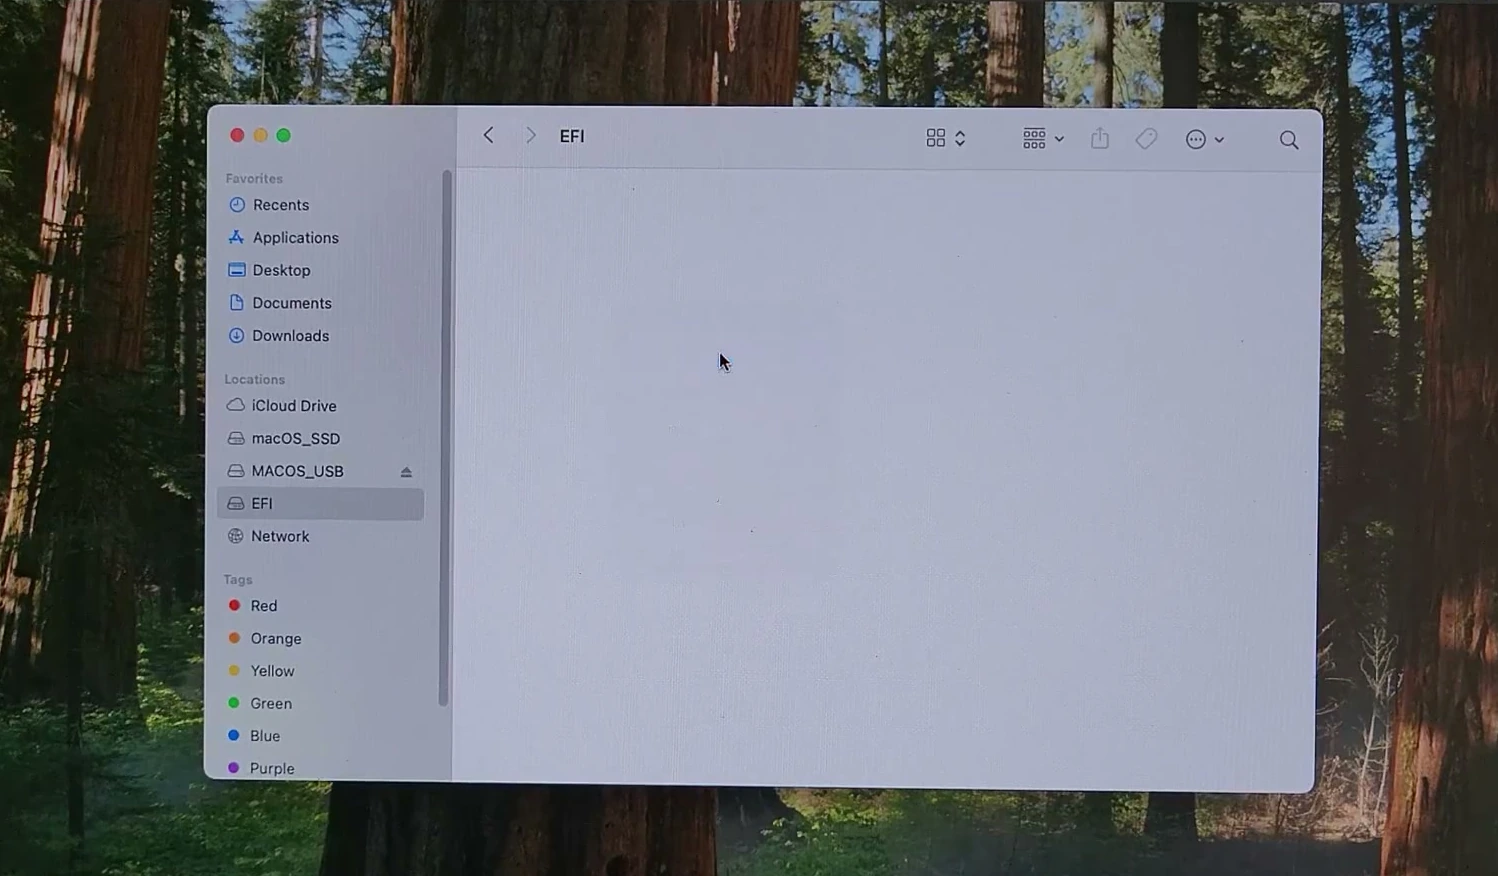
Check the final folder structure: the internal EFI volume should contain an EFI folder with BOOT and OC inside it. If the internal partition already contains boot files, back them up and inspect them before replacing anything.
Now shut the computer down, disconnect the USB installer and start it again. If the internal OpenCore boot entry is configured correctly, the boot picker will appear and macOS will load from the SSD.
Common problems to check
▸ Some USB ports do not work
Return to the port map and make sure UTBMap.kext matches the computer’s ports. Confirm that USBToolBox.kext and the map are present and enabled in config.plist, and that the intended UTBDefault setting is disabled.
▸ The macOS recovery option is missing
At the OpenCore picker, press the Space bar to reveal hidden entries. Also verify that both the EFI and com.apple.recovery.boot folders exist at the USB root.
▸ Recovery opens, but installation cannot download files
This USB contains a recovery environment rather than the entire offline installer. Check the network connection, preferably using a compatible Ethernet adapter, before trying again.
▸ macOS works only while the USB is connected
Recheck the EFI partition on the internal SSD, its EFI/BOOT and EFI/OC folders, and the computer’s boot order. Do not erase or overwrite an existing EFI partition without confirming which system uses it.
A successful Hackintosh setup is always hardware-specific. Keep a backup of a known-working EFI folder, particularly before changing firmware settings or updating macOS.